Advertisement
Quick Links
Advertisement

Related Manuals for DiscountRamps NDALR


Summary of Contents for DiscountRamps NDALR
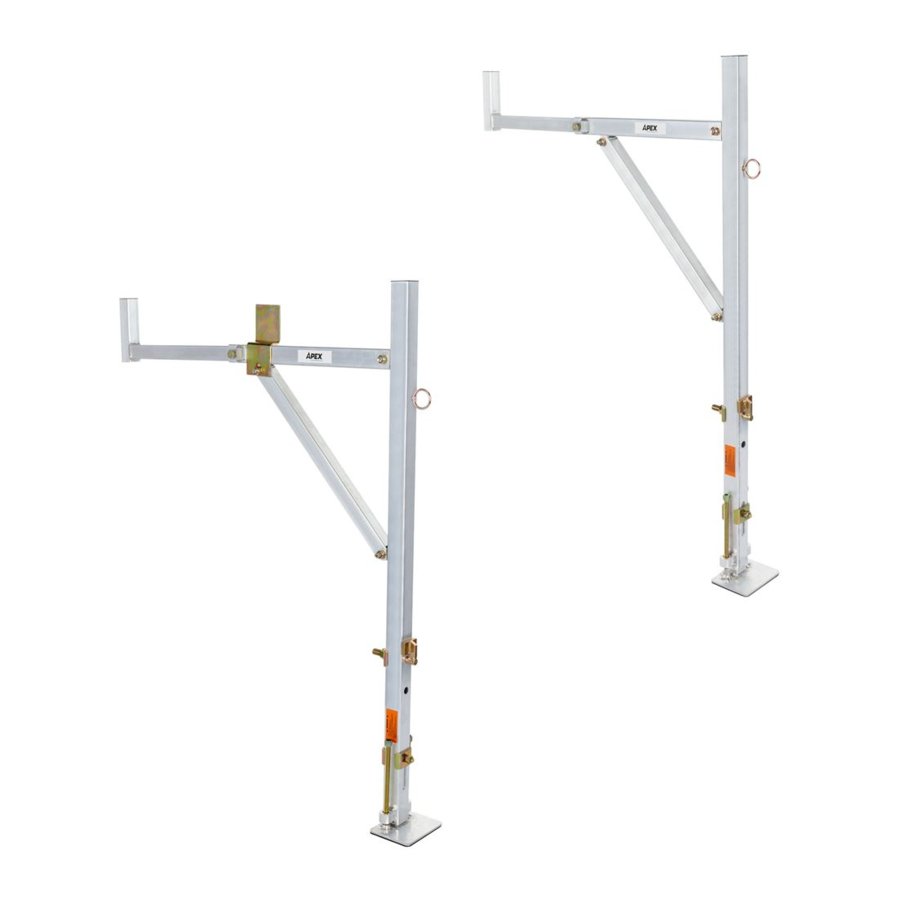
- Page 1 NDALR 250lbs Aluminum Truck Rack Fig 1...
-
Page 2: Installation Steps
Installation Steps Part 1 Fig 2-3 Fig 2-2 Fig 2-1 Frame 2x base 2x Part 1 The purpose of part one is to assemble the frame for the truck rack. Follow the instructions below: To assemble the frame you will need the “Base” and both “Frames”. On the side you prefer to have the truck rack on, place a “Base”... - Page 3 Part 2 Fig 3 16 spring washer 2x M12X185 Socket head screw bolt 4x 16-U bolt 2x M16 nut 2x Stop bolt 2x Part 2 The purpose of part two is to secure the base and frame to the truck bed of your truck. Follow the instructions below: To secure the frame you will need 2 “Stop Bolt”, 2 “16-U Bolts”, 2 “16 Spring Washer, 2 “M16 Nut”...
- Page 4 Part 3 Fig 4 12-U bolt 4x M12*75 hexagon bolt 2x 12 spring washer 2x M12 nut 2x Part 3 The purpose of part three is to lock the frame at a desired height. For the series of instructions below: To lock in the desired height, you will need 2 “12 Spring Washer”...
- Page 5 Part 4 Fig 5 M12*60 hexagon bolt 6x M12 locknut 6x Parallel support frame 2x Ladder stop 1x Supporting arm 2x Part 4 The purpose of part four is to attach the support arms and their rails to the rack. Follow the steps below: To attach the support arms and their rails, you will need 2 “Supporting Arm”, 2 “Parallel Support Frame”, 6 “M12*60 Hexagon Bolts”, and 6 “M12 Locknut”...
- Page 6 Part 5 Fig 6 Extended arm 2x M12*30 hexagon bolt 2x Part 5 Insert the Extended Arm into the Parallel Supporting Frame, and secure it with a M12*30 Hexagon Bolt.
- Page 7 Part 6 Fig7 Frame 2x M6 locknut 2x Tie Down Ring 2x M6 Washer 4x Part 6 Screw “Tie Down Ring” with “M6 Washer” and “M6 Lock Nut” to “Frame “. Square and level all components, and then tighten all hardware securely...
-
Page 8: Parts List
Explosion diagram and parts list Fig 8 Parts List Item# Description Quantity Frame Base Supporting Arm Extended Arm Parallel Support Frame... -
Page 9: Hardware List
Hardware List Part Description Pic. Quantity Part Description Pic. Quantity M12*75 16-U Bolt Hexagon Bolt M12*30 Stop Bolt Hexagon Bolt 12-U Bolt M12 Locknut M12 Nut M12 flat washer M12 Spring Ladder Stop Washer M12X185 Socket Tie Down Ring Head Screw Bolt M12*60 M6 Washer Hexagon Bolt...
Need help?
Do you have a question about the NDALR and is the answer not in the manual?
Questions and answers