Table of Contents
Advertisement
Quick Links
Advertisement
Table of Contents

Subscribe to Our Youtube Channel
Related Manuals for SAJ AS1-3KS-5.1


Summary of Contents for SAJ AS1-3KS-5.1
- Page 1 - 1 -...
-
Page 2: Table Of Contents
Content CHAPTER 1 SAFETY PRECAUTIONS ........- 4 - ....................- 4 - 1.1 S AFETY ................- 6 - 1.2 S YMBOLS NSTRUCTIONS ................- 7 - 1.3 E MERGENCY ITUATION CHAPTER 2 PRODUCT INTRODUCTION ........- 8 - ................ - Page 3 ............... - 28 - 5.2 S YSTEM OMMISSIONING ................. - 28 - 5.3 S TART P THE NVERTER ..............- 29 - 5.4 S OWN THE NVERTER ................- 29 - 5.5 R EMOTE ONITORING CHAPTER 6 FAULT CODES AND COMMON TROUBLESHOOTING ..............
-
Page 4: Chapter 1 Safety Precautions
Chapter 1 Safety Precautions This user manual describes the instructions and procedures for the installation of the AS1 AC Retrofit Battery System. Please read the user manual before operating Keep this user manual properly and operate strictly according to all safety tips and operation instructions in this manual. - Page 5 cause fatal injury to the operator, third parties, and equipment. The manufacturer is not responsible for these losses and warranty claims. •To ensure property and personal safety, the battery modules and inverter shall be well grounded. Caution •Do not modify or tamper with AS1 and other components of the system. •Please pay attention to the risks caused by improper modification.
-
Page 6: Symbols Instructions
1.2 Symbols Instructions Symbol Description Dangerous electrical voltage The device is directly connected to public grid, thus all work to the battery shall only be carried out by qualified personnel. No open flames Do not place or install near flammable or explosive materials. Danger of hot surface The components inside the device will release a lot of heat during operation. -
Page 7: Emergency Situation
1.3 Emergency Situation Despite of its careful and professional protection design against any hazard results, damage of the battery may still occur. If a small amount of battery electrolyte is released due to a serious damage of the outer casing; or if the battery explodes due to not being treated timely after a fire breaks out nearby, and leaks out poisonous gases such as carbon monoxide, carbon dioxide and etc., the following actions are recommended:... -
Page 8: Chapter 2 Product Introduction
against any hazard results, rupture of battery shall may still occur due to mechanical damage, internal pressure and etc., and may result in a leakage of battery electrolyte. The electrolyte is corrosive and flammable. When there is fire, the toxic gases produced will cause skin and eyes irritation, and discomfort after inhalation. -
Page 9: Product Model Description
energy storage system. The built-in lithium battery inside AS1 can be expanded in capacity according to user demands, and the modular design of the slave device makes it easy to install wiring. In daytime, solar power supports the loads first while the surplus power will be stored by AS1, to improve self-consumption rate. -
Page 10: Datasheet
Indicates the built-in battery capacity, such as 5.1 for 5.1kWh. 2.3 Datasheet AS1-3KS-5.1 AS1-3KS-5.1 Type Battery Data Battery Type Lithium ion Total Energy Capacity[Wh] 5120 Battery Capacity [Ah] Rated Voltage [V] 51.2 Voltage range [V] 42~58.4 Depth Of Discharge[DOD] ≤90% Cycle Life ≥6000... -
Page 11: Chapter 3 Installation Instructions
Communication Mode Wi-Fi/4G/Ethernet(Optional) Operating Temperature Range 0°C~50°C (>45℃ derating) Cooling Method Natural Convection Ambient Humidity 0-95% Non-condensing Noise[dBA] <29 Ingress Protection IP65 Dimensions [H*W*D][mm] 738*650*186 Weight [kg] Standard Warranty [Year] AS 4777.2, VDE 4105, G98, C10/C11, CEI0-21, Applicable Standard IEC 62619, IEC 62040 Chapter 3 Installation Instructions 3.1 Safety Tips Danger... -
Page 12: Determine The Installation Method And Location
3.2 Determine the Installation Method and Location AS1 series product dimension Fig. 3.1 AS1-3KS-5.1 appearance and dimension diagram AS1-3KS-5.1 is cooled by natural wind convection. It is recommended to install in indoors or sheltered areas to avoid direct sunlight, rain and snow. - 12 -... - Page 13 Fig. 3.2 Installation tips Vertical ground mounting method is recommended and it’s allowed to be installed by maximum tilting 15° backward. Do not install it horizontally or reversely. √ √ × × × Fig. 3.3 Installation angle - 13 -...
-
Page 14: Installation Steps
Please ensure that the air at the installation point is circulated. Bad air ventilation will affect the working performance of internal electronic components and shorten the service life of AS1. 50CM 50CM 50CM Fig. 3.4 Installation distance 3.3 Installation Steps 3.3.1 Determine the mounting hole position of the hanging panel The AS1 series is mounted on a hanging panel. - Page 15 Fig. 3.5 AS1- 3KS-5.1 hanging panel size (master device) Fig. 3.6 B1-5.1-48 hanging panel dimension (slave device) Before installation, please make sure that the wall has sufficient strength to fix the screws and bear the weight of AS1. Mark the hanging hole position of the hanging panel on the wall and drill the corresponding hole position;...
- Page 16 ∅ Fig. 3.8 B1-5.1-48 hanging panel dimension (slave device) AS1-3KS-5.1 is the master device and B1-5.1-48 is the slave device. In order to ensure normal installation of both, the installation distance between the master and the slave panel, while that between the slave panels shall at least meet...
- Page 17 Master Slave 1 Slave 2 Slave 3 Fig. 3.9 Distance between hanging panels - 17 -...
- Page 18 Fix the hanging panel with hex head screw on the installation position. Fig. 3.10 Fixing the hanging panel Please be careful when installing the device. Please install the slave device first and then install the master device. In case the distance between the master device and the slave device is not enough, installation can’t be done.
- Page 19 Fig. 3.11 Install AS1-3KS-5.1 - 19 -...
-
Page 20: Chapter 4 Electrical Connections
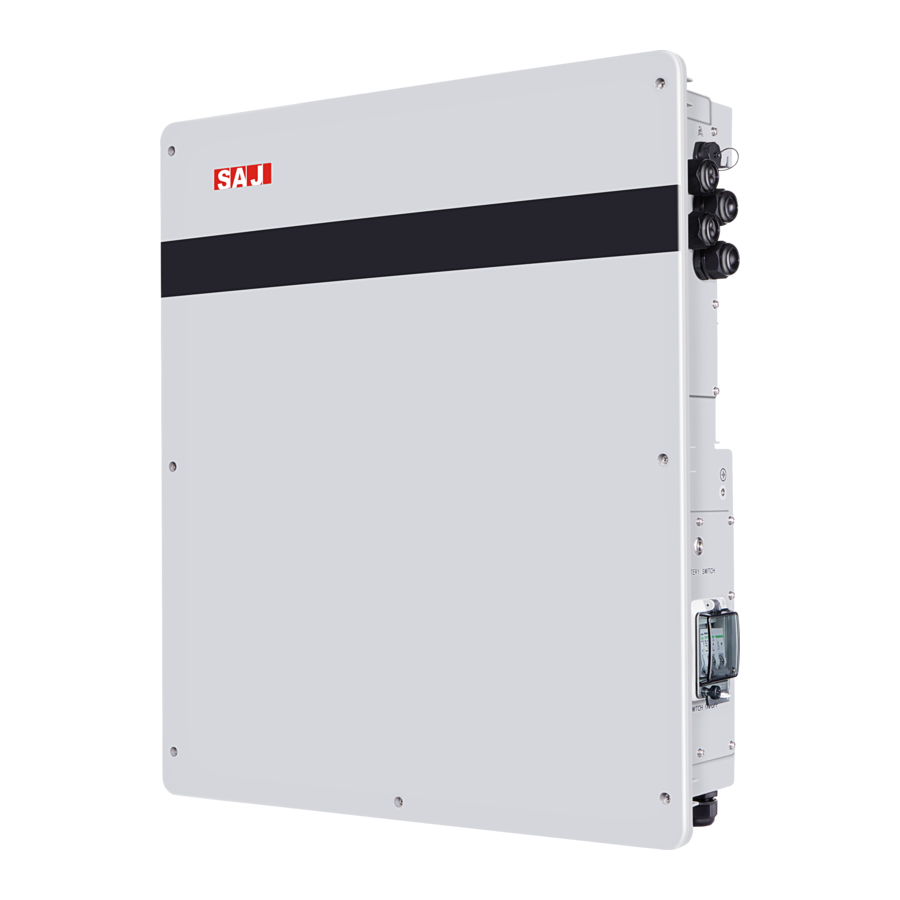
Chapter 4 Electrical Connections 4.1 Electrical Interface Description Fig. 4.1 AS1-3KS-5.1 electrical interfaces Code Name DRMS Port CT connection RS232 communication Grid connection Backup connection Ground BMS switches Battery switches BAT+ BMS LINK BAT- Table 4.1 Interface description - 20 -... -
Page 21: System Wiring Schematic
4.2 System Wiring Schematic Fig. 4.2 Wiring schematic diagram Don’t connect the backup loads side with the grid or battery Fig. 4.3 Wrong connection example 4.3 Master Device Wiring When wiring the master device, you need to disassemble the wiring cover in the upper right corner and connect as per the terminal identification. -
Page 22: Slave Device Wiring
Fig. 4.4 Master device wiring terminals 4.4 Slave Device Wiring More capacity is required to connect the slave devices in parallel. Disconnect the battery connector cover of the master device and the slave unit before wiring. Only 3 lines are required to connect a slave device. (BAT+-BAT+, BAT--BAT-, LINK-LINK) - 22 -... -
Page 23: Ommunication Nterface Escription
Fig. 4.5 Slave device wiring terminals Notice ·Please use the battery cable in original package. ·Do not share 1 lithium battery slave device on 2 AS1. 4.5 Communication Interface Description Fig. 4.6 RS232 pins Pin number Name RS-232 TX RS-232 RX Table 4.2 RS232 pins description - 23 -... - Page 24 Note: The RS232 interface can be connected to the eSolar GPRS/4G/WiFi module. For operation details, please refer to the quick installation guide of each monitoring module. 4.5.2 Inverter Demand Response Mode To comply with Australian and New Zealand safety requirements, the DRMs terminals should be connected.
-
Page 25: Ct Installation
DRM7 3 & 5 The inverter is generating less than 75% of the rated power AND sink reactive power if capable DRM8 4 & 5 The inverter is generating 100% of rated power (Subject to constrains from other active DRMs) Table 4.3 DRMS requirement 4.6 CT Installation Opening-closing current transformer (CT) is adopted. -
Page 26: Ground Connection
Fig. 4.9 CT connection 4.7 Ground Connection After penetrating the external hex head screw through OT terminal of the grounding line, screw in the grounding port of inverter enclosure in clockwise direction. Figure 4.10 Ground connection 4.8 External AC Circuit Breaker and Residual Current Device Please install a circuit breaker to ensure the inverter is able to disconnect from grid safely. -
Page 27: Chapter 5 Debugging Instructions
needed to protect the system from tripping, either type A or type AB RCD are compatible with the inverter. The integrated leakage current detector of inverter is able to detect the real time external current leakage. When a leakage current detected exceeds the limitation, the inverter will be disconnected from grid quickly, if an external residual current device is connected, the action current should be 30mA or higher. -
Page 28: System Commissioning
Description LED lamps state Green lamp flicker from Battery discharging bottom to top Green lamp flicker from Battery charging top to bottom Green/Re d LED Red lamp flicker:1 s/time Standby lamp Green lamp and red lamp Procedures are being upgrade flicker in alternative Red lamp Always light Faults in device... -
Page 29: Shut Down The Inverter
5.4 Shut Down the Inverter The inverter can be shut down by the following steps: Turn OFF the DC switch on the right side of the inverter; Long pressing the battery switch on the right side of the inverter (approx. 5 second), the blue light shown on the button area will be gone out after the button is being released, the battery is shut down;... - Page 30 Fig. 5.2 iOS system Fig. 5.3 Android system Log in APP→ Enter password:123456→Sign in→ Select“Bluetooth” → Select“Next” →Search equipment → Click on the Bluetooth name of the inverter (such as AS1-3K-5.1:03704) Fig. 5.4 Bluetooth connection Fig. 5.5 Search equipment Bluetooth connected, module signal light is blue→Set country and grid code for first start-up at Initial Setting→After inverter starts, users can view inverter's information.
- Page 31 Fig. 5.6 Initial setting Fig. 5.7 Equipment information Grid compliance,working modes and measuring device can be selected from eSolar SET, The working modes description stated as below. Self-consumption Mode Power generated by will be supplied firstly to the load, secondly to the battery and the remaining power will be export to grid.
-
Page 32: Chapter 6 Fault Codes And Common
Chapter 6 Fault Codes and Common Troubleshooting Explanation Fault type Communication loss of the main and Error subordinate machine Master High temperature Master Error Low temperature Master Error DCI Err Master Error Synchronizing pulse fault Master Error Relay fault Master Error Storage fault Master Error... - Page 33 Output overload Master Error Voltage of grid high warning Master Alarm Voltage of grid low warning Master Alarm Frequency of grid high warning Master Alarm Frequency of grid low warning Master Alarm Grid loss warning Master Alarm Grid average overvoltage within 10 Alarm mins Master Overload alarm Master...
-
Page 34: Chapter 7 Inverter & Battery Maintenance
subordinate machine Slave Storage fault Slave Error RTC fault Slave Error BMS equipment fault Slave Error Unit cell over-voltage alarm Slave Alarm Unit cell under-voltage alarm Slave Alarm Over charging current alarm Slave Alarm Over discharging current alarm Slave Alarm Over discharging temperature alarm Slave Alarm Over charging temperature alarm Slave... -
Page 35: Storage
7.2 Storage After purchasing the battery, please store it with following instructions: 1) Please store it in a dry and ventilated environment, keep it away from heat sources; 2) Please keep it in an environment with storage temperature as -20 ° C ~ 50 °... -
Page 36: Cleanliness
7.3 Cleanliness Clean the enclosure lid, LCD and LED indicator of the inverter with moistened cloth with clear water only. Do not use any cleaning agents as it may damage the components. - 36 -...
Need help?
Do you have a question about the AS1-3KS-5.1 and is the answer not in the manual?
Questions and answers