Advertisement
Husky Brute Electric Jacks (Part# 87247, 87248, 87249 and 87641)
Instructions for Upper Jack Assembly Replacement (Upper Assembly part# 87637, 87638 and 87658)
Important: Read all instructions before you start.
Step 1: Verify that your upper jack assembly replacement kit contains the correct upper assembly for your lower jack assembly. The
end of the ball screw should have a close, but not snug, fit into the drive adapter (Figure A). The 87637 upper jack assembly fits the
HB3000 and HB3000-2 which have 16mm (0.630") ball screws and drive adapter holes. The 87638 upper jack assembly fits the
HB4500 which has a 20mm (0.787") ball screw and drive adapter hole. The 87658 upper jack assembly fits the HB4500R which has a
20mm (0.787") ball screw and drive adapter hole.
Step 2: Extend the jack several inches before
disconnecting the power and removing it from the trailer.
This will allow you to pull the outer tube down far enough
to access the upper ball screw pin and cotter pin in step 5.
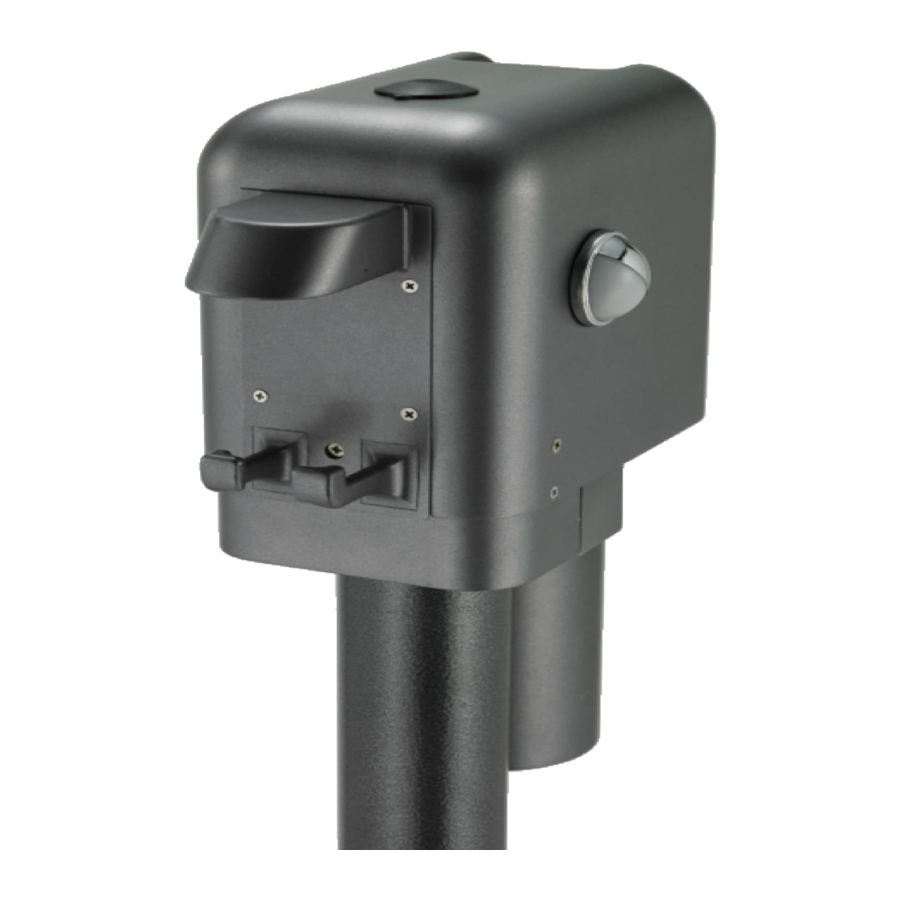
Step 3: Remove 5 screws from the main cover (Figure B
and C), then remove 4 screws from motor cover (Figure
D). The cover can now be removed (Figure E). The top
cover only needs to be moved up enough to allow
removal and reinstallation of the motor cover. Leave all
electrical connections intact.
Step 4: Remove the four Allen head cap screws that
connect the outer tube to the upper assembly using a
6mm Allen wrench. Save these bolts and the lock
washers for re-assembly. (Figure F)
Step 5: Remove the cotter pin from the upper ball screw
pin and remove upper pin from the drive adapter. The
entire lower jack assembly can now be removed. Save
the upper pin and cotter pin for re-assembly.
Step 6: Repeat step 3 on the new upper jack assembly to
prepare it for the installation of the lower jack assembly.
Step 7: Connect the power wire from the new upper jack
assembly to the positive terminal of your battery. Connect
your negative battery terminal to the body of the upper
jack assembly using one of the top cover screws (Figure
G) or a suitable alligator clip (Figure H).
Step 8: Activate the jack switch in the "UP" direction
(Figure I) until the motor automatically comes to a stop.
If nothing happens in the "UP" direction then activate the
switch in the "DOWN" direction first for several seconds;
then push the switch in the "UP" direction and hold it there
until the motor automatically stops. Now the Smart
Stop™ inside the upper jack assembly is properly located
in the completely extended position.
Step 9: Skip to step 10, unless you have the HB4500R
jack. If you have the HB4500R, test the operation of the
new remote that was supplied with your new upper
assembly. If all functions on the remote operate properly,
push the "UP" button until the jack is fully extended again
and proceed to step 10. If the remote does not operate
correctly, you should contact your Husky dealer for
assistance before proceeding.
Step 10: Now disconnect the battery from the jack.
Step 11: Fully extend (screw out) the ball screw in the
lower jack assembly by hand until it comes to rest against
the stop at the end of the ball screw and won't turn any
further. (Figure J)
87637, 87638 and 87658 Electric Jack Upper Assembly Replacement – Rev. 2011-06-16
Ball Screw
Drive Adapter
Figure A
Rear screw
Figure C
Figure E
Figure G
Figure I
4 Side screws
Figure B
Motor cover
screws (Qty 4)
Figure D
Cap Screws
Figure F
Figure H
Figure J
Advertisement
Table of Contents

Related Manuals for Husky 87247


Summary of Contents for Husky 87247
- Page 1 Husky Brute Electric Jacks (Part# 87247, 87248, 87249 and 87641) Instructions for Upper Jack Assembly Replacement (Upper Assembly part# 87637, 87638 and 87658) Important: Read all instructions before you start. Step 1: Verify that your upper jack assembly replacement kit contains the correct upper assembly for your lower jack assembly. The end of the ball screw should have a close, but not snug, fit into the drive adapter (Figure A).
- Page 2 Step 12: Align the upper jack assembly with the lower jack assembly laying on a bench together as shown in Figure K. The front hole of the outer tube, circled in Figure L, needs to be facing the same direction as the motor on the upper jack assembly.
Need help?
Do you have a question about the 87247 and is the answer not in the manual?
Questions and answers