Table of Contents
Advertisement
Quick Links
Advertisement
Table of Contents

Related Manuals for Iget C220


Summary of Contents for Iget C220
- Page 1 User manual iGET C220 www.iget.eu 1/20...
-
Page 2: Table Of Contents
Contents User Manual ..........................3 Buttons ............................3 Icon descriptions ........................3 Initial setups ..........................4 Connect GPS cycling computer with APP ................5 Connect with sensors ........................ 6 Install the standard mount ......................7 Start to ride ..........................7 Navigation ........................... -
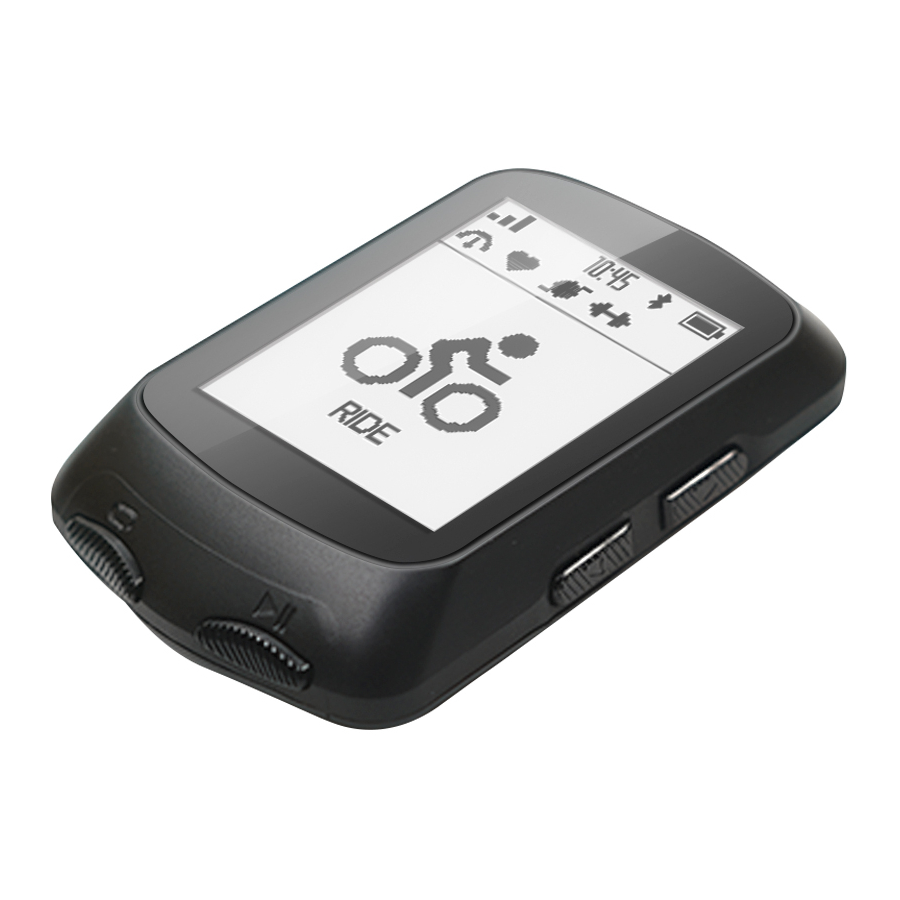
Page 3: User Manual
User Manual Buttons Icon descriptions Satellite Signal Record/Pause Time Bluetooth Battery Speed Heart Rate Cadence Power Trainer 3/20... -
Page 4: Initial Setups
Initial setups Press and hold the power button to turn on the device and select your language. Phone pairing notification on APP GPS Bike. Set speed and distance, altitude, temperature units. 4/20... -
Page 5: Connect Gps Cycling Computer With App
Set time formats. Set Time Zone. Connect GPS cycling computer with APP Download GPS Bike APP.(Make sure Bluetooth is ON in mobile phones) Press to enter Main Menu. 5/20... -
Page 6: Connect With Sensors
Select Pair Phone then press Connect with sensors Select Sensors then activate sensor and hold near the device. Select Add Sensor. Select a sensor and press to save. Saved sensors will connect automatically to the device. Select a saved sensor to forget, connect, set wheel size, set crank length or calibrate. 6/20... -
Page 7: Install The Standard Mount
Install the standard mount Use the included zip ties to attach to the bike stem. To ensure proper installation and fixation, please use the iGET base or out-front bike mount. Start to ride Wait for the device to search for satellites outdoors. Press to enter Ride page. - Page 8 Press to start or pause this activity. Press to count laps, then press to exit the lap counting page. to enter the menu on ride page and select Save to save the activity. Press 8/20...
-
Page 9: Navigation
Press to exit the data display screen. Navigation Press to enter Navigation. Download a route from GPS Bike APP. For the most accurate route, enter multiple waypoints in the app (+ Add Point (optional)). Select a route, and press to start the navigation. 9/20... -
Page 10: Workouts
Zoom in route by pressing in Navigation page. Press to enter the menu and select Back to Start to return to your starting point. Select Stop Course to stop the navigation. Workouts Press to enter your workout list. Download a workout from GPS Bike APP. Select a workout and press to start. -
Page 11: Indoor
Indoor Press to start indoor cycling. Under Indoor, satellite positioning and automatic pause functions are turned off. Save your record and exit Indoor mode. 11/20... -
Page 12: Settings
Settings Display settings Select Settings in Main Menu, press enter. Select Pages, press to enter. Select a page, press to enter (Note: Road, Commute, Tour, Climbing, Navigation are the page names) Data Page: Set the data display screen. Up: The page moves forward one position. Down: The page moves back one position. - Page 13 Press to select number of frames on the data display screen and press confirm. Press to select a frame and press to confirm. Select a frame item and press to confirm. Select an item and press to confirm. 13/20...
-
Page 14: Language Settings
Language settings Select Language and press to enter. Select your language and press to confirm. Backlight settings Select Backlight and press to enter. Select Mode and press to switch the backlight mode. (Auto: Backlight turns on automatically at night). Select Keys and press to switch the button wake-up time of the backlight. -
Page 15: Other Settings
Press to set hour and press to confirm. Press to set minute and press to confirm. Other settings Select Other and press to enter. Press to turn on/off Auto Start, Auto Pause, Smart Record, Key Tones, Battery Save, Auto Power Off. Smart Record: Reduce the frequency of device recording and only key points of position, speed or heart rate will be recorded. -
Page 16: Reset
Reset Select System and press to enter. Select Reset: This restores default settings. History will not be deleted. Select Delete All: This restores default settings and clears all history. Charging Unplug the USB waterproof plug from the left side. Plug the USB cable into an AC adapter or a computer USB port. After the device is charged, the USB waterproof plug needs to be plugged. -
Page 17: Cycling Data Export
Turn off the device and plug the USB cable into an AC adapter or a computer USB port. Open the removable hard disk of the PC, open the iGET C220 folder, and open the Activity folder. Copy and export the Fit file in the Activity folder. - Page 18 22 × 1-3/8 26 × 2.10 1770 2068 20 × 1-1/2 26 × 2.125 1785 2070 24 × 1 26 × 2.35 1753 2083 24 × 3/4 Tubular 26 × 3.00 1785 2170 24 × 1-1/8 26 × 1 1795 2145 24 ×...
-
Page 19: Data
Data Classification Data Speed Speed, Avg Speed, Max Speed, Lap Speed, Pre Lap Spd, Lap Max Spd; Cadence Cadence, Avg Cad, Max Cad, Lap Cad, Pre Lap Cad, Lap Max Cad; Heart Rate Heart Rate, Avg HR, Max HR, Lap HR, Pre Lap HR, Lap Max HR, HR Zone HR%, Avg HR%, Max HR%, Lap HR%, Pre Lap HR%;... -
Page 20: Technical Support
Interface Micro USB Wireless Bluetooth 5.0 Transmission Package C220*1, Micro USB cable*1, standard bike mount*1, user manual*1 Includes Optional speed sensor, cadence sensor, heart rate monitor Accessories Technical support Contact us on the web: helpdesk.intelek.cz, where you create a request to which the trained technician will respond.
Need help?
Do you have a question about the C220 and is the answer not in the manual?
Questions and answers