
Related Manuals for Alesis E-Drum Total


Summary of Contents for Alesis E-Drum Total
- Page 1 User Guide English ( 3 – 14 ) Guía del usuario Español ( 15 – 26 ) Guide d’utilisation Français ( 27 – 38 ) Guida per l’uso Italiano ( 39 – 50 ) Benutzerhandbuch Deutsch ( 51 – 62 ) Appendix English ( 63 )
-
Page 2: Box Contents
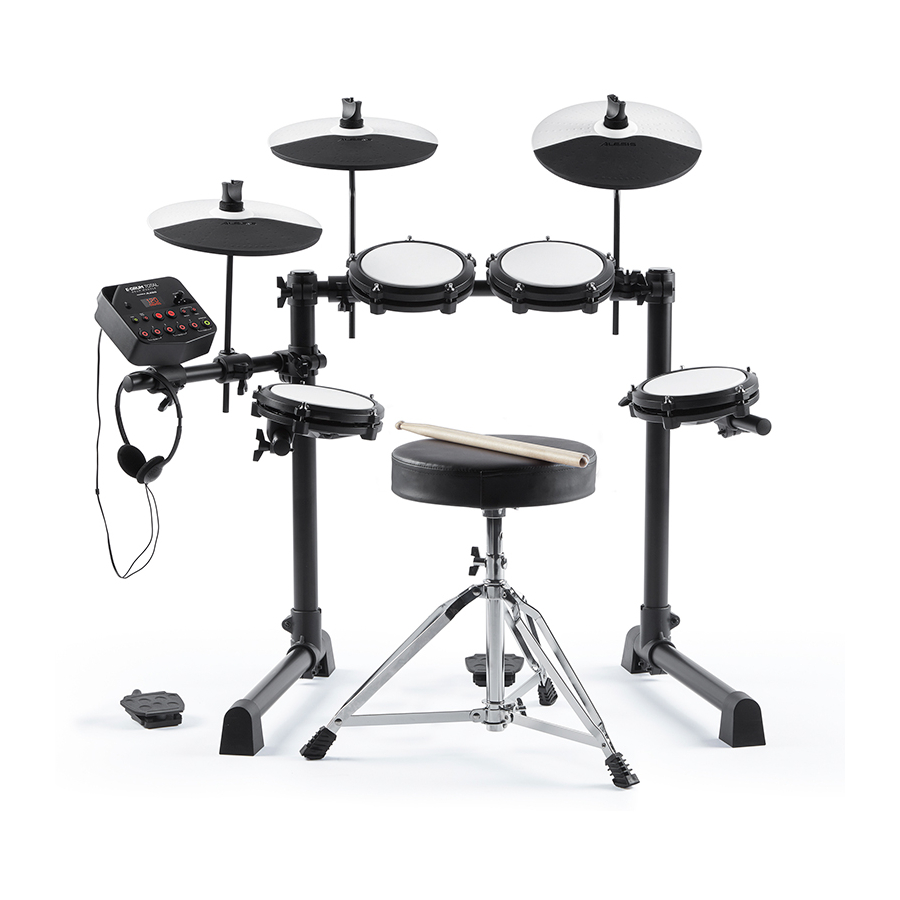
User Guide (English) Introduction Box Contents E-Drum Total drum rack, assembled including: E-Drum Total sound module (4) 6” / 15.2 cm drum pads (3) Cymbal poles (3) 10” / 25 cm Cymbal pads (2) Floor pedals (hi-hat and kick) Cable snake... - Page 3 Assembly 1. Remove the E-Drum Total drum rack, cymbals and cymbal poles from each of their boxes. Place the drum rack (as shown, right) on a flat, level surface. 2. Unfold the rack legs and loosen the joints of each rack arm to unfold.
- Page 4 Connect the multipin head of the included cable snake to the port on the bottom side of the E-Drum Total module. Tighten the two screws to secure the cable snake to the module.
-
Page 5: Module Features
Module Features Top Panel Power Button: Press this button to turn the drum module on. Press and hold it for 2 seconds to turn the drum module off. Display: This screen shows information relevant to the drum module's current function and operation. -
Page 6: Rear Panel
Rear Panel Power Jack: Use the included power adapter (9 V, 500 mA, center pin-positive) to connect this jack to your power outlet. Cable Snake Input: Connect the head of the included cable snake here. Connect the cables at the tail end of the cable snake to your kit's triggers (drum pads, cymbal pads, and pedals). -
Page 7: Selecting A Kit
Selecting a Kit To select one of the module's 10 preset kits, do one of the following: VARIATION • Press the Variation button so it is lit red, and then press the 1, 2, 3, 4, or 5 button to select Kit 1, 2, 3, 4, or 5 respectively. - Page 8 Using the Metronome (Click) You can use the built-in metronome ("click") to help you keep time while practicing with the built-in Drum Coach or with patterns. You can change the metronome's tempo (speed), volume, sound, and time signature. Turning the Metronome On or Off CLICK To turn the metronome on or off, press the Click button.
-
Page 9: Beat Check
Changing the Metronome Interval To change the metronome's note division (the note value it measures with each click): Press the Click button and 3 button simultaneously. CLICK The Display will show the current interval. Use the – / + buttons to select a new interval: 2 (half note), 3 (triplet), 4 (quarter note), 6 (sextuplet), 8 (eighth note), or 16 (sixteenth note). -
Page 10: Gradual Up/Down
Gradual Up/Down This exercise evaluates how quickly you can play while still maintaining accurate time. To use Gradual Up/Down: COACH Press the Pattern button and Tempo button at the same time. Then press the 2 button. PATTERN TEMPO Set the metronome's time signature and interval (as described in Using the Metronome (Click) section). - Page 11 Hit the pads in the rhythm you selected (above) and in time with the metronome (the starting tempo is your metronome's current setting). The six LEDs of the 1-5/Variation buttons indicate how accurate or “in time" you are: • When you are right on the beat, the 3 VARIATION and 4 buttons will light up.
-
Page 12: Automatic Power-Off
In the case of the E-Drum Total Drum Module, you can connect its USB port to a USB port on your computer with a standard USB cable (sold separately). All MIDI messages will travel to and from your computer over this connection. - Page 13 Triggering Sounds on an External MIDI Device MIDI IN MIDI OUT Using a standard USB cable (not included), connect the drum module's USB port to a USB port on your computer. If you are triggering sounds in software, skip to the next step. If you are triggering sounds in an external MIDI device, make sure that device is connected to your computer (either directly via USB or through a USB-MIDI interface).
Need help?
Do you have a question about the E-Drum Total and is the answer not in the manual?
Questions and answers