Advertisement
Table of Contents
- 1 Important General Information
- 2 Electrical Panel
- 3 Risk of Burns
- 4 Danger of Burns
- 5 Description of the Equipment
- 6 Screen Icons
- 7 Start Screen
- 8 H a N D L I N G a N D S E T T I N G S
- 9 Delete Data
- 10 Standard Output
- 11 Control Board
- 12 Display Board
- 13 Machine Does Not Turn on
- 14 Installation Date
- Download this manual
Advertisement
Table of Contents

Related Manuals for QUALITYFRY iQ 600


Summary of Contents for QUALITYFRY iQ 600
- Page 1 MODELS iQ 600 - iQ 610 - iQ 620 - iQ630 G O U R M E T . C A R R O U S E L . T E C H N I C A L M A N U A L...
- Page 2 T E C H N I C A L M A N U A L T H I S M A N U A L R E F E R S T O T H E : i Q 6 0 0 b A S I C G O U R M E T i Q 6 1 0 G O U R M E T i Q 6 2 0 B A S I C C A R R O U S E L i Q 6 3 0 C A R R O U S E...
- Page 3 2 0 V Í D E O S F I N D A L L T H E E X P L A N A T O R Y V I D E O S O N O U R Y O U T U B E C H A N N E L A N D R E F E R T O I T A S O F T E N A S...
- Page 4 I M A G E V I E W O F O P E N iQ600 - iQ 610 GOURMET Q U A L I T Y F R Y Q U A L I T Y F R Y...
- Page 5 QUALITYFRY S.L. QUALITYFRY S.L. reserves itself the right to enter the improvements derived from its ongoing research on this model, without prior notice.
- Page 6 G e n e r a L I n d e x...
-
Page 7: Important General Information
1. IMPORTANT GENERAL INFORMATION 5. PRODUCT INPUTS 1.1.Regarding equipment safety and responsibility 6. PRODUCT OUTPUTS 1.2.Types of warnings 2. WARRANTY, SAFETY AND INSTALLATION 7. MAINTENANCE (MACHINE 2.1.Source of danger: when moving heavy loads MAINTENANCE VIDEOS) 2.2.Source of danger: mechanical parts of the 7.1.Daily appliance 7.2.Weekly... - Page 8 Q U A L I T Y F R Y Q U A L I T Y F R Y...
- Page 9 600 Basic Gourmet, iQ610 Gourmet, iQ 620 Basic Carrousel, iQ 630 Carrousel Automated Fryers has been created so that you know the operations that must be carried out while you are in charge of this equipment. For optimum performance, situations that you may encounter have been described.
- Page 10 Users are warned that technical maintenance and repairs must be performed by a technical servicing agent authorised by QUALITYFRY, using original QUALITYFRY spare parts. QUALITYFRY is not responsible for any products that have not been installed, adjusted or handled correctly, without following the installation instructions provided with the product.
- Page 11 QUALITYFRY. To obtain a list of authorised technical service agents, please consult your supplier. QUALITYFRY fryers must only be handled by hand. If the equipment is damaged by using pointed, sharp, or similar objects, you will lose the right to a warranty.
-
Page 12: Risk Of Burns
Types of warnings Warnings are categorised according to the following levels of danger: DANGER/WARNING: Death / serious injury (irreversible). Imminent/potential danger. RISK OF BURNS: Serious injury (reversible). Potential danger. ATTENTION: Minor injury (reversible). Potential danger. NOTICE : Property damage. Potential danger Q U A L I T Y F R Y Q U A L I T Y F R Y... - Page 13 This warranty covers all defects This warranty only covers the in workmanship and materials buyer of QUALITYFRY fryers, in all QUALITYFRY fryers and equipment or original parts. equipment or parts sold in This warranty is non-trans- Spain, except as excluded ferable.
- Page 14 Get in touch with our authorised manufacturing technical service to obtain warranty service or call your supplier. You can also visit the QUALITYFRY website at https://www.qualityfry.com/: click on contact and fill in the form; in the “Comment” field, request service; it is important that you provide the model, series number of the machine and a description of the problem;...
- Page 15 • Maintenance items such as gaskets, activated carbon filters, internal and external finishes, filter kits (funnel, bucket, hose, etc.). • Concepts of service provision (displacement), labour and transportation, which could occur in cases when Qualityfry deems it appropriate. 1 5 1 5...
- Page 16 - If, during the warranty period, the client uses this equipment and installs new or recycled parts which are not directly acquired from QUALITYFRY or any authorised service provider, the warranty will become void. Furthermore, QUALITYFRY and its affiliates shall not...
- Page 17 Attention Source of danger: when moving heavy loads Risk of injury due to heavy lifting when loading and unloading the appliance onto and from transport equipment. Use a fork-lift truck or a pallet truck. Do not exceed safety limits to lift and load the appliance. Use personal protection equipment.
- Page 18 Once disconnected and with the extractor dock upright, pull the handle positioned beneath the unit on the bottom left, and once it has been pulled, remove the fryer from inside the unit. Once the fryer case is out of the unit, remove the polystyrene positioners which are located behind the fryer.
- Page 19 installed. This should be done by two (2) people, so that the base of the machine is exposed, allowing it to be worked on easily. Once the fryer unit is on the work surface, insert the fryer, and lower the extractor dock over the case so that fumes do not escape while frying.
- Page 20 Source of danger: mechanical parts of the fryer When installing and using your iQ 600 Basic Gourmet, iQ610 Gourmet, iQ 620 Basic Carrousel, iQ 630 Carrousel fryers, you must take the following precautions: • Risk of crushing body parts if the machine falls.
-
Page 21: Danger Of Burns
• Risk of suffering cuts from sharp edges When handling sheet metal for use or cleaning, use personal protection equipment (protective gloves for working with steel or sheet metal or utensils for protection against chemical agents). • When opening or closing the door Use the handle and stay away from the hinges. - Page 22 be taken. Wearing specific protective clothing is always recommended, particularly heat-resistant gloves for work with fryers and industrial ovens. • Risk of burns from hot liquids: While the fryer is in operation, the oil is hot, therefore it should not be removed until it reaches an appropriate temperature for it to be handled (less than <40ºC or <104ºF).
- Page 23 DANGER OF BURNS Source of danger while cleaning: hot oil or Chemical cleaning products. For all cleaning activities, specific protective clothing should be worn; heat-resistant gloves, cut-resistant gloves and protective gloves against chemical agents: When performing the daily oil filtering, you must be sure that the oil temperature is below <40ºC or <104ºF.
- Page 24 If the equipment is rarely cleaned, or not cleaned at all, fat build-up can ignite. Fire hazard! • If you see smoke coming from inside the fryer, switch off the appliance, unplug the appliance from the power supply and keep the door closed, so that the fire extinguishes.
- Page 25 • To clean the exterior cladding, only use cleaning products suitable for domestic and gentle use, for example dishwasher detergent or a degreaser on a soft and damp cloth. Do not use any kind of corrosive or irritating substances. • Do not use abrasive products or detergents. Otherwise you may lose your equipment’s warranty.
-
Page 26: Description Of The Equipment
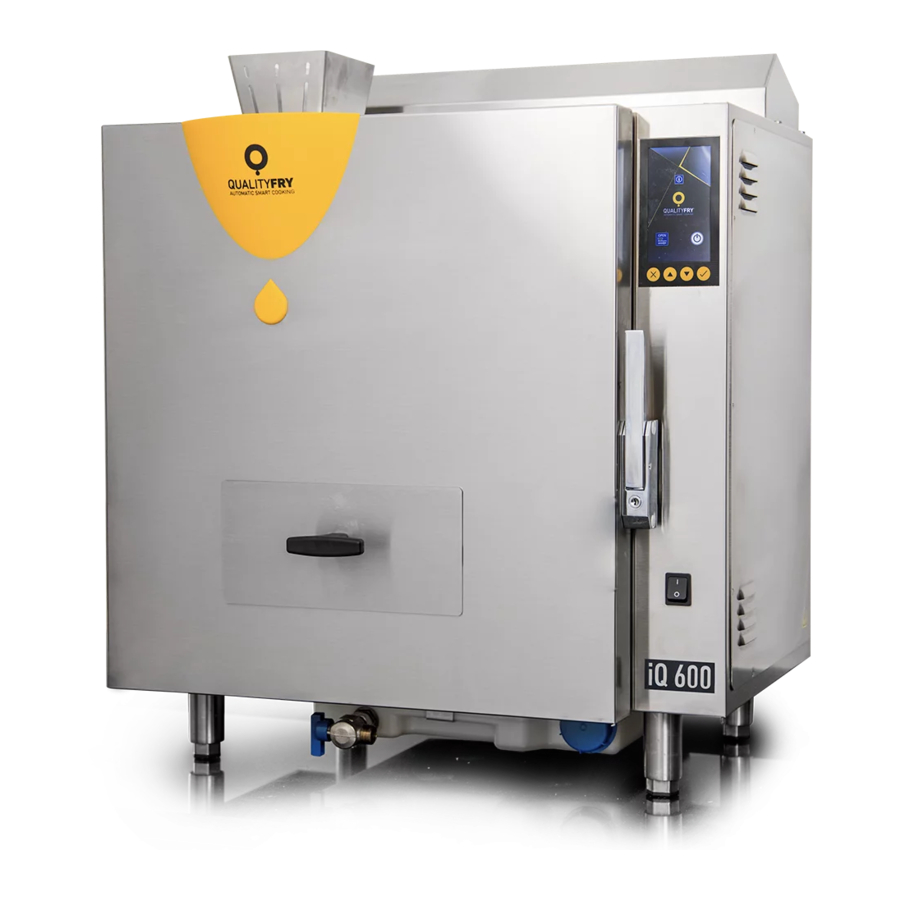
D E S C R I P T I O N O F T H E E Q U I P M E N T iQ 600 BASIC Gourmet - iQ 610 GOURMET iQ 620 BASIC Carrousel - iQ 630 CARROUSEL... - Page 27 The QUALITYFRY fryers are automated fryers, which fries any type of fresh or frozen food in less time, thanks to its design which maintains its internal temperature and foods do not absorb the oil when they are fried. The machine has been designed and built to be placed inside premises;...
- Page 28 Electric installation and connection The machine is fitted with a flexible electric cable with a length of two (2) metres to connect it to the electric power grid of the premises. This network must be single-phase and must withstand a power voltage of 20A, 230V and a frequency of 50/60 Hz.
- Page 30 Q U A L I T Y F R Y Q U A L I T Y F R Y...
- Page 31 i Q 6 0 0 B A S I C G O U R M E T i q 6 1 0 G O U R M E T 14. Coil 27. Heating Box 1. Unit 15. Boxed Filter Set 28.
- Page 32 Q U A L I T Y F R Y Q U A L I T Y F R Y...
- Page 33 i Q 6 2 0 B A S I C C A R R O U S E L i Q 6 3 0 c a r r o u s e l 1. Unit 14. Coil 27. Heating Box 2.
- Page 34 Keyboard QUALITYFRY fryers have a touchscreen with which intuitively control the temperature, the number of portions, language, the refilling of oil and many other options that will make your life much easier. In the image below we show you the related keyboard that will assist you in navigating the system.
- Page 35 3 5 3 5...
-
Page 36: Screen Icons
By pressing the button “i” for information, you will be able to access the QR codes and see the help videos for staff on how to set and/or carry out maintenance of your QUALITYFRY fryer. Q U A L I T Y F R Y... -
Page 38: Start Screen
Start screen 1 . F R Y I N G 5 . F A N S P R O G R A M S If you see this icon, you should Indicates the eight (8) check the fryer fans, which are programmed frying programs. -
Page 40: H A N D L I N G A N D S E T T I N G S
After pouring the oil into the fryer, we then press the ON button one the screen. The QUALITYFRY fryers have a 5” touchscreen, which allows for simpler and more intuitive control of cooking programs and quick monitoring of the entire fryer. - Page 41 Configuration The machine can be set with eight (8) different frying programs, which allow us to intuitively control the number of portions, language, oil filler and temperature to adapt to your needs. To set the fryer, on the main screen of the display we will find the “Menu” button, within which we can find the following options: Data, Delete data, Programs memory, Settings, Production and Off (electronic shutdown).
- Page 42 Data Displays the counters of the frying portions and instant temperature values of the oil. It also gives the IP address to which the machine is connected. To access this function, we must press on the “Menu” screen, and then press “Data”. It shows the temperature of the two (2) probes, one for the temperature and the other for the oil level;...
-
Page 43: Delete Data
Delete data Allows us to reset the partial counter of portions processed. To access this function we must press on the “Menu” screen, and then press “Delete data”. If you press the “Menu” button on the screen the delete confirmation panel will appear. - Page 44 Programs memory With this option we can program the weight of the product to be fried in continuous mode, the frying quality, the temperature and the frying time of the different programs. One accesses this function by pressing on “Menu” and then pressing “Programs memory”.
- Page 45 1 . E X C E L L E N T 4 . T I m E Q U A L I T Y Individualised frying time for each When enabled the machine will program (from 00:20 secs. up to not start heating again until it 15:00 min).
- Page 46 Settings From “Settings” we access the submenus in which we can set the temperature format (ºC or ºF), the language messages will be displayed in or the acoustic warning while the scoop is rotating. We can also enable or disable some of the machine’s probes To access it we must press “Menu”...
- Page 47 1 . L A N G U A G E 4 . R U N T E S T We can change the language in Its function is mainly used which the different messages to assess each of the are displayed (Spanish, English, components that make up German, French, and Dutch, the fryer (scoop motor, hatch...
- Page 48 Production To select the different types of production in the fryer, press “Menu” and then “Production”. Once in this option we can select the desired production type for the fryer: Individual, Large 1 Scoop rotation (1SR), Large 2SR (2SR) and Continuous.
- Page 49 1 . I N D I V I D U A L 3 . l a r g e 2 s r Also known as small portions, it The same as the 1 Scoop Rotation allows two (2) different products except here the product makes to be fried at the same time and two rotations to...
- Page 50 Below we will describe the two (2) inputs in greater detail: Standard hopper iQ 600 Basic Gourmet iQ 610 Gourmet Continuous hopper iQ 620 Basic Carrousel iQ 630 Carrousel...
- Page 51 Standard hopper iQ 600 - iQ 610 GOURMET Located on the upper left hand part of the cabinet, it has the shape of the trunk of an inverted pyramid. The product to be fried is placed in its mouth. It has sufficient capacity to take the maximum amount of food that can be fried at one time, depending on the selected production mode (individual production, large 1SR or 2SR).
- Page 52 Continuous production hopper iQ 620 - iQ 630 Carrousel It is located on the upper part of the cabinet. It has four (4) inputs to optimize the operator’s work, being able to program 6 products at a time: 2 in the frying chamber and 4 in the carousel hopper. Its large capacity for high demand products facilitates the operator’s work, as they only have to insert in each compartment the product to be fried.
- Page 53 P R O D U C T O U T P U T S The QUALITYFRY product range has two (2) types of outputs. - One is the traditional output, which is shaped like a drawer and is optimal for pulling out of the fryer and serving directly on the diner’s plate or board.
-
Page 54: Standard Output
Standard output It is fitted to the door; it was designed to serve products from the drawer directly onto the plate. It is ideal for establishments that want to provide personalised service. Large or single product output It is fitted to the door; it was designed to store continuous productions, which makes it ideal for having ready-made fried products for serving several orders. - Page 55 S T A N D A R D O U T P U T — L A R G E O U T P U T — 5 5 5 5...
- Page 56 M a i n t e n a n c e For an optimal operation of the iQ 600 - iQ 610 - iQ 620 - iQ 630 (GOURMET Y CARROUSEL) models, we recommend the following daily, weekly, two-monthly and yearly maintenance plan.
- Page 57 - Open the appliance door. - Remove the safety plug from the fryer tap. - Place the silicone hose on the tap. - Place the bucket on the ground and place the funnel with the filter inside it. - Open the tap’s red safety key. - Check the level of the filtered oil and, if necessary, fill up to 5.5 litres, with new oil.
- Page 58 2 . C L E A N I N G O F T H E C A B I N E T , I N P U T H O P P E R A N D P R O D U C T O U T P U T After having performed the previous step (oil filtering), to clean the outside and inside of the fryer, follow the following steps: - Clean the exterior and interior of the appliance.
- Page 59 E X P L A N AT O R Y V I D E O This QR code takes you to the explanatory video about daily maintenance. 5 9 5 9...
- Page 60 Weekly or every 200 product portions Use personal protection equipment (anti-cut gloves for work with steel or sheet metal and protective gloves or utensils against chemical agents) as mentioned in the Safety section. 1 . W A S H I N G F R Y E R V A T To wash the vat, one must follow the oil filtering steps explained in the “Daily”...
- Page 61 the top of the basket. - Unscrew the three (3) flywheels that adjust the output ramp, then pull outward to remove the ramp from the frying basket. - Turn the paddle upwards and pull to remove it. - Remove the blade from the bucket by pulling it towards the inside of the fryer vat.
- Page 62 2 . W A S H I N G P R O D U C T I N P U T A S S E M B L Y To wash the input assembly, follow these steps: - Push right and then pull upwards to remove the hopper or carousel. - Pull up on the opening hatch.
- Page 63 3 . E M P T Y I N G C O N D E N S A T I O N T A N K To empty the condensation tank, follow these steps: - It is recommended to empty the condensation chamber weekly or when it is full.
- Page 64 Bimonthly Use personal protection equipment (anti-cut gloves for work with steel or sheet metal and protective gloves or utensils against chemical agents) as mentioned in the Safety section. 1 . W A S H I N G M E T A L L I C F I L T E R The bimonthly process must coincide with the cleaning of the inside of the fryer and coincide with the full oil change.
- Page 65 2 . C L E A N I N G O F T H E G A S E X T R A C T I O N E L B O W The following steps must be followed to clean the gas extraction pipe.
- Page 66 Weekly or Annual Use personal protection equipment (anti-cut gloves for work with steel or sheet metal and protective gloves or utensils against chemical agents) as mentioned in the Safety section. 1 . C L E A N I N G T H E D E C A N T E R H E A T I N G C O I L - It is recommended to perform this maintenance when it coincides with bimonthly maintenance, as the “gas extraction elbow”...
- Page 67 - Remove the coil from inside the machine for cleaning. 2 . C L E A N I N G T H E C O N D E N S A T I O N D R U M After removing the frying vat, remove the metallic support to the drum.
- Page 68 Q U A L I T Y F R Y Q U A L I T Y F R Y...
-
Page 70: Control Board
5398 Control Board J13 J3 Q U A L I T Y F R Y Q U A L I T Y F R Y... -
Page 71: Display Board
Display Board 7 1 7 1... - Page 72 Q U A L I T Y F R Y Q U A L I T Y F R Y...
- Page 74 5600 Control Board ... . . Q U A L I T Y F R Y Q U A L I T Y F R Y...
- Page 75 Display Board...
- Page 76 Blade Error 1 . C h e c k t h a t t h e f r y e r i s c o r r e c t l y p o s i t i o n e d and if it is blocked by the motor support, unblock it and reposition it until it is hooked correctly.
- Page 77 When the machine turns the blade, using a multimeter, check between pins 5 and 6 of the J7 connector whether the system panel always shows 3.9v, if detected, the magnet will go to 0 for a second, if not, the magnet of the door link disk should be changed [RESOLVED?] •...
- Page 78 Hatch Error 1 . T u r n o f f t h e m a c h i n e , remove and reattach the carousel and check if it works [RESOLVED?] • YES • NO (go to point 2) 2 .
- Page 79 4 . C h e c k t h a t t h e m o t o r h a s t h e m a g n e t m o u n t e d o n t h e h a n d l e 5 .
- Page 80 Machine does not heat up 1 . C h e c k t h e t h e r m o s t a t , reassemble it according to the instructions and turn on the machine. 2 . M e a s u r e b e t w e e n t h e r e s i s t o r p i n s t o s e e i f t h e r e i s c o n t i n u i t y after resetting the thermostat.
- Page 81 8 1 8 1...
- Page 82 4 . C h e c k t h a t t h e f r y e r v a t i s w e l l p o s i t i o n e d 5 . P o s s i b l e b r o k e n R e s i s t o r 6 .
- Page 83 8 3 8 3...
- Page 84 The machine trips 1 . C h e c k t h a t t h e l i n e i s c o r r e c t , check the 220 - 240 V 2 . C h e c k t h a t t h e p l u g h a s n o t b e e n t a m p e r e d w i t h and that it is connected properly 3 .
- Page 85 8 5 8 5...
- Page 86 4 . C h e c k t h a t t h e r e i s n o w a t e r o r m o i s t u r e i n t h e h e a t i n g u n i t (if so, dry it) 5 .
- Page 88 Probe 1 or Probe 2 Error 1 . G o i n t o t h e m a c h i n e ’ s t e c h n i c a l m e n u : a.
- Page 89 The float doesn’t beep 1 . T h e f l o a t d o e s n o t m a k e c o n t a c t because it is dirty; clean it 2 . T h e f l o a t d o e s n o t m a k e t o u c h t h e t o p because it is stuck to the probe or bent (put it in its correct horizontal position) 3 .
- Page 90 Without messages on the screen FAULT POSSIBLE CAUSES SOLUTIONS The machine is unplugged. Plug the machine into the mains. THE MACHI- NE DOES There is no voltage or current in the Check that the mains plug socket or NOT TURN plug socket where it is connected.
- Page 91 Add the correct amount of food to the fryer and take care to not exceed You have added too much food while in the marker in the hopper. “small portions” mode. Recommended amounts: 250 grammes in “small portions” mode, 600 grammes in “large portions”...
- Page 92 When handling the appliance due to fault make sure you have read the manual first. Use personal protective equipment (anti-gloves for work with steel and sheet metal; protective gloves or utensils against chemical agents; or heat-resistant gloves for work with fryers and industrial ovens).
- Page 93 WITH MESSAGES ON THE SCREEN FAULT POSSIBLE CAUSES SOLUTIONS Check the input unit and correctly The hatch is fitted incorrectly. place the hatch. Clean the input unit as it may be The input unit is dirty. preventing the motor from functioning correctly.
- Page 94 Remove the fryer case and put it The vat or fryer is not correctly back in, making sure you hear a placed in the machine. “click”. Check the angled plug and motor The angled plug is disconnected. connections. “SPATULA ERROR” The blade motor turns and still shows Contact Technical Support the error.
- Page 95 Fill the vat with exactly 5.5 litres The oil level is incorrect. of oil. Check the elbow plug and resistor Elbow plug disconnected. connections. “PROBE 2 ERROR” Bad connection between the angled Check that the black gasket is inside cable and the resistor. the heating unit.
- Page 96 HATCH ERROR Check if Check if Wait for the Machine Check the entrance Restart Is it right the motor Working machine machine to reboted (Hopper and Hatch). Installed is moving Machine works reboot properly Adjust the input bracket (Hopper and Hatch). Connections Hatch motor to the mainboard QF5398 and QF5600 Q U A L I T Y F R Y Q U A L I T Y F R Y...
- Page 97 Check over if the Check both Are the Does the Magnet Check Repair black handle still Conections micro micro sensors motor attached conections conections has the small sensors move? circular magnet . Attach Magnet in Replace Replace the side of the micro sensors motor motor handle.
- Page 98 PROBE ERROR (TEMPERATURE / LEVEL) Check if the angle Review the values Check the oil Check the Values Properly Turn off connector is level of the probes temp oil level machine Corrects? connected? (5.5Lts) properly connected /level (Ohm) (5.5Lts) Disconect and Replace reconect all the broken...
- Page 99 Review the Check angled Check all the circuit Angled cable Values Is the internal inner wire connector connections until the good condition cable correct? correct? form. cable mother board Replace the Find the the point Replace angled inner form of bad conectivity cable form.
- Page 100 PROBE ERROR (TEMPERATURE / LEVEL) Tests to be carried out on the heating group Once the error flow check on the previous page is done, we must check the value in Ohm of the Temperature / Level probe of the machine, for this, we must use the ohm multimeter.
- Page 101 Value Table PT100 1 0 1 1 0 1...
- Page 102 THERMOSTAT ERROR Check the Press the button Check that the Reboot Turn off Is the oil level Heating oil level thermostat bulb is not and reset machine machine correct? stuck to the resistance (5.5Lts) thermostat Refill oil until the righ 5.5 Lts.
- Page 103 Check if the Has the Has the Check values and ulb in right Recheck Contactors thermostat has thermostat resistance continuity of the contactors position? corrects? continuity continuity? continuity? resistance. djust and Replace Replace the Replace place in the the damaged thermostat resistance ht position.
- Page 104 CHECKING OF HEATING GROUP (FLOAT VALIDATION) Check the Is the oil Check if the Check if the angle Properly Turn off Is there level oil level connector is pro- floater has connected? continuity? Machine correct? continuity. perly connected (5.5Lts) Disconect and Replace the reconect all the damaged...
- Page 105 Check the inner Verify the angle Check all the circuit Is there Internal cable Angled wire wire in the connector connections until the continuity? form correct? form correct? resistance cable mother board Replace the Replace Find the error inner wire angled wire conection in the form...
- Page 106 CHECKING OF HEATING GROUP (FLOAT VALIDATION) Connections heating group to motherboard QF5398 1 0 6 1 0 6 Q U A L I T Y F R Y Q U A L I T Y F R Y...
- Page 107 Connections heating group to motherboard QF5600 1 0 7 1 0 7...
- Page 108 BLADE ERROR Chamber Check if the frying Check micro Turn off attached box is correctly switch of the Machine correctly? blade attached Remove and Check if the blade Reboot Does it work attached the motor is working machine chamber again (blade moves ) IMPORTANT: Carry out all this operation with the machine cold or with the oil at a temperature below 40ºC or 104ºF...
- Page 109 Blade Micro switch Replace blade micro switch blade replaced micro switch Replace Engine stops while blade doing the force (motor set) test? Check if the drag Replace Magnet plate (blade) has attached? drag plate the magnet Replace drag plate 1 0 9 1 0 9...
- Page 110 BLADE ERROR Connections motor Blade to Motherboard QF5398 y QF5600 1 1 0 1 1 0 Q U A L I T Y F R Y Q U A L I T Y F R Y...
- Page 111 1 1 1 1 1 1...
- Page 112 CARROUSEL ERROR “HATCHERROR” Wait for Machine Reboot Check if it Working Machine to rebooted Machine works reboot Check the black Check if the Does the Is it good carrousel motor crown of the motor move? installed works (moving) carrousel Install the magnet or Adjust the input Replace replace the black...
- Page 113 Error Check the Take care to see if the cause by the error is“Carrousel” or entrance set carrousel? “Hatch” (carrousel and hatch). Go to “hatch error” process Are the Check Check Is the micro (4) magnets carrousel conections switch ok installed? micro switch Replace micro...
- Page 114 CARROUSEL ERROR “HATCHERROR” Connections motor Carrousel to motherboard QF5398 1 1 4 1 1 4 Q U A L I T Y F R Y Q U A L I T Y F R Y...
- Page 115 Connections motor Carrousel to motherboard QF5600 1 1 5 1 1 5...
-
Page 116: Machine Does Not Turn On
MACHINE DOES NOT TURN ON Check if the Is the Electric Check that it is Plug in to Turn off electric differen- Working electric supply differential attacheed to the the net machine tial of the local conected? main circuit has switched Reboot Reboot Working... - Page 117 Connections Is there Check if there is Review power Are the Conections and automatic voltage or power supplies voltage in the plug supply of the /electrical electric in the working? tension? automatic ok? (220~240VAC) machine machine Replace Replace conection Check electri- power or electrical cal circuit of...
- Page 118 FAN 1 “ERROR SERPENTINE” (BIG) AND FAN 2 -EXTRACTOR (SMALL) Furnish the Check if it Does the ventila- Turn off Rebo ventilator spins and tor spins and has machine machi air flow? blades moves air Check connections Review power Does the Conections up to the supply of the...
- Page 119 Fan icon Replace Working disappears? ventilator 1 1 9 1 1 9...
- Page 120 FAN 1 “ERROR SERPENTINE” (BIG) AND FAN 2 -EXTRACTOR (SMALL) Connections Ventilator and extractor to the motherboard QF5398 y QF5600 1 2 0 1 2 0 Q U A L I T Y F R Y Q U A L I T Y F R Y...
- Page 121 1 2 1 1 2 1...
- Page 122 RELAY OF ELECTRIC BOX OF THE LOCAL SWITCHES OFF Check if the electric Check that it is Turn off Electric Is it plugged Plug in the Working differential of the attacheed to the Machine differential to the net? machine local has switched. main circuit / ON? Reboot...
- Page 123 Check if the internal Is there Check if there is Dry the connections and Connections connections of the voltage or Working oltage in the plug remove the moisture with humidity? heating group are wet tension? (220~240VAC) inside the heater group or damp Check elec- Check resistance...
- Page 124 FLOAT DOES NOT WORK Check level Verify angled wire Check if the Is there Well Turn off Oil level if it is correctly floater has continuity? conected? correct? machine (5.5Lts) plugged continuity Replace Unplug and damaged replug all the floater Refill until Reboot Working...
- Page 125 Review the complete Check internal Internal Check internal Is there Angled wire wire form circuit from the wire form and wire form continuity? form ok? correct? motherboard resistance Find the Replace Replace broken spot in internal form angled wire the circuit wire form 1 2 5...
- Page 126 MESSAGE “CONDENSATION TANK FULL” Turn off the Open the tap of the Message Tank empty machine and drum and drain the Condensation wait to cool down tank full water Empty the Does it work drum completely IMPORTANT: Carry out all this operation with the machine cold or with the oil at a temperature below 40ºC or 104ºF.
- Page 127 Remove the sensor Install it again in Is there the condensation from the drum, clean continuity? tank and validate continuity Replace the sensor of the tank 1 2 7 1 2 7...
- Page 128 DISPLAY IS NOT WORKING (BLACK SCREEN) Check that the Check if there is Check that is Is it Is the Turn off Plug in local differential voltage in the connected to plugged to the Working diferencial machine machine is not switched plug the net? electrical net...
- Page 129 Check communi- Review display Is there Are the cation cable Check power Is there well Cable in good card and display voltage or power supplies between display supply conectivity? condition? right conected? working? tension? board and control board Replace Reconect Check the Replace power...
- Page 130 All rights reserved. Photocopying, reproducing or translating to another language any part of this document without the prior written consent of QUALITYFRY S.L. is prohibited. QUALITYFRY S.L. reserves the right to make improvements to this model arising from its constant research, without prior notice. © 2021 QUALITYFRY S.L., all rights RESERVED.
-
Page 131: Installation Date
Supplier or Installer Signature Client Signature Installation Date Installation Date Equipment serial number Equipment serial number... - Page 132 W W W . q u a l i t y f r y . c o m W W W . q u a l i t y f r y . c o m M A - S A T - 0 2 R e v . 0 1...
- Page 134 w w w . q u a l i t y f r y . c o m C/ Albasanz, 12 - Planta 1ª 28037 - Madrid - Spain . (+34) 913 759 567...
Need help?
Do you have a question about the iQ 600 and is the answer not in the manual?
Questions and answers