
Subscribe to Our Youtube Channel
Related Manuals for KNAAP BIKES AMS


Summary of Contents for KNAAP BIKES AMS
- Page 1 KNAAP BIKES User manual KNAAP BIKE AMS These are the original English instructions. October 2020 Version 1.0...
-
Page 2: Table Of Contents
TABLE OF CONTENTS 1 INTRODUCTION 1.1 About this user manual 1.2 Typographic conventions 1.3 Additional documentation 1.4 Contact details 2 ASSEMBLING THE BIKE 2.1 At a glance… 2.1.1 Bike 2.1.2 Battery and charger 2.1.3 Speed control system 2.1.3.1 Speed controller, LCD screen 2.1.3.2 Pedal assist sensor 2.1.3.3 Gear shifter, 7 gears, cassette and rear hub motor 2.2 Installing the bike components... - Page 3 3.1.2 Safety notes - eBike battery and charger 3.2 Using the battery 3.2.1 Installing the battery 3.2.2 Charging the battery 3.2.3 Removing the battery 3.2.4 Storing the battery 3.2.5 Battery status LEDs 3.4 Using the brakes 3.5 Using the speed control system (with LCD display) 3.5.1 Functions 3.5.1.1 Display setting mode 3.5.1.2 Advanced settings...
- Page 4 4.1 Cleaning the bike 4.2 Adjusting the chain tension 4.3 Adjusting the brakes 4.4 Lubricating the bike 4.5 Maintenance schedule 4.6 Torque settings 5 TRANSPORT AND STORAGE 5.1 Transporting the bike and the battery 5.1.1 Transporting the bike 5.1.2 Transporting the battery 5.2 Storing the bike 6 PROBLEM SOLVING 7 ENVIRONMENT AND DISPOSAL...
-
Page 5: Introduction
1 INTRODUCTION 1.1 About this user manual This user manual is primarily intended for the Knaap bike owner. Make sure that you read and understand this manual and the safety instructions contained herein before using the Knaap bike. Failure to do so can result in serious injury or death. Obey all instructions. -
Page 6: Typographic Conventions
1.2 Typographic conventions The following symbols are used in this user manual: Danger indicates a hazardous situation that, if not avoided, will result in death or serious injury. Warning indicates a hazardous situation that, if not avoided , may result in death or serious injury. -
Page 7: Assembling The Bike
2 ASSEMBLING THE BIKE 2.1 Product elements... -
Page 9: Bike
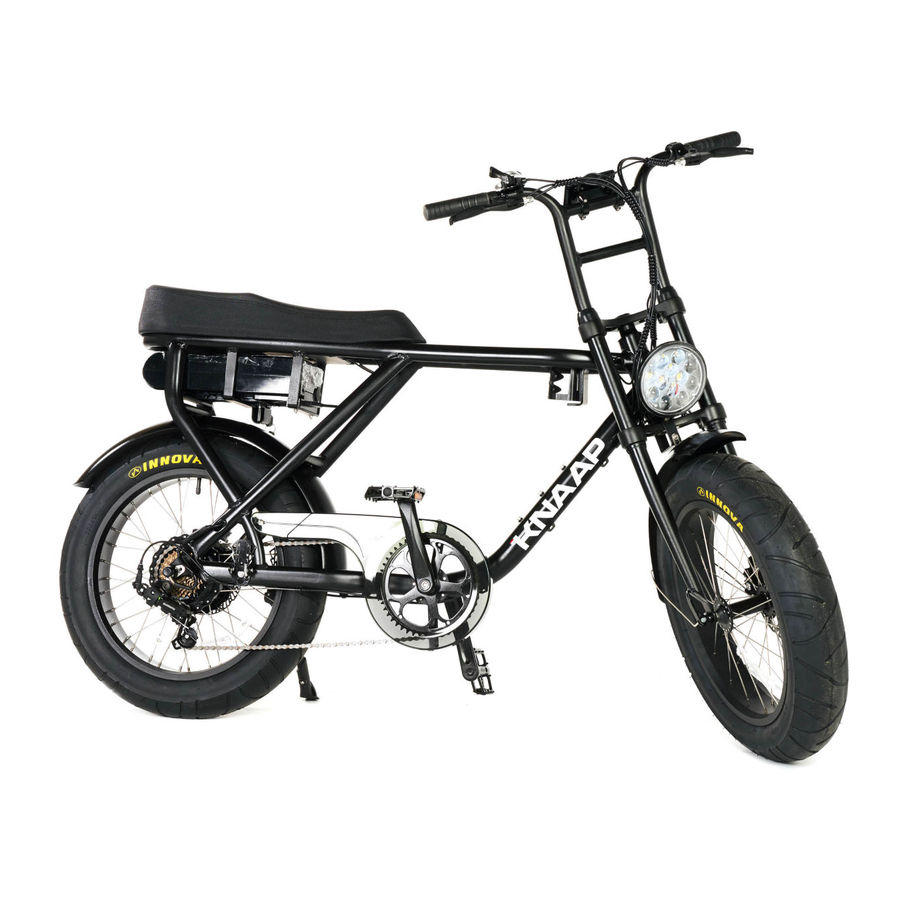
A. Brake B. Power Button, Speed controller and light button C. Handlebar D. LCD console E. Gear shifter F. Brake G. Stem H. Mug holder Saddle Battery lock K. Battery L. Rear light/reflector M. Rear mudguard N. Rear hub motor O. - Page 10 Spare part box Rubber dust covers Toolkit (see T oolkit ) Pedals Charger...
- Page 11 Toolkit Allen key 3mm Allen key 4mm Allen key 4,5mm Allen key 5mm Allen key 6mm Wrench 8 Wrench 13/15 Wrench 17/19 Screwdriver Socket for screwdriver...
-
Page 12: Installing The Bike Components
2.2 Installing the bike components An overview of all torque values can be found in s ection 4.6 Torque settings . 2.2.1 What is in the box? 1. Open the packaging and remove the bike, the charger and the parts box. 2. -
Page 13: Installing The Front Mudguard
2.2.2 Installing the front mudguard Tools/Material required: ● Front mudguard ⓥ ● Allen key 4.5 mm Ⓣ3 ● Wrench 8 Ⓣ6 1. Remove the f ront mudguard ⓥ f rom the packaging. 2. Attach the f ront mudguard ⓥ o nto the h anger ① with the a llen key Ⓣ3 and w rench Ⓣ6 . -
Page 14: Installing The Front Wheel
2.2.3 Installing the front wheel 2.2.3.1 Installing the quick release axle in the front wheel 1. Remove the q uick release axle Ⓤ attached to the f ront wheel . 2. Remove the e nd nut ① and the c one-shaped spring ② from the q uick release axle Ⓤ . - Page 15 3. Put the q uick release axle Ⓤ into the h ollow hub ② : a. Make sure that you insert the q uick release axle Ⓤ from the non-driver side. b. Make sure that the c one-shaped springs ① are on each side of the wheel. 4.
-
Page 16: Installing The Front Wheel In The Front Fork
2.2.3.2 Installing the front wheel in the front fork Tools/Material required: ● Allen key 4.5mm Ⓣ3 1. Make sure that the foam protection sleeves are removed from the handlebar. 2. Remove the f ront fork spacer ① . - Page 17 3. Put the q uick release axle Ⓤ into the f ront fork dropouts ① . Risk of injury. The front wheel axle must be fully seated into the dropouts. If the wheels are not secured in place, they can go askew or come out of the dropouts.
- Page 18 4. Hold the e nd cap ① and turn and tighten the q uick release lever ② . 5. Tighten the e nd cap ① , c lose the q uick release lever ② . The quick release lever must fully close.
- Page 20 6. Mount the w ire stay ① onto the f ront mudguard Ⓥ and attach it at both sides of the f ront wheel axle ② with the a llen key 4.5mm . 7. Make sure that the f ront mudguard Ⓥ does not touch the front tire.
-
Page 21: Installing/Adjusting The Handlebar
2.2.4 Installing/adjusting the handlebar Tools/Material required: ● Allen key 5mm Ⓣ4. 1. Remove the h andlebar Ⓒ from the packaging. 2. Take the t wo rubber dust covers Ⓢ 1 from the parts box. 3. Slide the d ust covers Ⓢ 1 onto the lower end of each of the h andlebar stems ①②. 4. - Page 22 5. Make sure that the r ibbed insertion marks ① are fully inserted into the b ike frame ② . Risk of injury. The height of the handlebar stems can be adjusted to the user’s preferences, but the safety mark must NOT be visible. 6.
-
Page 23: Installing The Pedals
2.2.5 Installing the pedals Tools/Material required: ● Pedals Ⓢ3 ● Wrench 13/15 Ⓣ7 The left pedal is threaded in the opposite direction, and must be tightened by turning it counterclock wise. This is standard on most bikes. 1. Check the p edals Ⓢ3 b efore installation: They are labeled “L” for the rider’s left, “R” for the rider’s right. -
Page 24: Safety Notes - Ebike Safety Fundamentals
3 SAFETY 3.1 Safety notes - eBike safety fundamentals ● Always wear a helmet. ● Wear bright, highly visible clothing, preferably with reflective tape or patches. ● Obey the rules of the road. Stop at stop signs and lights. ● Stay in control: ○... -
Page 25: Using The Battery
4 RIDING THE BIKE 4.1 Using the battery ● Risk of explosion. The battery and the dock must be dry before installation. Dry the battery and the dock with a soft cloth, if required . ● Risk of explosion. Do NOT charge or use a battery that is damaged. If the battery is damaged, it must be discarded immediately. -
Page 26: Installing The Battery
3.2.1 Installing the battery 1. If installing the b attery Ⓚ f or the first time: ○ Remove the b attery . ○ Remove the packaging from the b attery a nd discard the packaging in accordance with the local disposal regulations. -
Page 27: Charging The Battery
3.2.2 Charging the battery ● The battery can be charged directly on the bike or separately. After charging, the charger must be disconnected from the battery and the AC power socket immediately. ● Charging a new battery takes approximately 8-9 hours. If you discharge the new battery and recharge it within a week, all relevant substances within the battery are activated, which elongates the lifetime of the battery. - Page 28 6. When the battery is fully charged: a. The c harger LED lights up g reen . b. Remove the p ower plug of the charger from the AC power socket. c. Remove the output plug of the charger from the b attery Ⓚ .
-
Page 29: Removing The Battery
3.2.3 Removing the battery 1. Unlock the battery: Turn the b attery key ① counterclockwise. 2. Make sure that the O N/OFF button ② of the b attery Ⓚ is in the O FF position. 3. Remove the b attery Ⓚ from the dock and slide it to the rear. 3.2.4 Storing the battery ●... - Page 30 60 minutes with the supplied charger. Batteries in long-term storage at room temperature should receive a refresh charge every three months or so.
-
Page 31: Battery Status Leds
3.2.5 Battery status LEDs 1. Press the power button on the battery: a. If none of the battery status LEDs lights up: The battery is damaged. Do NOT charge the battery. I f within 2 years of purchase, contact the retailer from where you purchased your Knaap Bike (... -
Page 32: Using The Brakes
3.4 Using the brakes ● For the UK: The rider’s left brake is the rear brake and the rider’s right brake is the front brake. ● For the EU: The rider’s right brake is the rear brake and the rider’s left brake is the front brake. Risk of injury. -
Page 33: Using The Speed Control System (With Lcd Display)
3.5 Using the speed control system (with LCD display) The Knaap bike comes with a speed control system. The speed control system is connected to the rear hub motor and the pedal assist sensor located on the driver-side crank arm. When you start pedalling, the pedal assist sensor detects the forward pedal rotation and after two rotations activates the motor to power your ride. - Page 34 button of the s peed controller . The L CD display lights up. 2. Press and hold the The LCD display switches off automatically after 10 minutes of inactivity (default setting). a nd b uttons ② until you reach the l evel of pedal button...
-
Page 35: Functions
3.5.1 Functions The s peed controller and the L CD display of the Knaap bike give access to the following functions: ● Display setting mode ● Advanced display settings ● Power indicator ● Distance (trip and total) ● Walk assist ●... - Page 36 button t o change the speed limit U P or D OWN . Press the button or the button t o save the new setting. Press the Next is B rightness . iii. c. Brightness: button ...
- Page 37 The new settings are applied after restarting the LCD display.
-
Page 38: Advanced Settings
3.5.1.2 Advanced settings 2. Press and hold the button to switch on the LCD display. Press and hold the button and the button a t the same time to e nter the d isplay settings mode . The ... - Page 39 button t o change the t ime ( 0 - 60 m inutes ) . Press the button or the button t o save the new setting. Press the Next is P ower level . iii.
-
Page 40: Power Indicator Function
3.5.1.3 Power indicator function The power indicator shows the power status of the battery: The power indicator flashes weakly in case of low battery power. 3.5.1.4 Distance function button to shift between T RIP and T OTAL . 1. -
Page 41: Walk Assist Function
3.5.1.5 Walk assist function ● This function is intended for walking alongside the bike with more ease. ● The Walk assist function cannot be used while riding the bike. button to start the W alking assist function. 1. Press and hold the 2. -
Page 42: Error Codes
3.5.1.7 Error codes In the event of an error, an error code shows on the L CD display and the motor stops. Once the error is solved, the motor starts working again. Error code Definition Throttle not returning to zero state Throttle abnormality Low voltage protection Over voltage protection... -
Page 43: Using The Gear Shifter
3.6 Using the gear shifter The Knaap bike has a 7-gear shifter, so you can pedal comfortably no matter what the terrain. Use an easier gear (1 is the easiest) on hills or when you’re riding into the wind. Use a harder gear (7 is the hardest) on flats or if the wind is blowing from behind. -
Page 44: Using The Lighting System
3.7 Using the lighting system 3.7.1 Front light and rear light 1. Make sure that the b attery and the L CD display are switched on. button t o switch on the lights. 2. Press the button t o switch off the lights. 3. -
Page 45: Recommendations For First-Time Ebike Riders
3.8 RECOMMENDATIONS FOR FIRST-TIME EBIKE RIDERS 3.8.1 Getting acquainted with the bike Take some time to familiarize yourself with the Knaap bike and its special features. First make sure that you read and understand the user instructions, then go for a ride! The following safety aspects in particular must be considered: ●... - Page 46 a. Inspect the side walls and threads of the tire. Look out for cracks and objects that may be stuck in the outer layer. b. If the wheel wobbles or appears to be off-center, your wheel must be trued. Consult a skilled technician.
-
Page 47: Maintenance
4 MAINTENANCE In order to keep your bike in a good shape it must be inspected and maintained at regular intervals. This can be done either by yourself or a skilled technician. Also make sure that you clean your bike regularly. It doesn’t take long and it gives you the chance to spot any faults before they develop into anything serious. -
Page 48: Cleaning The Bike
4.1 Cleaning the bike If you clean your bike regularly, you are more likely to detect weak spots that might develop into a serious issue later. Risk of damage. Do NOT use a high pressure cleaner. Water coming from a high-pressure hose can cause damage to the bearings of your bike. -
Page 49: Adjusting The Chain Tension
11. Lubricate the chain of the bike. See s ection 4.4 Lubricating the bike. 4.2 Adjusting the chain tension Tools/Materials required Knaap toolkit 1. Put your bike on a bike stand. The wheels should be up in the air; otherwise it is difficult to tighten the bike chain. -
Page 50: Adjusting The Brakes
4.3 Adjusting the brakes Tools/Material required: ● Allen key 5mm Ⓣ4 The adjustment procedure is the same for the front and the rear brake . If the brakes feel too tight or too loose: TIP: A two fingers length is needed between the handlebar and the brake lever when you squeeze. If this is not the case, the brake must be adjusted. - Page 51 If you need to adjust the brake pads: 1. Make sure that the w heel i s well-centered. 2. Loosen the m ounting bolts ① until the c aliper body ② is free to move from side to side. Do NOT remove the ...
-
Page 52: Lubricating The Bike
4.4 Lubricating the bike Tools/Material required: ● Bike lubricant (not included) ● Silicone cleaning spray (not included) ● All season chain oil (not included) 1. Ideally the bike should be put in a work stand. 2. Make sure that the bike is clean and that the drive chain is degreased. See s ection 4.1 Cleaning the bike ... - Page 53 where it runs down into the housing. 6. Reconnect the outer housing. 7. Pull the lower section of the housing free from the frame, and slide it away from the derailleur. 8. Repeat the lubrication process and reconnect the housing. 9.
-
Page 54: Maintenance Schedule
4.5 Maintenance schedule Every Ride Monthly Six Months Yearly 500 km / 600 mi 1,500 / 930 mi 4,500 km / 2,800 mi Check your tire Clean your bike (see Clean your bike (see Inspect the pedals, add section 4.1 C leaning pressure and section 4.1 Cleaning the fresh grease, and check... -
Page 55: Torque Settings
centered by a skilled technician. Check your brake Maintain, lubricate, Check all cables and cable Check all cables and pads for wear and and service your housing for wear, kinks, cable housing for wear, make sure that suspension rust and fraying. Replace kinks, rust and fraying. - Page 56 release Handlebar clamp nuts 5 - 6 Nm Brake lever nuts 10 - 12 Nm All other nuts Check the nut diameter: ● M4: 2.5 - 4.0 Nm ● M5: 4.0 - 6.0 Nm ● M6: 6.0 - 7.5 Nm...
-
Page 57: Transport And Storage
5 TRANSPORT AND STORAGE 5.1 Transporting the bike and the battery Risk of damage.Due to its size, shape and weight we do not recommend carrying the bike on the roof of a passenger car. Risk of fire. Appropriate measures must be taken when transporting the battery. 5.1.1 Transporting the bike 1. -
Page 58: Storing The Bike
5.2 Storing the bike There are a few main things to consider when storing the bike for a longer period of time: ● Wash the bike thoroughly. Clean grease and oil key components like the chain and the cassette. See s ection 4.1 Cleaning the bike for more details. ●... -
Page 59: Problem Solving
6 PROBLEM SOLVING Issue Cause Solution The battery is empty. Check the battery status. Check the wiring. The cables are not Check the electrical installed/connected contacts. Contact your correctly or the cables The h eadlight / rear retailer or a skilled are worn. - Page 60 The wheels are not in line Adjust the wheels. One of the wheels or with each other. The b ike is vibrating both may need to be trued. while in use. Contact your retailer or a skilled technician. The battery is nearly Fully charge the battery.
- Page 61 charger is working. When connected to the AC power outlet, the LED should light up g reen . Check whether the battery has been connected correctly. Follow the correct sequence for connecting the battery: first connect the charger to the AC power outlet and then connect the battery to the charger.
- Page 62 The h ub motor does not The speed controller is Check the electrical start running, even not working. contacts. Weld them if with the ON/OFF switch needed. of the battery and the You may need to replace ON/OFF switch of the the speed controller.
- Page 63 The relevant cables are Check whether the not installed correctly or cables are connected they are disconnected. correctly. No cables should be exposed. The speed sensor may Check the attachment of not be installed correctly. the speed sensor. It must not be attached too tightly.
- Page 64 The speed sensor is not The speed sensor must installed correctly. be installed correctly Contact your retailer or a skilled technician.
-
Page 65: Environment And Disposal
7 ENVIRONMENT AND DISPOSAL We care for the environment. By disposing the product, its packaging and its components in the proper manner, you help to avoid possible hazards for the environment and public health that could otherwise be caused by improper treatment of waste equipment. The recycling of materials contributes to the conservation of our natural resources. -
Page 66: Disclaimer
8 DISCLAIMER Knaap bikes makes no representations or warranties with respect to this manual and, to the maximum extent permitted by law, expressly limits its liability for breach of any warranty that may be implied to the replacement of this manual with another. Furthermore, Knaap bikes reserves the right to revise this publication at any time without incurring an obligation to notify any person of the revision. -
Page 67: Technical Data
9 TECHNICAL DATA Item Specification Model/type Knaap AMS Weight 28 kg Load capacity 180 kg Battery Samsung li-ion 21ah 36V 756Wh Sans Electronic Charger Input voltage: 110 - 240 VAC / 50-60 Hz Output voltage: 42 VDC Rear hub motor... -
Page 68: Maintenance Forms
10 MAINTENANCE FORMS In order to keep your bike in a good shape it must be inspected and maintained at regular intervals. Fill in all details and make sure all maintenance checks are carried out, either by yourself or a skilled technician. - Page 69 Address Postal code + city E-mail Phone...
- Page 70 Maintenance 500 km / 310 miles (or after 3 months) Maintenance task Repairs Comments Date and distance (km/miles) Knaap bikeshop Signed by...
- Page 71 Maintenance 1,500 km / 930 miles (or after 6 months) Maintenance task Repairs Comments Date and distance (km/mileage) Knaap bikeshop Signed by...
- Page 72 Maintenance 4,500 km / 2,800 miles (or 12 months) Maintenance task Repairs Comments Date and distance (km/mileage) Knaap bikeshop Signed by...
- Page 73 Maintenance 7,000 km / 4,350 miles (or after 24 months) Maintenance task Repairs Comments Date and distance (km/mileage) Knaap bikeshop Signed by...
- Page 74 Maintenance 9,500 km / 5,900 miles (or after 36 months) Maintenance task Repairs Comments Date and distance (km/mileage) Knaap bikeshop Signed by...
- Page 75 Maintenance 14,500 km (or after 42 months) Maintenance task Repairs Comments Date and distance (km/mileage) Knaap bikeshop Signed by...
- Page 76 Maintenance 17,000 km (or after 48 months) Maintenance task Repairs Comments Date and distance (km/mileage) Knaap bikeshop Signed by...
- Page 77 Maintenance ___________ km / mi Maintenance task Repairs Comments Date and distance (km/mileage) Knaap bikeshop Signed by...
- Page 78 Maintenance ___________ km / mi Maintenance task Repairs Comments Date and distance (km/mileage) Knaap bikeshop Signed by...
- Page 79 Maintenance ___________ km / mi Maintenance task Repairs Comments Date and distance (km/mileage) Knaap bikeshop Signed by...
- Page 80 Maintenance ___________ km / mi Maintenance task Repairs Comments Date and distance (km/mileage) Knaap bikeshop Signed by...
- Page 81 Congratulations on your new purchase and welcome on board as a new # KnaapSquad member . You have selected a high quality product. Connect to us on social media and leave a picture, comment or review describing your awesome #knaapbikes experience.
Need help?
Do you have a question about the AMS and is the answer not in the manual?
Questions and answers