Advertisement
Quick Links
Advertisement

Related Manuals for O'jump 950


Summary of Contents for O'jump 950
- Page 1 N°297 FREESTYLE TRAINING BARS Ref. : 950 (UK) Assembly Instructions 18/01/2021...
- Page 2 Thank you for buying this product O'jump. We advise you to read the assembly instructions carefully. The apparatus is presented in pre-assembled parts for a simplified assembly. We have designed this O'jump product to bring you complete satisfaction. If you need help, the O'jump team is at your disposal to accompany you.
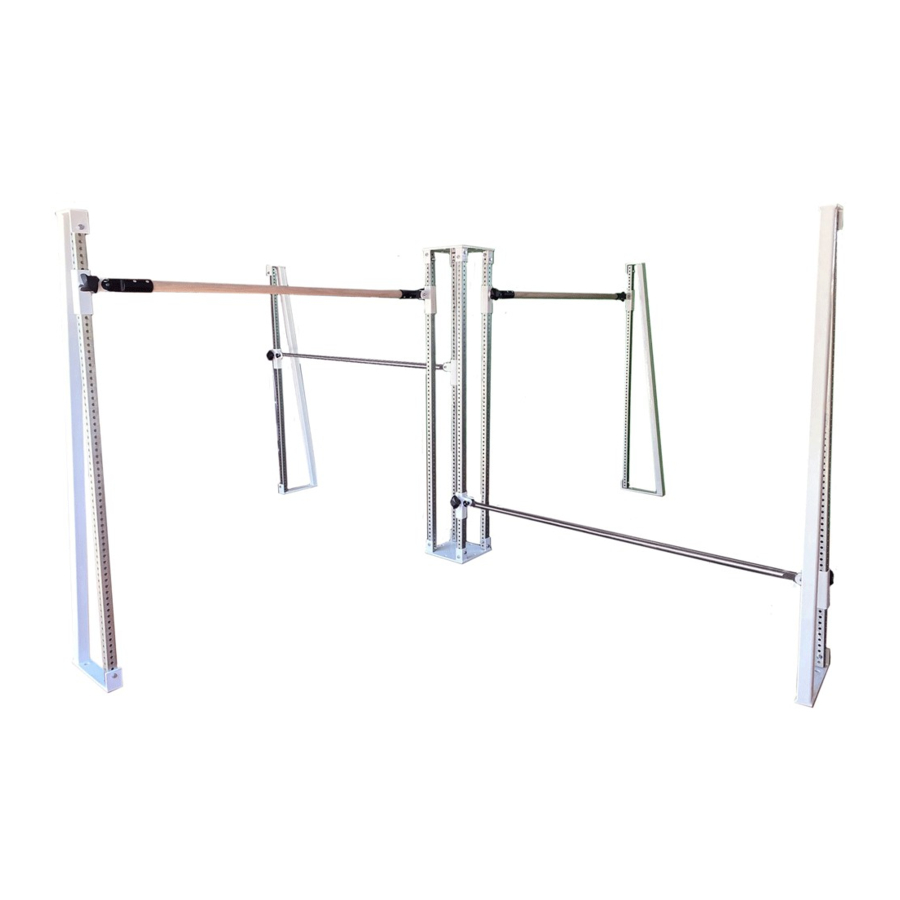
- Page 3 Tools needed to assemble the apparatus Hex wrench N°18/19 Hardware listing (pre-assembled) Indexing pin indexing knob M10 x 60 Ø22x10.5 18/01/2021...
- Page 4 List of parts (pre-assembled) Ø28 steel hand-rail Central post (1 package) Lateral post (4 packages) Ø40 wooden hand-rail (2 packages) (2 packages) 18/01/2021...
- Page 5 Assembling the hand-rail To insert the indexing pin, press the blue button to release the ball. 18/01/2021...
- Page 6 Hand-rail height adjustment Unscrew the indexing knobs. Pull on the indexing knobs to release the slide. Slide it down or up. Release the knob in front of the desired position. Lock the two knobs by tightening. (See picture page 7) Repeat the operation for all four posts.
- Page 7 18/01/2021...
- Page 8 Fixing the freestyle training bar to the ground Material required : A bubble level A drill Anchors adapted to Screws adapted to Wrench adapted to Pencil your support your support your type of screws Check with the O’JUMP service specifying the nature of your soil. The type of anchors and screws depending on whether your floor is concrete, wooden floor, flexible ground...
- Page 9 With a pencil, trace the location of the 6 holes. Cutaway top view Place the lateral post and check the correct alignment of the hand-rail using the above dimensions. 18/01/2021...
- Page 10 Drill all the holes using a drill bit appropriate for your floor. Place the fixations in the holes. They should not be higher than the ground. Put in place the uprights in front of the holes, then fix the uprights with appropriate screws.
Need help?
Do you have a question about the 950 and is the answer not in the manual?
Questions and answers