Table of Contents
Advertisement
Quick Links
Advertisement
Chapters
Table of Contents

Related Manuals for Daewoo POLUS P126TI


Summary of Contents for Daewoo POLUS P126TI
- Page 1 65.99892-8051 Operation Manual GENERATOR DIESEL ENGINE DE12T POLUS P126TI...
- Page 2 Please contact your authorized DAEWOO dealer for the answers to any questions you may have about your DE12T/ P126TI generator engine’s features, operation, or manuals.
-
Page 3: Table Of Contents
CONTENTS 1. General information ........................1.1. Engine specification 1.2. Engine assembly 2. Safety regulations........................6 2.1. General notes 2.4. Regulations designed to prevent pollution 2.2. Regulations designed to prevent accidents 2.5. Notes on safety in handling used engine oil 2.3. Regulations designed to prevent damage 3. -
Page 4: General Information
1. General information 1.1. Engine specification Engine Model DE12T P126TI P126TI-I Items Water-cooled, 4 cycle in-line Water-cooled, 4 cycle in-line Engine type type type Turbo charged Turbo charged & intercooled Combustion chamber type Direct injection type Cylinder liner type Replaceable dry liner Timing gear system Gear driven type No. -
Page 5: Engine Assembly
1.2. Engine assembly 1.2.1. Engine sectional view (Longitudinal) 14 15 EA8M1002 1. Cooling fan 7. Piston pin 13. Crankshaft 2. Exhaust valve 8. Piston 14. Oil pan 3. Valve spring 9. Combustion chamber 15. Connecting rod 4. Oil filter 10. Crankshaft pulley 16. - Page 6 1.2.2. Engine sectional view (Cross) EA8M1003 1. Intake manifold 7. Injection nozzle assembly 2. Fuel filter 8. Rocker arm 3. Oil cooler 9. Cylinder head cover 4. Injection pump 10. Exhaust manifold 5. Cylinder block 11. Piston ring 6. Oil filter 12.
- Page 7 1.2.3. Engine assembly views 1) DE12T 3 12 4 13 18 11 10 20 21 26 EA8M1004 1. Cooling fan 10. Flywheel housing 19. Thermostat 2. Cooling water pipe 11. Flywheel 20. Injection pump 3. Oil filler cap 12. Exhaust manifold 21.
- Page 8 2) P126TI 9 10 14 15 16 17 18 20 21 EA8M1005 1. Cooling fan 8. Oil pan 18. Injection pipe 2. Cooling water pipe 9. Starter 19. Thermostat 3. Air pipe 10. Flywheel housing 20. Injection pump (Intercooler Intake manifold) 11.
-
Page 9: Safety Regulations
Do not touch the engine with bare hands when it is warm from operation risk of burns. • Exhaust gases are toxic. Comply with the installation instructions for the installation of DAEWOO generator diesel engines which are to be operated in enclosed spaces. Ensure that there is adequate ventilation and air extraction. •... - Page 10 1) Never demand more of the engine than it was designed to yield for its intended purpose. Detailed information on this can be found in the sales literature. The injection pump must not be adjusted without prior written permission of DAEWOO. - 7 -...
-
Page 11: Regulations Designed To Prevent Pollution
“just as good”. 4) In addition to the above, note the following points. • Never let the engine run when dry, i.e. without lube oil or coolant. Use only DAEWOO- approved service products (engine oil, anti-freeze and anticorrosion agent). •... - Page 12 Health precautions • Avoid prolonged or repeated skin contact with used engine oil. • Protect your skin by means of suitable agents (creams etc.) or wear protective gloves. • Clean skin which has been in contact with engine oil. - Wash thoroughly with soap and water, A nailbrush is an effective aid. - Certain products make it easier to clean your hands.
-
Page 13: Technical Information
IMPORTANT ENGINE INFORMATION ENGINE AND MATERIAL DIV. 6, MANSECOK-DONG, DONG-GU INCHEON, KOREA TYPE 2-D DIESEL FUEL. THIS DAEWOO HEAVY-DUTY DIESEL MODEL IS CERTIFIED TO OPERATE ON EPA AND CARB STANDARDIZED ENGINE FAMILY DESIGNATION IS Serial No. TUNE-UP SPECIFICATIONS AND ADJUSTMENTS... -
Page 14: Engine Type
3.2. Engine type The Engines DE12T/ P126TI are in-line vertical water-cooled 6-cylinder four-stroke diesel engines with direct injection. DE12T is turbo-charged engine, and P126TI model is turbo- charged and inter-cooled engine. 3.2.1. Cylinder block The cylinder block is a single piece of alloy cast iron. To increase its stiffness, it is extended to a level below the crankshaft center line. -
Page 15: Engine Timing
3.3. Engine timing Camshaft, oil pump and injection pump are driven by a gear train arranged at the front end. Injection pump gear Camshaft gear Water pump gear (Z = 72) (Z = 72) (Z = 29) Idle gear (Z = 52) Crankshaft gear (Z = 36) Oil pump idle gear... -
Page 16: Lubrication System
3.5. Lubrication system The engine is equipped with force-feed lubrication. The pressure is produced by a gear pump whose drive gear is in direct mesh with the crankshaft gear at the front end of cylinder block. The oil pump draws the oil from the oil sump and delivers it through the oil cooler and oil filter to the main distributor gallery and from there to the main bearings, big-end bearings and camshaft bearings as well as to the small-end bearings and the rocker arms. - Page 17 Engine oil viscosity - ambient temperature SAE 20, 20W SAE 40, 50 Single SAE 10W SAE 30 grade Ambient -30 C -15 C -0 C 15 C 25 C 30 C temp (-20 F) (-0 F) (-32 F) (60 F) (80 F) (90 F) Multi...
-
Page 18: Air Cleaner
3.6. Air cleaner In case that elements are deformed, damaged or if the air cleaner has a crack, replace it. By the definite interval, the elements must be cleaned and replaced. - Cleaning of air cleaner element: Every 200 hours. - Changing of air cleaner element: Every 600 hours. - Page 19 3.8. Fuel system The fuel is delivered by the fuel feed pump via the fuel filter to the injection pump and from there to the injection nozzles. The fuel is sprayed into the cylinders through nozzles fitted in screw-fit injection nozzle holders in the cylinder heads.
- Page 20 3.8.1. Injection pump The in-line injection pump is driven via gears from the crankshaft. It is connected to the force feed lubricating system of the engine and consequently maintenance-free. The governor flange-mounted on the pump casing is a variable range governor designed to keep the speed set by the speed control unit constant under conditions of varying load.
- Page 21 6.00 (152) 5.25 (133) O 0.27 (7) C1 OFF SOFT COUPLING LEAD CIRCUIT OVERSPEED OVERNORS RESET TEST MERICA OVERSPEED SPEED CONTROL UNIT SPEED ESD5550 MODEL : GAIN MADE IN AGAWAM, MA U.S.A STABILITY STARTING SPEED FUEL RAMPING DEAD TIME CAUTION DROOP COMPENSATION ENGINE SPEED CONTROL...
- Page 22 The fuel filter should be replaced at every 1,200 hours. 3.8.3. Fuel requirements DAEWOO marine diesel engines was designed to use Number 2-D diesel fuel or equivalent that meets specification DIN 51601-DK. For maximum fuel economy, Number 2-D fuel whenever possible. When temperatures are below -7 ˚...
- Page 23 Fuel oil selection chart General Fuel ASTM No. 1 No. 2 DIN 51601 Classification Test ASTM 1-D ASTM 2-D Gravity, ˚ D 287 40 ~ 44 33 ~ 37 0.815 ~ 0.855 Flash Point D 93 100 (38) 125 (52) 131 (55) ˚...
- Page 24 3.9. Cooling system The engine has a liquid-cooling system. The fresh water pump is a maintenance-free by gear from the crankshaft. Depending on the agreed extent of delivery and the design of the engine, the coolant circuit can be equipped with temperature monitors which, in the event of loss of coolant, shut the engine down.
- Page 25 3.9.1. Coolant pressure cap Check the pressure valve opening pressure using a expansion tank cap tester. Replace the filler cap assembly if the measured valve Rediater Cap does not reach the specified limit. (pressure valve opening pressure : 0.9 kg/cm Note : Because it is dangerous to open Rediater the pressure cap quickly when...
- Page 26 3.10. V-belt tension check and adjust By the finger-pressure the belt is pressed by Press hear here 10mm ~ 15mm between the fan pulley and 15mm the alternator pulley in normal condition. For Alternator the adjustment of the tension, loosen the Pulley Pulley adjusting bolts which support the alternator,...
-
Page 27: Electrical Equipment
3.12. Electrical equipment 3.12.1. Alternator The alternator is fitted with integral silicon rectifiers. A transistorized regulator mounted on the alternator body interior limits the alternator voltage. The alternator should not be operated except with the regulator and battery connected in circuit to avoid damage to the rectifier and regulator. - Page 28 3.12.2. Starter motor The sliding-gear starter motor is flanged to the rear of the flywheel housing on the left-hand side. As parts of every engine overhaul, the starter pinion and ring gear should be cleaned with a brush dipped in fuel and then a coat of grease should be applied again. 24V x 6.0kW TERMINAL S/W TERMINAL "B"...
-
Page 29: Commissioning And Operation
4. Commissioning and operation 4.1. Preparation At the time of initial commissioning of a new or overhauled engine make sure to have observed the “Technical Information for the installation DAEWOO generator engines”. • Oil filler neck on cylinder head cover Before daily starting of the engine, check the fuel, coolant and oil level, replenish if necessary. - Page 30 4.2.2. Check points for break-in During the break-in (the initial running of the engine) period, be particularly observant as follows: a) Check engine oil level frequently. Maintain oil level in the safe range, between the “min.” and “max.” marks on dipstick. ˚...
- Page 31 4.3. Inspections after starting During operation the oil pressure in the engine lubrication system must be monitored. If the monitoring devices register a drop in the lube oil pressure, switch off the engine immediately. And the charge warning lamp of the alternator should go out when the engine is running. •...
-
Page 32: Tuning The Engine
4.5. Tuning the engine The purpose of an engine tune-up is to restore power and performance that’s been lost through wear, corrosion or deterioration of one or more parts or components. In the normal operation of an engine, these changes can take place gradually at a number of points, so that it’s seldom advisable to attempt an improvement in performance by correction of one or two items only. -
Page 33: Periodical Inspection And Maintenance
5. Maintenance and care 5.1. Periodical inspection and maintenance In order to insure maximum, trouble-free engine performance at all times, regular inspection, adjustment and maintenance are vital. • Daily inspections in below figure should be checked every day. • The maintenance should be executed thoroughly at regular internals. (refer to appendix “General Engine Inspection Cycle”.) 5.2. - Page 34 5.2.3. Oil exchange procedure While the oil is still hot, exchange oil as follows: • Take out the oil dip dipstick. • Remove the drain valve from oil pan and the drain plug form oil filter head, then drain out the engine oil into a container. Drain Plug EA8O5001 •...
-
Page 35: Cooling System
Lightly oil the O-ring and turn the oil filter until sealing face is fitted against the O-ring. Turn 1-1/4 turns further with the filter wrench. Note : It is strongly advisable to use DAEWOO genuine oil filter cartridge for replacement. 5.3. Cooling system The coolant must be changed at intervals of 1,200 hours operation or six months whichever comes first. - Page 36 c) Loosen the coolant drain plug. Loosen the coolant drain plug of the cylinder block. EAMD001I Caution : When removing the pressure filler cap while the engine is still hot, cover the cap with a rag, then turn it slowly to release the internal steam pressure This will prevent a person from scalding with hot steam spouted out from the filler port.
- Page 37 5.3.3. Intercooler The intercooler is air to air type and has a large cooling fan capacity. The intercooler life and performance depends on the intake air condition greatly. Fouled air pollutes and clogs the air fins of intercooler. As a result of this, the engine output is decreased and engine malfunction is occurred.
- Page 38 5.4. Air intake system 1. Connection port, fouling indicator 2. Cleaner housing 3. Clamp 4. Element 5. Hexagon nut 6. Cover 7. Dust bowl EA6O5012 5.4.1. Maintenance (only when engine is switched off) Empty the dust bowl (7) regularly. The bowl should never be filled more than halfway with dust.
- Page 39 5.4.3. Cleaning filter elements • By compressed air (Wear goggles) For the purpose, the air gun should be fitted with a nozzle extension which is bent ˚ at the discharge end and which is long enough to reach down inside to the bottom of the element.
- Page 40 5.5. Fuel system 5.5.1. Fuel filter • After every 1,200 hour of operation, drain the water and sediment from the fuel- water separator. • Shut off the engine. Use your hand to open the drain valve • Turn valve counter clockwise approximately 2 ~ 3 turns until draining occurs.
- Page 41 If the engine is equipped with a fuel water separator, drain off any water that has accumulated. Water in fuel can seriously affect engine performance and may cause engine damage. DAEWOO recommends installation of a fuel water separator on generator units.
- Page 42 5.5.6. Bleeding the fuel system After the cleaning of the fuel filter or after the engine stop by the lack of fuel, the bleeding of the fuel system must be executed by all means. Bleed the system by manually operating the priming pump with fuel filter outlet joint bolt Priming pump and injection pump bleeder screw loosened.
- Page 43 Normal Abnormal Abnormal EFM1006I • Install a nozzle to a nozzle tester. • Check injection pressure, and adjust the nozzle using the adjusting shim if the pressure does not meet the specified limit. • Check nozzle spray patterns and replace if damaged. DE12T P126TI 1st : 160kg/cm...
- Page 44 soak in a vessel with solvent and to clean it then with a stiff brush. In doing so, take care to see that only the compressor wheel is immersed and that the turbocharger is supported on the bearing casing and not on the wheel. 5.7.2.
-
Page 45: Checking And Setting
6. Checking and setting 6.1. Adjustment of valve clearance 6.1.1. General information The valve clearances are to be adjusted at the times of the following situations. • After initial 50 hour’s operation. • When the engine is overhauled and the cylinder heads are disassembled. •... - Page 46 Cooling Fan Flywheel Intake Valve Exhaust Valve Cylinder No. Cylinder Fan EA8O6001 6.1.3 Method of adjusting the valve clearance 1) Loosen the lock-nuts using a ring spanner. 2) Insert a thickness gauge of 0.3mm between valve stem and rocker arm 3) Turn the adjusting bolts using a screw driver until the gauge can be pulled out...
-
Page 47: Adjustment Of Injection Timing 6.5. V-Belts
6.2. Adjustment of injection timing 6.2.1. Method of adjusting injection timing • Turn the flywheel until No. 1 piston is placed in the “OT” position of notch marks Timing on the flywheel, and then turn again the Check hole flywheel clockwise until showing the notch mark of the right figure corresponding to the injection timing is aligned with the pointer ( ) on the flywheel housing. -
Page 48: Tightening The Cylinder Head Bolts
• Tighten the coupling fixing bolts and nuts to specified torque. Torque 6.0 kg • EAMD021I • Tighten the drive shaft connecting flange fixing bolts to specified torque. Torque 7.5 ~ 8.5 kg•m • Install the oil delivery pipe and return pipe. 6.3. - Page 49 6.4. Cylinder compression pressure 1) Stop the engine after warming it up, then remove the nozzle assemblies. EA9O5003 2) Install a special tool (gauge adapter) in nozzle holder hole and connect the compression pressure gauge adapter. 3) Cut off fuel circulation, rotate the starter, then measure compression pressure of each cylinder.
- Page 50 6.5. V-belts The tension of the V-belts should be checked after every 2,000 hours of operation. (1) Change the V-belts if necessary If in the case of a multiple belt drive, wear or differing tensions are found, always replace the complete set of belts.
- Page 51 Tensioning forces on the tester new installation Type Drive belt width When servicing after After 10 min. long running time Installation running time 9.5 mm 50 kg 45 kg 40 kg 11.8 mm 55 kg 50 kg 45 kg 15.5 mm 75 kg 70 kg 60 kg...
-
Page 52: Appendix
• Appendix 1. General engine inspection cycle : Check & adjust : Replace Every Every Every Every Every Inspection Daily Remark 50hrs 200hrs 600hrs 800hrs 1200hrs Check for leakage(hoses, clamp) Check the water level Cooling Change the coolant water System Every Adjust the V-belt tension 2,000hrs... - Page 53 2. Diagnosis and remedy 1. Engine Starting Impossible Starting motor operation poor Starting motor revolution Inspection of battery electorlytic Engine Fuel Ilquid amount & gravity Inspect air cleaner Inspect amount of fuel Normal Too low Normal None Normal Polluted Ajustment Recharging Replace or Replenish...
- Page 54 2. Engine Overheated Operating state 1. Overload 2. Radiator core clogged Fuel unit Cooling unit 3. Continuous over-run Check coolant Inspect fuel quality Fuel excessive supply Normal Too low Poor Check fan belt Clean and replace Repair Check injection nozzle tension wear with specilied fuel Replace...
- Page 55 3. Output Insufficient Engine Installation improper Check for coupling Fuel unit Others alignemnt Check for air mixing Inspect air cleaner Adjust or replace in fuel coupling Normal Clean Relpace Inspect fuel supply pump Inspect air leakage Inspect engine control Normal Clean Replace of air piping line rod, link, cable, etc.
- Page 56 4. Oil pressure lowered Check if oil pressure gauge indicates wrongly Check oil amount Too low Normal Use recommended oil Check cooling (replenish) temperature Too high Normal Refer to engine overhea Inspect oil quality Normal Check oil relief Water & fuel mixed Improper valve in oil...
- Page 57 5. Fuel Consumption Excessive Causes according to Use Conditions 1. Overload 2. Govemor's Arbitrary Adjustment 3. Full Speed Operation for Long time 4. Sudden Speed Change from Low to Inspect fuel leakage High Speed Normal Oil leakage Inspect injection nozzle (injection pressure Adjust Replace atomizing state etc.)
- Page 58 6. Oil Consumption Excessive Cause according to use conditions 1. Excessive oil infusing 2. Continuous operation in low or extremely cold state Inspect oil leakage Inspect air cleaner Clean Replace Normal Oil leakage Check oil quality Internal External Retighten Check compressed Replace with Replace pressure...
- Page 59 8. Battery Discharge Generator Wiring Switch Battery Inspect cut wire Check fan belt Check electrolytic shorts and loose tension & damage liquid amount connections Repair Replace Normal Battery over Battery self Battery room Electrolytic charging discharge damage liquid's standard Inspect generator Charging Replace Voltage regulator...
- Page 60 Condition Causes Remedies • Valve’s poor shut, stem distortion Repair or replace 1) Starting difficult • (1) Compression pressure Valve spring damage Replace valve spring • Cylinder head gasket’s leak Replace gasket • Wear of piston, piston ring or liner Adjust •...
- Page 61 Condition Cause Remedies 5) Engine noisy For noises arise compositely such asrota ting parts, lapping parts etc., there is nec essity to search the cause of noises accu rately. • (1) Crankshaft As the wear of bearing or crankshaft Replace bearing & progress, the oil clearances increase.
- Page 62 Condition Cause Remedies 7) Oil Consumption Excessive • (1) Oil level elevated Clearance between cylinder iner & Replace piston • Wear of piston ring, ring groove Replace piston, piston ring • Piston ring’s damage, stick, wear Replace piston ring • Piston ring opening’s disposition Correct position improper...
- Page 64 Tel : 82-32-760-1114 Fax : 82-32-762-1546 U.S.A Tel : 1-216-595-1212 Fax : 1-216-595-1214 Seoul Office 8th floor Daewoo Heavy Industries & Machinery Bidg, 14-34, Daewoo Rep. C/O Boeing Co. Youido-Dong, Youngdungpo-Gu, Seoul, Korea P.O.Box 3707 M/S 39-AH, Seattle, WA 98124-2207, U.S.A...
- Page 65 65.99897-8050 Maintenance Manual GENERATOR DIESEL ENGINE DE12T POLUS P126TI...
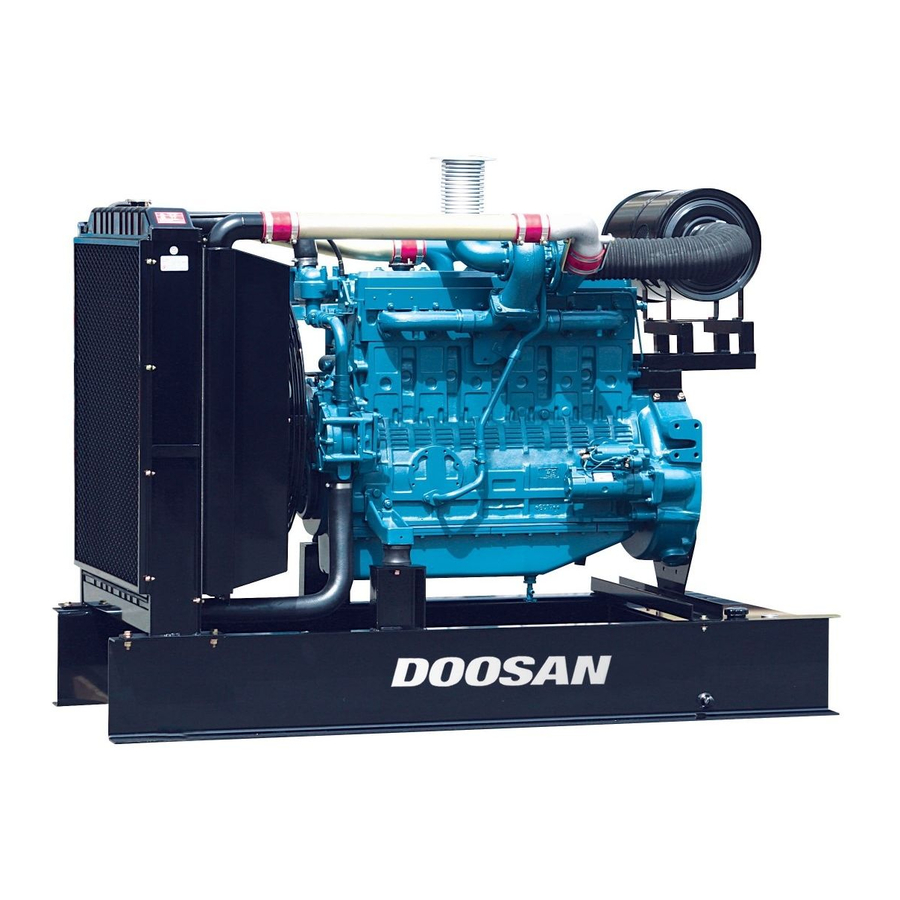
- Page 66 FOREWORD This maintenance manual is designed to serve as a reference for DAEWOO Heavy Industries Ltd’s (here after DAEWOO’s) customers and distributors who wish to gain basic product knowledge on DAEWOO’s DE series generator diesel engines (DE12T and POLUS P126TI) These economical and high-performance diesel engines (6 cylinders, 4 strokes, in-line, direct injec- tion type) have been so designed and manufactured to be used for the generator application.
- Page 67 For the last, the content of this maintenance instruction may be changed without notice for some quality improvement. Thank you. DAEWOO Heavy Industries LTD. July. 1999...
-
Page 68: Worldwide Network
CONTENTS 1. GENERAL INFORMATION ......................1 1.1. General repair instructions 1.3. Engine assembly 1.2. Engine characteristics 1.4. Engine specifications 2. MAJOR MAINTENANCE......................8 2.1. Preventive maintenance 2.3. Engine inspection 2.2. Diagnosis and remedy 3. DISASSEMBLY AND REASSEMBLY OF MAJOR COMPONENTS ........28 3.1. -
Page 69: General Information
4. The use of proper tools and special tools where specified is important to efficient and relaible service operation. 5. Use genuine DAEWOO parts necessarily. 6. Used cotter pins, gaskets, O-rings, oil seals, lock washer and self-lock nuts should be dis- carded and new ones should be prepared for installation as normal function of the parts can not be maintained if these parts are reused. - Page 70 Due to the application of OMEGA combus- tion system and optimal utilization of intake and exhaust port configuration within the cylinder head, the POLUS P126TI and DE12T (DE12 series) generator diesel engines discharge very low level of haz- ardous exhaust gases such as smoke,...
-
Page 71: Engine Assembly
1.3. Engine assembly 1.3.1. Engine sectional view (longitudinal) 14 15 EA8M1002 1. Cooling fan 7. Piston pin 13. Crankshaft 2. Exhaust valve 8. Piston 14. Oil pan 3. Valve spring 9. Combustion chamber 15. Connecting rod 4. Oil filter 10. Crankshaft pulley 16. - Page 72 1.3.2. Engine sectional view (cross) EA8M1003 1. Intake manifold 7. Injection nozzle assembly 2. Fuel filter 8. Rocker arm 3. Oil cooler 9. Cylinder head cover 4. Injection pump 10. Exhaust manifold 5. Cylinder block 11. Piston ring 6. Oil filter 12.
- Page 73 1.3.3. Engine assembly views 1) DE12T 3 12 4 13 18 11 10 20 21 26 EA8M1004 1. Cooling fan 10. Flywheel housing 19. Thermostat 2. Cooling water pipe 11. Flywheel 20. Injection pump 3. Oil filler cap 12. Exhaust manifold 21.
- Page 74 2) P126TI 9 10 14 15 16 17 18 20 21 EA8M1005 1. Cooling fan 8. Oil pan 18. Injection pipe 2. Cooling water pipe 9. Starter 19. Thermostat 3. Air pipe 10. Flywheel housing 20. Injection pump (Intercooler Intake manifold) 11.
-
Page 75: Engine Specifications
1.4. Engine specifications Engine Model DE12T P126TI P126TI-I Items Water-cooled, 4 cycle in-line Water-cooled, 4 cycle in-line Engine type type type Turbo charged Turbo charged & intercooled Combustion chamber type Direct injection type Cylinder liner type Replaceable dry liner Timing gear system Gear driven type No. -
Page 76: Major Maintenance
For the improper control might give the fatal damage to the cooling water pump and cylinder liners, detail care is needed. • Since DE12T and POLUS P126TI (generator diesel engine of DE12 series) cylinder liner is dry type, particularly the cooling water control should be applied thoroughly. •... - Page 77 4) Make the numerical value by comparing the test paper which hue has changed with the color list of label on storage bottle. 5) By comparing the hue changed into yellowish green or so with the green color indication of test paper storage bottle, confirm the density. (Then, the density indication must be in the hue range of 33% to 50%).
- Page 78 2.1.4. Oil filter • Check for oil pressure and oil leaks, and repair or replace the oil filter if neces- sary. • Change the oil filter cartridge simultane- ously at every replacement of engine oil. Oil filter (Cartridge) Oil filter head EQM4010I 2.1.5.
- Page 79 2.1.7. Intercooler The intercooler is air to air type and has a large cooling fan capacity. The intercooler life and performance depends on the intake air condition greatly. Fouled air pollutes and clogs the air fins of intercooler. As a result of this, the engine output is decreased and engine malfunction is occurred.
- Page 80 • As for the valve clearance, adjust it when in cold, as follow. Model Intake Valve Exhaust Valve DE12T 0.3 mm 0.3 mm P126TI - By cranking the engine, let #6 cylinder’s valves overlap. - In time, adjust the valve clearance corresponding to “ ”...
- Page 81 2.1.9. Cylinder compression pressure • Stop the engine after warming up, and take out nozzle holder assembly. EA9O5003 • Install the special tool (compression gauge adapter) at the nozzle holder hole, and connect the compression pres- sure gauge there. Standard value 28kg/cm over Limit value...
- Page 82 2.1.11. Fuel injection pump • ICheck the housing crack, damage etc. and replace it if abnormal. • Check if the idle operation and speed regulating lever’s sealing is removed. • The adjustment and testing of fuel injection pump should necessarily be done at the test bench.
- Page 83 2.1.15. Supercharger The supercharger needs not arty special equipment Every time of engine replacement, a leakage or clogging of oil pipes should be inspected. Air cleaner should be maintained carefully for nut or foreign material not to get in. Periodic inspection should be applied on the compressed air and exhaust gas pipes, For leaking air will bring the overheat engine, an immediate repair must be done.
- Page 84 2.2. Diagnosis and remedy 1. Engine Starting Impossible Starting motor operation poor Starting motor revolution Inspection of battery electorlytic Engine Fuel Ilquid amount & gravity Inspect air cleaner Inspect amount of fuel Normal Too low Normal None Normal Polluted Ajustment・ Recharging Replace or Replenish...
- Page 85 2. Engine Overheated Operating state 1. Overload 2. Radiator core clogged Fuel unit Cooling unit 3. Continuous over-run Check coolant Fuel excessive supply Inspect fuel quality Normal Too low Poor Check fan belt Clean and replace Repair Check injection nozzle tension wear with specilied fuel Replace...
- Page 86 3. Output Insufficient Engine Installation improper Check for coupling Fuel unit Others alignemnt Check for air mixing Inspect air cleaner Adjust or replace in fuel coupling Normal Clean Relpace Inspect fuel supply pump Inspect air leakage Inspect engine control Normal Clean Replace of air piping line rod, link, cable, etc.
- Page 87 4. Oil pressure lowered Check if oil pressure gauge indicates wrongly Check oil amount Too low Normal Use recommended oil Check cooling (replenish) temperature Too high Normal Refer to engine overhea Inspect oil quality Normal Check oil relief Water & fuel mixed Improper valve in oil...
- Page 88 5. Fuel Consumption Excessive Causes according to Use Conditions 1. Overload 2. Govemor's Arbitrary Adjustment 3. Full Speed Operation for Long time 4. Sudden Speed Change from Low to Inspect fuel leakage High Speed Normal Oil leakage Inspect injection nozzle (injection pressure Adjust Replace atomizing state etc.)
- Page 89 6. Oil Consumption Excessive Cause according to use conditions 1. Excessive oil infusing 2. Continuous operation in low or extremely cold state Inspect oil leakage Inspect air cleaner Clean Replace Normal Oil leakage Check oil quality Internal External Retighten Check compressed Replace with Replace pressure...
- Page 90 8. Battery Discharge Generator Wiring Switch Battery Inspect cut wire Check fan belt Check electrolytic shorts and loose tension & damage liquid amount connections Repair Replace Normal Battery over Battery self Battery room Electrolytic charging discharge damage liquid's standard Inspect generator Charging Voltage regulator Replace...
- Page 91 Condition Causes Remedies • Valve’s poor shut, stem distortion Repair or replace 1) Starting difficult • (1) Compression pressure Valve spring damage Replace valve spring • Cylinder head gasket’s leak Replace gasket • Wear of piston, piston ring or liner Adjust •...
- Page 92 Condition Cause Remedies 5) Engine noisy For noises arise compositely such asrota ting parts, lapping parts etc., there is nec essity to search the cause of noises accu rately. • (1) Crankshaft As the wear of bearing or crankshaft Replace bearing & progress, the oil clearances increase.
- Page 93 Condition Cause Remedies 7) Oil Consumption Excessive • (1) Oil level elevated Clearance between cylinder iner & Replace piston • Wear of piston ring, ring groove Replace piston, piston ring • Piston ring’s damage, stick, wear Replace piston ring • Piston ring opening’s disposition Correct position improper...
-
Page 94: Engine Inspection
2.3. Engine inspection 2.3.1. Stopping Engine Cut off the main circuit breaker of the generator control panel. After checking the engine for any unusual condition at the idling speed, then press the stop button to stop the engine. 2.3.2. General Engine inspection cycle : Check &... - Page 95 2.3.3. Use of original parts for repair and replacement For engine is being mechanically harmonized with many parts, only when the original parts that the manufacture recommends to use is used, the engine trouble would be preventively maintained and capable to keep up the maximum performances. For the analogous parts not the original parts are poor in qualities and gives ill performances, it may rather bring early engine failure.
-
Page 96: Disassembly And Reassembly Of Major Components
3. Disassembly and reassembly of major components 3.1. Disassembly 3.1.1. General precautions • Maintenance operation should be carried out in a bright and clean place. • Before disassembly, provide parts racks for storage of various tools and disassembled parts. • Arrange the disassembled parts in the disassembly sequence and use care to prevent any damage to them. - Page 97 3.1.3. Engine oil • Take out the oil dip dipstick. • Remove the oil drain valve of oil pan and drain out the engine oil into a prepared container. Drain valve EA8O5001 3.1.4. Alternator belt • Loosen the tension adjusting nut installed on the alternator bracket, and take off the alternator belt.
- Page 98 3.1.7. Oil level gauge guide tube • Loosen the flange nut installed on the oil pan to remove the guide tube. EQM3005I 3.1.8. Fuel filter • Remove fuel hoses connected to the fuel injection pump, take off the bracket fixing bolts, then disassemble the fuel filter.
- Page 99 3.1.11. Injection pipe • Unscrew the hollow screws to disassem- ble the fuel return pipe. • Remove the nuts installed on the fuel injection pump and nozzles, then disas- semble the injection pipe. EQM3009I 3.1.12. Intake manifold • Remove the air hose connected to the fuel injection pump.
- Page 100 3.1.14. Exhaust manifold • Release the exhaust manifold fixing bolts, disassemble the exhaust manifold, then remove the heat shield and gasket. NOTE : Make sure to release the nuts one after another because the exhaust manifold will removed if you unscrew two nuts simultaneously.
- Page 101 3.1.17. Water pump • Remove the water pipe connected to the expansion tank. • Remove the water pipe and hoses con- nected to the water pump. • Unscrew the water pump fixing bolts and remove the water pump. 3.1.18. Injection pump •...
- Page 102 3.1.20. Fan drive pulley • Remove the bolts and disassemble the fan drive pulley. 3.1.21. Vibration damper • Unscrew the pulley fixing bolts and dis- assemble the pulley-vibration damper assembly. • Unscrew the vibration damper fixing bolts and disassemble the damper from the pulley.
- Page 103 3.1.24. Fuel injection pump drive assembly • Unscrew the injection pump drive shaft bearing housing fixing bolts and remove the injection pump drive assembly which the shaft, gear, bearings, and housing are put together. EAMD027I 3.1.25. Cylinder head cover • Unscrew the cover fixing bolts and dis- assemble the cover.
- Page 104 3.1.28. Cylinder head • Unscrew the cylinder head fixing borts and take off the cylinder head. • Remove the cylinder head gasket. EAMD031I 3.1.29. Valve and valve stem seal • Compress the valve spring retainer using a jig and take off the valve cotter pins. •...
- Page 105 3.1.31. Oil pan • Stand the engine with the flywheel hous- ing facing the bottom. • Release the oil pan fixing bolts, remove the stiffeners then disassemble the oil pan. EAMD034I 3.1.32. Oil pump and oil pipe • Unscrew the oil suction pipe bracket bolts, releasing the pipe fixing bolts, then disassemble the oil suction pipe assem- bly.
- Page 106 • Remove the piston pin snap rings, take off the piston pin, then disconnect the connecting rod from the piston. • Disassemble the piston rings using ring pliers. • Use care not to interchange the disas- sembled parts and keep them in the sequence of cylinder No.
- Page 107 3.1.37. Oil seal • Take off the rear oil seal using an oil seal disassembling jig. • If only the inside guide ring is removed, use a special tool to take off the outside seal. 3.1.38. Flywheel housing • Loosen the housing fixing bolts disas- semble the flywheel housing.
- Page 108 3.1.41. Timing gear case • Unscrew the case fixing bolts and disas- semble the timing gear case. EAMD046I 3.1.42. Crankshaft • Remove the bolts from bearing caps. • Remove the main bearing cap fixing bolts in the order of assembling. •...
- Page 109 3.2. Inspection 3.2.1. Cylinder block 1) Clean the cylinder block thoroughly and make a visual inspection for cracks or damage. 2) Replace if cracked or severely damaged, and correct if slightly damaged. 3) Check oil and water flow lines for restriction or corrosion. 4) Make a hydraulic test to check for any cracks or air leaks.(Hydraulic test) : Stop up each outlet port of water/oil passages in the cylinder block, apply air pressure of about 4kg/cm...
- Page 110 3) flatness Measure flatness of the intake/exhaust manifolds fitting surfaces on the cylinder head using a straight edge and a feeler gauge. Standard Limit 0.05 mm 0.2 mm 4) Hydraulic test Hydraulic test method for the cylinder head is same as that for cylinder block. 3.2.3.
- Page 111 • Valve head thickness Measure the valve head thickness, and replace the valve if the measured value is beyond the limit. Dimension Standard Limit Description Intake valve 1.5 mm 1 mm or less Exhaust valve 1.5 mm 0.9 mm or less EFM2037I 2) Valve guide •...
- Page 112 3) Valve seat • Contacting face amount Measure the contacting face between the intake valve seat and exhaust valve seat for valve seat wear, and replace if the measured value exceeds the speci- fied limit. • Install the valve into the valve seat on the cylinder head, and check the amount of depression of the valve from the lower portion of the cylinder head using a dial...
- Page 113 4) Valve spring • Visual check Visually check the exterior of the valve springs for damage, and replace if nec- essary. • Functional check - Measure free length and spring tension with a valve spring tester. 1.0mm or less (Refer to appendix) - Measure the spring inclination with a square.
- Page 114 • Rocker arm shaft diameter With an outside micrometer, measure the rocker arm shaft diameter at the point where the rocker arms have been installed. Replace the rocker arm if the amount of wear is beyond the specified limit. Standard Limit EA8M3002 23.978 ~...
- Page 115 • Visual check of tappet Visually check the face of the tappets in contact with the cam for pitting, scores or cracks, and replace if severely damaged. If the amount of cracks or pitting is small, (1) Unevenness (2) Crack (3) Normal correct with an oil stone or grinding paper.
- Page 116 3.2.5. Cam shaft 1) Cam • Cam lobe height Standard Limit Cam lobe height Intake 50.50~ 50.70 mm 49.5 mm Exhaust 50.70~ 50.90 mm Cam journal diameter(A,B) 59.86~ 59.8 mm 59.52 mm I II Use a micrometer to measure the cam I II lobe height and journal diameter.
- Page 117 • Run-out Support the camshaft on two V blocks and check for run-out using a dial indi- cator. Correct or replace the cam shaft if the amount of run-out is beyond the value indicating need for servicing. Standard Limit 0.05 mm 0.2 mm EA0M4066 3) Cam shaft end play...
- Page 118 2) Wear • With an outside micrometer measure the diameter of the crankshaft journals and pins in the directions as shown, and compare the measured values to deter- mine the amount of wear. • If the amount of wear is beyond the limit, have the crankshaft ground and install undersize bearings.
- Page 119 3) Crankshaft run-out • Support the crankshaft on V blocks. • Turn the crankshaft with a dial indicator placed on the surface plate and take the amount of crankshaft run-out. Standard Limit 0.05 mm 0.1 mm 3.2.7. Crank shaft bearing and connection rod bearing 1) Visual check Visually check the crankshaft bearing and...
- Page 120 • Connecting rod bearing clearance Install the connecting rod bearing in the connecting rod bearing cap, tighten the connecting rod cap bolts to the specified torque, then measure the inside diame- ter. Torque 28 kg • Standard Dia. 83.02~ 83.092 mm Compare the two values obtained through measurement of connecting rod bearing inside diameter with the...
- Page 121 • Crankshaft bearing crush Install the bearing and cap in the cylinder block, retighten the bolts to specified torque, unscrew out one bolt completely, then measure the clearance between the bearing cap and cylinder block using a feeler gauge. Standard Dia. 0.15 ~ 0.25 mm EA6M063I •...
- Page 122 3.2.8. Piston 1) Visual check Visually check the pistons for cracks, scuff or wear, paying particular attention to the ring groove. 2) Clearance between the piston and cylinder liner • With an outside micrometer, measure the piston outside diameter at a point 18mm away from the lower end of pis- ton skirt in a direction at a right angle to the piston pin hole.
- Page 123 3.2.9. Piston rings 1) Visual check Replace the piston rings with new ones if detected worn or broken when the engine is overhauled. 2) Piston ring gap • Insert the piston ring into the upper por- tion of the cylinder liner bore so that it is held at a right angle to the cylinder liner wall.
- Page 124 4) Piston ring tension With a tension tester, measure piston ring tension. Replace the piston ring if the measured value is beyond the limit. Standard Top ring 2.27 ~ 3.41 kg 2nd ring 2.0 ~ 3.0 kg Oil ring 4.03 ~ 5.57 kg 3.2.10.
- Page 125 3.2.11. Connecting rod 1) Distorsion Check the connecting rod for distortion. As shown in the figure below, install the connecting rod to the connecting rod tester, and check for distortion using a feeler gauge. If the connecting rod is found distorted, never re-use it but replace with a new one.
-
Page 126: Reassembly
3.3. Reassembly 3.3.1. General precautions • Wash clean all the disassembled parts, particularly oil and water ports, using compressed air, then check that they are free from restrictions. • Arrange the general and special tools in order for engine assembly operation. •... - Page 127 • Apply engine oil to the entire face of the tappets and slide them into the tappet holes on the cylinder block. • Wet the cam bush inside diameter and camshaft with oil, and carefully assem- ble them while turning the camshaft. •...
- Page 128 • Semi-tighten a bolt at both sides of the crankshaft, apply engine oil to journals and pins, then assemble the crankshaft with the cylinder block by tightening the fixing bolts. • nstall the oiled thrust washers with the oil groove facing outward. •...
- Page 129 • Apply oil to the entire part of the bearing cap bolts, then tighten in tightening sequence to specified torque. • Torque 30 kg • After semi-tightening both bolts evenly, tighten them diagonally to about 15kg.m for the first stage and 25 kg.m for the EQM3059I second stage respectively, then tighten them completely to the specified torque...
- Page 130 3.3.8. Flywheel • Install a guide bar into a bolt hole on the crank shaft, and lift the flywheel to align the dowel pin with the pin hole on the fly- wheel for temporary assembly opera- tion. • Install bolts in the remaining holes, take out the guide bar, then install a bolt in the hole where the guide bar had been inserted.
- Page 131 3.3.10. Fuel injection pump drive gear assembly • Mount gasket by aligning the bolt holes with the pin holes on the bearing hous- ing. • Tighten up the fixing bolts in the direc- tion of fuel injection pump. EAMD027I 3.3.11. Timing gear •...
- Page 132 • Check and adjust the amount of back- lash between gears using a feeler gauge. Backlash 0.15 ~ 0.25 mm 3.3.12. Timing gear case cover • Install dowel pin on the timing gear case. • Mount a gasket by aligning the fixing bolt holes with those on the gasket.
- Page 133 3.3.15. Piston and connecting rod • Use a piston heater to heat the piston approximately 100 ˚C (212 ˚F ) for 5 min- utes. • Align the piston pin hole with the oiled connecting rod small end and press the piston pin (by lightly tapping with a rub- ber hammer) to assemble the connect- ing rod with the piston.
- Page 134 • Identify the mark “Y” or “TOP” on the ring end to prevent the top and bottom of the piston ring from being interchanged and make the marked portion face upward. Marked with the name of piston ring manulacturing company EAMD090I •...
- Page 135 • Move the bearing cap with hand, and release and reassemble it if no move- ment is detected. EAMD094I 3.3.16. Relief valve • Assemble the relief valve. EAMD036I 3.3.17. Oil pump and oil pipe • Install a dowel pin in the No.7 bearing cap, then assemble the oil pump with specified torque.
- Page 136 3.3.18. Oil pan • Mount gasket and put the oil pan there- • Place stiffeners and tighten bolts. • Align the bolt holes with gasket holes to prevent damage to the gasket and tight- en to specified torque. Torque 2.2 kg •...
- Page 137 3.3.20. Nozzle tube • Apply sealant (LOCTITE # 620) to the nozzle tube and place the O-ring over the cylinder head fitting face on the noz- zle tube, then install the nozzle tube in the cylinder head. • Install a guider of the nozzle tube insert ass’y (Guider + Expander) the cylinder Guider head, then tighten the nozzle fixing nuts.
- Page 138 • Install head gasket, with ‘TOP’ mark fac- ing upward, on the cylinder block by aligning the holes with dowels. EAMD101I • Check the inside of combustion cham- ber for foreign substances, and carefully mount the cylinder head assembly in the block by aligning the dowel pin with the dowel pin hole.
- Page 139 • Adjust the valve clearance as following guide. <Guide for valve clearance adjustment> After letting the #1 cylinder’s piston come at the compression top dead center by turning the crankshaft, adjust the valve clearances. Loosen the lock nuts of rocker arm adjusting screws and push the feeler gauge of specified value between a rocker arm and a valve stem and adjust the clearance with adjusting screw respectively and then tighten with the lock nut.
- Page 140 • Adjust valve clearance with a feeler Valve clearance adjust gauge and tighten the fixing nuts to specified torque. Torque 4.4 kg • EA8M3007 3.3.22. Rocker arm assembly • Apply lubricating oil to the rocker arm bush and shaft, and assemble the inter- mediate bracket with the rocker arm using fixing bolts.
- Page 141 3.3.24. Oil cooler • Install the oil cooler onto the oil cooler cover. • Carefully apply the gasket to prevent oil leakage. • Do not damage the gasket and install the cover onto the cylinder block. • Connect a connection pipe between the water pump and oil cooler.
- Page 142 • Turn the flywheel until No. 1 piston is placed in the “OT” position of notch Timing check hole marks on the flywheel, and then turn again the flywheel clockwise until show- ing the notch mark of the right figure cor- responding to the injection timing is aligned with the pointer ( ) on the fly- wheel housing.
- Page 143 • Tighten the Coupling fixing bolts and nuts to specified torque. Torque 6.0 kg • • Tighten the drive shaft connecting flange fixing bolts to specified torque • Torque 7.5 ~ 8.5 kg EAMD021I • Install the oil delivery pipe and return pipe.
- Page 144 3.3.30. Power take-off • Assemble the power take-off sub assem- bly. EA8M3010 3.3.31. Exhaust manifold • Install the exhaust manifold gasket over the stud bolts by aligning the gasket with the exhaust port on the cylinder head so that the face and back of the gasket can be positioned correctly.
- Page 145 3.3.33. Starter • Assemble the starter in position on the flywheel housing. EAMD121I 3.3.34. Intake manifold • Fit a gasket on the intake manifold before assembling the intake manifold. EQM3011I 3.3.35. Injection pipe • Semi-assemble a nut at both ends of the fuel high pressure pipe and tighten them up one by one to specified torque.
- Page 146 3.3.36. Fuel filter • Assemble the fuel filter with the intake manifold. • Assemble the fuel feed hose according to the direction of an arrow impressed on the fuel filter head so that fuel can be fed in the sequence of FUEL FEED PUMP FUEL FILTER FUEL INJECTION PUMP.
- Page 147 3.3.39. Cooling fan • Install the cooling fan and flange, then tighten the fixing boltd. EQM3106I 3.3.40. V- belt • Install the V-belt on the crank pulley, Press here alternator pulley and fan drive pulley. 15mm • Adjust the V-belt tension using the ten- Alternator sion adjusting bolt.
-
Page 148: Breaking-In
3.4. Breaking-in 3.4.1. Operation of a new engine (Break-In) Because the sliding surfaces of a new engine are not lapped enough, the oil film can be destroyed easily by overload or overspeed and the engine life-time may be shortened. Therefore the following things must be obeyed by all means. Up to the first 2,000km(150 hours) Engine should be run at fast idling until the temperature of the engine becomes normal operating condition. -
Page 149: Maintenance Of Major Components
4. Maintenance of major components 4.1. Cooling system 4.1.1. General information This engine is water-cooling type. Heat from the combustion chamber and engine oil heat are cooled down by coolant and radiated to the outside, resulting in the normal operation of the engine. - Page 150 4.1.2. Water pump • Loosen the bolt (16) to disassemble the housing cover (15). • Heat the impeller (6) slightly, then remove it using a puller jig. • Remove the mechanical seal. • Unscrew the socket bolt (12) and remove the shaft and bearing assembly from the housing. •...
- Page 151 4.1.3. Thermostat • General descriptions and main data To radiator The thermostat maintains a constant tem- ˚ perature of coolant (90 ~ 95 C) and improves thermal efficiency of the engine by preventing heat loss. Namely, when the temperature of coolant Bypass is low, the thermostat valve is closed to valve...
- Page 152 4.1.4. Diagnostics and troubleshooting Complaints Possible causes Corrections • • 1. Engine overheating Lack of coolant Replenish coolant • • Radiator cap pressure Replace cap valve spring weakened • • Fan belt loosened or Adjust or replace fan belt broken •...
-
Page 153: Fuel Injection Pump
4.2. Lubricating system 4.2.1. General descriptions and main data • General descriptions All the engine oil pumped up from the oil pan by the gear type oil pump is filtrated through the oil cooler and oil filter, and this filtrated oil is forced through the main oil gallery in the cylinder block from where it is distributed to lubricate the various sliding parts, and fuel injection pump in order to ensure normal engine performance. - Page 154 4.2.2. Oil pump • Disassembly (1) Disassembly of oil pump drive gear a .Unscrew the screw and disassem- ble the oil relief valve. b. Unfold the washer for the oil pump drive gear fixing nut and remove the nut. c. Disassemble the drive gear. EQM4006I (2) Remove the oil pump cover fixing nuts and disassemble the oil pump cover.
- Page 155 (3) Measuring clearance between drive shaft and bushing a. Measure the outside diameters of the drive shaft and driven shaft, and replace if the measured values are less than the limit. Standard 16.95 ~ 16.968 mm b. Measure the inside diameter of the pump body bushing to determine the clearance between the bushing and shaft, and compare the measured value with the standard value to determine whether to replace or not.
- Page 156 4.2.4. Diagnostics and troubleshooting Complaints Possible causes Corrections • • 1. Oil consumption Poor oil Use suggested oil • • excessive Oil seal or packing leaky Replace • • Pistons or piston rings worn Replace pistons and/or pis ton rings •...
- Page 157 4.3. Fuel injection pump 4.3.1. General information of fuel system The fuel system consists of the fuel tank, injection pump, injection nozzle, fuel filter, and fuel lines such as pipes and hoses necessary to connect those components. EA8O3004 1. Fuel filter 7.
- Page 158 4.3.2. Injection pump The components relating to the injection pump should be serviced at regular intervals as the plunger and delivery valve may be worn after a given length of time for use and cause the deterioration of the engine. Make sure that servicing should be performed at the professional maintenance shop as authorized by Bosch or Zexel Company.
- Page 159 (8) Governor adjustment Rack limit over 14 11.0 10.8 Idle spring Set : 6.5 -0.5 +5 _ 250 400 PUMP SPEED (rpm) EA8M4001 - 91 -...
- Page 160 2) P126TI (1) Main data and specifications Part No. : 65.11101 -7310 (106674-4130 ZEXEL) Model : NP-PE6P120/700RS3S (106067-6020) Governor : GAC electric (65.11501-7002A) Plunger & barrel 12, right hand double helix 30 lead Delivery valve : 90mm /st ( 7 x 2.35mm) Fuel feed pump : NP-FP/KD-PS (105237-5470) : 3.9 ±...
- Page 161 4.3.3. Governor system (P126TI) Governor system for fuel injection pump consists of “Integral Actuator” and “ Speed Control Unit”. (1) Integral Actuator <Side View> <Top View> - 93 -...
- Page 162 Fig. No. Description Q’ty Remark stop lever (emergency) pump gasket washer allen screw 7 ~ 9 N.m ball link stop nut 3.5 ~ 4.0 N.m * operating lever oil seal counter nut 4.5 ~ 6.0 N.m stop screw connector screw mounting bar flat washer lock washer...
- Page 163 (2) Speed control unit for governor system The ESD5550 Series speed control unit is an all electronic device designed to control engine speed with fast and precise response to transient load changes. This closed loop control, when connected to a proportional electric actuator and supplied with a magnetic speed sensor signal, will control a wide variety of engines in an isochronous or droop mode.
- Page 164 (A) Specification PERFORMANCE ± 0.25% or better Isochronous Operation/steady State Stability ± 1 K ~ 7.5 KHz continuous Speed Range/Governor ± 1% Maximum Speed Drift with Temperature Idle Adjust CW 60% of set speed Idle Adjust CCW Less than 1,200 Hz. Droop Range 1 ~ 5 % regulation* 400 Hz ±...
- Page 165 (B) Diagram 6.00 (152) 5.25 (133) O 0.27 (7) C1 OFF LEAD CIRCUIT SOFT COUPLING OVERSPEED OVERNORS RESET TEST MERICA OVERSPEED SPEED CONTROL UNIT SPEED ESD5550 MODEL : GAIN MADE IN AGAWAM, MA U.S.A STABILITY STARTING SPEED FUEL RAMPING DEAD TIME CAUTION DROOP COMPENSATION...
- Page 166 Note : * If wire leads are longer than 3 meters (10 ft), a shielded cable should be used. Ground shield at ONE END ONLY * The speed control unit is rugged enough to be placed in a control cabinet or engine mounted enclosure with other dedicated control equipment.
- Page 167 (D) System Trouble shooting • SYSTEM INOPERATIVE If the engine governing system does not function, the fault may be determined by per- forming the voltage tests described in Steps 1, 2, 3, and 4. (+) and (-) refer to meter polarity.
- Page 168 • UNSATISFACTORY PERFORMANCE If the governing system functions poorly, perform the following tests. Symptom Test Probable Fault Engine over- 1. Do not crank. Apply DC power to the 1. Actuator goes to full fuel. Then, dis- speeds governor system connect speed sensor at Terminals C &...
- Page 169 4.3.4. Fuel feed pump 1) General descriptions and construction Priming pump Check valve Check valve Outlet Inlet side side Tappet Piston Cam shaft EQM4019I The P-type injection pump is mounted with K-ADS or KP type feed pump. These pumps have the same basic construction and operation, and the general descriptions of the KP type pump are given below: The figures show its construction (right figure) and operation (below figure).
- Page 170 Inlet side Outlet side Interruption EQM4020I This feed pump is mounted with a priming pump designed to permit manual feeding of fuel from the fuel tank with the injection pump mounted in the engine. During the manual feeding operation, air must be bled from the fuel lines.
- Page 171 2) disassembly • Clamp the feed pump with a vise and disassemble the plugs (30, 32), strainer (31) and gaskets (35, 36). • Take off the priming pump (25), plug (16), both gaskets (18), spring (15), and check valve (14). •...
- Page 172 5) Testing (1) Suction capacity test Connect one end of a hose to the inlet Outlet hose side of the feed pump and immerse the other end of it into the fuel tank as illus- Feed pump trated. Hold the feed pump in position about 1 m above the level of fuel in the fuel tank.
- Page 173 4.3.5. Injection nozzle 1) General descriptions Pressurized fuel delivered from the fuel injection pump is sprayed into the combustion chamber past the injection nozzle at proper spray pressure and spray angle, then burnt completely to achieve effective engine performance. (1) At valve closed (2) At valve opened EQM4024I 2) 1-spring type...
- Page 174 (2) Reassembly • After removing carbon deposit, sub- merge the nozzle in diesel oil and clean • Replace all the gaskets with new ones. • Assemble the parts and tighten them to specified torque. (3) Adjustment • Remove the cap nut and assemble a nozzle to a nozzle tester.
- Page 175 3) 2-spring type (1) Disassembly EQM4029I 1. Nozzle holder body 13. Lift pin 2. Push rod 14. Pin 3. Primary spring 15. Spacer 4. Adjusting screw 16. Pin 6. Gasket 17. Retaining nut 7. Cap nut 30. Gasket 10. Adjusting shim 31.
- Page 176 (2) Inspection and adjustment Adjusting the primary opening pressure a. Install plate plate assembly (157944-9520) onto a vise. NOTE : Use the plate assembly (157944-9520) in fixing a nozzle holder having a flange. A nozzle holder without flange should be EQM4030I directly installed onto a vise.
- Page 177 f. Install the pin (16) and nozzle (A) onto the spacer. EQM4034I g. After installing the gasket (157892-1500) on the nozzle, use the cap nut (157892- 4000 : SW22mm) to fix the nozzle onto the nozzle holder. Note : While tightening nut, keep checking to see if the lock pin...
- Page 178 j. Assemble the push rod (2), primary spring (3), and adjusting screw (4) on the nozzle holder in the order described. k. Install the gasket and cap nut onto the adjusting screw. l. Assemble the nozzle and nozzle holder assembly to the nozzle tester (105785- 1010).
- Page 179 • Inspecting the needle valve for full lift a. Install gasket (026508-1140) and plug (157892-1600 : SW12mm) onto the adjusting retaining nut (157892-1400). EQM4042I b. Install the nozzle holder on the plate with the cap nut facing upward. c. Install the holder into the cap nut. d.
- Page 180 f. Install the dial gauge on the holder assem- bly so that the pin is brought into contact with the upper end of the push rod, then fix the pin with the nut. Note 1 : Fix the dial gauge so that a stroke of 2 mm or so can be mea- sured.
- Page 181 • Inspection of pre-lift a. If the nozzle tester handle is released with the needle valve engaged in a full lift condition, the tester pressure drops, being accompanied by decrease in the needle valve lift value (indicated value on the dial gauge). kgf / cm EQM4049I Tester pressure...
- Page 182 c. If the measured pre-lift value deviates from the specified limit, replace the pin (14, 16), lift piece (13), spacer (15), and nozzle assembly (A) with a new “nozzle service kit”. EQM4053I • Inspection of secondary opening pressure a. After confirming the pre-lift, operate the nozzle tester and increase the internal pressure up to 350 ~ 450 kgf/cm to fully...
- Page 183 • Adjusting secondary opening pressure a. In the event that the measured value deviates from the specified limit, readjust the primary opening pressure if the amount of deviation is small. (to the stan- dard range of the primary opening pres- sure) - If the secondary opening pressure is lower than the standard value: Adjust the...
- Page 184 Adjusting shim for secondary opening pressure (Out diameter = 9.5 , Inner diameter = 4.5) Part No. Thickness(mm) Part No. Thickness(mm) 1505380-4900 0.40 1505380-5300 0.56 1505380-5000 0.50 1505380-5400 0.58 1505380-5100 0.52 1505380-5500 0.60 1505380-5200 0.54 1505380-5600 0.70 • Retaining nut a.
- Page 185 4.3.6. Diagnostics and troubleshooting Complaints Possible causes Corrections 1. Engine won’t start (1) Fuel pipes clogged or air into pipe line Correct 1) Fuel not being pumped (2) Feed pump valve defective Replace out from feed pump (3) Feed pump piston or push rod sticking Disassemble, correct 2) Fuel not being injected (1) Fuel filter element restricted...
- Page 186 Complaints Possible causes Corrections 6. Engine output (1) Supply of fuel insufficient Check feed pump unstable (2) Air in fuel Bleed (3) Water in fuel Replace fuel (4) Operation of plungers unsmooth Disassemble, correct (5) Movement of control rack sluggish Disassemble, correct (6) Nozzles defective Disassemble, correct...
-
Page 187: Turbocharger
4.4. Turbocharger 4.4.1. Main data and specifications 1) Main data and specifications Specification DE12T P126TI Turbocharger Model TV51 Air pressure at compressor outlet Approx. 1.257 kg/cm 2 Approx.1.9 kg/cm 2 Approx. 19.0m 3 /min Approx. 26.0m 3 /min At maximum output Air suction volume Speed of turbine revolution Approx. - Page 188 3) Construction Turbine housing Retainer ring Bolt Plug Bearing O-ring Crank Thrust collar Compressor wheel V-band Screw Wheel Thrust bearing Bolt Piston ring Thrust space Clamp Wheel shroud Piston ring Compressor housing Center housing Seal ring Elbow Retainer ring Seal ring Retainer Bearing Rear plate...
- Page 189 4.4.2. General descriptions The engine output is determined by the fuel delivery volume and engine efficiency. To burn the supplied fuel completely to change into effective power for the engine, the volume of air enough to burn the fuel completely should be supplied into the cylinders. Therefore, the engine output is determined substantially by the cylinder capacity, and a greater volume of compressed air is charged into cylinders of given capacity, the greater engine output can be obtained as a greater volume of air charged into the cylinders burns so...
- Page 190 4.4.4. Precautions for operation 1) Precautions for operation of engine The following precautions should be observed when starting, operating, or stopping the engine: Operations Precautions Reasons When starting 1) Check oil level 2) Crank the engine with starter to 2) Abrupt starting of the engine the engine check the increase in oil pres- causes the engine to rotate with...
- Page 191 4.4.5. Walk-around check and servicing As the condition of turbocharger depends greatly on how well the engine is serviced, it is very important to maintain the engine in accordance with the specified maintenance procedure. 1) Intake system Pay particular attention to the air cleaner when servicing the intake system. In the case of wet-type air cleaner, if the level of oil surface is lower than specified, clean- ing effect is poor;...
- Page 192 4.4.6. Periodical checking and servicing Make it a rule to check the turbocharger assembly for condition and contamination periodically. 1) Guide for checking the rotor for rotating condition The inspection of the rotor assembly for rotating condition should be performed by the degree of unusual sound.
- Page 193 (2) Rotor radial play Dial gauge Magnetic vise Oil outlet Radial play Move the turbine shaft Limit of wear : 0.075~0.11mm in both directions Limit of wear : 0.12mm simultaneously Oil inlet EA8M4004 (3) If the measured axial and radial plays are beyond the limit of wear, replace or repair the turbocharger.
- Page 194 (3) Exhaust system • Check the inside of the exhaust system for foreign matters. • Be sure to use heat resisting steel bolts and nuts. Do not interchange them with ordi- nary steel bolts and nuts when performing reassembly operation. Apply anti-seizure coating to the bolts and nuts.
-
Page 195: Special Tool List
5. Special tool list Description Part No. Illustration Nozzle tube Insert ass’y DPN-5337 Valve stern oil seal installer EF.123-082 Injection pump setting ass’y EF.123-015 Oil seal insert ass’y(FR) EF.123-127 Oil seal insert ass’y(RR) EF.123-053 Oil seal puller ass’y(FR) EF.123-052 EA8M5001 - 127 -... - Page 196 Description Part No. Illustration Oil seal puller ass’y(RR) EF.123-048 Cylinder pressure tester EU.2-0531 adapter Cylinder liner puller ass’y EU.123-087 Valve stem seal punch EF.123-066 Valve clearance adjust ass’y EU.2-0131 Valve spring press EF.123-065 EA8M5001 - 128 -...
- Page 197 Description Part No. Illustration Crankshaft gear punch EU.2-0647 Feeler gauge 60.99901-0027 Snap ring plier T7610001E Piston ring plier T7621010E - 129 -...
-
Page 198: Appendix
Appendix • Tightening torque for major parts Screw Strength Major Parts Tightening torque Remarks (diameter x pitch) (Grade) ˚+150˚ 6 kg•m+180 M14 x 1.5 Cylinder head bolt 12.9T Angle Connecting rod bearing cap bolt M14 x 1.5 12.9T 28.0 kg•m Crankshaft main bearing cap bolt M16 x 1.5 12.9T... - Page 199 • Standard bolt tightening torque table Refer to the following table for bolts other than described above. Degree of strength 10.9 12.9 Diameter (4A) (4D) (4S) (5D) (5S) (6D) (6S) (6G) (8G) (10K) (12K) pitch Limit value for elasticity (kg/mm (mm) Tightening torque (kg•m) 0.15...
- Page 200 - 132 -...
- Page 201 - 133 -...
- Page 202 - 134 -...
- Page 203 - 135 -...
- Page 204 - 136 -...
- Page 205 Tel : 82-32-760-1114 Fax : 82-32-762-1546 U.S.A Tel : 1-216-595-1212 Fax : 1-216-595-1214 Seoul Office 8th floor Daewoo Heavy Industries & Machinery Bidg, 14-34, Daewoo Rep. C/O Boeing Co. Youido-Dong, Youngdungpo-Gu, Seoul, Korea P.O.Box 3707 M/S 39-AH, Seattle, WA 98124-2207, U.S.A...
Need help?
Do you have a question about the POLUS P126TI and is the answer not in the manual?
Questions and answers
Daewoogenerator catalogue please give me model P126TI-3