Table of Contents
Advertisement
Quick Links
G-Note
™
~ Writing, Drawing or Annotating Anywhere ~
Digital Recorder
http://www.geniusnet.com/
Series
Federal Communications Commission (FCC) Radio
Frequency Interference Statement
This equipment has been tested and found to comply within the limits of a Class B digital
device, pursuant to Part 15 of the FCC Rules. These limits are designed to provide
reasonable protection against harmful interference in a residential installation. This
equipment generates, uses, and can radiate radio frequency energy and, if not installed
and used in accordance with the instructions, may cause harmful interference to radio
communications. However, there is no guarantee that interference will not occur in a
particular installation. If this equipment does cause harmful interference to radio or
television reception, which can be determined by turning the equipment off and on, the
user is encouraged to try to correct the interference by one or more of the following
measures:
l
Reorient or relocate the receiving antenna.
l
Increase the separation between the equipment and receiver.
l
Connect the equipment to an outlet on a circuit different from that to which the
receiver is connected.
l
Consult the dealer or an experienced radio/TV technician for help.
Trademark Information
Genius and G-Note are registered trademarks of KYE SYSTEMS Corporation.
Microsoft and Windows are registered trademarks of Microsoft Corporation.
Pentium is a registered trademark of Intel Corporation.
Adobe and Acrobat are registered trademarks of Adobe Systems Inc.
All other trademarks are the property of their respective owners.
Copyright Notice
© 2005 KYE SYSTEMS Corp. All rights reserved. No part of this publication may be
reproduced, stored in a retrieval system, or transmitted, in any form or by any means
(electronic, mechanical, photocopying, recording, or otherwise), without the prior written
permission of the publisher.
Note: Specifications mentioned in this manual are subject to change without notice.
1
Advertisement
Table of Contents

Related Manuals for Genius G-Note Series


Summary of Contents for Genius G-Note Series
- Page 1 Consult the dealer or an experienced radio/TV technician for help. Trademark Information Genius and G-Note are registered trademarks of KYE SYSTEMS Corporation. Microsoft and Windows are registered trademarks of Microsoft Corporation. Pentium is a registered trademark of Intel Corporation.
-
Page 2: Table Of Contents
INDEX G-Note Specifications ....................52 Introduction ......................4 1.1 Possible applications ..................4 1.2 System Requirements..................4 1.3 Package Content....................5 Knowledge about G-Note ..................5 2.1 Install the batteries into the digital recorder ............ 7 2.2 Install the batteries for Digital Pen..............7 2.3 Setup the NotePad and recorder .............. -
Page 3: Introduction
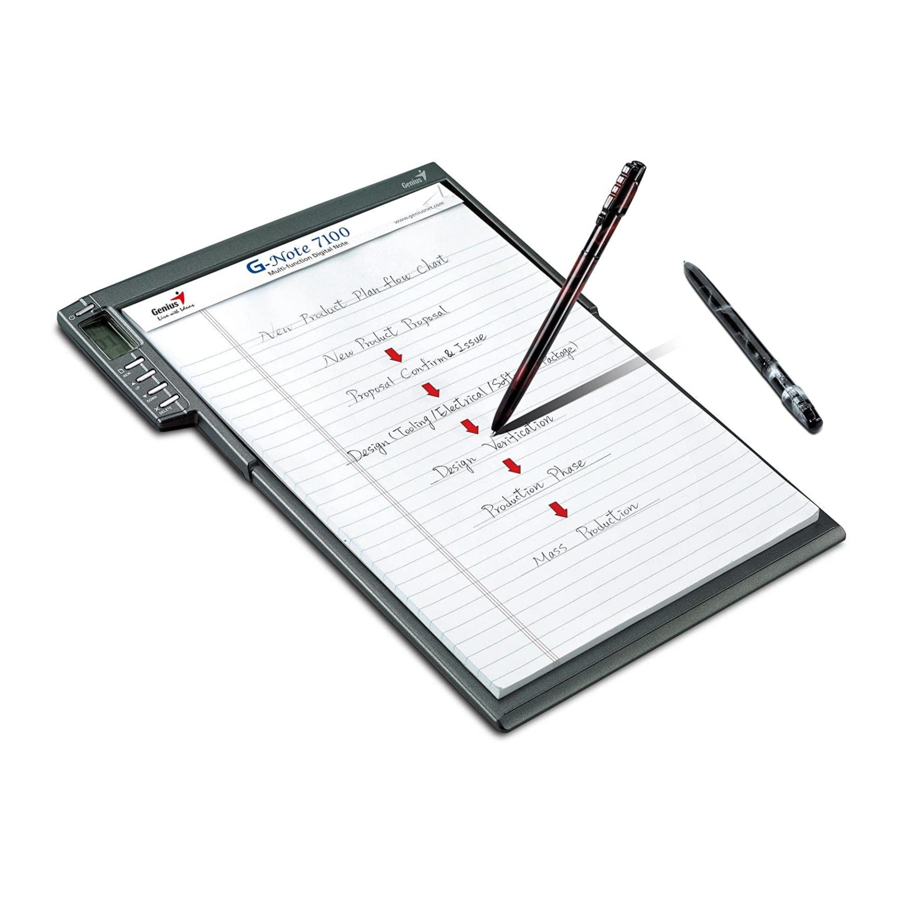
1. Introduction Package Content The G-Note Series of digital note recorder has built-in memory that allows you to instantly capture notes or diagrams written in ink on normal paper without 《G-Note 7000》 connecting into your computer, and then transfer a digital data into a computer 1.G-Note digital note recorder x 1... -
Page 4: Install The Batteries Into The Digital Recorder
Install the batteries into the digital recorder Model : G-Note 7100 Open the batteries of trough and change the batteries. After that, close the cover trough. Turn of the power before changing the batteries or the memory data could come out with errors. WARNING! When the battery installed in a wrong way, will leak out the liquid from the battery. - Page 5 Pen’s refill: 1. MiniStar D1 Open the bottom of digital pen’s lid and take out the mercury battery from packing bag, then install a new one with the negative (-) pole facing the pen tip. MiniStar® Screw both barrel parts up until tight. ( - )Negative (+)Positive Incorrect battery installation will result in the malfunction of the digital...
-
Page 6: Setup The Notepad And Recorder
Setup the NotePad and recorder 3. G-Note Operation Guide Attach the paper notepad on G-Note pad standard and the maximum size is: Front panel’s functions 210mm x 263mm (A4/Letter) Status one Status two (MENU setup) Please do not exceed the size of Digital recorder and exert great efforts to tear the papers. -
Page 7: Power Button
For recognizing the text on the LCD screen easily, the two decimal digits of To avoid the creation of superimposed digital pages, make sure that the the page counter are enlarged in the center of the screen, whereas the page status indicator on the LCD screen displays an empty page before hundreds (0-1) are displayed behind the hyphen in the top row of the you start writing on a new page. -
Page 8: Menu Functions
data and selecting the pages you wish to delete. In addition, you can remember STEP-1 Press and select for different direction. and delete pages faster by put a mark “-“ in the head of file name. MENU functions STEP-1 Turn on the power by pressing and get in the functions of menu. - Page 9 3.6.2.1 Set the number of notepad 3.6.2.2 FORMAT Flash Memory The function is designed for user who own several notepads and would like to The function will delete all the data in the memory. If not sure the data have original notebook with multi-numbers to record and trace up all digital are available or not, please back it up and save it into your computer, or you notes.
- Page 10 Press to select the workbook sub-menu. Press to select the workbook sub-menu STEP-1 STEP-1 STEP-2 Press [ENTER] to confirm. STEP-2 Press [ENTER] to confirm. Press to select the Version Information command STEP-3 Press s to select the Tablet command, and then STEP-3 and press to confirm.
-
Page 11: To Suspend-Timer ( 3 Minutes
3.6.3 Auto Suspend-Timer ( 3 minutes--- 60 minutes) 3.6.4 Space/Power Display STEP-1 Press to select the suspending sub-menu. Press to select the status menu. STEP-1 STEP-2 Press [ENTER] to confirm. Press [ENTER] to confirm. STEP-2 The default idle time is 15 minutes. Remaining disk space in % Remaining battery capacity in % Unit: Minute... -
Page 12: Testing For Digital Ink Pen
4. Introduction to Software Functions Testing for Digital Ink Pen The Digital Organizer allows you to view, edit, annotate, or e-mail on Windows. You can download the digital notepads from the G-Note to your computer, and Firstly, pick up the digital pen( make sure the mercury battery install organize, rename, delete, or save them in most frequently used file formats like properly) and try to write anything on the G-Note’s working area JPG, BMP, or PDF. -
Page 13: Transfer Your Data From G-Note To Your Computer
Importing digital pages Transfer your data from G-Note to your computer 1. After you plug in the USB connector to your PC, “Note Notifier” screen will comes 1. Using USB cable to connect your G-Note and computer. Make sure your automatically. -
Page 14: Using The G-Note As Tablet
Using the G-Note as Tablet Standard Tools As soon as you have established a USB connection between your PC and G-Note, you can have the function of tablet. You can use the digital ink pen as an Page Tools input device that working as the same way as the pen tablet, mouse or a tablet Notepad Panel You must turn the G-Note as the same direction as... - Page 15 Open New folder Open an existing G-Note file. Use In G-Note Explorer, click on a new the dialog to locate the file in the folder and key in an appropriate G-Note flash memory, or on your folder name, and press [Enter]. hard disk Save Save the currently selected digital...
- Page 16 1. After clicking on the E-Mail icon Save as PDF your selection will appear in the You can select one, many or all Attach file(s) dialog box. pages to transfer and save as PDF file format. Please follows the steps as showing below: 2.
-
Page 17: The Digital
(5) Select Directory Narrow Under directories and open the file Narrow down the page name. Enlarge Enlarge the zoom page (6) Select saved model You can select JPG, BMP or PDF to Click on the down arrow in the transfer files. Zoom drop down menu and select the zoom factor. - Page 18 Untangle Superimposed Pages After files combination, move and locate the position and attach it. A commonly mistake made by users is to forget pressing the New page front panel button each and every time they turn a paper sheet on the notepad to start a new digital page in memory.
-
Page 19: Drawing Toolbars - Support Tablet Function
STEP-2 Select the shape of pen tip. Scroll Tool Moving the whole page by scrolling it. Select the Pen icon to annotate the Notepad pane with the pen tool. STEP-3 Select the color of pen tip. There different shapes (curve、line、ellipse、rectangle) to select. - Page 20 You can directly copy and paste your selection in Microsoft Mode Select Office programs such as Word, Excel, and Outlook for further Actual paper size and monitor size processing or sending by e-mail. select. You can adjust the electrical data on the computer screen. (G-Note paper and monitor size are 1:1) MS Outlook...
-
Page 21: Modify The Color And Shape
Selecting the objects you want to 1. You can select drawing tool STEP-1 modify with the Select tool and shape The selection will appear in a selection box. You can now change pen tip colors and shapes, and click the [OK] button to confirm. 2. -
Page 22: Insert Background Colors
attention: when selected STEP-1 Start with selecting the [Background different shapes, the style will be Picture] under [Insert] on the view changed as well. menu. (Support JPG and BMP) STEP-2 Select picture source, and then the picture appears on the notepad STEP-5 Select pen tip color page. -
Page 23: Insert Background Colors
STEP-5 Select working background Step-3 Delete the Background image Able to select the line Vertical, Delete the image file that locates in the “Name of Image”. Horizontal, Separation, Spacing or Colors. STEP-6 Select working background colors After selecting background 4.9.2 Real Picture Model colors, press ok to confirm the 4.9.2.1 Insert background images... -
Page 24: Recommend Software
Save pictures 6. Take Care of your G-Note Save setting working background for using next time.。 To assure proper functioning of the G-Note, please observe the following precautions: Remove the batteries from the G-Note if it is not expected to be used for long periods. -
Page 25: Q & A, Troubleshooting
G-Note cannot power on Q & A, Troubleshooting The batteries in the G-NOTE may have run out of power during a note taking session. Please replace the batteries (see section 2.1 for instructions). A superimposed digital page is created. G-Note is connecting into computer, which means the G-Note changed Make sure to press the New button on the front panel every time when you to the Tablet function. -
Page 26: Appendix
A. Pull out the refill Appendix Step 1︰Press the pen tip into the pen trough. (Make sure it is stuck inside) Step 2︰Pull out the refill from the pen trough. Replacing the ink cartridge of the digital pen Step 3︰Separate the refill from the digital pen. Open the compartment of the G-Note underneath by lifting its cover. - Page 27 G-Note 7100 Specifications Technology Electromagnetic digitizer Dimensions 332(L) x 249(W) x 16(H) mm Weight 545g (not including batteries) A4 size – 210 x 297mm Letter size – 215.9 x 279.4 mm Paper size Working Area:210 x 263mm Thickness notepad Max. 5~7 mm Storage medium Built-in with 32MB flash memory Power Source...
Need help?
Do you have a question about the G-Note Series and is the answer not in the manual?
Questions and answers