Table of Contents
Advertisement
Quick Links
Advertisement
Table of Contents

Related Manuals for POSITECTOR RTR


Summary of Contents for POSITECTOR RTR
- Page 2 Introduction This Reference is a compilation of the On-Gage Help that is available on your PosiTector gage. To view these help items on the gage, enter the gage menu and touch icon or press the button with the desired menu item selected.
-
Page 3: Table Of Contents
Contents Memory ........................View ........................Off .......................... On .......................... Clear ........................Statistics ........................Statistics ........................ Clear ........................HiLo Alarm ......................Calibration Settings ...................... Zero ........................Tape Grade ......................Linearize ........................ Setup ........................... Set Clock ....................... Reset ........................Units ........................Battery Type ......................Sound ........................ - Page 4 Short Filter ......................Cutoff Filter ......................2D Orientation ......................Connect ........................USB ........................Sync.net Now ....................USB Drive ......................JSON Files ....................HTML Report ..................... Auto Sync .net ....................Updates ......................... Help ..........................Power Off ........................Page 2...
-
Page 5: Memory
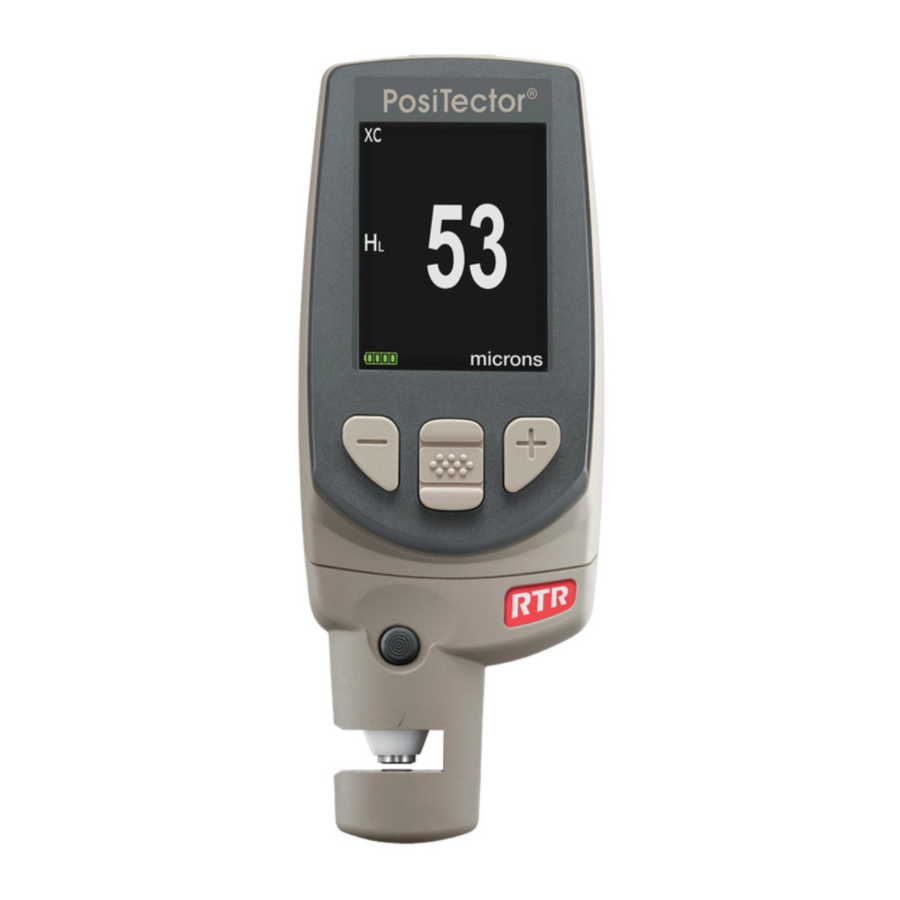
Memory The PosiTector RTR Standard has internal memory storage for recording measurement data. Stored measurements can be reviewed on-screen or downloaded to a computer. Measurements are date and time-stamped. Store up to 1000 readings (per probe) into a single batch. -
Page 6: Statistics
Statistics (PosiTector RTR-H probes only) Menu option for configuring Statistics and HiLo Alarm modes. Statistics Statistics mode continually displays/updates average, standard deviation, min/max thickness and number of readings while measuring. When selected, the statistics icon and statistical summary will appear on the display. -
Page 7: Calibration Settings
Verify accuracy of the digital micrometer measuring system. Place the PosiTector RTR Check Shim into the probe opening. The average of several measurements should be within the combined tolerance of both the Gage and the shim. -
Page 8: Tape Grade
C tape at its low end and XC tape at its high end, something the PosiTector RTR H will automatically do when measuring HL. When Linearize mode is OFF, the PosiTector RTR H will measure all grades of replica tape just like a conventional spring micrometer. - Page 9 This method is a compromise between accuracy and ease of use. When the Linearize box is NOT ticked, the PosiTector RTR displays a height value of H comparable to the value an analog spring micrometer would display after the 50.8 microns (2 mils) of incompressible polyester film has been subtracted.
-
Page 10: Setup
Setup Set configuration options for the Gage. Set Clock All measurements are date and time stamped (24 hour format) when stored into memory. It is therefore important to keep both the date and time current using this menu option. Use the Up and Down buttons to scroll, and the (-) and (+) buttons to adjust value. -
Page 11: Units
Language = English Battery Type = Alkaline Backlight = Normal USB Drive = ON Auto Sync .net = ON Bluetooth Smart = OFF NOTE: Date, Time and WiFi are not affected by either Reset. Units Converts the display from thou/mils to microns and vice versa. Battery Type Selects the type of batteries used in the Gage from a choice of Alkaline, Lithium or NiMH (nickel-metal hydride rechargeable). -
Page 12: Language
Language Converts displayed and printed words to the selected language. Gage Info Displays the model number and serial number, probe type and serial number, PosiSoft.net registration key, the amount of remaining memory for storage of readings, date and time, and software packages. For security purposes, the registration key is required to add the Gage to your free PosiSoft.net account. -
Page 13: Analysis Setup
Analysis Setup (PosiTector RTR-3D probes only) Setup 2D and 3D analysis parameters. 2D Parameters (PosiTector RTR-3D probes only) 2D parameters are calculated from a virtual trace across the image area. When the Orientation is set to Horizontal X or Vertical Y directions, the Evaluation Length is equal to 3.8mm, minus double the length of the selected discard filter. -
Page 14: 3D Parameters
(PosiTector RTR-3D probes only) Rt Total profile height: the distance between the highest peak and the deepest valley within the evaluation length. (PosiTector RTR-3D probes only) Rz Average maximum height of the profile: arithmetic average of the successive values of the maximum peak to deepest valley within each sampling interval calculated over the evaluation length. -
Page 15: Sz Root
(PosiTector RTR-3D probes only) H Average maximum peak-to-valley height: the distance between the anvils minus the 2 mils (50.8 µm) of incompressible film. When selected an optional linearization can be performed by selecting the linearization checkbox in the Cal Settings Menu. -
Page 16: 3D Parameters
(PosiTector RTR-3D probes only) Sq Root mean square roughness: the root mean square average of the measured height deviations from the mean surface taken within the evaluation area. 3D Parameters (PosiTector RTR-3D probes only) Spd Areal peak density: the number of peaks per unit area (formerly known as Pd). -
Page 17: Cutoff Filter
Cutoff Filter (PosiTector RTR-3D probes only) To optimize the analysis for a specific application, filters may be applied to the raw image to remove undesirable profile characteristics prior to calculating the 2D and 3D parameters. The long wavelength cutoff Gaussian filter attenuates features that have a longer wavelength than the selected size. -
Page 18: Connect
PosiSoft.net. USB Drive When USB Drive is enabled, the PosiTector is recognized as a USB mass storage device which provides a simple interface to retrieve stored data in a manner similar to USB flash drives and digital cameras. USB Drive is also required to import stored measurements into PosiSoft Desktop. -
Page 19: Json Files
Files can be parsed in to databases and custom software applications. NOTE: Disabling this option may reduce the time required for the computer to recognize the PosiTector when first connected via USB. HTML Report When enabled (default), a formatted HTML report is viewed by selecting the index.html or START_HERE.html file found in the root directory. -
Page 20: Help
Help When a Menu option is highlighted, the (i) icon indicates on-gage help is available. Press (+) or touch the (i) icon to display the help. Update your gage to ensure that you have the latest on-gage help information. A formatted PDF containing all on-gage help items is available at www.defelsko.com/help. -
Page 21: Power Off
Power Off To conserve battery life, the gage will automatically go to sleep after 5 minutes of inactivity and enter Sleep Mode. While in Sleep Mode the gage powers up significantly faster— convenient when moving between parts or locations. The gage will completely power off after 4 hours of inactivity.
Need help?
Do you have a question about the RTR and is the answer not in the manual?
Questions and answers