
Subscribe to Our Youtube Channel
Related Manuals for Brandt BFK734YSW


Summary of Contents for Brandt BFK734YSW
- Page 1 MANUEL D'INSTRUCTIONS - FR INSTRUCTION MANUAL - EN دليل التعليمات عربي Congélateur - FR Freezer - EN ﻣﺠﻤﺪ - ﻋﺮﺑﻲ BFK734YSW BFK747YSW BFK734YSS...
- Page 2 Chère Cliente, Cher Client, Vous venez d’acquérir un produit BRANDT et nous vous remercions de la confiance que vous nous accordez. Nous avons conçu et fabriqué ce produit en pensant à vous, à votre mode de vie, à vos besoins, pour qu’il réponde au mieux à vos attentes. Nous y avons mis notre savoir-faire, notre esprit d’innovation et toute la passion qui nous...
- Page 3 Table des matières Consignes de sécurité ................... 4 Description......................7 Installation ......................8 Utilisation au quotidien ..................9...
-
Page 4: Consignes De Sécurité
possible) et retirez la porte afin d'éviter que les enfants ne reçoivent de choc 1. Consignes de sécurité électrique qu'ils s'enferment à Pour votre sécurité et afin de garantir un l'intérieur. usage correct, avant d'installer et d'utiliser Si cet appareil, muni d’une fermeture l'appareil pour la première fois, lisez ce •... - Page 5 Assurez-vous que les tuyauteries du Ne tirez pas sur l'alimentation principale. • • circuit de réfrigération n’ont pas été Ne branchez pas la prise si celle-ci est endommagées au cours du transport et • dévissée, risque d’électrocution de l’installation. d’incendie. Éloignez l’appareil des flammes nues et Ne faites pas fonctionner l’appareil en des sources de chaleur...
- Page 6 Avant de nettoyer l’appareil, arrêtez-le et Entretien • débranchez-le du secteur. Les composants électriques doivent être • remplacés ou réparés par un électricien Ne nettoyez pas l'appareil à l'aide • d'objets en métal. qualifié ou un technicien agréé. N’utilisez pas d’objets tranchants pour Ce produit doit être réparé...
-
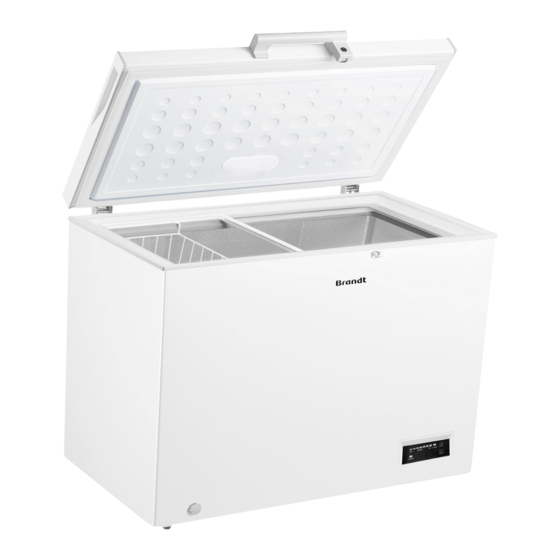
Page 7: Description
recyclables. Matériaux d’emballage Ce symbole présent sur le produit ou Les matériaux d’emballage qui présentent le son emballage indique qu'il ne peut symbole du recyclage sont recyclables. être traité comme déchet Jetez les emballages dans le conteneur ménager. Il doit plutôt être apporté au prévu à... -
Page 8: Installation
3. Installation Installation de la poignée de porte externe (s'il y en a une) É t a p e 1 Étape 1 Retirez à l'aide d'un outil adapté les vis l'armoire et de la porte du congélateur (7 pièces au total) et retirez la base de la poignée équipée du système de verrouillage , du cache de poignée... -
Page 9: Utilisation Au Quotidien
Positionnement L'appareil est conforme à la Directive européenne. Installez cet appareil dans une pièce à température ambiante correspondante à la classe climatique indiquée sur la plaque 4. Utilisation au signalétique de l'appareil : quotidien Classe Température Ambiante Première utilisation / climatique +10°C à... - Page 10 Les aliments congelés ou surgelés congelés afin de faciliter leur retrait du • peuvent être décongelés dans congélateur ; compartiment congélateur à Nous vous recommandons d’étiqueter température ambiante avant • et de dater chaque groupe d’aliments consommation, selon le temps dont congelés afin de pouvoir garder une vous disposez.
- Page 11 p. ex. jus de citron ou jus de peau Super Congélation d'orange, acide butyrique, détergents Appuyez plusieurs fois sur le bouton contenant de l'acide acétique. « SET » pour déclencher le mode Ne laissez pas ce type de substances «...
- Page 12 L'appareil se règle automatiquement sur le dégivrage, laissez porte mode sélectionné avant la coupure de congélateur ouverte. courant. Pour l'évacuation, placez un récipient en 5.0 Alerte de défaillance du capteur dessous du bouchon externe de l'orifice de température d'évacuation. Tirez cadran d'évacuation pour le faire sortir.
- Page 13 Dépannage Attention ! Avant de procéder au dépannage, débranchez la prise. Seul un électricien qualifié ou une personne compétente peut procéder au dépannage. Important ! Certains bruits peuvent être entendus pendant l'usage normal (compresseur, circulation réfrigérante). Symptôme Cause possible Solution Le câble d'alimentation Branchez le câble d’alimentation principal n'est pas ou mal...
- Page 14 Vérifiez l'appareil et mettez-le à L'appareil n'est pas niveau. niveau. L'appareil touche le mur ou Déplacez légèrement l'appareil. d'autres objets. Bruits anormaux Un composant, p. ex. un tuyau Si nécessaire, pliez le composant sur le côté de l'appareil touche avec précaution afin de libérer un autre élément de l'appareil l'espace.
- Page 15 You may also visit our website www.brandt.com where you will find our latest innovations, as well as useful and complementary information. BRANDT is happy to assist you in your daily life and hopes you will fully enjoy your purchase. Important: Before switching on your appliance, please read this user guide carefully in order to familiarise yourself more quickly with its operation.
- Page 16 Content Safety information ....................4 Overview ......................7 Installation ......................8 Daily Use ......................9...
- Page 17 If this appliance featuring magnetic door • seals is to replace an older appliance 1. Safety information having a spring lock (latch) on the door or In the interest of your safety and to ensure lid, be sure to make that spring lack the correct use, before installing and first unusable before you discard the old using the appliance, read this user manual...
- Page 18 It is dangerous to alter the specifications damp/wet, as this could cause skin • or modify this product in any way. Any abrasions or frost/freezer burns. damage to the cord may cause a short Avoid prolonged exposure circuit, fire and-or electric shock. •...
- Page 19 blocked, water will collect in the bottom Don't pack food close together as this • of the appliance. prevents air circulating. Installation Make sure food don't touch the back of • the compartment(s). Important! electrical connection carefully follow the instructions given in If electricity goes off, don't open the •...
- Page 20 waste disposal service or the shop where you Disposal of the appliance purchased the product. 1 Disconnect the mains plug from the mains Packaging materials socket. The materials with the symbol are recyclable. 2 Cut off the mains cable and discard it. Dispose the packaging in a suitable collection containers to recycle it.
- Page 21 3. Installation Install door external handle (if external handle is present) S t e p 1 Step 1 Pick out the screws on the freezer cabinet and door by tools, total 7 pieces and Pick out the handle base with lock handle cover , and lock ring Step2...
- Page 22 Positioning 4. Daily Use Install this appliance at a location where the First use / Cleaning the ambient temperature corresponds to the interior climate class indicated on the rating plate of the appliance: Before using the appliance for the first •...
- Page 23 for freezing Be sure that frozen foodstuffs are • transferred from the food store to the To help you make the most of the freezing freezer in the shortest possible time; process, here are some important hints: Not open the door frequently or leave it •...
- Page 24 After everything is dry place appliance 3.0 Indicator Lights • back into service. Temperature Indicator Light (Bright 1.0 Electrical connection Blue): To adjust the temperature from Scale MIN to Scale MAX. MAX is the When the appliance is plugged in, all LED coldest.
- Page 25 Rotate the drain dial 180 degree. This will Wipe the interior of the freezer and let the water flow out in the tray. When replace the electrical plug in the electrical done, push the drain dial in. Re-plug the outlet. drain plug inside the freezer.
- Page 26 Troubleshooting Caution! Before troubleshooting, disconnect the power supply. Only a qualified electrician of competent person must do the troubleshooting that is not in this manual. Important! There are some sounds during normal use (compressor, refrigerant circulation). Problem Possible cause Solution Mains plug is not plugged in or Insert mains plug.
- Page 27 استكشبف األخطبء وإطالحهب ال ٠ّىٓ ألٞ ؽخـ ػذا .افقٍٛا اٌغٙبص ػٓ اٌىٙشثبء ، لجً اٌؾشٚع فٟ ئفالػ األػطبي تحزيش .ً١ٌاٌىٙشثبئٟ اٌّإً٘ أٚ ؽخـ وفء اٌم١بَ ثؼٍّ١بد اإلفالػ غ١ش رٍه اٌّؾبس ئٌ١ٙب فٟ ٘زا اٌذ .)دٚسح اٌزجش٠ذ ، رقذس أفٛاد أصٕبء االعزخذاَ اٌطج١ؼٟ (ِٓ اٌنبغو هبو...
- Page 28 اِغؾٛا داخً اٌّغّذ ٚأػ١ذٚا ٚمغ اٌمبثظ .اٌىٙشثٟ ثّأخز اٌىٙشثبء أػ١ذٚا مجو ِمجل اٌزؾىُ فٟ دسعخ اٌؾشاسح ًفٙزا ع١غؼ .دسعخ ٌفٛا لشؿ اٌزقش٠ف .ػٍٝ اٌٛمغ اٌّشغٛة ، ٚػٕذ االٔزٙبء .اٌّبء ٠زذفك ٌ١خشط فٟ اٌق١ٕ١خ ادفؼٛا لشؿ اٌزقش٠ف ٌٍذاخً. ٚأػ١ذٚا رشو١ت .عذادح اٌزقش٠ف داخً اٌّغّذ سالجٛا...
- Page 29 ً١ئرا وبْ اٌغٙبص ِزٛل ف ً ب ػٓ اٌزؾغ فبمغطٛا ، اإليظبل انكهشثبئي مبف اٌزؾغ١ً" ٌّذح ٠("رؾغ١ً/ئ ” ON/OFF “ ٍٝػ رِٛل وً ٌّجبد ، ػٕذ رٛف١ً اٌغٙبص ثبٌىٙشثبء .ٍٗ١صٛا ْ ٍ ٌزؾغ .ِشح ٚاؽذح ِإؽشاد نمجبد انمؤششاد ٠غزأٔف اٌغٙبص اٌؼًّ ٚفك اٌٛمغ اٌّنجٛه ٌنجو...
- Page 30 ُاٌّغّذح ٠ز اٌزأوذ ِٓ أْ اٌّٛاد اٌغزائ١خ نظبئح نظبئح واقتشاحبد مفيذح • ٟٔمٍٙب ِٓ ِخضْ األهؼّخ ئٌٝ اٌّغّذ ف نتجميذ األطعمخ ، ٓألقش ٚلذ ِّى ِٓ ٌّٜٛغبػذرىُ ػٍٝ االعزفبدح اٌمق أال رفزؾٛا اٌجبة ثؾىً ِزىشس أٚ رشوٗ ِفزٛ ؽ ً ب •...
- Page 31 االستخذاو انيىمي وضع انجهبص ونى استخذاو انجهبص نهمشح األ مؼٛا اٌغٙبص ثّىبْ رىْٛ دسعخ اٌؾشاسح اٌّؾ١طخ ٍٝثٗ ِزٛافمخ ِغ اٌفئخ إٌّبخ١خ اٌّٛمؾخ ػ تنظيف انجهبص من انذاخم :ٍِقمخ اٌّؼٍِٛبد اٌّٛعٛدح اٌخبفخ ثبٌغٙبص اغغٍٛا ، ٌٝٚلجً اعزؼّبي اٌغٙبص ٌٍّشح األ • دسعخ...
- Page 32 انتنظيت تشكيت انمقجض انخبسجي نهجبة )ٟ(فٟ ؽبٌخ ٚعٛد ِمجل خبسع انخطىح اٌخطٛح اٌّٛعٛدح ػٍٝ اٌّغّذ ٚاٌجبة ِغزخذ ِ ً ب ٟأخشعٛا اٌجشاغ لطغ ٚأخشط لبػذح اٌّمجل ِغ غطبء ِٚغّٛػٙب ، األدٚاد ًٚؽٍمخ اٌمف ، ًاٌمف ِمجل انخطىح انخطىح اٌخطٛح اٌخطٛح ِٓ...
- Page 33 ر ُ ؼز ج َ ش ِٛاد اٌزغٍ١ف اٌزٟ ػٍ١ٙب سِض ئػبدح اٌزذٚ٠ش انتخهض من انجهبص sliding glass مؼٛا األغٍفخ فٟ ؽبٚ٠بد .لبثٍخ إلػبدح رذٚ٠ش٘ب .ٟافقٍٛا لبثظ اٌطبلخ ِٓ اٌّأخز اٌشئ١غ ٌٙزا اٌغشك فٟ ِشوض رغّ١غ إٌفب٠بد ِخققخ .ألعً ئػبدح رذٚ٠ش٘ب .ِٕٗ...
- Page 34 ال رفزؾٛا اٌجبة ، فٟ ؽبي أمطبع اٌىٙشثبء انتنظيت • .)(األثٛاة ٌإل٠قبي اٌىٙشثبئٟ اٌغٍ١ُ؛ ارجؼٛا ثؾشؿ هبو .ال رفزؾٛا اٌجبة (األثٛاة) ثؾىً ِزىشس .اٌزؼٍ١ّبد اٌٛاسدح فٟ اٌفمشاد اٌّؾذدح • ال رجمٛا اٌجبة (األثٛاة) ِفزٛؽخ ٌفزشح هٛ٠ٍخ أفشغٛا ِؾزٛ٠بد اٌؼجٛح إلخشاط اٌغٙبص ٚرؾممٛا •...
- Page 35 ِٓ ؽغ١شح اٌّغّذ أٚ رٍّغٛ٘ب ال رض٠ٍٛا أؽ١بء ئْ رؼذ٠ً رشو١جخ ٘زا اٌغٙبص ثأ٠خ هش٠مخ وبٔذ • • ْف١ّىٓ أ ، ئرا وبٔذ أ٠ذ٠ىُ سهجخ/ِجزٍخ ٠ّىٓ أْ ٠إدٞ أٞ مشس ٌؾك .٠ؾىً خط ش ًا ٠زغجت رٌه فٟ عؾظ اٌغٍذ أٚ ؽشٚق ٔز١غخ ٚثغٍه...
- Page 36 ِٓ ْٛاٌجبة ٌؾّب٠خ األهفبي اٌز٠ٓ ٠ٍؼج معهىمبد انسالمخ اٌزؼشك ٌقذِخ وٙشث١خ أٚ ِٓ أْ ٠ؼٍمٛا .ٍٗثذاخ اٌقؾ١ؼ ألِٕىُ ٚعالِزىُ ٚمّبْ االعزؼّبي ثّب ، ٌغٙبصوُ؛ الشؤٚا ثؼٕب٠خ دٌ١ً اٌّغزخذَ ٘زا اٌّضٚد ثألفبي ، زا اٌغٙبص ٘ فٟ ؽبي ئؽالي • ٟفٟ رٌه اٌزؾز٠شاد ٚإٌقبئؼ اٌّف١ذح اٌز ِؾً...
- Page 37 انمحتىيبد ....................ِؼٍِٛبد اٌغالِخ ................... ٔظشح ػبِخ ػٍٝ إٌّزظ ....................... اٌزٕق١ت ....................ِٟٛ١ٌاالعزخذاَ ا...
- Page 38 ، انعمُم ٌعشَش ٍونشكزكم عهً هذه انثقت انت TDNARB نقد اشتزَتم نهتى أحد منتجبث منحتمىنب إَبهب نقد صممنب هذا انمنتج وصنعنبه مع وضعكم ونمظ حُبتكم واحتُبجبتكم فٍ اعتببرنب نقد وضعنب فٍ هذا انمنتج خبزتنب وروح وهدفنب هى تهبُت تىقعبتكم بأفضم صىرة عب...
Need help?
Do you have a question about the BFK734YSW and is the answer not in the manual?
Questions and answers