Table of Contents
Advertisement
Quick Links
John Lewis
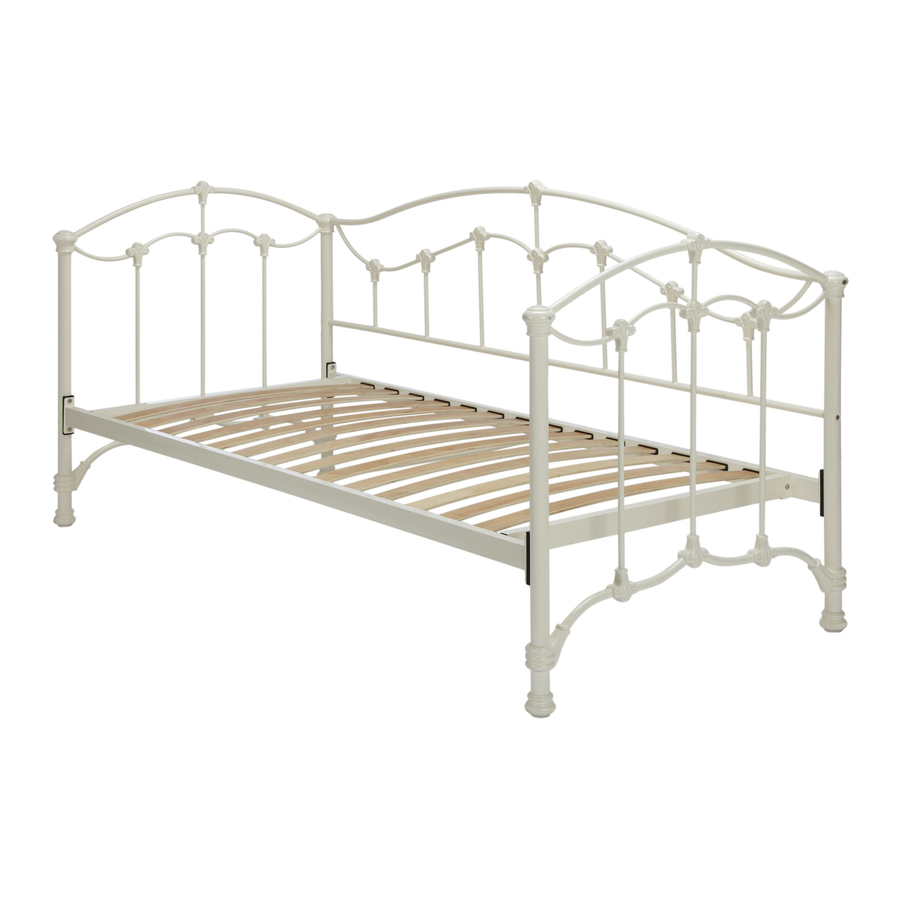
Single
Thank you for purchasing this Daisy Daybed. Please read the instructions before use to ensure safe and
satisfactory operation of this product.
PRE-ASSEMBLY PREPARATION
Please ensure instructions are read in full before attempting to assemble this product.
Necessary Tools
Please check the pack contents before attempting to assemble this product. A full checklist of
components is given in this leaflet. If any components are missing, please contact the John Lewis
helpline.
This product is HEAVY. It should be assembled as near as possible to the point of use. TAKE CARE
WHEN LIFTING to avoid personal injury and (or) damage to the product.
This product takes approximately 40 MINUTES to assemble with 2 PEOPLE.
The fittings pack contains SMALL PARTS which should be KEPT AWAY FROM YOUNG CHILDREN .
Read this leaflet in full before commencing assembly.
If you require any additional information or have any issues with this product please call the John Lewis
Helpline on 01244 689949 or email:mail@fwgroup-uk.com
Daisy Daybed
1/7
Stock code: 803/41405
For product support or spare parts please
call the John Lewis Helpline;
T: 01244 689949
E: mail@fwgroup-uk.com
Advertisement
Table of Contents

Related Manuals for John Lewis Daisy Daybed 803/41405


Summary of Contents for John Lewis Daisy Daybed 803/41405
- Page 1 The fittings pack contains SMALL PARTS which should be KEPT AWAY FROM YOUNG CHILDREN . Read this leaflet in full before commencing assembly. If you require any additional information or have any issues with this product please call the John Lewis Helpline on 01244 689949 or email:mail@fwgroup-uk.com...
- Page 2 Fittings and parts checklist Fittings M6 x 25mm Bolt x 8 pcs Cap Ends x 28 pcs M6 x 38mm Bolt x 4 pcs Allen Key x 1 pc Spanner x 1 pc M6 x 12mm Bolt x 2 pcs M6 x 63mm Bolt x 4 pcs Plastic Spacer x 4 pcs Washer Spacer x 2 pcs...
- Page 3 Step by step assembly instructions Step One Attach the Side Rails (3) to the Tubing Slats (4) by placing the Tubing Slats (4) into the 3 slots (X, Y, Z) on the Side Rails (3) and securing with M6 x 38mm Bolts (B) and Screw Nut (E). Tighten the Bolts (B) and Screw Nut (E) using the Allen Key (G) and Spanner (H) as shown in the diagram below.
- Page 4 Step Three Place the Tubing Slat (4) into the last slot on the Side Rail (3) and secure using M6 x 38mm Bolt (B) and Screw Nut (E) as shown below. Tighten the Bolt (B) and Screw Nut (E) using the Allen Key (G) and Spanner (H) as detailed in the below diagram.
- Page 5 Step Five Attach the Side Rails (3) to the Arm Panels (1) using the Plastic Spacer (I) and M6 x 25mm Bolt (A) as shown below. Step Six Attach the Cross Bar (6) to the Side Rails (3) using M6 x 12mm Bolt (C) then tighten with Allen Key (G) as detailed below.
- Page 6 This bed is now ready to use.
- Page 7 If you require any additional information or have any issues with this product please call the John Lewis Helpline on 01244 - 689949 or e-mail: mail@fwgroup-uk.com John Lewis Partnership 171 Victoria Street London SW1E 5NN www.johnlewis.com...
Need help?
Do you have a question about the Daisy Daybed 803/41405 and is the answer not in the manual?
Questions and answers