Caple CM465 Instruction Manual
Sense coffee machine
Hide thumbs
Also See for CM465:
- Instruction manual (44 pages) ,
- Instruction manual (23 pages) ,
- Instruction manual (44 pages)

Related Manuals for Caple CM465


Summary of Contents for Caple CM465
- Page 1 S e n s e C o f f e e M a c h i n e I n s t r u c t i o n m a n u a l CM465, CM465SS & CM465GM Contact Caple on 0117 938 7420 for spare parts or www.caple.co.uk...
-
Page 2: Table Of Contents
Setting The Coffee Temperature Setting The Switch-Off Time Carrying Out The Descaling Statistics Resetting Settings Setting The Clock Cleaning Messages Troubleshooting Installation Instructions Caple Contact Details Instruction manual CM465 / CM465SS / CM465GM Please keep this instruction manual for future reference... -
Page 3: Introduction
2 to 3 years (after a maximum 8,000 cups). Servicing of your coffee machine is chargeable, and can be booked via email service@caple.co.uk or telephone 0117 938 7420. - Page 4 - This appliance is intended to be used in household and similar applications such as: - Staff kitchen areas in shops, offices and other working environments. - Farm Houses. Instruction manual CM465 / CM465SS / CM465GM Please keep this instruction manual for future reference...
- Page 5 - Use it with care to avoid scalds from the water and steam jets or through incorrect use. Instruction manual CM465 / CM465SS / CM465GM Please keep this instruction manual for future reference...
- Page 6 - Use the accessories holder to contain coffee accessories (for example coffee beans). - Never touch the appliance with damp hands. - Unplug directly from the plug only. Instruction manual CM465 / CM465SS / CM465GM Please keep this instruction manual for future reference...
- Page 7 The requirements for this appliance are stated on the rating label. - This appliance is designed only for cooking food and is intended for indoor use.minimum temperature of 120°C. Instruction manual CM465 / CM465SS / CM465GM Please keep this instruction manual for future reference...
- Page 8 Registration can also be completed online by visiting www.caple.co.uk. Ensure you keep your warranty card safe, you may need to show it to Caple Service together withproof of purchase.If you fail to show your warranty card you will incur all repair charges.
-
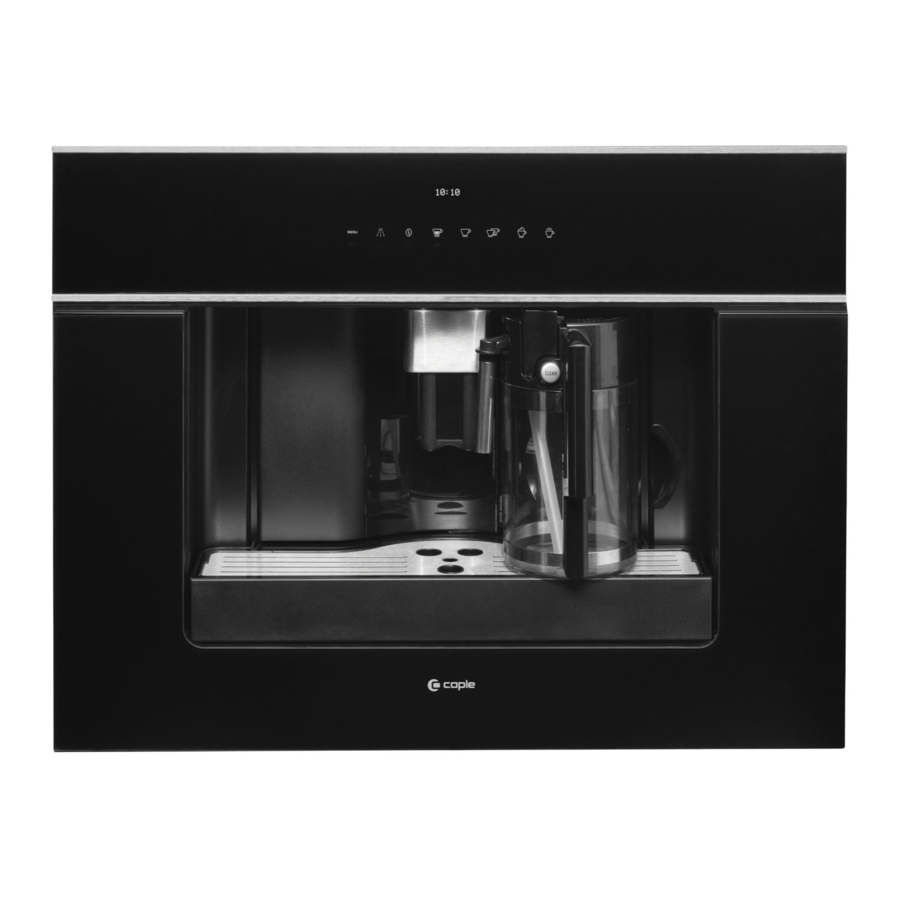
Page 9: Product Overview
V. Coffee guide W. Place for accessories (left and right) UCCINO X. IEC Connector B Aa vable) d coffee taken out) EN 5 ght) B Aa Instruction manual CM465 / CM465SS / CM465GM Please keep this instruction manual for future reference... -
Page 10: Control Panel
8. ‘OK’ to confirm the selected function 9. Touch key ‘One cup of coffee’ 10. Touch key ‘Two cups of coffee’ 11. Touch key ‘Cappuccino’ 12. Touch key ‘Hot water deliver’ Instruction manual CM465 / CM465SS / CM465GM Please keep this instruction manual for future reference... -
Page 11: Preparation
Only fi ll the water tank with cold water. Never use other liquids such as mineral water or milk. such as mineral water or milk. EN 10 Instruction manual CM465 / CM465SS / CM465GM EN 10 Please keep this instruction manual for future reference... - Page 12 › Each time you turn the coffee maker on by the main switch (A), it performs a “SELF DIAGNOSIS” cycle and then goes off. To turn it on again, press the On/off button (Aa). Instruction manual CM465 / CM465SS / CM465GM Please keep this instruction manual for future reference...
-
Page 13: Operation
• Y ou can stop the coffee from dispensing by pressing the ‘One cup of coffee deliver’ touch key (10) or ‘Two cup of coffee deliver’ touch key Instruction manual CM465 / CM465SS / CM465GM Please keep this instruction manual for future reference... - Page 14 Never remove the water tank when the appliance is dispen are removed. coffee. Otherwise, the appliance will not be able to make t Instruction manual CM465 / CM465SS / CM465GM Please keep this instruction manual for future reference coffee. If the appliance malfunctions, do not contact Capl...
- Page 15 Never remove the water tank when the appliance is dispensing coffee. Otherwise, the appliance will not be able to make the coffee. If the appliance malfunctions, do not contact Caple service straight away, first look at the troubleshooting guide. If this does not help, contact Caple customer service.
- Page 16 “Cleaning the brewing unit” section. Instruction manual CM465 / CM465SS / CM465GM Preparing hot water Please keep this instruction manual for future reference...
- Page 17 For a few seconds the display shows “PLEASE WAIT”. After that the appliance is ready to make coffee again and the last selected coffee setting appears on the display. Instruction manual CM465 / CM465SS / CM465GM Please keep this instruction manual for future reference...
- Page 18 (about 5°C). 4. Make sure the intake tube is correctly inserted in the rubber washer. Then replace the milk container lid. Instruction manual CM465 / CM465SS / CM465GM Please keep this instruction manual for future reference...
- Page 19 The appliance displays the message “CLEANING” above a progressive bar. You should not release the CLEAN button until the bar is complete indicating that cleaning is concluded. Instruction manual CM465 / CM465SS / CM465GM Please keep this instruction manual for future reference...
- Page 20 4. To change the quantity of coffee or frothed milk the appliance delivers automatically into the cup, proceed as described in the section “Changing the quantity of coffee and milk for cappuccino”. Instruction manual CM465 / CM465SS / CM465GM Please keep this instruction manual for future reference...
- Page 21 7. Press the touch key ‘OK’ (9) to confirm or the ‘Return’ touch key (3) to cancel the operation. 8. Press the ‘Return’ touch key (3) twice to exit the menu. Instruction manual CM465 / CM465SS / CM465GM Please keep this instruction manual for future reference...
- Page 22 15 minutes. See “Cleaning the nozzles and the milk container” for information on cleaning the milk container. EN 19 EN 19 Instruction manual CM465 / CM465SS / CM465GM Please keep this instruction manual for future reference...
-
Page 23: Using Menu Options
2. The language set appears on the display. Press the scroll touch keys until the desired language appears. When the desired language is displayed, confirm with the touch keys ‘OK’. Instruction manual CM465 / CM465SS / CM465GM Please keep this instruction manual for future reference... -
Page 24: Water Hardness
Confirm the selection with the touch key ‘OK’. The appliance is now programmed to provide the descaling warning when necessary, based on the actual hardness of the water. Instruction manual CM465 / CM465SS / CM465GM Please keep this instruction manual for future reference... -
Page 25: Setting The Coffee Temperature
SHUTOFF TIME” appears. Confirm the menu option with the touch key ‘OK’. 2. Select another switch-off time with the scroll touch keys. When the desired switch-off time is displayed, confirm it with the touch key ‘OK’. Instruction manual CM465 / CM465SS / CM465GM Please keep this instruction manual for future reference... -
Page 26: Carrying Out The Descaling
The appliance is now ready for use again and is back to the last coffee mode selected. clean water. Instruction manual CM465 / CM465SS / CM465GM Please keep this instruction manual for future reference Note: If the descaling cycle is interrupted before completion, the appliance continues to... - Page 27 2. The appliance performs an automatic rinse cycle (a little hot water runs out of the spouts and is collected in the drip tray beneath). MENU EXIT Instruction manual CM465 / CM465SS / CM465GM Please keep this instruction manual for future reference...
-
Page 28: Statistics
DEFAULT” appears. Confirm the menu option with the touch key ‘OK’. 2. The display shows “PLEASE CONFIRM”. 3. Confirm the menu option with the touch key ‘OK’. Instruction manual CM465 / CM465SS / CM465GM Please keep this instruction manual for future reference... -
Page 29: Setting The Clock
N O T E : This function does not automatically make coffee. It turns on the machine, runs the diagnostic check and readys the machine automatically to make coffee. Instruction manual CM465 / CM465SS / CM465GM Please keep this instruction manual for future reference... - Page 30 4. Press the touch key ‘OK’ to confirm. 5. Press the touch key ‘RETURN’ once to exit the function or twice to exit the menu. Instruction manual CM465 / CM465SS / CM465GM Please keep this instruction manual for future reference...
-
Page 31: Cleaning
The drip tray is fitted with a level indicator (red) showing the level of water it contains. Before the indicator protrudes from the cup tray, EN 27 the drip tray must be emptied and cleaned. Instruction manual CM465 / CM465SS / CM465GM Please keep this instruction manual for future reference... - Page 32 C L E A N I N G T H E P R E - G R O U N D C O F F E E F U N N E L › Check regularly (about once a month) that the pre-ground coffee funnel is not blocked. EN 28 Instruction manual CM465 / CM465SS / CM465GM Please keep this instruction manual for future reference...
- Page 33 If the brewing unit is difficult to insert, you must first adapt it to the right dimensions by pressing it forcefully from the bottom and top. EN 29 Instruction manual CM465 / CM465SS / CM465GM Please keep this instruction manual for future reference...
- Page 34 1. Turn the milk container lid clockwise then remove it. 2. Remove the milk spout (S) and intake tube (M). EN 30 Instruction manual CM465 / CM465SS / CM465GM Please keep this instruction manual for future reference...
- Page 35 Risk of scalding from steam and hot water escaping from the milk Warning! Risk of scalding from steam and hot water escaping from the milk dispenser pipe. dispenser pipe. Instruction manual CM465 / CM465SS / CM465GM Please keep this instruction manual for future reference...
-
Page 36: Messages
C O N TA I N E R very loud, this can mean that a small stone from the coffee beans has blocked the mill mechanism. Instruction manual CM465 / CM465SS / CM465GM Please keep this instruction manual for future reference... - Page 37 G E N E R A L A L A R M ! The inside of the machine is very dirty. machine still shows this message once it has been cleaned, please consult customer services. Instruction manual CM465 / CM465SS / CM465GM Please keep this instruction manual for future reference...
-
Page 38: Troubleshooting
‘Messages’ section. If no message is displayed, try to find a solution first by checking the points mentioned in the table below, or contact our Caple service department. FA U LT... - Page 39 Put the milk container correctly in place. in place. If the above table has not solved the problem please contact Caple Service by phone on 0117 938 7420 or by email service@caple.co.uk Instruction manual CM465 / CM465SS / CM465GM...
-
Page 40: Installation Instructions
If the cable is damaged or requires replacing, contact an authorised service centre only to avoid all risks. › You should personalise water hardness as soon as possible following the instructions. Instruction manual CM465 / CM465SS / CM465GM Please keep this instruction manual for future reference... - Page 41 5 6 0 m 5 5 0 5 0 m m i n m i n 8 0 m m i n . + - 1 560 mm Instruction manual CM465 / CM465SS / CM465GM Please keep this instruction manual for future reference...
- Page 42 • If the height of the appliance requires adjusting, use the spacer › If the height of the appliance requires adjusting, use the spacer disks provided.(4) disks provided. disks provided. EN 39 Instruction manual CM465 / CM465SS / CM465GM EN 39 Please keep this instruction manual for future reference...
- Page 43 Instruction manual CM465 / CM465SS / CM465GM Please keep this instruction manual for future reference...
-
Page 44: Caple Contact Details
Caple Service Fourth Way Avonmouth T: 0117 938 1900 Bristol E: service@caple.co.uk BS11 8DW www.caple.co.uk...
Need help?
Do you have a question about the CM465 and is the answer not in the manual?
Questions and answers