
Subscribe to Our Youtube Channel
Related Manuals for Caple CM465BG


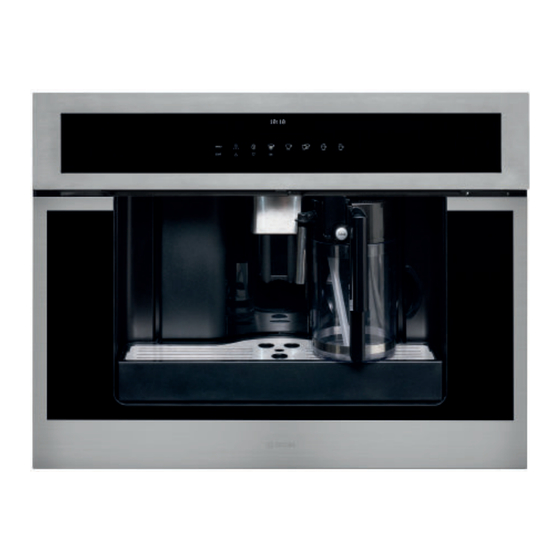
Summary of Contents for Caple CM465BG
- Page 1 S e n s e C o f f e e M a c h i n e I n s t r u c t i o n m a n u a l CM465 Contact Caple on 0117 938 7420 for spare parts or www.caple.co.uk...
-
Page 2: Table Of Contents
Using Menu Options Water Hardness Setting The Coffee Temperature Setting The Switch-Off Time Carrying Out The Descaling Statistics Resetting Settings Setting The Clock Cleaning Messages Troubleshooting Installation Instructions Caple Contact Details Instruction manual CM465 Please keep this instruction manual for future reference... -
Page 3: Introduction
2 to 3 years (after a maximum 8,000 cups). Servicing of your coffee machine is chargeable, and can be booked via email service@caple.co.uk or telephone 0117 938 7420. - Page 4 - Appliances with removable cord: avoid splashes of water on the power cord connector or socket at the back of the appliance. - Clean all the components thoroughly, taking particular care with parts in contact with the coffee and milk. - WARNING: Models with glass surfaces: do not use the appliance if the surface is cracked.
- Page 5 - By clients in hotels, motels and other residential type environments. - Bed and breakfast type environments. - If the plug or power cable is damaged, it must be replaced by customer services only to avoid all risk. - This appliance can be used by children aged from 8 years and above if they have been given supervision or instruction concerning use of the appliance in a safe way and if they understand the hazard involved.
- Page 6 - Do not lean or hang on the machine when it has come out of the cabinet and do not place heavy or unstable objects on the machine. - Surfaces marked with this symbol become hot during use. - This appliance can be installed over a built-in oven if the latter is fitted with a cooling fan at the rear (maximum microwave power: 3kW).
- Page 7 - Maintenance and repair work must be made only by authorised Caple service technicians. Installation and repair work that is carried out by unauthorised technicians may endanger you. - It is dangerous to alter or modify the specifications of the appliance in any way.
- Page 8 Registration can also be completed online by visiting www.caple.co.uk. Ensure you keep your warranty card safe, you may need to show it to Caple Service together withproof of purchase.If you fail to show your warranty card you will incur all repair charges.
-
Page 9: Product Overview
P R O D U C T O V E R V I E W A. Main switch N. Milk container: (Aa) - On / Off button N1. Cover (removable) N2. Slider CAFFELATTE/CAPPUCCINO B. Handles (removable) C. Nozzle N3. CLEAN button D. -
Page 10: Control Panel
C O N T R O L PA N E L MENU EXIT 2. ‘MENU’ to activate or deactivate menu 3. ‘RETURN’ to exit the selected mode 4. ‘Rinse’ 5. ‘SCROLL’ to scroll forwards through the menu and display 6. ‘COFFEE STRENGTH’ to select strength or preground 7. -
Page 11: Preparation
P R E PA R A T I O N on the 'Product overview' section The first time you switch on the appliance with the main switch (see ‘A’ on the 'Product overview' section on the ‘Product overview’ section) and every time that it is plugged in, the appliance executes a “SELF-DIAGNOSIS”... - Page 12 6. Place a cup under the hot water spout (If the hot water spout is not inserted, the appliance displays “INSERT WATER SPOUT”. The appliance displays: “HOT WATER PRESS OK”. Press the touch key ‘OK’ (9) and after a few seconds a little water comes out of the spout. 7.
-
Page 13: Operation
O P E R A T I O N P R E PA R I N G C O F F E E ( U S I N G C O F F E E B E A N S ) continually ›... - Page 14 › If the coffee only comes out in drips or not at all, the knob for setting the grind level must be turned by one position clockwise (see “Setting the grind level” ). Turn one click at a time until the coffee is delivered satisfactorily. ›...
- Page 15 Never remove the water tank when the appliance is dispensing coffee. Otherwise, the appliance will not be able to make the coffee. If the appliance malfunctions, do not contact Caple service straight away, first look at the troubleshooting guide. If this does not help, contact Caple customer service.
- Page 16 S E T T I N G T H E G R I N D L E V E L If coffee is dispensed too quickly or too slowly (in drips), you can change the grind level. Only change the grind level during the milling process. Otherwise, the coffee machine may be damaged.
- Page 17 N OT E S : 1. Never introduce pre-ground coffee when the machine is off as it could spread through the inside of the appliance. 2. Never add more than 1 measure, otherwise the appliance will not make the coffee. 3.
- Page 18 C H A N G I N G T H E Q U A N T I T Y O F H OT W AT E R The machine is set by default to automatically delivery 150ml of hot water. To change these quantities, proceed as follows: 1.
- Page 19 5. Position the frothed milk regulator (N2) between the words NO froth CAPPUCCINO and CAFFELATTE printed on the milk container lid. "Denser" froth 6. The quantity of froth can be adjusted by moving the regulator frothed milk regulator "Less dense" froth towards the word CAFFELATTE for a denser froth.
- Page 20 When the CLEAN button is released, the function stops. After cleaning, remove the milk container and place in the refrigerator. The milk should not be left out of the refrigerator for more than 15 minutes. 4. To change the quantity of coffee or frothed milk the appliance delivers automatically into the cup, proceed as described in the section “Changing the quantity of coffee and milk for cappuccino”.
- Page 21 C H A N G I N G T H E Q U A N T I T Y O F M I L K A N D C O F F E E F O R C A P P U C C I N O The appliance is set by default to automatically deliver a standard cappuccino.
- Page 22 C L E A N I N G T H E N O Z Z L E S Clean the nozzles on the milk container every time after heating milk or making cappuccino. Otherwise, remains of milk may set hard. 1.
-
Page 23: Using Menu Options
U S I N G M E N U O P T I O N S The menu options are used to change and save the appliance’s factory settings, start programmes and look up information. They are: › Language › Temperature ›... -
Page 24: Water Hardness
W A T E R H A R D N E S S A “PLEASE DESCALE!” message is displayed after the appliance has been operated for a factory set period of time, calculated on the basis of the maximum quantity of lime scale which may be contained in the water used. -
Page 25: Setting The Coffee Temperature
S E T T I N G T H E C O F F E E T E M P E R A T U R E You can choose between three temperature levels. The coffee temperature levels are defined as follows: ›... -
Page 26: Carrying Out The Descaling
For subsequent descaling operations, descaling solutions can be purchased from www.caple.co.uk. Make sure that any splashes from the descaling product do not come into contact with surfaces that are sensitive to acids, such as marble, limestone and ceramic. - Page 27 8. Empty the container under the hot water nozzle and put it back under the hot water nozzle. 9. Take out the water tank and fill it with clean water. 10. Put the water tank back in place. The display shows: “RINSING”. 11.
-
Page 28: Statistics
S T A T I S T I C S You can look up the following information values: › Total number of coffees made with the appliance up to that point › Number of descaling procedures carried out › Number of cappuccinos made ›... -
Page 29: Setting The Clock
S E T T I N G T H E C L O C K 1. Press the touch key ‘MENU’ to enter the menu and then the scroll touch keys until “SET CLOCK” is displayed. 2. Press the touch key ‘OK’. 3. - Page 30 B U Z Z E R This activates or deactivates the buzzer emitted by the machine each time an icon is pressed or an accessory is inserted/removed. N OT E : The buzzer is active by default. 1. Press the touch key ‘MENU’ to enter the menu and then the scroll touch keys until “BUZZER”...
-
Page 31: Cleaning
C L E A N I N G Before performing any cleaning operations, the machine must be turned off by pressing the main switch and unplugged from the mains power supply. Never immerse the coffee maker in water. C L E A N I N G T H E C O F F E E M A C H I N E Do not use solvents or abrasive detergents to clean the coffee maker. - Page 32 TO R E M O V E T H E D R I P T R AY: 1. Open the service door. 2. Remove the drip tray and the waste coffee container. 3. Clean the drip tray and waste coffee container. 4.
- Page 33 C L E A N I N G T H E I N S I D E O F T H E C O F F E E M A K E R › Check regularly (about once a week) that the inside of the appliance is not dirty.
- Page 34 7. Once inserted, make sure the two coloured buttons have snapped back out, otherwise the service door cannot be closed. › The two coloured buttons are correctly snapped out (A). › The two coloured buttons are not snapped out (B). 8.
- Page 35 C L E A N I N G T H E M I L K C O N TA I N E R Always clean the tubes inside the milk container when you prepare milk. If there is still milk in the container, do not leave it out of the refrigerator for longer than strictly necessary.
-
Page 36: Messages
M E S S A G E S M E S S A G E M E A N I N G W H AT TO D O The water tank is empty or not Fill the water tank and insert it according properly in place. - Page 37 M E S S A G E M E A N I N G W H AT TO D O The descaling programme must be carried out Shows that the coffee machine is P L E A S E D E S C A L E ! as soon as possible (see “Carrying out the encrusted with limescale.
-
Page 38: Troubleshooting
‘Messages’ section. If no message is displayed, try to find a solution first by checking the points mentioned in the table below, or contact our Caple service department. FAU LT... - Page 39 Put the milk container correctly in place. in place. If the above table has not solved the problem please contact Caple Service by phone on 0117 938 7420 or by email service@caple.co.uk Instruction manual CM465...
-
Page 40: Installation Instructions
I N S T A L L A T I O N I N S T R U C T I O N S W A R N I N G S : › After removing the packaging, make sure the product is complete and undamaged. If in doubt, do not use the appliance and contact your retailer. - Page 41 B U I L D I N G I N Please check the minimum dimensions necessary for the proper installation of the appliance. The coffee machine must be installed in a column unit, which must in turn be fixed to the wall. m i n 5 6 0 m 5 5 0...
- Page 42 › Position the appliance on the rail, making sure the pins are correctly inserted in the housing, then fix it with the screws supplied. › If the height of the appliance requires adjusting, use the spacer disks provided.(4) Instruction manual CM465 Please keep this instruction manual for future reference...
- Page 43 Instruction manual CM465 Please keep this instruction manual for future reference...
-
Page 44: Caple Contact Details
Caple Service Fourth Way Avonmouth T: 0117 938 1900 Bristol E: service@caple.co.uk BS11 8DW www.caple.co.uk...
Need help?
Do you have a question about the CM465BG and is the answer not in the manual?
Questions and answers