
Related Manuals for Caen RFID Hex R1290I


Summary of Contents for Caen RFID Hex R1290I
- Page 1 TECHNICAL INFORMATION MANUAL Revision 2 – 29 April 2019 R1290I Multipurpose RAIN RFID Reader with POE...
- Page 2 All you need to start using your reader in a few clicks! Scope of Manual The goal of this manual is to provide the basic information to work with the Hex R1290I Multipurpose RAIN RFID Reader with POE. This manual refers to distribution firmware release of the reader ≥ 1.5.0.
- Page 3 The information contained herein has been carefully checked and is believed to be accurate; however, no responsibility is assumed for inaccuracies. CAEN RFID reserves the right to modify its products specifications without giving any notice; for up to date information please visit www.caenrfid.com.
- Page 4 RESET THE READER ................................48 FIRMWARE UPGRADE ............................... 49 TECHNICAL SPECIFICATIONS .............................. 52 Technical Specification Table..............................52 REGULATORY COMPLIANCE............................... 54 FCC Compliance ..................................54 CE Compliance ....................................54 RoHS EU Directive ..................................55 Hex R1290I CE Declaration of Conformity ..........................56 Index - Hex R1290I Technical Information Manual...
-
Page 5: Table Of Contents
Fig. 1.5: Hex R1290I Accessories ................................11 Fig. 4.1: Hex R1290I Web Interface ...............................24 List of Tables Tab. 1.1: Hex R1290I Top Panel LEDs and Buttons ..........................7 Tab. 1.2: Hex R1290I Interfaces Panel ..............................8 Tab. 1.3: Hex R1290I GPIO Panel ................................8 Tab. -
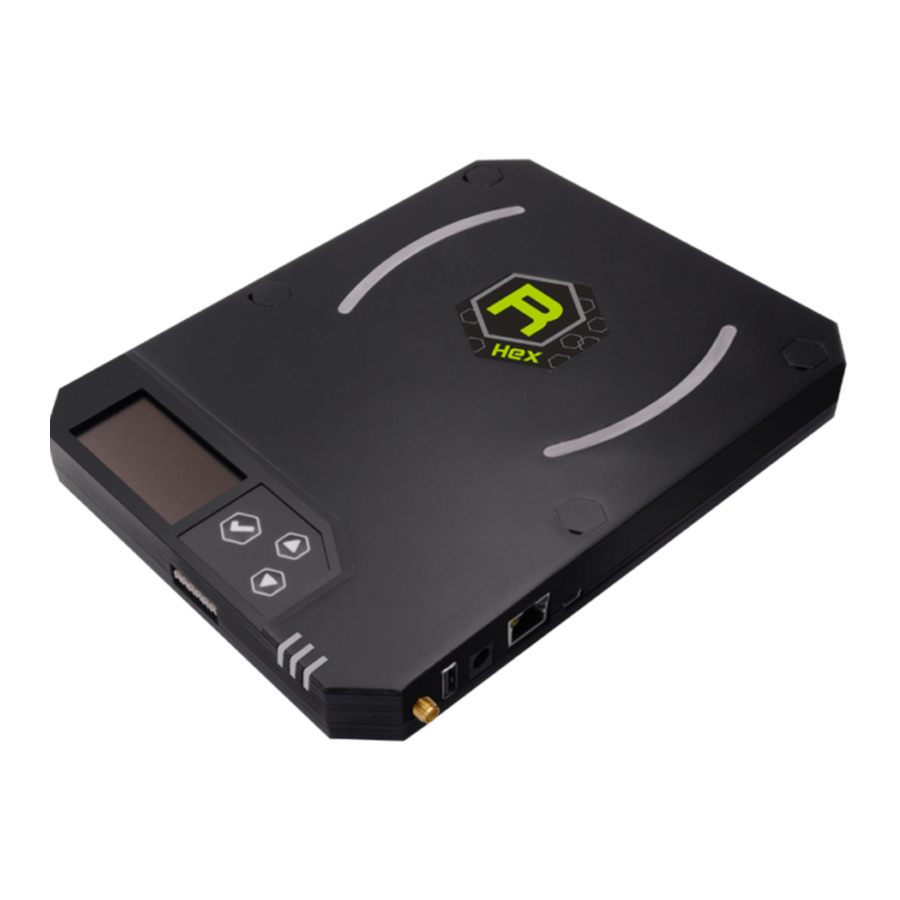
Page 6: Fig. 1.1: Hex Reader (Model R1290I)
(see § Ordering Options page 11): 865.600÷867.600 MHz (ETSI EN 302 208 v3.1.1) (Mod. R1290IE) 902÷928 MHz (FCC part 15.247) (Mod. R1290IU) INTRODUCTION - Hex R1290I Technical Information Manual... -
Page 7: Fig. 1.2: Hex R1290I Top Panel
Scroll down Power LED Power On – Green LED Communication LED Communication activity – Blinking Yellow LED Tag-ID LED Tag Detection – Blinking Red LED Tab. 1.1: Hex R1290I Top Panel LEDs and Buttons INTRODUCTION - Hex R1290I Technical Information Manual... -
Page 8: Fig. 1.3: Hex R1290I Interfaces Panel
Ethernet 10/100/1000BASE-T (RJ45) / POE standard IEEE 802.3af USB device USB 2.0 Hi-Speed Device port Tab. 1.2: Hex R1290I Interfaces Panel GPIO Panel Fig. 1.4: Hex R1290I GPIO Panel Description 5Vout GPI0 RELE1I RELE1O Tab. 1.3: Hex R1290I GPIO Panel INTRODUCTION - Hex R1290I Technical Information Manual... - Page 9 A connection between GND ground and RTN signal is also required. It is possible to verify the correct functioning of the circuit by connecting the reader to the CAEN RFID Easy Controller software, Tools-I/O management section: ۷...
- Page 10 Output signal The RELE1I and RELE1O pins are the terminals of a normally open dry contact. By connecting to the CAEN RFID Easy Controller Software, Tools-I/O management section, you can close the contact by removing the check from the Status box related to GPIO 1 and then press the Apply button.
-
Page 11: Fig. 1.5: Hex R1290I Accessories
No. 1 Power supply Fig. 1.5: Hex R1290I Accessories Ordering Options Code Description WR1290IEXAAA R1290IE - Hex - POE multipurpose UHF RFID Reader (ETSI) Reader WR1290IUXAAA R1290IU - Hex - POE multipurpose UHF RFID Reader (FCC) INTRODUCTION - Hex R1290I Technical Information Manual... - Page 12 The reader can be configured in three different profiles: EASY2READ (factory default): choosing this option you select the CAEN RFID easy2read communication protocol. Select this option in order to control the reader using the CAEN RFID Easy Controller Application SDK (Software Development Kits) library.
- Page 13 PC as an ELMO GMAS (Gadget Serial) device. Look at the COM port number (COM5 in this example): Download the latest version of the Easy Controller software from the Hex R1290I web page, Downloads section and install it. GETTING STARTED - Hex R1290I Technical Information Manual...
- Page 14 Launch the Easy Controller by double clicking on its icon: On the main screen click on File → Connect. A Connection window will open. Select the connection type (RS232) and specify the serial port (COM5 in this example): GETTING STARTED - Hex R1290I Technical Information Manual...
- Page 15 10. Place a tag on the reader, click on Start Inventory and see the tag information displayed in the main window: For more information on the CAEN RFID Easy Controller for Windows application usage, please refer to the relevant technical information manual: you can download it from the...
- Page 16 Warning: If your reader is powered on and you want to access the configuration menu, you must first turn off the reader (disconnect the power supply), wait about 10 seconds, turn on the reader again (connect the power supply) and follow the procedure described above. CONFIGURATION MENU VIA READER - Hex R1290I Technical Information Manual...
-
Page 17: Tab. 3.1: Hex R1290I Configuration Menu
The complete structure of the Hex R1290I configuration menu is the following: HW Rev Model INFO MAC Address RF Model RF Regulation Back Inet IP Address Subnet Mask NETWORK Gateway DNS Server Back Profile RFID Easy2Rd opt. HID opt. QUIT Tab. - Page 18 NETWORK submenu. Back: select “back” with the up or down button and press the trigger button to return to the main menu. CONFIGURATION MENU VIA READER - Hex R1290I Technical Information Manual...
- Page 19 Easy2read (factory default) is the CAEN RFID easy2read communication protocol that permits to control the reader using the CAEN RFID Easy Controller Application or the SDK (Software Development Kit) library. For details on the use of the easy2read profile please refer to § Easy2read Profile chapter page 37.
-
Page 20: Tab. 3.2: Conducted Power- Radiated Power
Proximity: through this option, you can enable/disable the proximity sensor (see § Fig. 1.2: Hex R1290I Top Panel page 7). By default, the Proximity Sensor is disabled. To modify the value, press the trigger button until the desired value is shown (enabled/disabled), then press the up or down button to select “back” and the trigger button to return to the RFID submenu. -
Page 21: Tab. 3.3: Conducted Power- Radiated Power
“back” and the trigger button to return to the HID opt. Proximity: through this option, you can enable/disable the proximity sensor (see § Fig. 1.2: Hex R1290I Top Panel page 7). By default, the Proximity Sensor is disabled. To modify the value, press the trigger button until the desired value is shown (enabled/disabled), then press the up or down button to select “back”... - Page 22 “back” and the trigger button to return to the HID opt. The external antenna is not supplied and can be attached to the reader using the External Antenna Port (see § Fig. 1.3: Hex R1290I Interfaces Panel and Tab. 1.2: Hex R1290I Interfaces Panel page 8). ...
- Page 23 Plug an Ethernet cable (not provided) into your computer and connect the other end of the Ethernet cable to the reader. By default, the Hex R1290I is configured with the static IP address 192.168.0.2. If your private network matches the default network configuration of the reader you can connect to it. Otherwise you can either change the network configuration of the reader (see §...
-
Page 24: Fig. 4.1: Hex R1290I Web Interface
When the connection with the reader is established, the main screen of the web interface is displayed: Fig. 4.1: Hex R1290I Web Interface The Web Interface menu options are the following: NETWORK SYSTEM RFID INFO CONFIGURATION USING THE WEB INTERFACE - Hex R1290I Technical Information Manual... - Page 25 Click on SYSTEM option in the Web Interface panel and then click on the “Reboot” button. After reboot, the new settings are active. CONFIGURATION USING THE WEB INTERFACE - Hex R1290I Technical Information Manual...
- Page 26 Warning: To save the changes click on the “SAVE” button. Note that all changes made via the web interface are active only after the reboot of the reader. Click on the “Reboot” button. After reboot, the new settings are active. CONFIGURATION USING THE WEB INTERFACE - Hex R1290I Technical Information Manual...
- Page 27 Easy2read (factory default) is the CAEN RFID easy2read communication protocol that permits to control the reader using the CAEN RFID Easy Controller Application or the SDK (Software Development Kit) library. For details on the use of the easy2read profile please refer to § Easy2read Profile chapter page 37.
-
Page 28: Tab. 4.1: Conducted Power- Radiated Power
Tab. 4.1: Conducted power- radiated power Note that, when the reader is configured in the easy2read profile, to set the power you can also use the CAEN RFID Easy Controller Application or the SetPower function of the SDK (Software Development Kit) library. - Page 29 Using the Easy controller Software: for more details see § Inventory on button press page 43. Using the API: for more details see the EventInventoryTag Method (the event trigger flag, bit 5, set to 1) in the CAEN RFID API Reference Manual downloadable from Hex R1290I web...
-
Page 30: Tab. 4.2: Conducted Power- Radiated Power
80% 100% The correspondent values are: Conducted Power Radiated Power ETSI Radiated Power FCC Percentage (mW) (mW e.r.p.) (mW e.r.p.) 100% Tab. 4.2: Conducted power- radiated power CONFIGURATION USING THE WEB INTERFACE - Hex R1290I Technical Information Manual... - Page 31 The external antenna is not supplied, the user can attached his own external antenna to the reader using the External Antenna Port (see § Fig. 1.3: Hex R1290I Interfaces Panel and Tab. 1.2: Hex R1290I Interfaces Panel page 8).
-
Page 32: Tab. 4.3: Epc Code Parameters
'9', '{', '|', '}', '!', '"', '#', '$', '(', ')', '*', '+', ',', '.', '/', ':', ';', '=', '?', '@', '[', ']', '^', '_', '-' By default the postfix string is \r\n\ (see the following table Tab. 4.4: Escape Sequences supported page 33). CONFIGURATION USING THE WEB INTERFACE - Hex R1290I Technical Information Manual... -
Page 33: Tab. 4.4: Escape Sequences Supported
Click on SYSTEM option in the Web Interface panel and then click on the “Reboot” button. After reboot, the new settings are active. CONFIGURATION USING THE WEB INTERFACE - Hex R1290I Technical Information Manual... - Page 34 CAEN434445464748494A4B4C- ASCII FORMAT: ABCDEFGHIJKL OFFSET LENGTH GROUP SEPARATOR PREFIX POSTFIX Result: -B-C-D-E-F-G OFFSET LENGTH GROUP SEPARATOR PREFIX POSTFIX Result: -DE:FG:HI- OFFSET LENGTH GROUP SEPARATOR PREFIX POSTFIX CAEN Result: TagABCDEFGHIJKLCAEN CONFIGURATION USING THE WEB INTERFACE - Hex R1290I Technical Information Manual...
-
Page 35: Tab. 4.5: Conducted Power- Radiated Power
80% 100% The correspondent values are: Conducted Power Radiated Power ETSI Radiated Power FCC Percentage (mW) (mW e.r.p.) (mW e.r.p.) 100% Tab. 4.5: Conducted power- radiated power CONFIGURATION USING THE WEB INTERFACE - Hex R1290I Technical Information Manual... - Page 36 MAC Address: the reader MAC address Distro Release: the distribution firmware release of the reader RF Model: the internal RF module model, R1270C RF Regulation: the reader regulation (e.g. FCCUS) CONFIGURATION USING THE WEB INTERFACE - Hex R1290I Technical Information Manual...
- Page 37 Plug an Ethernet cable (not provided) into your computer and connect the other end of the Ethernet cable to the reader. By default, the Hex R1290I is configured with the static IP address 192.168.0.2. If your private network matches the default network configuration of the reader you can connect to it. Otherwise you can either change the network configuration of the reader (see §...
- Page 38 On the main screen click on File → Connect. A Connection windows will open. Select the Connection Type (TCP/IP Connection) and type the Hex IP address into the TCP/IP Address box (default value is 192.168.0.2). Then click on Connect: CONFIGURATION USING THE WEB INTERFACE - Hex R1290I Technical Information Manual...
- Page 39 Place a tag on the reader, click on start inventory and see the tag information displayed on the main window: For more info on the use of the Easy Controller, please refer to the CAEN RFID Easy Controller Software Technical...
- Page 40 PC is running a Windows version older than Windows 10, otherwise the installation of the driver is not necessary), the reader is detected by the PC as an ELMO GMAS (Gadget Serial) device. Look at the COM port number (COM5 in this example): CONFIGURATION USING THE WEB INTERFACE - Hex R1290I Technical Information Manual...
- Page 41 On the main screen click on File → Connect. A Connection window will open. Select the Connection Type (RS232) and specify the RS232 port (COM 5 in this example): CONFIGURATION USING THE WEB INTERFACE - Hex R1290I Technical Information Manual...
- Page 42 Place a tag on the reader, click on start inventory and see the tag information displayed on the main window: For more information on the CAEN RFID Easy Controller for Windows application usage, please refer to the relevant user manual: you can download it from the...
- Page 43 Activation via reader Configuration Menu (see § RFID paragraph page 19) or via Web Interface (see § RFID paragraph page 27). Activation via Easy Controller Software: Connect the reader to the Easy Controller software. On the main menu of the application, click on Settings → Options: CONFIGURATION USING THE WEB INTERFACE - Hex R1290I Technical Information Manual...
- Page 44 Click on Apply. Click on Start Inventory on the main window: Now you can press the trigger button to perform a tag inventory. For more information on the CAEN RFID Easy Controller for Windows application usage, please refer to the relevant technical information manual: you can download it from the...
- Page 45 Launch a text editing application (or any other application accepting keyboard input). Put tags in the reader read range. On the text editing window you will see the EPCs of the tags. CONFIGURATION USING THE WEB INTERFACE - Hex R1290I Technical Information Manual...
- Page 46 Tab. 4.3: EPC Code parameters page 32 you can customize the text of the EPC code displayed on the screen. Warning: Note that, when configured in the HID profile, the Hex reader cannot be controlled using the CAEN RFID Easy Controller Application. CONFIGURATION USING THE WEB INTERFACE - Hex R1290I Technical Information Manual...
- Page 47 "Code" option of the § Custom section page 32. To use the uploaded script, the user needs a Java Virtual Machine. Contact the CAEN RFID support to obtain the Virtual Machine and the guideline to its use.
- Page 48 Connect the reader to the Web Interface (for more info see § CONFIGURATION USING THE WEB INTERFACE page 23), select the SYSTEM option and then click on the “Reboot” button. Wait for the reboot to be completed. RESET THE READER - Hex R1290I Technical Information Manual...
- Page 49 Warning: The firmware upgrade is a factory reset: any scripts uploaded to the reader are deleted. The Hex R1290I firmware upgrade can be performed only via USB. In order to upgrade the firmware follow the steps described below: Download the Hex Upgrade Tool and the firmware image file at the...
- Page 50 Click on the “Upgrade Firmware” button and wait for the upgrade process to be completed. In the window you will see the message “Status: upgrading”. At the end of procedure, if the upgrade has been successfully performed, you will see the message “Status: ready”: FIRMWARE UPGRADE - Hex R1290I Technical Information Manual...
- Page 51 Turn off the reader (disconnect the power supply), wait about 10 seconds and then turn on the reader again (connect the power supply). Now the reader is ready to work with the new firmware upgraded. FIRMWARE UPGRADE - Hex R1290I Technical Information Manual...
-
Page 52: Tab. 10.1: Hex R1290I Technical Specifications
POE standard IEEE 802.3af (12,95W) IP Rating IP30 Operating Temperature -10 °C to +55 °C (W)220 x (L)170 x (H)25mm Dimensions (8.66 x 6.69 x 0.98 inch Weight 475g Tab. 10.1: Hex R1290I Technical Specifications TECHNICAL SPECIFICATIONS - Hex R1290I Technical Information Manual... - Page 53 Warning: The RF settings must match the operating country/region to comply with local laws and regulations. The usage of the reader in different countries/regions from the one in which the device has been sold is not allowed. TECHNICAL SPECIFICATIONS - Hex R1290I Technical Information Manual...
- Page 54 Any changes or modification not approved by CAEN RFID could void the user’s authority to operate the equipment. The device shall be used such that a minimum separation distance of 20cm is maintained between the reader and user's/nearby people's body.
- Page 55 RoHS EU Directive The Hex R1290I RFID reader is compliant with the EU Directive 2011/65/CE on the Restriction of the Use of certain Hazardous Substances in Electrical and Electronic Equipment (RoHS2). REGULATORY COMPLIANCE - Hex R1290I Technical Information Manual...
- Page 56 R1290I CE DECLARATION OF CONFORMITY Hex R1290I CE Declaration of Conformity CAEN RFID Srl Via Vetraia, 11 55049 Viareggio (LU) Italy Tel.: +39.0584.388.398 Fax: +39.0584.388.959 Mail: info@caenrfid.com Web site: www.caenrfid.com herewith declare under our own responsibility that the product: Code:...
-
Page 57: Hex R1290I Fcc Grant
R1290I FCC GRANT Hex R1290I FCC Grant...
Need help?
Do you have a question about the Hex R1290I and is the answer not in the manual?
Questions and answers