Table of Contents
Advertisement
Quick Links
Advertisement
Table of Contents

Subscribe to Our Youtube Channel
Related Manuals for IMV ImaGo


Summary of Contents for IMV ImaGo
- Page 1 Instruction manual Your complete animal imaging solution...
-
Page 2: Safety Instructions
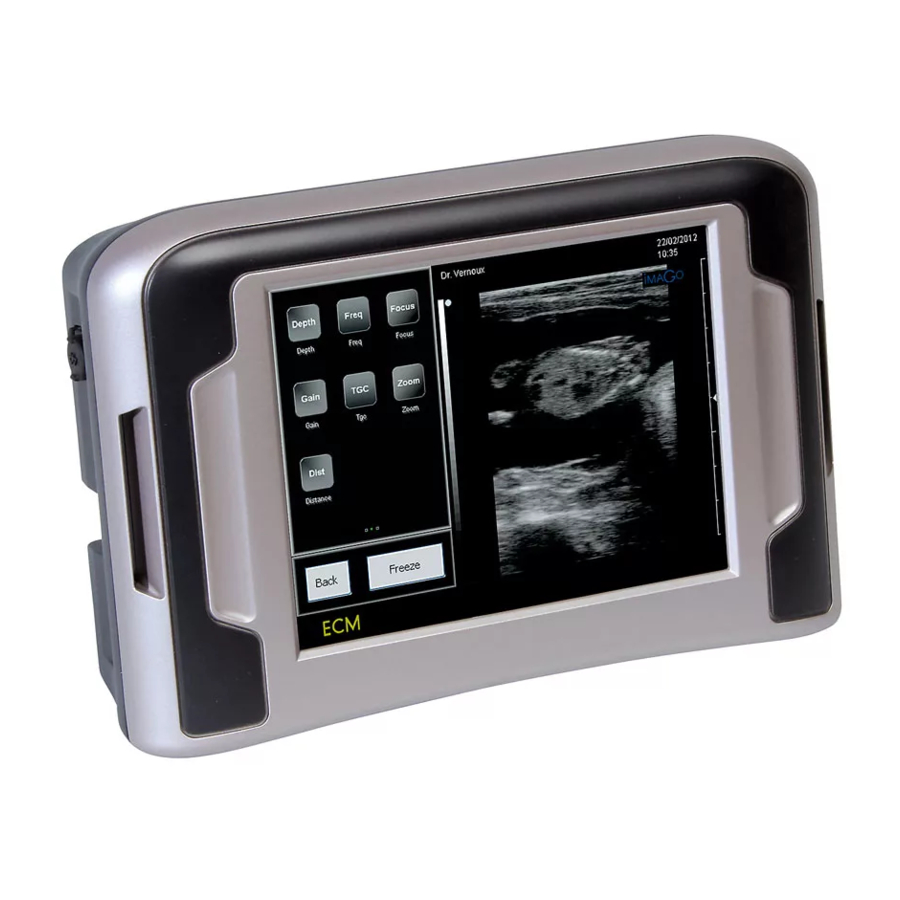
Only supplied power cord can be used to power the system. To back left of the scanner with the connector pointing upwards. Turn start the ImaGo, ensure a probe is connected and press the power the locker in the middle of the connector with slight pressure to switch on the right side of device. - Page 3 (below right) other functions are available. To return to homepage, press freeze again. 3.1.2 Normal Interface After turning the scanner on, 3 pages are available; you always start on page 2 (below, center) as default setting. Current page www.imv-imaging.com | 3...
- Page 4 3. Scanner menus When image is frozen, 2 pages are available: Current page 3.2 Keyboard function 3.2.1 Simplified Interface Live scanning Freeze menu Gain: press + to Settings: access to user’s set increase the gain and – to decrease it. Review: to vizualise images Depth: press + to and clips saved.
- Page 5 Dual: Splits the screen. Press select to switch from one side to the other. You can freeze the image on one side and take measurements. Settings: Enter user settings Exit: If image is live, press exit. If image is frozen, click freeze and exit. www.imv-imaging.com | 5...
- Page 6 Keypad: Activate Azerty/Querty keypad Right-Handed/Left-Handed: Reverse screen depending on preference Energy Save: Screen deactivates after 20s inactivity when using BUGs. Only available in large screen mode. Reset: Reset the configuration system of IMAGO with factory settings...
- Page 7 (if any). • Exit: exit the User Protocol menu and return to the Settings menu. To activate a user protocol, select the Application, click on Patient, select Exam and choose the protocol for the examination. www.imv-imaging.com | 7...
- Page 8 3. Scanner menus Page 2 Page 3 Depth: Access vertical cursor to change depth depending Dynamic range: This function allows you to create a harder or smoother picture. Press the Dynamic key and chose on current probe and application. your dynamic range on the vertical cursor. The lower the Frequency: Choice of 3 frequencies depending on probe dynamic is the harder is the picture and the higher the you are using.
- Page 9 Store C: Store cineloop that has just been created. picture or choose an annotation that you have previously recorded in the settings menu. Settings: Preset the machine to your own convenience, and have access to the user protocols. www.imv-imaging.com | 9...
- Page 10 3. Scanner menus CINELOOP : Replay the last seconds of scanning that have just been done (124 pictures with linear and convex probes ; 62 pictures with sectorial probe). Play the cineloop. Pause the cineloop. These keys allow the user to skip forward and back through the cineloop Return back to review mode with the list of cineloops.
-
Page 11: Connection Of Peripherals
Instruction manual 4. Connection of peripherals The Imago equipment can be connected to several peripherals: Turn Charge Battery Power Composite On/Off Charge Supply For Video Port Goggles Bluetooth Port 5. Cleaning and disinfection instructions 5.1 Cleaning and disinfection of the device 5.2 Cleaning and disinfection of probes... -
Page 12: Service Centres
5. Service centres Your BUG does not contain user serviceable parts. Servicing must be done by IMV imaging authorised service centres. Your BUG device is sealed, do not try to take it apart. Your equipment should be returned periodically to an IMV imaging service centre. - Page 13 Instruction manual www.imv-imaging.com | 13...
- Page 14 Contact us now www.imv-imaging.com +44 (0) 1506 460023 info@imv-imaging.com facebook.com/IMVimaging twitter/IMVimaging © IMV imaging, V.1 July 2019/ Instruction manual ImaGo Your complete animal imaging solution...
Need help?
Do you have a question about the ImaGo and is the answer not in the manual?
Questions and answers