Table of Contents
Advertisement
Available languages
Available languages
Quick Links
FOR YOUR SAFETY
This sprayer operates with liquid under pressure.
Failure to observe CAUTIONS and follow instructions
for use and maintenance can cause tank, hose or
other parts to become corroded, weakened, and/or
burst. This can result in SERIOUS INJURY or PROPERTY
DAMAGE from forcible ejection of parts or high-
pressure discharge of spray material.
DO NOT USE ANY FLAMMABLES OR BOILING LIQUIDS
IN THIS SPRAYER as it is not designed nor intended
for such use. Some spray materials can ignite or
explode. Do not spray in an enclosed space, near
an open flame such as found in a BBQ grill or water
heater, near an electric motor or open switch, or
any source of heat. DO NOT SMOKE while spraying.
Use of flammables could result in SERIOUS INJURY
or PROPERTY DAMAGE from unintended ignition or
explosion. DO NOT USE ANY CAUSTICS OR ACIDS IN
THIS SPRAYER, since these can damage or weaken the
sprayer and its parts, resulting in SERIOUS INJURY or
PROPERTY DAMAGE. Keep out of reach from children
and pets. Always read and follow directions on the
spray material container, including the need for
protective clothing. BEFORE USING YOUR SPRAYER,
thoroughly INSPECT both inside and outside of the
sprayer and DO NOT PRESSURIZE sprayer if tank, hose
or other parts appear to be damaged, discolored,
brittle, excessively soft or loose. DO NOT PRESSURIZE
WITH ANY MECHANICAL DEVICE such as an air
compressor, since this can create dangerous pressure
and bursting of parts and result in SERIOUS INJURY.
Wear long-sleeved shirt, pants, gloves, goggles or
similar protective clothing when spraying.
LIMITED WARRANTY
H. D. Hudson Manufacturing Company warrants
to the original consumer purchaser of this product
at retail that it is free from defects in materials and
workmanship for the period of 1 year from the
original date of purchase. This warranty does not
apply to damage to the product resulting from
accident, misuse, neglect, alteration, modification,
tampering, or failure to follow instructions supplied
with the product. This warranty does not cover
normal wear and tear of o-rings or seals, and
the warranty shall be void if the product is used
commercially. If the product or any part of it should
malfunction within the warranty period,
call 1-800-977-7293. Valid only in North America.
SERVICE AND MAINTENANCE
Visit www.hdhudson.com/FAQS
Clean and dry your sprayer after every use to greatly
prolong its useful service life. Many spray materials
will harden if left in the sprayer and plug up the
nozzle, shut-off valve or supply tube. The soft parts,
O-rings and gaskets, will ultimately wear out and need
replacing, just like the oil filter on your car, for example.
How often they need replacing depends on how much
you spray, the spray materials you use and whether
or not the sprayer is regularly cleaned after use. Call
1-800-9-SPRAYER or visit www.hdhudson.com to
obtain genuine Hudson replacement parts. If you leave
your sprayer in the garage over Winter, particularly in
northern areas, the soft parts may dry out and need
servicing before you use your sprayer for the first time
in the Spring.
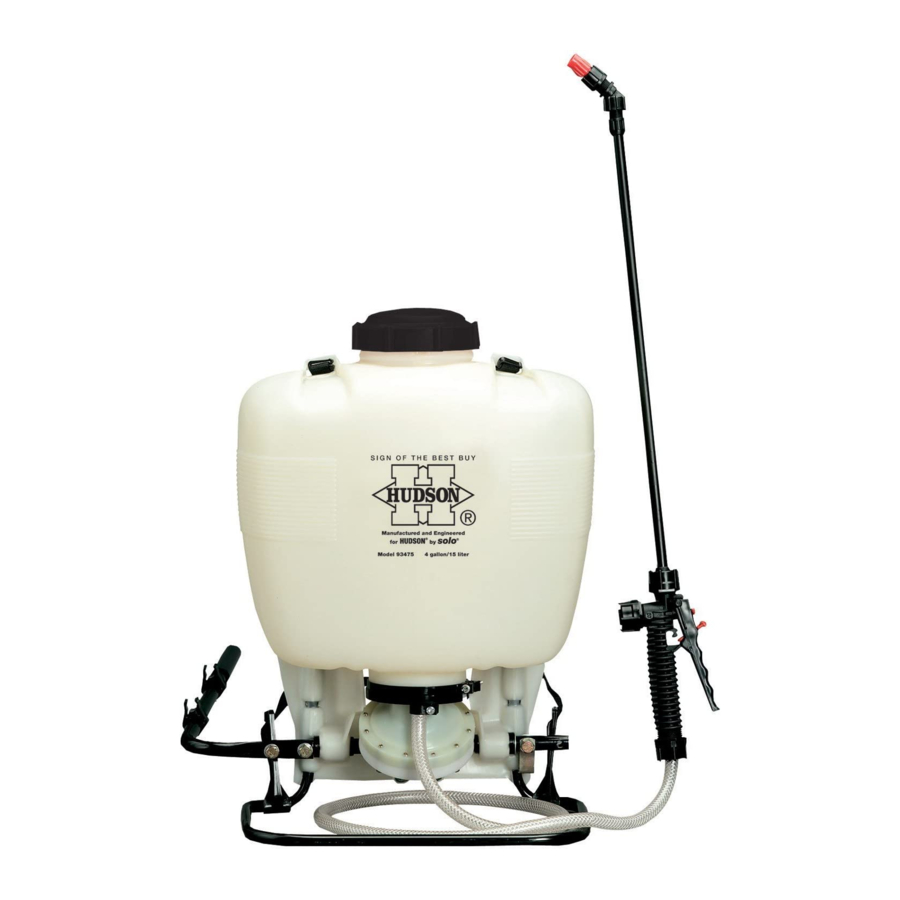
871-936 93475 Diaphragm Pump Bak-Pak® Sprayer Instructions
If you have any questions or concerns, or missing parts,
Do not return sprayer to the store!
1-800-9-SPRAYER
Call our hotline:
Common maintenance questions:
HOW TO ASSEMBLE
Bak-Pak® Assembly Video
@ hdhudson.com
Pump Lever Installation:
All hardware necessary for pump lever installation is
included with the sprayer. The pump lever (C) should
be installed as follows: place lever handle (C) onto the
shaft (A). Align bolt holes and install the two bolts (E)
and washers (F); then tighten. To install pump lever
on the opposite side, remove the stop plate (D) and
washer; install the pump lever as above. The stop plate
(D) should be mounted on the inner bolt hole with the
closed end of the stop plate pointing downward on the
opposite side of the pump shaft.
A
A
C
F
Removing Plastic Adjustable Nozzle
Unscrew the nozzle cap (1) from the nozzle body (3).
This is best accomplished while the retaining nut (2)
is fastened tightly to the elbow (5). Next, unscrew the
retaining nut (2). Push the nozzle body (3) out of the
retaining nut (2). The filter with gasket (4) will come out
with the body. To reinstall the nozzle, reverse the
above instructions.
Assembly Instructions for Wand
1. Insert wand into shut-off valve as shown.
2. Tighten the screw cap clockwise onto the shut-off valve.
1. Nozzle
2. Retaining Nut
3. Nozzle Body
4. Filter with Gasket
5. Elbow
Gauge Mount
871-936 Instruction
©2012 H. D. Hudson Manufacturing Company
(1-800-977-7293)
www.hdhudson.com/FAQS
View Online
B
D
F
E
E
Screw Cap
➔
➔
Wand
O-Ring
➔
Install Wand
➔
➔
Shut-Off
➔
See maintenance and instructional
videos on the internet:
www.hdhudson.com/instructional-videos
93475 Diaphragm Pump Bak-Pak® Sprayer
Manufactured and Engineered for Hudson
SHOULDER STRAP INSTALLATION:
The top of the shoulder straps are pre-attached to
the sprayer by means of a buckle. The lower end of
the straps are attached by fastening the strap hooks
to the metal frame between where frame exits the
plastic tank and where it makes a bend.
FILLING:
Mix the spray formula and the proper volume of
water in a separate container. Pour the mix through
the filter basket in the tank opening. This keeps
debris from entering sprayer. Add 2 or 3 gallons
of spray formula mix. Pump the sprayer handle to
prime the pump and fill the pressure cylinder. The
volume of liquid in formula mix tank will appear to
decrease as the pressure cylinder is filled. Add the
remaining formula mix to the tank. Remember that
it's not necessary to completely fill the sprayer tank
each time. Mix only the amount needed to get the
job done. Always read and follow manufacturers'
instructions printed on the product label. This
can save money and help prevent crop and
environmental damage.
by
®
Advertisement
Table of Contents

Related Manuals for Hudson Solo Bak-Pak 93475


Summary of Contents for Hudson Solo Bak-Pak 93475
- Page 1 ➔ environmental damage. 1-800-9-SPRAYER or visit www.hdhudson.com to Gauge Mount obtain genuine Hudson replacement parts. If you leave Shut-Off ➔ your sprayer in the garage over Winter, particularly in northern areas, the soft parts may dry out and need servicing before you use your sprayer for the first time in the Spring.
-
Page 2: Operating Features
OPERATING FEATURES: Nozzles - Your Hudson® Sprayer is supplied with nozzle arrangements to provide a variety of spray patterns. Item Application Flat spray nozzle Row treatment Jet stream nozzle Spot & longer range Jet stream nozzle and Shrubs and bushes... -
Page 3: Maintenance And Storage
Fax: (312) 644-7989 note that text and illustrations of this manual are not to be Web: www.hdhudson.com considered binding and do not constitute a basis for legal or www.facebook.com/hudsonsprayers other claims. www.youtube.com/hudsonsprayer 871-936 Instruction ©2012 H. D. Hudson Manufacturing Company... -
Page 4: Installation Instructions
Ensure that all pressure is released by locking the shut-off valve in the open position. Once a repair is completed, fill the unit with clean water, pressurize, and check for leaks. If the sprayer leaks, DO NOT USE. Repair leaks and recheck. Figure 7 871-936 Instruction ©2012 H. D. Hudson Manufacturing Company... -
Page 5: Para Su Seguridad
1-800-9-SPRAYER o visite hdhudson.com para obtener Cierre ➔ piezas de repuesto originales de Hudson. Si deja el rociador en el garaje durante el invierno, en especial en el norte, las piezas blandas pueden secarse y necesitar mantenimiento antes de que use el rociador por primera vez en primavera. - Page 6 FUNCIONAMIENTO: Boquillas - El aspersor Hudson incluye adaptaciones de boquilla para entregar una variedad de patrones de aspersión. Artículo Aplicación Boquilla de aspersión plana Tratamiento sin refinar Jet stream nozzle Punto y rango más largo Boquilla de corriente a chorro y...
- Page 7 Por lo www.youtube.com/hudsonsprayer tanto, tenga en cuenta que ese texto e ilustraciones de este manual no se consideran vinculantes y no constituyen una base para reclamos legales o de otro tipo. 871-936 Instrucciones ©2012 H. D. Hudson Manufacturing Company...
- Page 8 Una vez completada la reparación, llene la unidad con agua limpia, presurice y revise que no haya filtraciones. Si el aspersor gotea, NO LO USE. Repare las filtraciones y vuelva a revisar. Figura 7 871-936 Instrucciones ©2012 H. D. Hudson Manufacturing Company...
-
Page 9: Garantie Limitée
GARANTIE LIMITÉE GARANTIE LIMITÉE H. D. Hudson Manufacturing Company garantit INSTALLATION DES BRETELLES: à l’acheteur initial de ce produit chez un détaillant que le produit La partie supérieure des bretelles est fixée d’avance... - Page 10 CARACTÉRISTIQUES D’UTILISATION : Buses : votre pulvérisateur Hudson® est fourni avec des dispositifs de buses permettant d’obtenir différents types de jets. Article Application Buse à jet plat Traitement en rangée Buse à débit Endroits précis et longue portée Buse à débit et Arbustes et buissons Hélice = jet conique creux...
- Page 11 Toutefois, veuillez prendre note que le texte et les illustrations de ce manuel ne sont pas contractuels et ne constituent pas un fondement valable pour une créance légale ou autre. 871-936 Instructions ©2012 H. D. Hudson Manufacturing Company...
-
Page 12: Directives D'installation
Une fois les réparations terminées, remplissez le pulvérisateur avec de l’eau propre, mettez-le sous pression et vérifiez s’il y a des fuites. Si le pulvérisateur fuit, NE L’UTILISEZ PAS. Réparez les fuites et revérifiez. Figure 7 871-936 Instructions ©2012 H. D. Hudson Manufacturing Company...
Need help?
Do you have a question about the Solo Bak-Pak 93475 and is the answer not in the manual?
Questions and answers