Advertisement
Manufactured and Engineered
for
IF YOU HAVE ANY QUESTIONS OR CONCERNS, OR ARE
MISSING PARTS, DO NOT RETURN SPRAYER TO THE STORE!
PLEASE CALL OUR CONSUMER
HOTLINE AT 1-800-9-SPRAYER
Visit us on the Internet: www.hdhudson.com
E-mail: ladybug@hdhudson.com
Instruction 871-931
maintenance tip:
SAFETY PRECAUTIONS:
Before using sprayer with chemicals, fill sprayer with fresh water to assure that you have it properly assembled; pressurize and
1.
practice spraying. Also, check for any leaks at this time. When thoroughly familiar with the sprayer operation, follow normal operating
procedures.
2. Ensure all pressure in the sprayer is relieved by locking the shut-off valve in the open position.
3. Avoid contact with chemicals.
4. Always wear rubber gloves, safety goggles and appropriate protective clothing.
5. Work in a well ventilated area.
6. Individuals should be trained in the proper use of this sprayer, chemical handling procedures, and first aid/emergency
care. Where training is not available, individuals should study and follow the procedures detailed in this manual.
WARNING:
Chemicals can be harmful to individuals and the environment if improperly used. In addition, some chemicals are caustic, corrosive or
poisonous and should be avoided. Read warnings and chemical manufacturers' instructions. Hudson high density polyethylene sprayers
are fitted with Viton
seals which are resistant to a wide variety of agricultural and household chemicals; however, care should be
®
exercised to ensure that sprayer components are clean, functioning properly, and in a good state of repair before and during use. If
in doubt about a particular chemical, check with the manufacturer. If you suspect or observe indications that the material may be
unsafe in a Hudson sprayer...STOP. DO NOT USE OR APPLY CHEMICAL. ALWAYS WEAR RUBBER GLOVES, GOGGLES, AND APPROPRIATE PROTECTIVE
CLOTHING!
•
Read and follow operating instructions.
•
Do not fill with, use, or spray flammable materials.
•
Do not modify sprayer.
•
Never spray in the direction of humans, animals or property which might be injured or damaged by spray formula.
•
Do not use disinfectants, solvents or impregnating agents unless first tested to ensure they are not harmful to the environment or
sprayer.
•
Do not use liquids with a temperature above 110°F (43°C).
•
Wear appropriate protective clothing to prevent contact with chemical agents.
•
Rinse and clean sprayer thoroughly after using. Disposal of contaminated rinse should be in accordance with applicable ordinances.
Observe the precautionary instructions of the chemical manufacturer.
•
DO NOT USE ANY ACID (INCLUDING CITRUS) OR CAUSTIC
•
Remember that a sprayer with liquid is a significant amount of weight (8 lbs. per gallon). Use caution when bending, leaning or
walking. Bend at the knees rather than the waist.
•
During sprayer operation, the pressure cylinder (#4400240) contains compressed air and liquid. Compressed air and liquid under
pressure are inherently dangerous. Before making adjustments on sprayers fitted with a pressure regulating valve body (#4074323)
or control knob (#4074344) located on the pressure cylinder or any other repair or inspection of any sprayer, be sure to relieve
pressure through the shut-off valve and wand.
If you are missing parts, instructions or have questions, DO NOT take this unit back to the store.
STOP!
Call 1-800-9SPRAYER
solo
®
®
by
(1-800-977-7293)
Cap gasket is prelubricated for improved sealing.Occasional lubrication is recommended.
. Hudson will send the missing parts/information to you promptly.
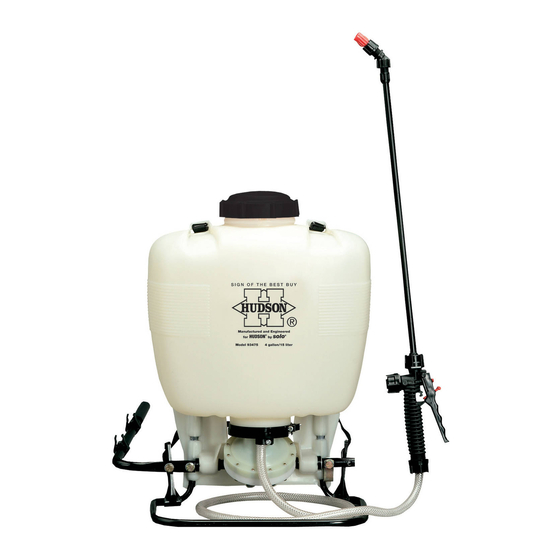
Operator's Manual & Parts List
MODEL 93425 and 93475
93425
Piston
Model 93425 and 93475
CHEMICALS (INCLUDING BLEACH).
93475
Diaphragm
Advertisement
Table of Contents

Related Manuals for Hudson 93425


Summary of Contents for Hudson 93425
- Page 1 If you suspect or observe indications that the material may be unsafe in a Hudson sprayer...STOP. DO NOT USE OR APPLY CHEMICAL. ALWAYS WEAR RUBBER GLOVES, GOGGLES, AND APPROPRIATE PROTECTIVE CLOTHING! •...
- Page 2 Screw Cap 1. Nozzle ➔ 2. Retaining Nut ➔ Wand 3. Nozzle Body 4. Filter with Gasket O-Ring ➔ Install Wand ➔ 5. Elbow ➔ Gauge Mount Shut-Off ➔ Removing plastic adjustable nozzle Unscrew the nozzle cap (1) from the nozzle body (3). This is best accomplished while the retaining nut (2) is fastened tightly to the elbow (5).
-
Page 3: Spray Tip Assembly
Nozzles - Your Hudson sprayer is supplied with nozzle arrangements to provide a variety of spray patterns. Item Application Part # Flat spray nozzle Row treatment 4074263 Jet stream nozzle Spot & longer range 4074755 Jet stream nozzle and... - Page 4 Note: If you use a wettable powder in your 93425 sprayer, be sure it is thoroughly If you find that your sprayer mixed in the formula solution. Immediately after use, be...
-
Page 5: Limited Warranty
LIMITED WARRANTY H. D. Hudson Manufacturing Company warrants to the original purchaser only that this product will continue to function as intended if used in accordance with operating instructions (under NORMAL CONSUMER USE) for one year. If the product fails to function as intended—DO NOT RETURN IT TO THE STORE—call our CONSUMER SERVICE HOTLINE AT 1-800-9-SPRAYER (toll free) for fast service. -
Page 6: Spare Parts List
spaRe paRts list Deluxe models only ECS Model Only PLEASE NOTE THAT REPLACEMENT PARTS ARE SOLD AS KITS AND NOT INDIVIDUALLY. (SEE PAGE 5 FOR KIT LISTINGS) PLEASE CALL OUR CUSTOMER CARE LINE AT 1-800-9SPRAYER. -
Page 7: Installation Instructions
InStAllAtIon InStRuCtIonS PISTON PUMP REPAIR KIT ( # 0610407-K) Tools needed for kit installation: 6mm Allen Head Wrench, Flat Screwdriver, 11mm Wrench or Cresent Wrench, Long Nose Pliers, Hammer, 13mm Socket or Wrench, T-25 Torx Screwdriver, Grease or Petroleum Jelly, 2X4 Piece of wood 18” long 1. - Page 8 InStAllAtIon InStRuCtIonS Diaphragm Pump Repair Kit ( # 0610406-K) Tools needed for kit installation: 6mm Allen Head Wrench, Flat Screwdriver, 11mm Wrench or Cresent Wrench, Long Nose Pliers, Hammer, 13mm Socket or Wrench, T-25 Torx Screwdriver, Grease or Petroleum Jelly, 2X4 Piece of wood 18” long 1.
Need help?
Do you have a question about the 93425 and is the answer not in the manual?
Questions and answers