Reflex Variomat Touch VS 2-1/35 Operating Manual
Hide thumbs
Also See for Variomat Touch VS 2-1/35:
- Original operating manual (552 pages) ,
- Original operating manual (608 pages)

Subscribe to Our Youtube Channel
Related Manuals for Reflex Variomat Touch VS 2-1/35


Summary of Contents for Reflex Variomat Touch VS 2-1/35
- Page 1 Variomat Touch 09.2020 - Rev. A VS 2-1/35 /60 /75 /95 VS 2-2/35 /60 /75 /95 Operating manual Original operating manual...
-
Page 2: Table Of Contents
Hydraulic connection ............10 13 Annex ................. 26 7.3.5 Fitting the thermal insulation ..........11 13.1 Reflex Customer Service ..............26 7.3.6 Fitting the level sensor ............. 11 13.2 Conformity and standards ..............26 Switching and make-up variants ............12 13.3... -
Page 3: Notes On The Operating Manual
Reflex Winkelmann GmbH accepts no liability for any damage resulting from can occur. failure to observe the information in this operating manual. In addition to the... -
Page 4: Description Of The Device
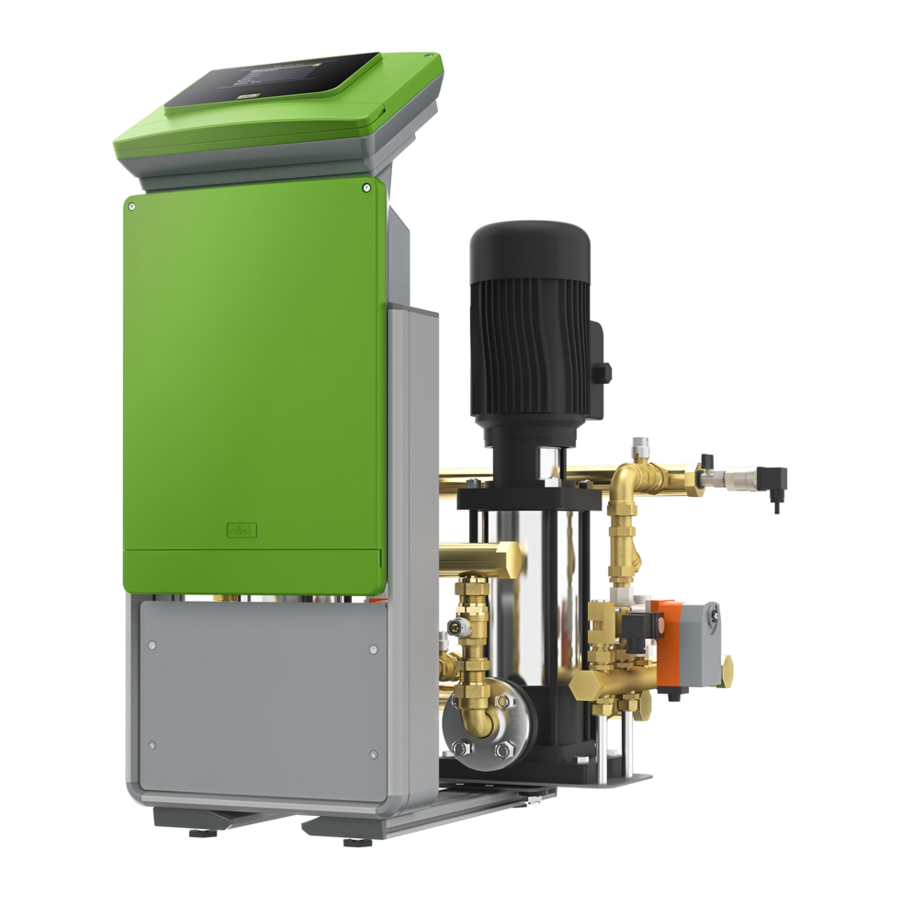
Main switch Degassing valve "DV" Control unit "VF" secondary vessel • Pump(s) "VF" primary vessel • "Reflex Control Touch" Feed and drain cock "FD" controller "VE" ventilation "LIS" level sensor Heating system WV Make-up valve "MAG" expansion vessel PIS Pressure sensor 4 —... -
Page 5: Scope Of Delivery
• All digital inputs and outputs can be set freely as option. Settings • "LIS" pressure pick-up to be made by Reflex Customer Service, see chapter 13.1 – Plastic sleeve with operating manual. "Reflex Customer Service" on page 26 Variomat Touch — 09.2020 - Rev. A... -
Page 6: Technical Data
I/O module (optional expansion module) Technical data Device controller with I/O module Housing Plastic housing Width (W): 340 mm Height (H): 233.6 mm Depth (D): 77 mm Relay outputs of the I/O "Control Touch" controller Weight: 2.0 kg module* RS-485 connection Permissible operating temperature: -5 °C –... -
Page 7: Setting The Module Address
All digital inputs and outputs can be set freely as option. The Use DIP switches 1 – 4 to set the module address. setting is carried out by Reflex Customer Service, see Proceed as follows: chapter 13.1 "Reflex Customer Service" on page 26 Pull out the mains plug of the I/O module. -
Page 8: Replacing The Fuses
Technical data Replacing the fuses Tanks DANGER Risk of electric shock! Risk of serious injury or death due to electric shock. Some parts of the main board may still carry 230 V voltage even with the device physically isolated from the 230 V power supply. •... -
Page 9: Installation Conditions
The load fastening points at the tanks must be used only as installation resources. For add-on components, proceed as follows: Install the Reflex Exvoid (2) at the connection of the corresponding vessel. Remove the protective cap from the degassing valve. Use the compression fitting to install the pressure compensation elbow (1) Execution for ventilation at the vessels. -
Page 10: Tank Installation
Installation 7.3.3 Tank installation ATTENTION Damage due to improper installation Additional device stresses may arise due to the connection of pipes or system equipment. • Ensure that pipes are connected from the device to the system without them being stressed or strained. •... -
Page 11: Fitting The Thermal Insulation
• Reflex make-up systems such as Reflex Fillset are designed for If required, install a diaphragm expansion vessel MAG ≥ 35 litres (Reflex N, for make-up lines with a flow rate < 1 m³/h. example). It reduces the switching frequency and can be also used in the individual protection of the heat generators. -
Page 12: Switching And Make-Up Variants
• Use flexible hoses to connect the primary vessel and the first secondary • If you don't connect a Reflex Fillset upstream, use an "ST" dirt trap with a vessel. mesh size ≥ 0.25 mm for the make-up. –... -
Page 13: Electrical Connection
M16 or M20, for example. • When using Reflex Fillsoft softening systems, always install the Fillset Thread all cables to be connected through the cable glands. Impulse. Connect all cables as shown in the terminal diagrams. -
Page 14: Terminal Plan, Operating Unit
Installation Terminal Terminal Signal Function Wiring Signal Function Wiring number number X0/3 +24 V (supply) X0/1 0 – 10 V (correcting PV 2 overflow valve (motor ball Factory- X0/2 variable) valve), only in VS 2-2 provided User X0/3 Supply 400 V, maximal 20 A supplied 0 –... -
Page 15: Rs-485 Interface
Note! • The electrical connection has been created according to applicable If required, please contact the Reflex Customer Service for the protocol national and local regulations. of the RS-485 interface, details of the connections and information about the accessories offered. -
Page 16: Modifying The Controller's Start Routine
If null balancing is not successfully completed, you cannot commission the device. In this case, please contact Customer Prior to commissioning, read the operating manual in full and check for Service, see chapter 13.1 "Reflex Customer Service" on page 26 . proper assembly. 16 — English... -
Page 17: Filling The Tanks With Water
Commissioning Venting the pump CAUTION Risk of burns Escaping hot medium can cause burns. • Maintain a sufficient distance from the escaping medium. • Wear suitable personal protective equipment (safety gloves and goggles). Press "OK" to conclude the start routine. Vent the "PU"... -
Page 18: Operation
Operation Manual mode Note! The commissioning process is now concluded. Use: For testing and maintenance tasks. Notice! Start: The "ST" dirt trap in the "DC" degassing line must be cleaned after the expiry of the continuous degassing time at the latest, see chapter 11.1.1 "Cleaning the dirt trap"... -
Page 19: Summer Operation
Controller Summer operation "OK" button "Automatic mode" button • Confirm/acknowledge • For continuous Use: input. operation. In summer • Browse in the menu. "Up" and "Down" scroll bar "Set-up menu" button Start: • "Scroll" in the menu. • For setting parameters. Switch off degassing via the customer menu. -
Page 20: Service Menu
• Vessel • Volume 10.3.2 Service menu • Weight • Diameter This menu is protected with a password. It can be accessed only by the Reflex • Position Customer Service. – Position in % • Software version 10.3.3 Default settings The device controller is shipped with the following default settings. -
Page 21: Setting Degassing Programmes
Controller Customer menu Parameter Setting Comment Language Display language. Minimum operating 1.8 bar see chapter 8.2 "Variomat pressure "P " switching points" on page 15 . Next maintenance 12 months Time left to the next due maintenance. Volt-free contact Press "(012) Degassing programme". Make-up –... -
Page 22: Messages
Message causes can be eliminated by the operator or a specialist workshop. If Interval degassing this is not possible, contact the Reflex Customer Service. The interval degassing is stored for continuous operation as default setting in the Customer menu. Degassing is continuous during an interval. An idling time ... -
Page 23: Maintenance
"Quit" exceeded. • Time interval for replacement of the softening cartridge exceeded. I/O module fault • I/O module defective. Inform Reflex Customer Service. • Connection between option card and controller faulty. • Option card defective. EEPROM defective • EEPROM defective. -
Page 24: Maintenance Schedule
Note! primary vessel. Arrange for maintenance tasks must be carried out only by specialist Vent the "PU“ pump, see chapter 8.5 "Venting the pump" on page 17 . personnel or Reflex Customer Service. Switch to Automatic mode. Note! Clean all other installed dirt traps (in the Fillset, for example). -
Page 25: Inspection
2 of the Directive supply. Verify that the main circuit board is voltage-free. 2014/68/EC, applicable in strict compliance with the Reflex Installation, Operation and Maintenance Manual. Disconnect the secondary tank (if provided) on the water side from the system and the primary tank. -
Page 26: Annex
For questions about our products Telephone number: +49 (0)2382 7069-9546 Monday to Friday 8:00 to 16:30 13.2 Conformity and standards Device conformity declarations are available on the Reflex homepage. www.reflex-winkelmann.com/konformitaetserklaerungen Alternatively, scan the QR code: 13.3 Guarantee The respective statutory guarantee regulations apply. - Page 27 Annex Installation and commissioning certificate - This device has been installed and commissioned in accordance with the instructions provided in the operating manual. The settings in the controller match the local conditions. Typ / Type: Fabr. Nr. / Serial-No. Variomat Touch — 09.2020 - Rev. A English —...
- Page 28 Reflex Winkelmann GmbH Gersteinstraße 19 59227 Ahlen, Germany +49 (0)2382 7069-0 +49 (0)2382 7069-9546 www.reflex-winkelmann.com...
Need help?
Do you have a question about the Variomat Touch VS 2-1/35 and is the answer not in the manual?
Questions and answers