Table of Contents
Advertisement
Quick Links
Advertisement
Table of Contents

Related Manuals for Altec ATP3000


Summary of Contents for Altec ATP3000
- Page 1 User manual Version 1.0...
-
Page 2: Table Of Contents
Adjustment knob ......................29 Print head pressure adjustment knob ....................29 Ribbon tension adjustment knob module ..................30 Mechanism fine adjustment to avoid ribbon wrinkles ..............31 +31(0)78 - 615 20 33 +32(0)2 - 270 34 88 info@altec.nl info@altec.be www.altec.nl www.altec.be... - Page 3 7.3.2 Alert..............................55 7.3.3 Group ............................... 56 7.3.4 Setup ..............................56 7.3.5 Manual name........................... 56 Troubleshooting ......................57 Maintenance ....................... 60 10 Support (FAQ) ......................61 +31(0)78 - 615 20 33 +32(0)2 - 270 34 88 info@altec.nl info@altec.be www.altec.nl www.altec.be...
-
Page 4: Introduction
Information in this document is subject to change without notice and does not represent a commitment on the part of ALTEC industrial identification B.V. No part of this manual may be reproduced or transmitted in any form or by any means, for any purpose other than the purchaser’s personal use, without the expressed written permission of ALTEC industrial identification B.V. - Page 5 Any changes or modifications not expressly approved by the grantee of this device could void the user's • authority to operate the equipment. Hazardous moving parts, keep fingers and other body parts away. • +31(0)78 - 615 20 33 +32(0)2 - 270 34 88 info@altec.nl info@altec.be www.altec.nl www.altec.be...
-
Page 6: Product Features
Ribbon end sensor (Transmissive) • • Head open sensor 1.1.2 Optional features The printer offers the following optional features: Bluetooth 4.2 module Wi-Fi module kit Peel-off module Cutter module +31(0)78 - 615 20 33 +32(0)2 - 270 34 88 info@altec.nl info@altec.be www.altec.nl www.altec.be... -
Page 7: General Specifications
Ribbon core inside diameter 25,4 mm (1”) ID core Ribbon width 40 mm ~ 110 mm Wind direction Ink coated outside wound / Ink coated inside wound +31(0)78 - 615 20 33 +32(0)2 - 270 34 88 info@altec.nl info@altec.be www.altec.nl www.altec.be... -
Page 8: Media Specifications
25,4 ~ 152,4 mm Label length (cutter mode) 25,4 ~ 1.016 mm Black mark Min. 8 mm (W) x Min. 2 mm (H) Gap height Min. 2 mm +31(0)78 - 615 20 33 +32(0)2 - 270 34 88 info@altec.nl info@altec.be www.altec.nl www.altec.be... -
Page 9: Product Overview
Please check if the following items are included: ATP-3000 printer unit • Quick installation sheet • Power cord • USB interface cable • +31(0)78 - 615 20 33 +32(0)2 - 270 34 88 info@altec.nl info@altec.be www.altec.nl www.altec.be... -
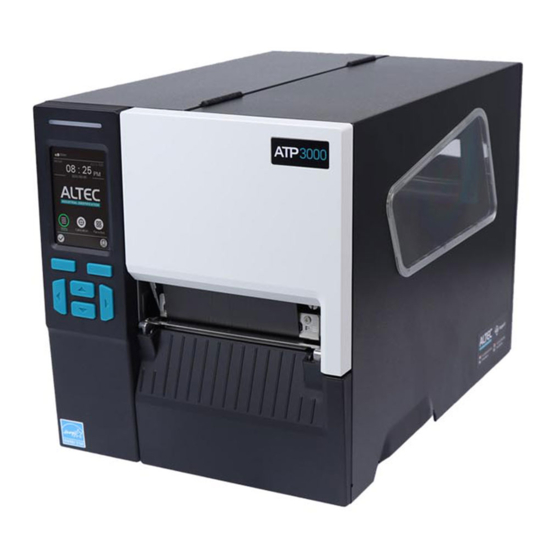
Page 10: Printer Overview
Printer overview 2.2.1 Front view LED indicator LCD touch display Front panel buttons Media view window Label exit Media cover handle +31(0)78 - 615 20 33 +32(0)2 - 270 34 88 info@altec.nl info@altec.be www.altec.nl www.altec.be... -
Page 11: Interior View
External label entrance Damper Ribbon end sensor Print head Front label guide Platen roller Black mark sensor ( shown as Gap sensor ( shown as ⯆ ) +31(0)78 - 615 20 33 +32(0)2 - 270 34 88 info@altec.nl info@altec.be www.altec.nl www.altec.be... -
Page 12: Rear View
2.2.3 Rear view External label entrance RS-232C interface Power switch Ethernet interface USB interface Power cord socket USB host +31(0)78 - 615 20 33 +32(0)2 - 270 34 88 info@altec.nl info@altec.be www.altec.nl www.altec.be... -
Page 13: Operator Control
Operator control Touch screen Printer status Firmware version Time & Date ETH 192.168.100.131 Ethernet IP address Icons Keys +31(0)78 - 615 20 33 +32(0)2 - 270 34 88 info@altec.nl info@altec.be www.altec.nl www.altec.be... -
Page 14: Led Indication And Keys
Indication Wi-Fi device is ready (function) Ethernet is connected Bluetooth device is ready (option) Remaining amount of ribbon Security lock TPH cleaning +31(0)78 - 615 20 33 +32(0)2 - 270 34 88 info@altec.nl info@altec.be www.altec.nl www.altec.be... - Page 15 Tap an item to open/use it Selected (green) Scroll up Scroll down Return Up page Enter Note: for LCD Menu panel - please refer to section for more details. +31(0)78 - 615 20 33 +32(0)2 - 270 34 88 info@altec.nl info@altec.be www.altec.nl www.altec.be...
-
Page 16: Power-On Utilities
Sensor calibration Release (Gap / Black mark sensor) Self-test Release (and enter dump-mode) Factory default Release Bline calibration Release Gap calibration Release READY (Skip AUTO.BAS) Release +31(0)78 - 615 20 33 +32(0)2 - 270 34 88 info@altec.nl info@altec.be www.altec.nl www.altec.be... -
Page 17: Setup
Note: Please switch OFF printer power switch prior to plug in the power cord to printer power jack. +31(0)78 - 615 20 33 +32(0)2 - 270 34 88 info@altec.nl info@altec.be www.altec.nl www.altec.be... -
Page 18: Loading The Ribbon
Loading the ribbon Open the printer right side cover. Install the ribbon onto ribbon supply spindle and install paper core onto ribbon rewind spindle. +31(0)78 - 615 20 33 +32(0)2 - 270 34 88 info@altec.nl info@altec.be www.altec.nl www.altec.be... - Page 19 Thread ribbon below the ribbon guidebar through ribbon sensor slot as the loading path shown here. Stick the ribbon leader onto the paper core. Keep the ribbon flat and without wrinkle. +31(0)78 - 615 20 33 +32(0)2 - 270 34 88 info@altec.nl info@altec.be www.altec.nl www.altec.be...
- Page 20 3-5 circles until the ribbon is smooth, properly stretched and wrinkle-free. Close the print head mechanism by pushing down the both sides of the print head release lever. Ribbon loading path +31(0)78 - 615 20 33 +32(0)2 - 270 34 88 info@altec.nl info@altec.be www.altec.nl www.altec.be...
-
Page 21: Remove Used Ribbon
Remove used ribbon Break the ribbon between ribbon guide plate and the ribbon rewind spindle. Slide the ribbon off to release the ribbon on the ribbon rewind spindle. +31(0)78 - 615 20 33 +32(0)2 - 270 34 88 info@altec.nl info@altec.be www.altec.nl www.altec.be... -
Page 22: Loading Media
Place the media roll on the label supply spindle and use label roll guard to fix it. +31(0)78 - 615 20 33 +32(0)2 - 270 34 88 info@altec.nl info@altec.be www.altec.nl www.altec.be... - Page 23 The media sensor position is movable, please make • sure the gap or black mark is at the location where media gap/black mark will pass through for sensing. +31(0)78 - 615 20 33 +32(0)2 - 270 34 88 info@altec.nl info@altec.be www.altec.nl www.altec.be...
- Page 24 Set media sensor type and calibrate the selected sensor. Note Please calibrate the gap/black mark sensor when changing media. +31(0)78 - 615 20 33 +32(0)2 - 270 34 88 info@altec.nl info@altec.be www.altec.nl www.altec.be...
-
Page 25: Loading The Fanfold/External Media
Please refer to section 4.4.1 step 4-8 for loading media. Note Please calibrate the gap/black mark sensor when changing media. Loading path for fan-fold labels +31(0)78 - 615 20 33 +32(0)2 - 270 34 88 info@altec.nl info@altec.be www.altec.nl www.altec.be... -
Page 26: Loading Media In Peel-Off Mode (Optional)
Open print head release lever, pull approximately 650 mm of the label through the front of the printer. Remove several labels to leave liner. +31(0)78 - 615 20 33 +32(0)2 - 270 34 88 info@altec.nl info@altec.be www.altec.nl www.altec.be... - Page 27 Insert the securing clip on media rewind spindle. Note The media rewind spindle can also install paper roll to wind the media on media rewind spindle. +31(0)78 - 615 20 33 +32(0)2 - 270 34 88 info@altec.nl info@altec.be www.altec.nl www.altec.be...
- Page 28 Close the print head release lever and press the FEED button to test. +31(0)78 - 615 20 33 +32(0)2 - 270 34 88 info@altec.nl info@altec.be www.altec.nl www.altec.be...
-
Page 29: Loading Media In Cutter Mode (Optional)
Push the Print head release lever to open print head mechanism. Lead the media through the cutter paper opening. Close the print head mechanism and press the FEED button to test. +31(0)78 - 615 20 33 +32(0)2 - 270 34 88 info@altec.nl info@altec.be www.altec.nl www.altec.be... -
Page 30: Adjustment Knob
Therefore, it may require adjusting pressure to get the best print quality. +31(0)78 - 615 20 33 +32(0)2 - 270 34 88 info@altec.nl info@altec.be www.altec.nl www.altec.be... -
Page 31: Ribbon Tension Adjustment Knob Module
Therefore, it may require to adjust the ribbon tension adjustment knob to avoid wrinkle and get the best print quality. Ribbon tension adjustment knob +31(0)78 - 615 20 33 +32(0)2 - 270 34 88 info@altec.nl info@altec.be www.altec.nl www.altec.be... -
Page 32: Mechanism Fine Adjustment To Avoid Ribbon Wrinkles
1 level and print the level and print the label again to label again to check if the wrinkle check if the wrinkle is gone. is gone. +31(0)78 - 615 20 33 +32(0)2 - 270 34 88 info@altec.nl info@altec.be www.altec.nl www.altec.be... - Page 33 3. If the wrinkle can’t be avoided, 3. If the wrinkle can’t be avoided, please contact Altec. please contact Altec. +31(0)78 - 615 20 33 +32(0)2 - 270 34 88 info@altec.nl info@altec.be...
-
Page 34: Lcd Display Menu
This "File Manager" option is used to check/manage the printer available memory. This "Diagnostic" optin is used to review printer to troubleshoot problems and other issues. +31(0)78 - 615 20 33 +32(0)2 - 270 34 88 info@altec.nl info@altec.be www.altec.nl www.altec.be... -
Page 35: Setting
Use this option to setup printing darkness. The available setting range is from 0 to 15, and the step is 1. You may need to adjust your density based on selected media. +31(0)78 - 615 20 33 +32(0)2 - 270 34 88 info@altec.nl info@altec.be www.altec.nl www.altec.be... - Page 36 1 to 358. Note: If printing from enclosed software/driver, the software/driver will send out the commands, which will overwrite the settings set from the panel. +31(0)78 - 615 20 33 +32(0)2 - 270 34 88 info@altec.nl info@altec.be www.altec.nl www.altec.be...
-
Page 37: Zpl2
Length Label top No motion Left position Enabled Reprint mode Disabled None 150 -> 300 Format convert 150 -> 600 200 -> 600 300 -> 600 +31(0)78 - 615 20 33 +32(0)2 - 270 34 88 info@altec.nl info@altec.be www.altec.nl www.altec.be... - Page 38 This feature is used to set delimiter character. Media power up This option is used to set the action of the media when you turn on the No motion printer. +31(0)78 - 615 20 33 +32(0)2 - 270 34 88 info@altec.nl info@altec.be www.altec.nl www.altec.be...
- Page 39 (dpi) value; the second, the dpi to which you would like to scale. Note: If printing from enclosed software/driver, the software/driver will send out the commands, which will overwrite the settings set from the panel. +31(0)78 - 615 20 33 +32(0)2 - 270 34 88 info@altec.nl info@altec.be www.altec.nl www.altec.be...
-
Page 40: Sensor
This option is used to set the maximum length for label calibration. 254 mm Advanced This function can set the minimum paper length and maximum 0 mm gap/bline length for auto-calibrate the sensor sensitivity. +31(0)78 - 615 20 33 +32(0)2 - 270 34 88 info@altec.nl info@altec.be www.altec.nl www.altec.be... -
Page 41: Interface
This item is used to set the RS-232 parity. None Data bits This item is used to set the RS-232 Data bits. Stop bit(s) This item is used to set the RS-232 Stop bits. +31(0)78 - 615 20 33 +32(0)2 - 270 34 88 info@altec.nl info@altec.be www.altec.nl www.altec.be... -
Page 42: Ethernet
Use this menu to set the Wi-Fi SSID Security Use this menu to set the Wi-Fi security Open Password Use this menu to set the Wi-Fi password +31(0)78 - 615 20 33 +32(0)2 - 270 34 88 info@altec.nl info@altec.be www.altec.nl www.altec.be... -
Page 43: Bluetooth
Menu lock Menu password Security MyMenu lock Cutter type MyMenu password Media low warning Ribbon low Warning warning Printer head care Reset counter Contact us Interval +31(0)78 - 615 20 33 +32(0)2 - 270 34 88 info@altec.nl info@altec.be www.altec.nl www.altec.be... - Page 44 This item is used to enable/disable the sound of front panel buttons. Contact us This feature is used to check the contact information for tech support service. +31(0)78 - 615 20 33 +32(0)2 - 270 34 88 info@altec.nl info@altec.be www.altec.nl www.altec.be...
-
Page 45: File Manager
Self-test printout Model name Firmware version Firmware checksum Printer S/N Configuration file System date System time Printed mileage (meter) Cutting Counter +31(0)78 - 615 20 33 +32(0)2 - 270 34 88 info@altec.nl info@altec.be www.altec.nl www.altec.be... - Page 46 It allows users or engineers to verify and debug the program. ASCII Data Hexdecimal data related to left column of ASCII data +31(0)78 - 615 20 33 +32(0)2 - 270 34 88 info@altec.nl info@altec.be www.altec.nl www.altec.be...
-
Page 47: Favorites
Touch and hold the option item, until “Delete Favorites” setting screen pops up. Tap “Yes” to delete this setting option item on “Favorites”. Touch and hold +31(0)78 - 615 20 33 +32(0)2 - 270 34 88 info@altec.nl info@altec.be www.altec.nl www.altec.be... -
Page 48: Printer Management Tool (Tpm)
Version Firmware version Serial No Serial number Printer is ready Mileage Printed mileage Error Interface USB / Ethernet Printer Printer name IP Address When using Ethernet +31(0)78 - 615 20 33 +32(0)2 - 270 34 88 info@altec.nl info@altec.be www.altec.nl www.altec.be... -
Page 49: Printer Settings
Shift X / Y Adjust print position Printer selection Select the printer(s) you want to apply the settings. This can be a specific printer or all printers. +31(0)78 - 615 20 33 +32(0)2 - 270 34 88 info@altec.nl info@altec.be www.altec.nl www.altec.be... - Page 50 D: These functionalities are not available for ATP-3000. RS232 (serial port) Port settings for the RS232 serial port • Baud rate • Data bits Parity • Stop bit(s) • +31(0)78 - 615 20 33 +32(0)2 - 270 34 88 info@altec.nl info@altec.be www.altec.nl www.altec.be...
- Page 51 Wi-Fi Settings for the (optional) Wi-Fi module The optional Wi-Fi module can be requested from Altec. Ethernet Settings for Ethernet connection DHCP Set printer name and RAW port Static IP Set (static) IP address, Subnet mask, Default gateway. MAC address can not be changed.
- Page 52 These settings are not available for the ATP-3000. Information Overview of ATP-3000 printer information Cutting counter / Mileage (km) can be reset here. Battery These settings are not available for the ATP-3000. +31(0)78 - 615 20 33 +32(0)2 - 270 34 88 info@altec.nl info@altec.be www.altec.nl www.altec.be...
-
Page 53: File Manager
Note Always close the command with an Enter (carriage return) Send Send the command to the printer Send File Load file and send it to the printer +31(0)78 - 615 20 33 +32(0)2 - 270 34 88 info@altec.nl info@altec.be www.altec.nl www.altec.be... -
Page 54: Rtc Setup
Print a test page with all current media settings (dimensions). Configuration Page Print a test page with all current printer settings. Ignore AUTO.BAS Restart the printer without a loaded (.bas) program. +31(0)78 - 615 20 33 +32(0)2 - 270 34 88 info@altec.nl info@altec.be www.altec.nl www.altec.be... -
Page 55: Bitmap Font Manager
7.2.6 Bitmap Font Manager Load bitmap fonts into the printer. In Bitmap Font Manager you can load fonts into the printer. This is sometimes used for stand-alone printing solutions +31(0)78 - 615 20 33 +32(0)2 - 270 34 88 info@altec.nl info@altec.be www.altec.nl www.altec.be... -
Page 56: Program Settings
Create users within the Printer Management tool. 7.3.2 Alert Send notifications (alerts) to users when the status of certain printer(s) - or printer groups - has changed. +31(0)78 - 615 20 33 +32(0)2 - 270 34 88 info@altec.nl info@altec.be www.altec.nl www.altec.be... -
Page 57: Group
Change general program settings. 7.3.5 Manual name In Manual Name you can set a (alternative) printer name. This name will only be used in the Printer Management tool. +31(0)78 - 615 20 33 +32(0)2 - 270 34 88 info@altec.nl info@altec.be www.altec.nl www.altec.be... -
Page 58: Troubleshooting
• Please refer to the steps in user’s manual to reinstall the label roll. • Gap/black mark sensor is not calibrated. • Calibrate the gap/black mark sensor. +31(0)78 - 615 20 33 +32(0)2 - 270 34 88 info@altec.nl info@altec.be www.altec.nl www.altec.be... - Page 59 • If the label is moving to the left side, please move the label guide to right. +31(0)78 - 615 20 33 +32(0)2 - 270 34 88 info@altec.nl info@altec.be www.altec.nl www.altec.be...
- Page 60 • Press [Menu] [Setting] [Shift Y] menu is incorrect. to fine tune the parameter of Shift Y. • The vertical offset setting in the driver is incorrect. +31(0)78 - 615 20 33 +32(0)2 - 270 34 88 info@altec.nl info@altec.be www.altec.nl www.altec.be...
-
Page 61: Maintenance
Do not touch printer head by hand. If you touch it careless, please use ethanol to clean it. • Please use an Altec CleaningWipe. DO NOT use medical alcohol, which may damage the print head. • Regularly clean the print head and supply sensors when changing media to keep printer performance and •... -
Page 62: Support (Faq)
Do you need any help setting up your printer or do you experience a problem during printing? The Netherlands Belgium T. +31(0)78 - 615 20 33 T. +32(0)2 - 270 34 88 info@altec.nl info@altec.be +31(0)78 - 615 20 33 +32(0)2 - 270 34 88 info@altec.nl info@altec.be... - Page 63 +31(0)78 - 615 20 33 +32(0)2 - 270 34 88 info@altec.nl info@altec.be www.altec.nl www.altec.be...
Need help?
Do you have a question about the ATP3000 and is the answer not in the manual?
Questions and answers