Advertisement
The new digital door viewer from
CHANNEL SAFETY SYSTEMS
Petersfi eld Business Park
Bedford Road
Petersfi eld
Hampshire
GU32 3QA
Digital Door Viewer Installation Guide
DDV INSTALLATION GUIDE
t: 0845 884 7000 | w: www.channelsafety.co.uk
Channel Safety Systems
t: 0845 884 7000
f: 0845 884 6000
e: sales@channelsafety.co.uk
w: www.channelsafety.co.uk
| 1/1
Advertisement
Table of Contents

Related Manuals for Channel Safety Systems ENTRitech


Summary of Contents for Channel Safety Systems ENTRitech
- Page 1 0845 884 7000 | w: www.channelsafety.co.uk The new digital door viewer from Channel Safety Systems CHANNEL SAFETY SYSTEMS Petersfi eld Business Park t: 0845 884 7000 Bedford Road f: 0845 884 6000 Petersfi eld e: sales@channelsafety.co.uk Hampshire w: www.channelsafety.co.uk...
-
Page 2: Table Of Contents
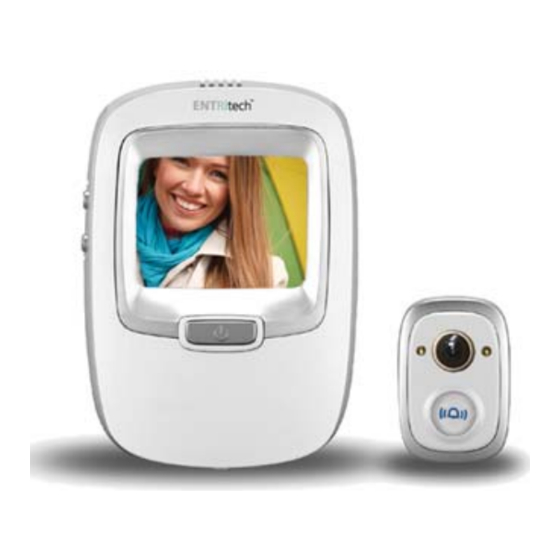
CHANNEL SAFETY SYSTEMS CONTENTS Parts ............................2 Installation ........................... 3-7 Operations ........................... 8 3.1. Digital Door Viewer Diagram ................8 3.2. Operating Instructions ................... 9 3.3. Device Timing Operation ..................10 PARTS Main Unit (Screen) 128mb microSD card (Pre-Installed) Doorbell Unit (Camera) -
Page 3: Installation
t: 0845 884 7000 | w: www.channelsafety.co.uk INSTALLATION Remove the current door viewer from your door. If you haven’t already got a door viewer, drill a 5/8”inch hole. Peel off the cover on one side of the Adhesive Backing and attach to the back of the Doorbell Unit. - Page 4 CHANNEL SAFETY SYSTEMS INSTALLATION CONTINUED... Peel off the tape backing on the back side of the Mounting plate, this will help prevent scratching on your door when attaching the main unit. Then place the backing unit against the door and pull the connection ribbon through the centre hole.
- Page 5 t: 0845 884 7000 | w: www.channelsafety.co.uk INSTALLATION CONTINUED... Use a screw driver (not included) to help remove the faceplate from the main unit. Install two AA batteries into the Main unit (not included). PLEASE NOTE! For the following steps, please note that the main connection points are vital to the Digital...
- Page 6 CHANNEL SAFETY SYSTEMS INSTALLATION CONTINUED... Place the unit on the door so that the two ports securely connect, ensure that the unit is properly connected. Use a Philips head screw driver (not included) along with the 2 long screws included to mount the unit to the backing plate in two locations.
- Page 7 t: 0845 884 7000 | w: www.channelsafety.co.uk INSTALLATION CONTINUED... The Digital Door Viewer is now fully installed. Please note that both the screen and camera lens may have a clear plastic cover to prevent scratching. Please remove the plastic after installation. DDV INSTALLATION GUIDE | 1/7...
-
Page 8: Operations
CHANNEL SAFETY SYSTEMS OPERATIONS Replacing the Batteries To replace the batteries simply remove the faceplate of the main unit by unscrewing the bottom screw of the device. Remove the old batteries and replace them with two new AA batteries. Refer to step 7 in the installation guide for more help. -
Page 9: Operating Instructions
t: 0845 884 7000 | w: www.channelsafety.co.uk OPERATING INSTRUCTIONS Take a picture from the inside: To monitor who is outside your door, you can press the power button, “A”, the screen will turn on after 3 seconds. When the screen is on press “A” to take a picture. The display will be in ‘Live mode’... -
Page 10: Device Timing Operation
CHANNEL SAFETY SYSTEMS DEVICE TIMING OPERATION CHANNEL SAFETY SYSTEMS Petersfi eld Business Park t: 0845 884 7000 Bedford Road f: 0845 884 6000 Petersfi eld e: sales@channelsafety.co.uk Hampshire w: www.channelsafety.co.uk GU32 3QA Digital Door Viewer Installation Guide...
Need help?
Do you have a question about the ENTRitech and is the answer not in the manual?
Questions and answers