
Related Manuals for Breville he Mini Smart Oven BOV450BSS1BCA1


Summary of Contents for Breville he Mini Smart Oven BOV450BSS1BCA1
- Page 1 Mini Smart Oven ® INSTRUCTION BOOK MANUEL D'INSTRUCTIONS MANUAL DE INSTRUCCIONES FR-CA ES-MX...
-
Page 2: Table Of Contents
Do not use on a cloth-covered SAFETY FIRST surface, near curtains or other flammable materials. At Breville we are very safety • A fire may occur if the oven is conscious. We design and covered or touches flammable manufacture consumer... - Page 3 To prevent by Breville for use in the ribbed burns or personal injury, always section on top of the oven. If use protective hot pads or...
- Page 4 • The use of any accessory oven off and unplug from the attachments not recommended power outlet. Wait until the by Breville may cause injuries. fire goes out before opening • Do not use the toast function the oven door.
- Page 5 • Do not attempt to operate the • Before attempting to move the oven by any method other than oven, or before assembling or those described in this booklet. disassembling parts, cleaning or storing, turn OFF the oven, • Do not leave the appliance allow to cool, and disconnect unattended when in use.
- Page 6 Breville Customer Service at are not completely understood, 1-866-BREVILLE. or if doubt exists as to whether the appliance is • Your Breville appliance comes properly grounded. with a unique Assist™ Plug, conveniently designed with a • The installation of a residual...
- Page 7 Use in conjunction with a SHORT CORD power strip or extension cord is INSTRUCTIONS not recommended. Your Breville appliance is fitted • Remove the power plug with a short power supply cord from the power outlet before to reduce personal injury or...
-
Page 8: Components
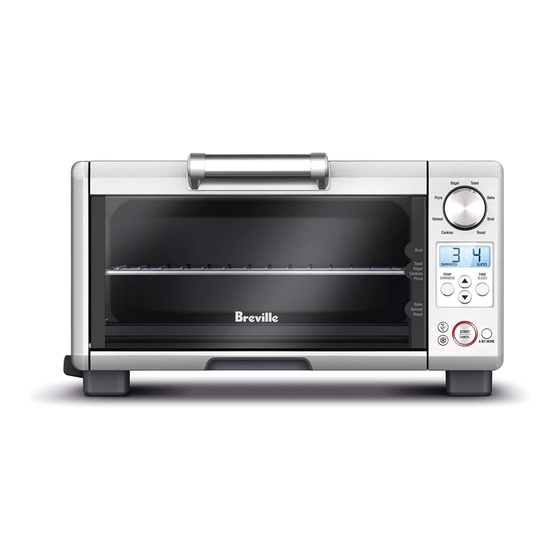
H. Crumb tray oven mitts when inserting, removing or I. Ventilation slots handling items from the oven. J. Breville Assist™ Plug K. LCD screen NOTE Only place items in the ribbed section on top of the oven as described on page 40. - Page 9 CANCEL A BIT MORE 10" x 10" Enamel Broiling Rack Part No: BOV650XL/88 The Breville enamel broil rack may be inserted L. START/CANCEL button into Breville enamel baking pan. When To switch the oven on/off assembled together, the broil rack is designed M.
-
Page 10: Quick Start Guide
QUICK START GUIDE This Quick Start Guide is designed for first time use. For safety and more information, refer to rest of the Instruction Book. PREPARING THE OVEN 5. Press the START/CANCEL button (A ONE-TIME PROCESS) to activate. The button surround will illuminate and, the oven alert will sound In order to remove any protective substances and the LCD will illuminate orange. - Page 11 LCD will illuminate blue. Center the food on the wire rack - either placing directly on the wire rack or positioned on the Breville baking pan (see page 23 of the Instruction Book for recommended cookware types and sizes). 2. Turn the FUNCTION dial until the 4.
- Page 12 OVEN FUNCTIONS ROAST FUNCTION Cooks a variety of meats and poultry that TOAST FUNCTION are tender and juicy inside and roasted to perfection outside. Ideal function for roasting Evenly toasts bread so it’s crisp and crunchy on potatoes and other hearty vegetables that the outside, while soft and moist on the inside.
- Page 13 A BIT MORE ® NOTE Allows you to conveniently and quickly add If cooking a frozen pizza, ensure to remove time to a cooking cycle. all packaging (including non metallic trays A BIT MORE can be used both during the ®...
-
Page 14: Functions
‘18 MINS’. NOTE Due to the high temperatures of the oven, Breville does not recommend placing the TIME oven in enclosed areas. Placing the oven in SLICES an enclosed area, such as a cabinet or wall... - Page 15 8. Press the START/CANCEL button to A NOTE ON COOKING TIMES activate this setting. The oven alert will The Breville Mini Smart Oven features ® sound, the button surround will illuminate Element iQ - a unique cooking technology ® red and the LCD will illuminate orange.
- Page 16 It is normal to notice the following occur The cooking temperature can be adjusted during the cooking cycle: in 10°F increments, from 120°F to a maximum of 450°F (or in the Celsius • It is normal that during the broil function, the mode, 5°C increments, from 50°C to a bottom set of elements turn off while the top maximum 230°C).
- Page 17 A NOTE ON RACK HEIGHT For optimum cooking results: POSITIONS • The wire rack should always be inserted into Cooking results are significantly affected by the rack height position with the spokes the position of the wire rack as this determines facing upwards.
- Page 18 A NOTE ON OPTIONAL SETTINGS Frozen Food Button FROZEN FOOD button adds the Temperature Conversion Button recommended, additional time required to The temperature reading on the oven defrost and then toast frozen bread or bagels is preset to Fahrenheit. Pressing the and cook frozen pizza or cookie dough.
- Page 19 A BIT MORE ® On the PIZZA function, FROZEN FOOD is the default setting, and the frozen symbol Allows you to conveniently and quickly add is displayed on the LCD screen. When cooking time to a cooking cycle. fresh pizzas, the setting can be de-selected by A BIT MORE can be used both during the ®...
- Page 20 TOAST FUNCTION 4. Turn the FUNCTION dial until the indicator reaches the TOAST function. The left figure on the LCD screen indicates the Elements preset browning or ‘Darkness’ setting ‘4’, Top and bottom heating elements cycle on and while the right figure on the LCD screen off to regulate the correct temperature.
- Page 21 As a general guide: 6. Press the START/CANCEL button to activate this setting. The button surround will illuminate red, the oven alert will sound DESIRED TOAST COLOR SETTING and the LCD will illuminate orange. Light color toast 1 or 2 The timer will be displayed and begin to count down.
- Page 22 BAGEL FUNCTION 8. If the toast cycle has finished and you would prefer your toast to be toasted slightly more, press the A BIT MORE button for an ® Elements additional 30 seconds. If the oven has not Top and bottom heating elements cycle on and finished the cycle, additional time will be off to regulate the correct temperature.
- Page 23 As a general guide: DESIRED BAGEL COLOR SETTING Light color bagel 1 or 2 Medium color bagel 3, 4 or 5 Dark color bagel 6 or 7 When using the BAGEL function for the first time, we recommend toasting on the 4.
- Page 24 8. The timer will be displayed and begin to 10. If the bagel cycle has finished and you count down. The time can be adjusted would prefer your bagel to be toasted during the bagel cycle by pressing the slightly more, press the A BIT MORE ®...
- Page 25 BAKE FUNCTION 3. Turn the FUNCTION dial until the indicator reaches the BAKE function. The LCD screen indicates the preset BAKE Elements temperature of ‘325°F’. Top and bottom heating elements cycle on and off to regulate the correct temperature. FUNCTION DIAL Rack Position Bagel Toast...
- Page 26 A BIT MORE ® 7. Place food, positioned on the Breville button. Toggle between the temperature enamel baking pan or in an oven-proof dish, and time LCD screen by pressing either the on the center of the wire rack so air flows TEMP or TIME button.
- Page 27 ROAST FUNCTION 9. At the end of the cooking cycle, the oven alert will sound three times, the START/CANCEL button surround will no Elements longer illuminate red and the LCD will be Top and bottom heating elements cycle on and illuminated blue.
- Page 28 Use the table below as a guide only to estimate and plan cooking times. We recommend checking doneness with a reliable meat thermometer. 7. Place food, positioned on the Breville enamel baking pan or in an oven-proof dish, TYPE/CUT ROASTING TIME...
- Page 29 When roasting, the Breville enamel BIT MORE button will start the roast cycle ® broil rack may be inserted into Breville enamel and count down from 10 minutes. Each baking pan. When assembled together, the subsequent press of the A BIT MORE ®...
- Page 30 BROIL FUNCTION 2. Place food in the Breville baking pan or in an oven-proof dish, then place on the center of the wire rack so air flows around the sides Elements of the food. Top heating elements cycle on and off to provide intense top heat.
- Page 31 TYPE/CUT WEIGHT/ BROILING NOTE THICKNESS TIME The two preset broiling temperatures allow Chicken you to change the broiling speed – how quickly Wings 1lb (500g) 12–15 mins the tops of your food brown - depending on Breast or Thigh 0.5lbs (250g) 20 mins the food to be broiled, quantity of food &...
- Page 32 NOTE Breville recommends using a dark colored, For safety reasons the oven is limited to non-stick pizza pan when cooking a pizza. a maximum of 20 minutes of continuous Light colored pans reflect heat and may not broiling.
- Page 33 For a crisper crust, pizzas can be cooked directly on the wire rack. However care should be taken as melted cheese and other ingredients may build-up on the heating elements and create a potential fire risk. TIME For even results we recommend carefully SLICES rotating the pizza 90°...
- Page 34 5. The LCD screen will indicate a blinking NOTE ‘PREHEATING’. Once the preheating cycle has completed, the temperature Some large pizzas may brown unevenly in alert will sound. compact ovens. Open the oven door half way through the cooking time and carefully rotate the pizza 90 degrees for more even browning.
- Page 35 3. Close the oven door. NOTE 4. Press the START/CANCEL button to A BIT MORE can be pushed when the oven ® activate this setting. The button surround is cold (i.e. not immediately after a cooking will illuminate red, the oven alert will sound, cycle) and the oven will commence cooking, and the LCD screen will illuminate orange.
- Page 36 COOKIE FUNCTION 4. The baking temperature and time can be adjusted before or during the baking cycle. Elements a) The preset baking temperature of 350˚F is displayed as the default on Top and bottom heating elements cycle on and the LCD screen. Press the down or up off to regulate the correct temperature.
- Page 37 7. Place food on the Breville enamel baking NOTE pan or in an oven-proof pan, then place on the center of the wire rack so air flows Due to the wide variety of cookie types, you around the back, as well as the front of will need to consider whether you’re baking...
- Page 38 55 minutes. height position. The wire rack should be positioned with the spokes facing upwards. NOTE 2. Place food on the Breville enamel baking A BIT MORE can be pushed when the oven is ®...
- Page 39 TIME button until the LCD screen displays the preset reheating time of ‘:15 MINS’. 8. Place food on the Breville enamel baking pan or in an oven-proof pan, then place on the center of the wire rack so air flows...
- Page 40 ® the reheat cycle and count down from 5 The use of any accessory attachments not minutes. Each subsequent selection of the recommended by Breville may cause injuries. A BIT MORE button will add 5 ® minutes to the reheating time, up to a maximum of 2 hours.
-
Page 41: Care & Cleaning
Cleaning the interior Care & Cleaning The walls on the inside of the oven feature a non-stick coating for easy cleaning. To clean any spattering that may occur, wipe the walls Ensure the oven is turned OFF by pressing with a soft, damp sponge. A non-abrasive the START/CANCEL button on the control liquid cleanser or mild spray solution may be panel. -
Page 42: Tips
• Due to the high temperatures of the oven, Breville does not recommend placing the oven in enclosed areas. Placing the oven in an enclosed area, such as a cabinet or wall recess... -
Page 43: Troubleshooting
90 degrees for more even browning. • The pizza crust does not Breville recommends using a dark colored, non-stick pizza pan when crisp. cooking a pizza. Light colored pans reflect heat and may not effectively crisp the pizza crust. Oven accessories are available at breville.com •... - Page 44 The LCD screen will display ‘E01’ when there is a non-resettable issue ‘E01’ with the appliance. Should this occur, immediately remove the power cord from the wall outlet and call the Breville Customer Service Center (1-866-BREVILLE). • The LCD screen displays The LCD screen will display ‘E02’...
- Page 45 Mini Smart Oven ® MANUEL D'INSTRUCTIONS FR-CA...
- Page 46 IMPORTANTES Table des MESURES DE matières SÉCURITÉ 2 Breville vous recommande la sécurité avant tout LISEZ TOUTES LES 9 Composants INSTRUCTIONS 11 Guide de démarrage rapide • Retirez et disposez de tout 15 Fonctions matériel d’emballage ou 42 Entretien & Nettoyage étiquettes promotionnelles...
- Page 47 être réchauffés ou tout autre servez-vous toujours de accessoire fourni par Breville poignées isolantes ou de qui peuvent être déposés gants de cuisine et utilisez les sur la section nervurée du poignées ou boutons du four...
- Page 48 • Due à la température élevée du Assurez-vous qu’ils résistent à four, Breville ne recommande la chaleur pour éviter qu’ils ne pas de placer le four dans craquellent. un espace clos. Le fait de le placer dans un espace fermé...
- Page 49 à accessoires fournis avec ce four. proximité de l’appareil. • L’utilisation d’accessoires non • Cet appareil ne doit pas être fournis par Breville peut causer utilisé par des personnes des blessures. (incluant les enfants) inexpérimentées ou avec •...
- Page 50 • Suivez attentivement les • Si la prise murale est standard consignes d’entretien et de à deux ouvertures, il est nettoyage décrites à la page de votre responsabilité et 86. Ne nettoyez pas l’appareil obligation de la remplacer avec des tampons à récurer par une prise murale à...
- Page 51 30 minutes avant de reprendre nettoyage, visitez www.Breville. un autre cycle. Si vous utilisez com ou appelez le Service la fonction Pizza ou Cookie à la clientèle de Breville au (Biscuits) pour plus d’une 1-866-BREVILLE. heure d’affilée, vous devez laisser refroidir le four durant •...
- Page 52 SUR LE CORDON CALIFORNIE : D’ALIMENTATION (Applicable aux résidents de la Californie seulement). Votre appareil Breville est muni Cet appareil contient des d’un cordon d’alimentation court produits chimiques connus de très sécuritaire qui réduit les l'État de la Californie comme...
- Page 53 IMPORTANT I. Orifices de ventilation Le boîtier du four, incluant la porte, est très J. Fiche Assist de Breville chaud durant et après l’utilisation. Servez-vous K. Écran ACL toujours de poignées isolantes ou de gants de L. Bouton de démarrage START/CANCEL cuisine pour déposer des aliments dans le four,...
- Page 54 CANCEL A BIT MORE Grilloir en émail de 10" x 10" (25cm x 25cm) Pièce no BOV650XL/88 Le grilloir en émail de Breville s’insère IMPORTANT dans le plateau de cuisson en émail de Breville. Lorsqu’un dans l’autre, le plateau de Ne touchez pas aux surfaces chaudes de grillage libère les gras de cuisson, pour une...
- Page 55 GUIDE DE DÉMARRAGE RAPIDE Ce guide de démarrage rapide est conçu pour la première utilisation de l’appareil. Pour des informations additionnelles, veuillez consulter l’ensemble du livret d’instructions. PROCÉDURE D’AMORÇAGE 5. Enfoncez le bouton START/CANCEL. Le (À PHASE UNIQUE) contour s’illuminera en rouge, le signal sonore se fera entendre et l’écran ACL Afin d’éliminer les substances recouvrant les s’illuminera en orange.
- Page 56 Placez les aliments au centre de la grille, soit directement sur la grille ou dans le plateau de cuisson Breville (voir le Livret d’instructions à la page 80 pour les recommandations sur les 2. Tournez le cadran de FONCTIONS jusqu’à...
- Page 57 FONCTIONS DU FOUR FONCTION ROAST (Rôtir) Pour de la viande ou du poulet tendre et juteux FONCTION TOAST (Griller) à l’intérieur et rôti à la perfection à l’ extérieur. Cette fonction est idéale pour rôtir les patates Pour des rôties croustillantes à l’extérieur et et autres légumes coriaces qui requièrent une tendres à...
- Page 58 A BIT MORE (Un peu plus) NOTE Vous permet de prolonger de façon rapide Pour cuire la pizza congelée, retirez au et pratique le cycle de cuisson. La fonction A préalable l’emballage (incluant la plaque à BIT MORE peut être utilisée durant le cycle pizza métallisée fournie) avant de la mettre au de cuisson ou immédiatement après que le four.
- Page 59 4" (10 cm) de chaque côté de l’appareil et ne laissez rien sur le dessus du four. NOTE TIME Due à la température élevée du four, Breville SLICES ne recommande pas de placer le four dans un espace clos. Le fait de le placer dans un espace fermé...
- Page 60 UNE NOTE SUR LE TEMPS pour activer le réglage. Le signal sonore DE CUISSON se fera entendre, le contour du bouton Le Mini Smart Oven de Breville est muni ® s’illuminera en rouge et l’écran ACL d’un Élément iQ - une technologie de ®...
- Page 61 Il est normal que les phénomènes suivants se Pour ajuster rapidement le temps ou la produisent durant la cuisson: température, pressez et tenez enfoncée la flèche du haut ou celle du bas. Le temps et • Il est normal que, durant la cuisson à BROIL la température s’ajusteront rapidement, tant (Dorer), les éléments inférieurs s’éteignent que vous tiendrez le bouton enfoncé.
- Page 62 UNE NOTE SUR LA POSITION Pour des résultats optimaux: DE LA GRILLE • La grille doit toujours être insérée en place Les résultats d’une bonne cuisson dépendent avec les rayons vers le haut. grandement de la distance entre la grille et les éléments chauffants.
- Page 63 UNE NOTE SUR LES RÉGLAGES Bouton FROZEN FOOD OPTIONNELS (Aliments congelés) Le bouton FROZEN FOOD ajoute le temps Bouton de conversion de température requis pour décongeler et griller le pain ou les bagels, ou pour cuire la pizza congelée ou la La température du four est préréglée pâte à...
- Page 64 A BIT MORE (Un peu plus) Pour la fonction PIZZA, le réglage FROZEN FOOD est le réglage par défaut. Le Vous permet de prolonger de façon rapide symbole apparaîtra sur l’écran ACL. et pratique le cycle de cuisson. La fonction A Si vous cuisez de la pizza fraîche, le réglage BIT MORE peut être utilisée durant le cycle...
- Page 65 FONCTION TOAST (GRILLER) 4. Tournez le cadran de FONCTION jusqu’à ce que la fonction TOAST (Griller) apparaisse sur l’écran ACL. Éléments chauffants Le chiffre de gauche indique le degré de Les éléments supérieurs et inférieurs coloration (DARKNESS) préréglé ‘4’, et s’allument et s’éteignent par intermittence afin le chiffre de droite indique le nombre de de garder une température constante.
- Page 66 À titre indicatif: 6. Pour activer ce réglage, enfoncez le bouton START/CANCEL. Le contour s’illuminera en rouge, le signal sonore se fera entendre COLORATION DÉSIRÉE RÉGLAGE et l’écran ACL l’illuminera en orange. Très pâle 1 ou 2 Le temps de cuisson s’affichera et le compte à...
- Page 67 8. Si le cycle de grillage est termine, et que FONCTION BAGEL vous préférez votre rôtie un peu plus grillée, pressez le bouton A BIT MORE pour Éléments chauffants un grillage additionnel de 30 secondes. Les éléments supérieurs et inférieurs Si le cycle n’est pas terminé, du temps s’allument par intermittence pour conserver supplémentaire de grillage sera ajouté...
- Page 68 À titre indicatif: COLORATION DÉSIRÉE RÉGLAGE Bagel très pâle 1 ou 2 Bagel moyen 3, 4 ou 5 Bagel très foncé 6 ou 7 Lorsque vous utilisez la fonction BAGEL pour la première fois, nous vous recommandons le 4. Fermez la porte du four. préréglage ‘4’...
- Page 69 8. Le temps de cuisson apparaîtra et le compte 10. Si le cycle de bagel est terminé et que vous à rebours débutera. Le temps peut être préférez votre bagel un peu plus grillé, ajusté durant le cycle de cuisson du bagel pressez le bouton A BIT MORE pour en pressant le bouton A BIT MORE...
- Page 70 FONCTION BAKE (CUIRE) CADRAN DE FONCTIONS Bagel Toast Éléments chauffants Les éléments supérieurs et inférieurs Bake Pizza s’allument et s’éteignent par intermittence pour ROTATE garder une température constante. Reheat Broil Position de la grille Cookies Roast Position inférieure. Réglages optionnels Bouton FROZEN FOOD (Aliments congelés) Bouton de CONVERSION...
- Page 71 (PREHEATING) se sera fait 7. Déposez les aliments dans le plateau de entendre, le compte à rebours débutera cuisson en émail de Breville ou dans tout automatiquement par tranches d’une autre plat à cuisson à l’épreuve de la chaleur, minute.
- Page 72 FONCTION ROAST (RÔTIR) Éléments chauffants Les éléments supérieurs et inférieurs TEMP s’allument et s’éteignent par intermittence afin DARKNESS de garder une température constante. Position de la grille Position inférieure. Réglage optionnel Bouton de CONVERSION DE TEMPÉRATURE 9. À la fin du cycle de cuisson, le signal La fonction ROAST (Rôtir) convient sonore se fera entendre trois fois.
- Page 73 4. La température et le temps peuvent TYPE/COUPE TEMPS DE RÔTISSAGE être ajustés avant ou durant le cycle PAR 500 G (1 LB) de rôtissage. Boeuf - Oeil de ronde, 30 minutes a) La température de rôtissage préréglée ronde ou rosbif de de ‘350°F’...
- Page 74 10. Si le cycle de rôtissage est terminé, et que vous procurez le grilloir en émail de Breville. vous préférez vos aliments un peu plus Pour le rôtissage, le grilloir en émail de Breville cuits, pressez le bouton A BIT MOREMC s’insère dans le plateau de cuisson en émail pour un 10 minutes additionnel.
- Page 75 11. Le cycle de rôtissage peut être interrompu 2. Déposez les aliments dans le plateau de en tout temps en pressant le bouton cuisson en émail de Breville ou dans un START/CANCEL. Cela annulera le cycle et plat à l’épreuve de la chaleur, et placez-le au le contour du bouton ne sera plus illuminé.
- Page 76 4. Tournez le cadran de FONCTIONS à la fonction BROIL. L’écran ACL affichera la température préréglée ‘HI’ (Élevée). FUNCTION DIAL TIME SLICES Bagel Toast Pizza Bake ROTATE TYPE/COUPE POIDS/ TEMPS DE Reheat Broil ÉPAISSEUR GRATINAGE Cookies Roast Boeuf Surlonge 1" (2.5cm) 12–15 mins Hamburger 1"...
- Page 77 6. Pressez le bouton START/CANCEL pour IMPORTANT aciver ce réglage. Le contour s’illuminera en rouge et le signal sonore se fera entendre. Le boîtier du four, incluant la porte, est très chaud durant et immédiatement après l’usage. 7. Le temps sera affiché et le compte à rebours Utilisez toujours des poignées isolantes ou des débutera par tranches d’une minute.
- Page 78 10°F, de 120°F dans le four. à un maximum de 450°F (ou en degrés Breville recommande d’utiliser une place à Celsius, par tranches de 5°C, de 50°C à pizza antiadhésive foncée pour cuire la pizza. un maximum de 230°C).
- Page 79 b) Pour sélectionner le temps de cuisson, 5. L’écran ACL affichera en clignotant pressez le bouton TIME et l’écran ACL ‘PREHEATING’ (Préchauffage). Une fois affichera le temps préréglé de ‘:18 MINS’. que le cycle de préchauffage sera terminé, le signal sonore se fera entendre. TIME SLICES PREHEATING...
- Page 80 10. Le cycle de pizza peut être interrompu en NOTE tout temps en pressant le bouton START/ CANCEL. Cela annulera le cycle et le Des pizzas plus larges peuvent griller de façon contour du bouton ne sera plus illuminé. irrégulière dans un four compact. Ouvrez la porte du four à...
- Page 81 FONCTION COOKIES (BISCUITS) a) La température de cuisson préréglée de 350˚F (175°c) est affichée comme la température par défaut sur l’écran ACL. Éléments chauffants Pressez les flèches vers le haut ou le bas Les éléments supérieurs et inférieurs pour ajuster la température par tranches s’allument et s’éteignent par intermittence pour de 10°F, de 120°F à...
- Page 82 7. Déposez les aliments sur le plateau en émail NOTE de Breville ou dans un plat à l’épreuve de la chaleur, et placez-le au centre de la grille, Vu la variété considérable de types de biscuits, de façon à ce que l’air circule tout autour vous devrez considérer quelle sorte de pâte à...
- Page 83 2. Placez les aliments sur le plateau de enfoncé lorsque le four est froid (c.-à-d. pas cuisson en émail de Breville ou dans un immédiatement après un cycle de cuisson); le plat à l’épreuve de la chaleur, puis placez le four commencera alors la cuisson.
- Page 84 TIME jusqu’à ce que l’écran ACL affiche le temps préréglé de ‘:15 MINS’. 8. Placez les aliments sur le plateau de cuisson en email de Breville ou dans un TIME plat a l’epreuve de la chaleur, puis placez le SLICES plateau au centre de la grille afi n de laisser circuler l’air autour des aliments.
- Page 85 L’utilisation d’accessoires non recommandés MORE amorcera le cycle de réchauffage et par Breville peut causer des blessures. le compte à rebours de 5 minutes. Chaque fois que vous sélectionnerez le bouton A Le boîtier du four, incluant la porte, est...
- Page 86 Nettoyage de l’intérieur du four Entretien Les parois internes du four sont recouvertes & Nettoyage d’un enduit antiadhésif qui facilite le nettoyage. Pour nettoyer les éclaboussures, essuyez- Éteignez le four en pressant le bouton START/ les avec une éponge douce et humide. CANCEL.
- Page 87 • Due à la température élevée du four, Breville ne recommande pas de placer le four dans un espace clos. Le fait de le placer dans un espace fermé...
- Page 88 90° pour un grillage plus uniforme. • La croute de la pizza n’est Breville recommande d’utiliser une place à pizza antiadhésive foncée pas croustillante pour cuire la pizza. Les plaques de couleur pâle réflètent la chaleur et de ce fait, la croute pourrait ne pas être suffisamment croustillante. Les accessoires pour le four sont disponibles à...
- Page 89 L'écran ACL affichera 'E03' si la température du four excède la limite maximale. Débranchez le four, laissez-le refroidir 15 minutes, puis rebranchez-le. • Si le message 'E03' persiste, contactez le Service à la clientèle de Breville (1-866-BREVILLE). • L'écran ACL affiche 'E04' L’écran ACL affichera ‘E04’...
- Page 90 Notes...
- Page 91 Mini Smart Oven ® MANUAL DE INSTRUCCIONES ES-MX...
- Page 92 CONSIDE- Contenido RACIONES IMPORTANTES 2 Breville recomienda anteponer la seguridad ANTES DE USAR ESTE 8 Componentes EQUIPO, LEA TODAS 10 Guía de inicio rápido LAS INSTRUCCIONES 14 Funciones Y GUÁRDELAS PARA 43 Cuidado y limpieza FUTURAS CONSULTAS 44 Consejos 45 Solucionar problemas •...
- Page 93 Breville que de él. Para evitar quemaduras esté hecho para usarse en la o lesiones, use siempre agarraderas sección acanalada de la parte o manoplas para horno aislantes, superior del horno.
- Page 94 • No se debe poner alimentos en el horno. de gran tamaño o utensilios de metal en el horno, ya que pueden • Breville no recomienda instalar el crear incendios o riesgos de horno en un espacio cerrado por descarga eléctrica.
- Page 95 • Si no va a usar el horno o va • No use este equipo para otro fin distinto al que se describe en este a dejarlo sin supervisión, folleto. No use el equipo al aire desconéctelo del tomacorriente. libre. No use el equipo en vehículos •...
- Page 96 Estados Unidos). dudas sobre si el equipo está correctamente conectado a tierra. • Su equipo Breville incluye el conveniente enchufe Assist™, cuyo • Se recomienda la instalación diseño con un orificio para el dedo de un dispositivo de corriente...
- Page 97 DE CABLE DE cuando el equipo no esté en uso, ALIMENTACIÓN CORTO y antes de limpiarlo o guardarlo. Su equipo Breville está equipado • La potencia del equipo es de con un cable de alimentación corto 1800W. En Canadá, el estándar...
-
Page 98: Componentes
H. Bandeja para migas agarraderas o manoplas para horno aislantes I. Ranuras de ventilación cuando tenga que manipular, insertar o retirar J. Enchufe Breville Assist™ algún objeto dentro o fuera del horno. K. Pantalla LCD NOTA Solo ponga objetos en la sección acanalada de la parte superior del horno, como se describe en la página page 42. - Page 99 CANCEL A BIT MORE Parrilla para asar enlozada de 10" x 10" Accesorio N.º: BOV650XL/88 La parrilla para asar enlozada de Breville L. Botón START/CANCEL (Iniciar/Cancelar) se puede insertar en la bandeja para horno Para encender o apagar el horno.
-
Page 100: Guía De Inicio Rápido
GUÍA DE INICIO RÁPIDO Esta Guía de inicio rápido está diseñada para el primer uso. Para mayor seguridad y más información, consulte el resto del manual de instrucciones. CÓMO PREPARAR EL HORNO 5. Presione el botón START/CANCEL (Iniciar/Cancelar) para activar. La luz del (PROCESO ÚNICO) botón se iluminará, la alerta del horno Es necesario hacer funcionar el horno vacío... - Page 101 Centre la comida en la rejilla, ya sea colocándola directamente encima o en la bandeja para horno de Breville (consulte 2. Gire el dial de funciones hasta que el la página page 23 del manual de indicador esté en la función correspondiente instrucciones para conocer los tipos y tamaños...
- Page 102 FUNCIONES DEL HORNO FUNCIÓN ROAST (ROSTIZAR) Cocina una variedad de carnes y aves, FUNCIÓN TOAST (TOSTAR) dejándolas tiernas y jugosas por dentro y asadas a la perfección por fuera. Función ideal para Tuesta el pan de manera uniforme para rostizar papas y otras verduras contundentes que quede crujiente y crocante por fuera, que requieren tiempos de cocción más largos.
- Page 103 A BIT MORE (Un poco más) ® NOTA Le permite agregar tiempo conveniente Si cocina una pizza congelada, asegúrese y rápidamente a un ciclo de cocción. de quitar todo el envoltorio, al igual que las La función A BIT MORE (Un poco más) ®...
-
Page 104: Funciones
NOTA Presione el botón TIME (Tiempo). La pantalla LCD mostrará el tiempo Breville no recomienda instalar el horno en preestablecido en 18 minutos. un espacio cerrado por las altas temperaturas que alcanza. Poner el horno en un sitio cerrado,... - Page 105 NOTA SOBRE LOS TIEMPOS (Iniciar/Cancelar) para activar esta DE COCCIÓN configuración. La alerta del horno sonará, El Mini Smart Oven de Breville incluye ® la luz del botón se iluminará de color Element iQ , una tecnología de cocción ®...
- Page 106 Es normal notar que ocurre lo siguiente Presione la flecha hacia abajo para reducir durante el ciclo de cocción: la temperatura, o la flecha hacia arriba para aumentarla. Una sola pulsación del botón • Durante el ciclo de cocción con la función de flecha hacia arriba o abajo ajustará...
- Page 107 NOTA SOBRE LAS POSICIONES Para obtener resultados de cocción óptimos: DE ALTURA DE LA REJILLA • Procure que los radios de la rejilla miren La posición de la rejilla afecta significativamente hacia arriba cuando la inserte en cualquier los resultados de la cocción, ya que ella posición en el horno.
- Page 108 NOTA SOBRE LOS AJUSTES Botón para comida congelada OPCIONALES El botón para comida congelada agrega el tiempo adicional recomendado que se requiere Botón de conversión de temperatura para descongelar los alimentos, y luego tostar pan o bagels congelados y cocinar pizza La temperatura que se muestra en la pantalla congelada o masa para galletas.
- Page 109 la configuración para las funciones TOAST A BIT MORE (Un poco más) ® (Tostar), BAGEL, REHEAT (Recalentar), Esta función le permite agregar tiempo de forma BAKE (Hornear) y COOKIES (Galletas) rápida y conveniente a un ciclo de cocción. volverá a ser la predeterminada, y ya no tendrá La función A BIT MORE (Un poco más) se ®...
- Page 110 2. Si está tostando de 1 a 2 rebanadas, FUNCIÓN CADA VEZ QUE SE PRESIONA, póngalas al centro de la rejilla. Si está EL BOTÓN A BIT MORE ® tostando de 3 a 4 rebanadas, póngalas (UN POCO MÁS) AGREGA uniformemente con espacio entre ellas.
- Page 111 5. La configuración de dorado y el número Por ejemplo, las tostadas con pasas de uva, de rebanadas se pueden ajustar antes los panes blancos con textura ligera o el o durante el ciclo de tostado. pan rebanado fino pueden requerir una configuración más baja, mientras que los a) Para cambiar la configuración de dorado, panes más densos, como el de centeno, trigo...
- Page 112 6. Presione el botón START/CANCEL 8. Si el ciclo de tostado ha terminado, (Iniciar/Cancelar) para activar esta y le gustaría que su tostada estuviera configuración. La luz del botón se iluminará ligeramente más tostado, presione el botón de color rojo, la alerta del horno sonará y la A BIT MORE (Un poco más) para obtener ®...
- Page 113 FUNCIÓN BAGEL Elementos Los elementos calefactores superiores e inferiores se encienden y se apagan para regular la temperatura correcta. Posición de la rejilla Altura intermedia. 4. Cierre la puerta del horno. Configuración opcional 5. Gire el dial de funciones hasta que el indicador esté...
- Page 114 Siga estas instrucciones generales: 7. Presione el botón START/CANCEL (Iniciar/Cancelar) para activar esta configuración. La luz del botón se iluminará COLOR DESEADO DEL CONFIGU- de color rojo, la alerta del horno sonará y la TOSTADO DEL BAGEL RACIÓN pantalla LCD se iluminará de color naranja. Bagel con tostado leve 1 o 2 8.
- Page 115 10. Si el ciclo ha terminado, y le gustaría que su FUNCIÓN BAKE (HORNEAR) bagel estuviera ligeramente más tostado, presione el botón A BIT MORE (Un poco ® Elementos más) para obtener 30 segundos adicionales. Los elementos calefactores superiores Si el horno no ha terminado el ciclo, se e inferiores se encienden y se apagan para agregarán 30 segundos al tiempo restante.
- Page 116 ‘30 MIN’. TIME 7. Ponga los alimentos en la bandeja para SLICES horno enlozada de Breville o en una fuente apta para el horno en el centro de la rejilla para que el aire fluya por los costados de los alimentos.
- Page 117 NOTA Al hornear alimentos como pastel, recomendamos poner el molde en una bandeja para hornear. Esto ayudará a distribuir de TEMP DARKNESS manera uniforme el calor del fondo de lo que se está cocinando. 9. Al final del ciclo de cocción sonará la alerta del horno tres veces, el botón START/ CANCEL (Iniciar/Cancelar) ya no estará...
- Page 118 FUNCIÓN ROAST (ROSTIZAR) 4. La temperatura de rostizado y el tiempo se pueden ajustar antes o durante el ciclo de rostizado. Elementos a) En la pantalla LCD se muestra la Los elementos calefactores superiores temperatura preestablecida ‘350 °F’ e inferiores se encienden y se apagan para (177 °C) como la temperatura regular la temperatura correcta.
- Page 119 7. Ponga los alimentos en la bandeja para horno • Recomendamos limitar el peso de las carnes enlozada de Breville o en una fuente apta y aves que vaya a rostizar a un máximo para el horno en el centro de la rejilla para que de 2 kg.
- Page 120 8. Luego de que la alerta de precalentamiento 10. Si el ciclo de rostizado ha terminado, haya sonado, el temporizador comenzará y le gustaría que su comida estuviese la cuenta regresiva automáticamente con ligeramente más cocinada, presione el botón incrementos de un minuto. La temperatura A BIT MORE (Un poco más) para rostizar ®...
- Page 121 FUNCIÓN BROIL (ASAR) 2. Ponga los alimentos en la bandeja para hornear de Breville o en una fuente apta para el horno, y luego póngala en el centro Elementos de la rejilla para que el aire fluya por los Los elementos calefactores superiores costados de los alimentos.
- Page 122 5. La temperatura y el tiempo de asado TIPO/CORTE PESO/ TIEMPO se pueden ajustar antes o durante el ESPESOR DE ASADO ciclo de asado. a) El ajuste preestablecido ‘HI’ (Alta) Lomo 2.5 cm 12 a 15 minutos se muestra como la temperatura Hamburguesa 2.5 cm 10 a 15 minutos...
- Page 123 7. Se mostrará el temporizador y comenzará 10. Si el ciclo de asado ha terminado, y le gustaría la cuenta regresiva en incrementos de un que su comida estuviera ligeramente más minuto. La temperatura y el tiempo se asada, presione el botón A BIT MORE ®...
- Page 124 Breville recomienda usar un molde para pizza a) En la pantalla LCD se muestra la antiadherente de color oscuro si va a cocinar una temperatura de cocción preestablecida...
- Page 125 NOTA NOTA Debido a la gran variedad de pizzas en el El molde para pizza, el color, el tamaño mercado, deberá considerar si está cocinando y el grosor de la pizza pueden influir en cuán una pizza fresca o congelada, con una corteza dorada o crocante sea la corteza de la pizza.
- Page 126 10. El ciclo de pizza se puede detener en NOTA cualquier momento presionando el botón START/CANCEL (Iniciar/Cancelar). Siempre asegúrese de usar agarraderas Esto cancelará el ciclo, la luz del botón se o manoplas para horno aislantes cuando tenga apagará y la pantalla LCD se iluminará que retirar la pizza del horno, ya que el queso de color azul.
- Page 127 FUNCIÓN COOKIES (GALLETAS) NOTA Elementos Si va a cocinar una pizza fresca, recomendamos usar agarraderas contra el calor o guantes Los elementos calefactores superiores de cocina con aislación para retirar la rejilla e inferiores se encienden y se apagan para completa con la piedra, y ponerla sobre la regular la temperatura correcta.
- Page 128 4. La temperatura y el tiempo de horneado NOTA se pueden ajustar antes o durante el ciclo. Debido a la gran variedad de tipos de cocciones, a) En la pantalla LCD se muestra la deberá considerar si está horneando masa de temperatura de horneado preestablecida galletas fresca, refrigerada o congelada, y ajustar en ‘350 °F’...
- Page 129 7. Ponga los alimentos en la bandeja para 9. Al final del ciclo de cocción, la alerta del horno enlozada de Breville o en una fuente horno sonará tres veces, el botón START/ apta para el horno en el centro de la rejilla CANCEL (Iniciar/Cancelar) ya no estará...
- Page 130 325 °F (162 °C). Para seleccionar la 2. Ponga los alimentos en la bandeja para temperatura de cocción, presione las horno enlozada de Breville o en una fuente flechas hacia arriba o hacia abajo para apta para el horno, luego colóquela en el ajustar la temperatura de 120 °F a 370 °F...
- Page 131 8. Ponga los alimentos en la bandeja para Presione la flecha hacia abajo o hacia horno enlozada de Breville o en una fuente arriba para ajustar el tiempo de cocción apta para el horno en el centro de la rejilla en incrementos de 1 minuto hasta máximo...
- Page 132 El uso de cualquier accesorio no recomendado cuando tenga que manipular, insertar o retirar por Breville puede causar lesiones. algún objeto dentro o fuera del horno. 12. El ciclo para recalentar se puede detener en cualquier momento presionando el botón START/CANCEL (Iniciar/Cancelar).
-
Page 133: Cuidado Y Limpieza
Cuidado IMPORTANTE No sumerja el cuerpo del horno, el cable de y limpieza alimentación o el enchufe en agua u otro líquido, ya que podría provocar una electrocución. Asegúrese de que el horno esté apagado Limpieza del interior presionando el botón START/CANCEL (Iniciar/Cancelar) del panel de control. -
Page 134: Consejos
4. Asegúrese de que la bandeja para migas esté dentro del horno y que la bandeja para • Breville no recomienda instalar el horno en un horno esté en la posición intermedia. espacio cerrado por las altas temperaturas que 5. -
Page 135: Solucionar Problemas
90 grados para obtener un dorado más uniforme. • La masa de pizza no se Breville recomienda usar un molde para pizza antiadherente de color vuelve crujiente. oscuro si va a cocinar una pizza. Las bandejas de colores claros reflejan el calor y es posible que no dejen la masa crujiente. - Page 136 La pantalla LCD mostrará el mensaje ‘E01’ cuando haya un problema no el mensaje ‘E01’. reiniciable con el equipo. Si esto ocurre, quite inmediatamente el cable de alimentación del tomacorriente y llame al Centro de servicios de Breville (1-866-BREVILLE en los Estados Unidos). •...
- Page 137 Notas...
- Page 138 Notas...
- Page 139 Notas...
- Page 140 ® Breville is a registered trademark of Breville Pty. Ltd. A.B.N. 98 000 092 928. Copyright Breville Pty. Ltd. 2020. • Due to continued product improvement, the products illustrated/photographed in this brochure may vary slightly from the actual product.
Need help?
Do you have a question about the he Mini Smart Oven BOV450BSS1BCA1 and is the answer not in the manual?
Questions and answers