
Related Manuals for Breville Compact Wave Soft Close


Summary of Contents for Breville Compact Wave Soft Close
- Page 1 Compact Wave Soft Close ™ Instruction Book – BMO650 INSTRUCTION BOOK MANUEL D'INSTRUCTIONS MANUAL DE INSTRUCCIONES FR-CA ES-MX...
-
Page 2: Table Of Contents
BREVILLE Contents RECOMMENDS SAFETY FIRST 2 Limited Product Warranty At Breville we are very safety 2 Breville recommends safety first conscious. We design and 12 Components manufacture consumer 13 Assembly products with the safety of you, 15 Functions our valued customer, foremost 17 Cooking Functions in mind. - Page 3 • Remove and safely discard items. any packaging material and promotional labels before using • Children should be supervised the Breville microwave oven for to ensure that they do not play the first time. with the appliance. • Read and follow the specific WARNING "PRECAUTIONS TO AVOID...
- Page 4 • When cleaning surfaces of plug of the Breville microwave door and oven that come oven. together on closing the door; • Do not place the microwave...
- Page 5 • For any maintenance other • Always ensure the microwave than cleaning, contact Breville oven power cord is unplugged Consumer Support. from the power outlet before • This appliance is for household attempting to move the use only.
- Page 6 Do not use outdoors. Misuse • Do not, under any may cause injury. circumstances, modify the power plug or use an adapter. • A 120 volt, 60 Hz, AC only, 15-20 amp electrical supply SPECIAL SAFETY with a fuse or circuit breaker INSTRUCTIONS FOR YOUR is required in accordance MICROWAVE OVEN...
- Page 7 This should be done prior to • Do not use metal containers or utensils in the microwave oven preparing food for heating or cooking in the microwave oven. as these could cause sparking and / or fire. • All suitable glass or plastic food containers should be •...
- Page 8 Immediately cease points without the appearance use and call Breville Consumer of boiling or bubbling. THIS Support for examination, repair COULD RESULT IN VERY or adjustment. It is particularly...
- Page 9 • If any smoke is observed, oven, press the STOP/CLEAR switch off and unplug the button and correct the problem microwave oven at the power or contact Breville Consumer outlet. Keep the door closed to Support for assistance. stifle any flames.
- Page 10 GROUNDING electrician or serviceman install an outlet near the INSTRUCTIONS appliance. WARNING RADIO INTERFERENCE Improper use of the grounding can result in a risk of electrical This device complies with part shock. 15 of the FCC Rules. Operation • This appliance is equipped is subject to the following two with a power cord having conditions: (1) This device may...
- Page 11 may cause harmful interference SPECIFICATIONS to radio communications. Power Input 120 VAC – 60 Hz; 1 350 W However, there is no guarantee Power Output 900 W – 2450 MHz that interference will not occur 11.5 inches/292 mm (H) in a particular installation. 19.1 inches/485 mm (W) If this equipment does cause Outside...
-
Page 12: Components
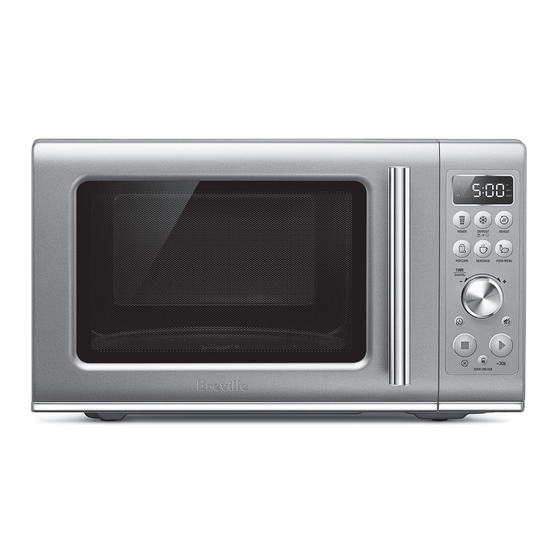
Components A. Viewing window I. TIME dial B. Door handle: Pull handle to open. J. Mute button C. LED screen K. START/+30 INSTANT START button. Each press adds 30 second increments at D. POWER LEVEL button: 100% power. The default power will be P100 (100%). When the POWER button is pressed again, L. -
Page 13: Assembly
Assembly BEFORE FIRST USE INSTALLATION AND TURNING ON THE MICROWAVE OVEN Before first use remove all promotional stickers and packaging material. Carefully unpack • Select a level surface that provides enough the microwave oven and keep all the packing open space for the intake and/or outlet vents. material until all the parts of the microwave •... - Page 14 If there is any damage, do not operate the oven and contact a Breville service centre. • Do not immerse the microwave oven, power...
-
Page 15: Functions
Functions SETTING THE CLOCK - STANDBY 12 HOUR CLOCK DISPLAY When the microwave has been idle for 1 minute, STANDBY mode will be activated and the clock will be shown. Press SET CLOCK on interface panel. The microwave will beep once. If the clock has not been set, the display will remain at 00:00 The default time is 06:00. - Page 16 DYNAMIC POWER ADJUSTMENT STOP/CLEAR The food menu settings have pre-determined Press STOP/CLEAR once during the cooking cook times and power levels to give the cycle to pause cooking, press again to cancel best results. However, to suit your personal cooking and return to default screen. preference adjustment of both time and power is available during the cooking cycle when MUTE...
-
Page 17: Cooking Functions
Cooking Functions FOOD MENU Popcorn The POPCORN setting is designed to pop the The food menu setting is designed to maximum number of kernels in each bag. automatically cook at the correct power for the correct time. To select this setting, press the POPCORN button. - Page 18 To select this setting, press the DEFROST button on the main interface. The setting will enable you to defrost by weight or by time. CUPS SLICES Defrost by Weight To defrost by weight, press the DEFROST button. When Defrost by Weight is selected, Turn the TIME dial to select the number the LED display will look as below: of slices and press START to begin cooking.
-
Page 19: Hints & Tips
Hints & Tips SOME IMPORTANT TIPS FOR • Elevating some types of food such as cakes, roast vegetables and dough products can MICROWAVE COOKING be advantageous. It allows more energy to To help equalize energy in the food so that it penetrate the food from all sides, base and cooks evenly follow these helpful tips. -
Page 20: Care & Cleaning
The turntable roller may If none of the above rectify the situation, then be washed in mild soapy water, rinse in clean contact your Breville Service Center. Do not try water and dry thoroughly. When removing to adjust or repair the oven yourself. -
Page 21: Troubleshooting
Troubleshooting PROBLEM EASY SOLUTION • Microwave oven Clean door and sealing surface of the oven. • interfering with radio, Reorient the receiving antenna of radio or television. • TV or similar equipment. Relocate the microwave oven with respect to the receiver. •... - Page 22 Notes...
- Page 23 Compact Wave Soft Close ™ Manuel d'instructions – BMO650 MANUEL D'INSTRUCTIONS FR-CA...
- Page 24 Garantie limitée du produit IMPORTANTES MESURES DE La garantie de Breville pour ce produit couvre la réparation ou le remplacement, SÉCURITÉ s’il s’avère défectueux en raison d’un défaut de matériel, de fabrication ou de fonctionnement pendant la période AVERTISSEMENT de garantie.
- Page 25 BRÛLURES. NE LAISSEZ PAS étiquettes promotionnelles LES ENFANTS UTILISER LE avant d'utiliser le micro-ondes MICRO-ONDES. Soyez prudent de Breville pour la première fois. lorsque vous retirez des articles • Lisez et suivez les «MESURES chauds. SPÉCIFIQUES POUR ÉVITER • Surveillez les enfants pour qu'ils UNE POSSIBLE EXPOSITION ne jouent pas avec l'appareil.
- Page 26 être émises. qualifié. Contactez l'équipe de soutien aux consommateurs de • Pour réduire les risques de feu Breville ou un centre de service dans la CAVITÉ du four : autorisé Breville près de chez i) Ne surcuisez les aliments.
- Page 27 FR-CA • Pour éliminer tout risque de dans une prise électrique et suffocation chez les jeunes de le mettre en marche. Ne enfants, retirez et jetez en lieu l'utilisez pas sans l'entraîneur sûr l'enveloppe protectrice qui de plateau et le plateau rotatif recouvre la fiche d'alimentation bien en place.
- Page 28 (interrupteur de l'usage et contactez l'équipe de sécurité) est recommandée soutien aux consommateurs pour assurer une sécurité de Breville pour le faire vérifier, supplémentaire lors de réparer ou ajuster. l'utilisation d'un appareil • Pour tout entretien autre que électrique. Il est recommandé...
- Page 29 FR-CA votre électricien pour des • Le micro-ondes est conçu pour chauffer les aliments et conseils professionnels. les boissons. Faire sécher les • Cet appareil doit être branché aliments ou les vêtements, à une prise électrique chauffer ou réchauffer les correctement reliée à...
- Page 30 • Assurez-vous toujours d'avoir contactez l'équipe de soutien vérifié la température des aux consommateurs de Breville boissons ou des aliments qui pour faire vérifier le four, ont été chauffés ou cuits au le réparer ou l'ajuster. Il est micro-ondes avant de les boire, particulièrement important...
- Page 31 FR-CA correctement et qu'aucune de POURRAIT ENTRAÎNER ses pièces soit endommagée. UN RISQUE SOUDAIN Par exemple : (1) porte tordue, DE DÉBORDEMENT (2) charnières ou loquets brisés SI LA SURFACE DU ou desserrés, (3) joints de porte LIQUIDE CHAUD OU et surfaces d'étanchéité...
- Page 32 • Ne tentez pas de faire de soutien aux consommateurs fonctionner le four d'autres de Breville. manières que celles décrites dans ce manuel d'instructions. INSTRUCTIONS DE MISE • Vérifiez si les ustensiles de À LA TERRE...
- Page 33 FR-CA de la faire remplacer par une ATTENTION prise électrique à 3 alvéoles. Tout changement ou • Ne coupez ni ne retirez en modification non expressément aucune circonstance la troisième approuvés par la partie broche (mise à la terre) du cordon responsable de la conformité d'alimentation et n'utilisez pas risque d'invalider l'autorisation d'adaptateur.
- Page 34 l'utilisateur est encouragé à SPÉCIFICATIONS essayer de corriger le brouillage Entrée de 120 VAC – 60 Hz; 1 350 W par une ou plusieurs des puissance mesures suivantes : Puissance 900 W – 2 450 MHz • Réorientez ou déplacez de sortie l'antenne de réception.
- Page 35 FR-CA Composants J. Bouton MUET A. Vitre de la porte B. Poignée de la porte : Tirer pour ouvrir. K. Bouton de DÉMARRAGE |+30 sec Chaque pression du bouton ajoute 30 sec C. Écran LED de cuisson à la puissance (100 %). D.
- Page 36 Assemblage AVANT LA PREMIÈRE UTILISATION INSTALLATION ET DÉMARRAGE DU FOUR À MICRO-ONDES Avant la première utilisation, retirez tous les collants promotionnels et tout le matériel • Choisissez une surface plane qui offre d'emballage. Déballez soigneusement le suffisamment d'espace pour le bon four à...
- Page 37 En cas de dommage, n'utilisez pas le four et contactez un centre de service autorisé Breville. • N'immergez pas le four à micro-ondes, le cordon ou la fiche d'alimentation dans l'eau...
- Page 38 Fonctions RÉGLAGE DE L'HORLOGE – AFFICHAGE SUR 12 HEURES Appuyez sur le bouton de RÉGLAGE DE L'HORLOGE sur l'interface du panneau principal. Le four bipera une fois. L'heure par défaut est 06:00. Les chiffres en surbrillance clignoteront pour indiquer qu'il peuvent être ajustés.
- Page 39 FR-CA RÉGLAGE DYNAMIQUE DE LA ARRÊT/PAUSE PUISSANCE Pour faire une pause durant la cuisson, Les paramètres du MENU ALIMENT ont appuyez une fois sur le bouton ARRÊT/ été prédéterminés en fonction des temps de PAUSE. Appuyez à nouveau sur le bouton cuisson/niveaux de puissance pour assurer pour arrêter la cuisson et retourner à...
- Page 40 Fonctions de cuisson Popcorn La fonction POPCORN est conçue pour faire CUPS éclater le maximum de grains de maïs dans SLICES chaque sac. Pour sélectionner cette fonction, appuyez sur le bouton POPCORN. Placez le sac au centre MENU ALIMENT du plateau rotatif. Tournez le cadran de TEMPS pour La fonction MENU ALIMENT est conçue sélectionner le poids, ou appuyez à...
- Page 41 FR-CA Couvrez avec un couvercle en plastique ventilé Pizza pour micro-ondes ou une pellicule plastique Le paramètre PIZZA a été spécialement conçu perforée pour micro-ondes. pour réchauffer parfaitement les restes de Une fois la cuisson terminée, laissez les pizza. légumes reposer 5 minutes avant de les servir. Pour sélectionner ce paramètre, appuyez DÉCONGELER deux fois sur le bouton MENU ALIMENT.
- Page 42 Décongeler selon le temps Pour décongeler selon le temps, appuyez une fois sur le bouton DÉCONGELER de l'interface principale. Quand Décongeler par temps est sélectionné, l'écran ressemble à ceci : CUPS SLICES Tournez le cadran de TEMPS pour sélectionner le temps désiré et appuyez sur le bouton de DÉMARRAGE pour commencer.
- Page 43 FR-CA • Le fait de surélever certains types d'aliments tels que les gâteaux, les légumes rôtis ou les Trucs et astuces produits à base de pâte peut être avantageux. Cela permet à plus d'énergie de pénétrer dans les aliments de tous les côtés, de la base au QUELQUES TRUCS IMPORTANTS SUR sommet.
- Page 44 Retirez l'entraîneur de plateau et autorisé Breville. Ne tentez pas d'ajuster ou de lavez-le à l'eau savonneuse, rincez et séchez réparer vous-même l'appareil. soigneusement. Assurez-vous de le remettre...
- Page 45 FR-CA Guide de Dépannage PROBLÈME SOLUTION FACILE • Le micro-ondes crée Nettoyez la porte et la surface d'étanchéité du four. • de l'interférence avec Réorientez l'antenne réceptrice de la radio ou du téléviseur. • la radio, la télé ou autre Replacez le micro-ondes en tenant compte du récepteur.
- Page 46 Remarques...
- Page 47 Compact Wave Soft Close ™ Manual de Instrucciones – BMO650 MANUAL DE INSTRUCCIONES ES-MX...
- Page 48 Garantía limitada INSTRUCCIONES DE SEGURIDAD La garantía de Breville para este producto cubre la reparación o IMPORTANTES sustitución si se encuentra defectuoso debido a fallas en los materiales, mano ADVERTENCIA de obra o funcionamiento dentro del periodo de garantía.
- Page 49 No está Contacte al Centro de servicios indicado para usos industriales de Breville o a un servicio o de laboratorio. técnico autorizado de Breville para que lo examinen, reparen • EL CONTENIDO o ajusten.
- Page 50 El horno microondas de Breville. uso de sustancias químicas • No deje el horno microondas corrosivas para limpiar dañará cerca del borde de una mesa...
- Page 51 ES-MX donde pueda tocar un horno • El horno microondas no está diseñado para funcionar caliente. mediante un temporizador • Debe haber una altura externo o un sistema de control mínima de espacio libre remoto independiente. necesario por encima de la •...
- Page 52 • Se recomienda la instalación inmediatamente el uso del de un dispositivo de corriente equipo y contacte al Servicio residual (interruptor de al Cliente de Breville para que lo seguridad) para proporcionar examinen, reparen o ajusten. protección adicional al usar • Para cualquier otro equipos eléctricos.
- Page 53 ES-MX alimenta el equipo. Consulte • El horno de microondas está destinado para calentar a un electricista para obtener bebidas y alimentos. El secado asesoramiento profesional. de alimentos o ropa y el • El aparato debe estar conectado calentamiento de almohadas, a tierra en un tomacorriente zapatillas, esponjas o artículos que disponga de una conexión...
- Page 54 Suspenda de consumirlos para evitar inmediatamente el uso del quemaduras. equipo y contacte al Servicio • Compruebe siempre la al Cliente de Breville para que temperatura de la comida o lo examinen, reparen o ajusten. bebida calentada o cocinada en...
- Page 55 ES-MX Es particularmente importante iv) Una vez calentado, deje reposar el recipiente en el que la puerta del horno se cierre horno microondas unos correctamente y que no haya instantes antes de retirarlo. daños en ninguna de estas partes: v) Tenga sumo cuidado al (1) Puerta (doblada), (2) Bisagras introducir una cuchara u otro y pestillos (rotos o sueltos),...
- Page 56 STOP/CLEAR (Detener/ las llamas. Borrar) y corrija el problema o comuníquese con el Servicio al • No intente hacer funcionar Cliente de Breville para obtener el horno microondas usando ayuda. métodos distintos de los que se describen en este manual de instrucciones.
- Page 57 ES-MX clavijas debidamente conectado expresamente aprobados por a tierra. el encargado de cumplimiento normativo podrían dejar sin • Por ningún motivo corte o retire efecto legal la autoridad del la tercera clavija (tierra) del usuario para operar el equipo. cable de alimentación ni use un adaptador.
- Page 58 aplicando una o más de las ESPECIFICACIONES TÉCNICAS siguientes medidas: Entrada de 120 VAC ~ 60 Hz; 1 350 W • Cambie la orientación o la energía ubicación de la antena de Potencia 900 W–2450 MHz recepción. de salida • Aumente la separación entre 11.5 pulgadas/292 mm (altura) equipo y el receptor.
- Page 59 ES-MX Componentes A. Visor para ver dentro J. Botón MUTE (Silencio) K. Botón START/+30 INSTANT START B. Manija de la puerta: tire para abrir. (Inicio/Agregar 30 s): Cada vez que se C. Pantalla LED presiona, se inicia el ciclo o se agregan D.
- Page 60 Montaje ANTES DEL PRIMER USO INSTALACIÓN Y ENCENDIDO DEL HORNO MICROONDAS Antes del primer uso, retire todas las pegatinas promocionales y todo el embalaje. Desembale • Seleccione una superficie nivelada con el horno microondas con cuidado y conserve suficiente espacio libre para las rejillas de todo el embalaje hasta que haya encontrado ventilación de entrada y salida.
- Page 61 Si detecta algún daño, no utilice el horno y contacte al Centro de Servicios de Breville. • No sumerja el horno microondas, el cable de alimentación o el enchufe en agua...
- Page 62 Funciones CONFIGURACIÓN DEL RELOJ: FORMATO DE 12 HORAS Presione el botón SET CLOCK (Configurar reloj) del panel de la interfaz. El microondas emitirá un sonido. La hora predefinida es 06:00. Los dígitos iluminados parpadearán para señalar que los puede ajustar. Gire el selector TIME (Tiempo) para ajustar las horas y presione START (Inicio) o SET CLOCK para confirmarlas.
- Page 63 ES-MX FINAL DE LA COCCIÓN Ajuste del nivel de potencia Al final de todo ciclo de cocción, el microondas Presione el botón POWER (Potencia) emitirá tres pitidos y la palabra “End” (Fin) en la parte frontal del microondas. parpadeará en la pantalla. La potencia predefinida es P100 (100 %).
- Page 64 Cuando el ciclo termine, remueva las Funciones bebidas que haya calentado y déjelas reposar 1 o 2 minutos antes de beberlas. Advertencia: de cocción sobrecalentar las bebidas puede quemarlas. Función Popcorn La función Popcorn (Palomitas) está diseñada CUPS para estallar la cantidad máxima de granos SLICES en cada bolsa.
- Page 65 ES-MX Gire el selector TIME (Tiempo) para establecer Función Pizza el número de tazas y presione START (Inicio) La función PIZZA está especialmente diseñada para comenzar a cocinar. Puede seleccionar de para recalentar perfectamente rebanadas 1 (4.4 oz/125 g) a 4 (17.6 oz/500 g) tazas. de pizza.
- Page 66 Gire el selector TIME (Tiempo) para seleccionar el peso de la comida a descongelar. El peso mínimo es de 4 oz/115 g y el máximo, de 48 oz/1.36 kg. Presione START (Inicio) para comenzar. CUPS SLICES Descongelación por tiempo Para descongelar por tiempo, presione el botón DEFROST dos veces.
- Page 67 ES-MX • Dé vuelta los alimentos de tamaño mediano o grande dos veces durante el ciclo. Esto Claves y consejos permite una exposición uniforme a las microondas. • Puede resultar conveniente elevar algunos CONSEJOS IMPORTANTES PARA tipos de alimentos, como pasteles, verduras COCINAR EN MICROONDAS asadas y productos de masa.
- Page 68 La base con los rodillos se continúa, comuníquese con el Centro de puede lavar con agua tibia y jabón, enjuagar Servicios Breville. No intente modificar reparar con agua limpia y secar bien. Cuando retire el horno usted mismo.
- Page 69 ES-MX Solución de problemas PROBLEMA SOLUCIÓN FÁCIL • El horno microondas Limpie la puerta y las superficies de sellado del horno. • interfiere con la Reoriente la antena receptora de la radio o el televisor. • radio, el televisor Cambie el horno microondas de lugar con respecto al receptor. •...
- Page 70 Notas...
- Page 71 ES-MX Notas...
- Page 72 1-800-953-1668 Sitio web: breville.mx/support Breville is a registered trademark of Breville Pty. Ltd. A.B.N. 98 000 092 928. Copyright Breville Pty. Ltd. 2024. • Due to continued product improvement, the products illustrated/photographed in this brochure may vary slightly from the actual product.
Need help?
Do you have a question about the Compact Wave Soft Close and is the answer not in the manual?
Questions and answers
My BMO 650SIL gets very hot quickly and shuts off. The interior of the micro wave is then very wet,as if there's no ventilation or exhaust. ....... Is it SAFE to continuing using?