PEIKER CEE CEECOACH PLUS Instruction Manual
Communication device
Hide thumbs
Also See for CEECOACH PLUS:
- Instruction manual (88 pages) ,
- Instructions manual (26 pages) ,
- Quick manual (9 pages)

Subscribe to Our Youtube Channel
Related Manuals for PEIKER CEE CEECOACH PLUS


Summary of Contents for PEIKER CEE CEECOACH PLUS
- Page 1 Communication device PLUS CEECOACH Instruction manual English translation of the original instruction manual 10/2020...
-
Page 3: Table Of Contents
Table of contents Notes on the manual and the manufacturer ........4 Keep manual available ................4 Online available information ..............4 Design features in the text ................ 4 Copyright ..................... 5 Manufacturer address ................5 Security....................6 Intended use ....................6 Basic Safety Instructions ................ - Page 4 Unpacking and checking the scope of delivery ......13 Putting the device into operation ..........14 Connect device to a Bluetooth® headset ........15 Wear the device on your belt ............17 Attach the device to the upper arm..........19 Switching the device on and off ............
- Page 5 RF Radiation Exposure Statement ..........38 Canada, Industry Canada (IC) Notices ......... 39...
-
Page 6: Notes On The Manual And The Manufacturer
Notes on the manual and the manufacturer PLUS This manual will help you to use the CEECOACH communication device, version 01.00.xx or higher, safely. PLUS The CEECOACH communication device is referred to in the following as "device". Keep manual available This manual is part of the device. -
Page 7: Copyright
CEE GmbH. © 2020 peiker CEE GmbH All rights reserved. Manufacturer address peiker CEE GmbH Gartenstraße 25... -
Page 8: Security
Security Intended use The device is used for group communication in the sports and leisure sector. The device can communicate with a maximum of 16 participants in a conference. The range between the participants is up to 650 m. The distance between the devices must be less than 10 m when connecting to a group. -
Page 9: Avoid Damage To Property And Malfunctions
Avoid hearing damage Too high volume levels can irreparably damage your hearing. Avoid continuous exposure to sound at maximum volume. Avoid environmental damage Dispose of the device and its components in accordance with the regulations applicable at the place of use. Avoid damage to property and malfunctions Avoid damage to the device due to incorrect use ... -
Page 10: Design Features Of The Warning Notices
Design features of the warning notices WARNING Notes with the word WARNING warn of a dangerous situation that could result in death or serious injury. CAUTION Notes with the word CAUTION warn of a situation that may cause minor or moderate injury. Design features of the indications of material damage ATTENTION! These notes warn of a situation that could lead to material... -
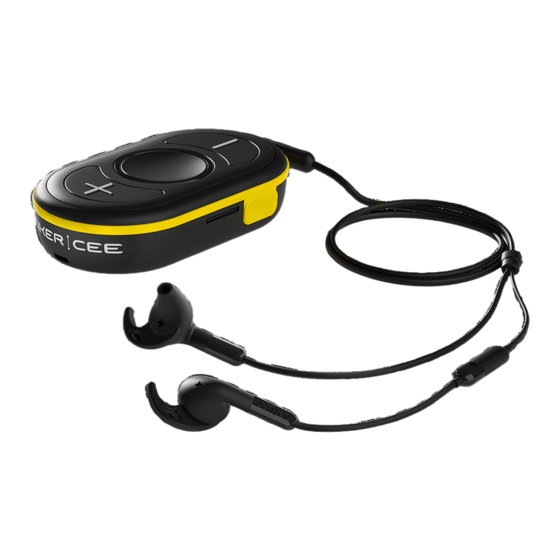
Page 11: Description
Description Scope of delivery... -
Page 12: Task And Function
Designation Belt clip (included 2 times in the duo set) Holder (included 2 times in the duo set) Device (included 2 times in the Duo-Set) Headset (included 2 times in the Duo-Set) wristband with velcro (included 2 times in the duo set) Screwdriver USB-C cable (included 2 times in the duo set) Plug (country-specific) -
Page 13: Control Elements
Control Elements... -
Page 14: Indications In The Light Ring
Designation Function key for connecting the device to other devices Connection socket for headset USB socket for USB-C cable Minus key: decrease volume Function key to connect the device to other devices or to the Bluetooth® headset Main key: Switch device on and off Switch microphone on and off Plus key: Increase volume illuminated ring... -
Page 15: Unpacking And Checking The Scope Of Delivery
Unpacking and checking the scope of delivery WARNING Small parts are included in the delivery. Children can swallow the small parts while playing and choke on them. Make sure that the small parts do not get into the hands of children. -
Page 16: Putting The Device Into Operation
Putting the device into operation Switch on the device (see section "Switching the device on and off" on page20). Use the headset as described in the manual of the respective manufacturer. When using a Bluetooth® headset, proceed as described in section "Connecting the device to a Bluetooth®... -
Page 17: Connect Device To A Bluetooth® Headset
Connect device to a Bluetooth® headset Switch on the device (see section "Switching the device on and off" on page20). Turn on the Bluetooth® headset. Make sure that the Bluetooth® headset is in pairing mode. Follow the instructions in the Bluetooth®... - Page 18 When using the device with a Bluetooth® headset, please note the following: • When a device is connected to a Bluetooth® headset, the Bluetooth® headset and the device can be turned off. After both devices are switched on again, they will automatically connect (re-connect). •...
-
Page 19: Wear The Device On Your Belt
Wear the device on your belt ATTENTION! Damage to the device due to incorrect wearing is possible. If possible, attach the device to the belt with the supplied belt clip or wear it securely on your upper arm. Do not drop the device. ... - Page 20 Alternatively you can thread the belt through the belt clip. To remove, lift the nose of the belt clip and pull the device together with the belt clip off the belt. To remove the belt clip, pull the locking lever upwards and remove the belt clip from the device.
-
Page 21: Attach The Device To The Upper Arm
Attach the device to the upper arm Remove the holder (1.) on the bracket. Use the supplied screwdriver. Feed the bracelet (2) through the loops (1) as shown (2.) and pull it through to the end. To attach the device to your upper arm, pass the strap (2) through the tab. -
Page 22: Switching The Device On And Off
Switching the device on and off To switch on the device, press the main button (1) and hold it pressed for at least 3 seconds. The light ring (2) then shows a color for 3 seconds (green, orange or red depending on the battery charge). - Page 23 The device is automatically switched off after five minutes if there is no connection to another device. This is the case when the LED is white every 2 seconds (device is not paired) or cyan (no other device is within radio range).
-
Page 24: Switch Microphone On And Off (Mute Function)
Switch microphone on and off (mute function) To switch off the microphone press the main button (1) briefly. You listen to the voice message "Mute". The light ring (2) flashes magenta. You are now no longer heard by other connected participants. ... -
Page 25: Adjust Volume
Adjust volume CAUTION Hearing damage due to too loud noises possible. Avoid continuous exposure to sound at maximum volume. To increase the volume, press the Plus key step by step. The device becomes louder in 1/12 steps. The color display in the light ring becomes larger. -
Page 26: Create Group
Create group You can form a group with up to 15 other devices. The distance between the devices must be less than 10 m when connected. Make sure that the devices to be connected are within range. Switch the devices on (see "Switching the device on and off" on page20). ... - Page 27 If no connection has been established, the light ring flashes white. In this case repeat the process. You can create new groups of connected devices at any time (see section "Creating groups" on page24).
-
Page 28: Update The Software Of The Device
Update the software of the device An update app is available for Windows and Apple computers at www.peiker-cee.de/doc. To download the update app you need the operating system WINDOWS 10 or MAC-OS on your computer. Proceed as follows: Download the file CeecoachplusUpdaterInstaller. ... -
Page 29: Load Device
Load device WARNING Fire possible due to overheated components. Never charge the battery unattended. You want to check the charge status of your device. Switch the device on or off. During this process, the charging status is displayed (see section "Display in the light ring"... - Page 30 Connect the larger plug of the USB-C cable to the charger. Connect the charger to a suitable power outlet. The charging time depends on the ambient temperature and the power of the charger. When the device's battery is fully charged, the light ring will glow solid green when the device is turned off until the device is disconnected from the charger.
-
Page 31: Resetting The Device To The Basic Setting
Resetting the device to the basic setting Make sure that the device is switched on. Press the main key (1) and the plus and minus keys simultaneously and hold them down for more than five seconds. The light ring (2) shines green twice, white once and then orange. The device is switched off. -
Page 32: Troubleshooting
"Connecting the device to a Bluetooth® headset" starting on page15. On the peiker CEE website you will find a list of frequently asked questions (FAQ), which is constantly updated. Check there as well, if there is an answer for your problem. -
Page 33: Cleaning The Device
Cleaning the device ATTENTION! Damage to the device possible by using strong cleaning agents. Use only mild detergents for heavy soiling. If necessary, clean the device and headset with a slightly moistened cloth. If the device is very dirty, clean it only with mild detergents, e.g. dishwashing detergent. -
Page 34: Store And Transport The Device
Store and transport the device Store the device and its components in a dry, dust-free place. For storage and transport, for example, use the optionally available transport bag. -
Page 35: Dispose Of The Device
Dispose of the device At the end of its service life, the device and its components must be disposed of in an environmentally friendly manner. Dispose of the device in accordance with the regulations applicable at the place of use. ... -
Page 36: Technical Data
Technical data Device Number of participants 2–16 Headset connection Bluetooth® headset or standard 3.5 mm jack Mounting Clip can be locked in 90° steps Display illuminated ring with 12 LEDs, multicolor Number of keys Device connection USB-C Charger connection USB-A Call time (operating time) up to 18 hours Charging... -
Page 37: Guarantee Statements
Guarantee statements peiker CEE GmbH (peiker Consumer Electronics Evolution GmbH) grants a manufacturer's warranty of two years from the date of purchase on all parts included in the scope of delivery within the scope of legal regulations (proof of purchase receipt). Improper handling or incorrect use shall exclude liability... -
Page 38: Eu Declaration Of Conformity
EU Declaration of Conformity Hereby peiker CEE GmbH (peiker Consumer Electronics Evolution GmbH) declares that the device complies with the requirements and other relevant regulations of the directive RED 2014/53/EU. Further information can be found at: http://www.ceecoach.com/DoC... -
Page 39: Fcc Note
Note regarding FCC 15.21 Warning: Changes or modifications not expressly approved by peiker CEE GmbH void user's authority to operate equipment. Note regarding FCC 15.19 This device complies with Part 15 of the FCC Rules. Operation is subject to the following two conditions:... - Page 40 RF Radiation Exposure Statement This equipment complies with the FCC/IC radiation exposure limits set fourth for portable transmitting devices operation in an uncontrolled environment. End users must follow the specific operating instructions to satisfy RF exposure compliance. • This transmitter must not be co-located or operation in conjunction with any other antenna or transmitter.
- Page 41 Canada, Industry Canada (IC) Notices This device complies with Industry Canada's licence-exempt RSS-102, RSS-247. Operation is subject to the following two conditions: (1) This device may not cause interference; and (2) This device must accept any interference, including interference that may cause undesired operation of the device. L’émetteur/récepteur exempt de licence contenu dans le présent appareil est conforme aux CNR d’Innovation, Sciences et Développement économique Canada applicables aux...
Need help?
Do you have a question about the CEECOACH PLUS and is the answer not in the manual?
Questions and answers