DURAVIT SensoWash Slim Operating Instructions Manual
Shower toilet unit
Hide thumbs
Also See for SensoWash Slim:
- Operating instructions manual (110 pages) ,
- Manual (109 pages) ,
- Mounting instructions (12 pages)
Table of Contents
Advertisement
Available languages
Available languages
Duravit AG
Duravit NYC
P.O. Box 240
105 Madison Avenue
Werderstr. 36
New York, NY 10016
78132 Hornberg
Toll Free 888-DURAVIT
Germany
Phone 212 686 0033
Phone +49 78 33 70 0
Fax
212 686 8033
Fax
+49 78 33 70 289
info@us.duravit.com
info@duravit.com
www.duravit.us
www.duravit.com
Duravit USA, Inc.
Leben im Bad
2205 Northmont Pkwy., Ste. 200
Living bathrooms
Duluth, GA 30096
Toll Free 888-DURAVIT
Phone 770 931 3575
Fax
770 931 8454
info@us.duravit.com
www.duravit.us
SensoWash
Operating instructions
Manual de instrucciones
Notice d'utilisation
操作說明
Slim
®
Shower toilet unit
Accesorio para el WC con ducha
Abattant WC douche
智慧馬桶座組件
1.
3.
2.
Advertisement
Chapters
Table of Contents

Subscribe to Our Youtube Channel
Related Manuals for DURAVIT SensoWash Slim


Summary of Contents for DURAVIT SensoWash Slim
- Page 1 Duravit AG Duravit NYC Duravit USA, Inc. Leben im Bad P.O. Box 240 105 Madison Avenue 2205 Northmont Pkwy., Ste. 200 Living bathrooms Werderstr. 36 Duluth, GA 30096 New York, NY 10016 Toll Free 888-DURAVIT 78132 Hornberg Toll Free 888-DURAVIT...
- Page 2 www.sensowash.us...
-
Page 3: Table Of Contents
Contents 1. Brief overview ..............4 1.1 Toilet unit ..............4 1.2 Remote control ............4 2. Description of Symbols ............4 3. For your safety ..............5 3.1 Normal Use ..............5 3.2 Safety instructions ............. 5 4. Basics of operation ............11 4.1 Remote control ............ -
Page 4: Brief Overview
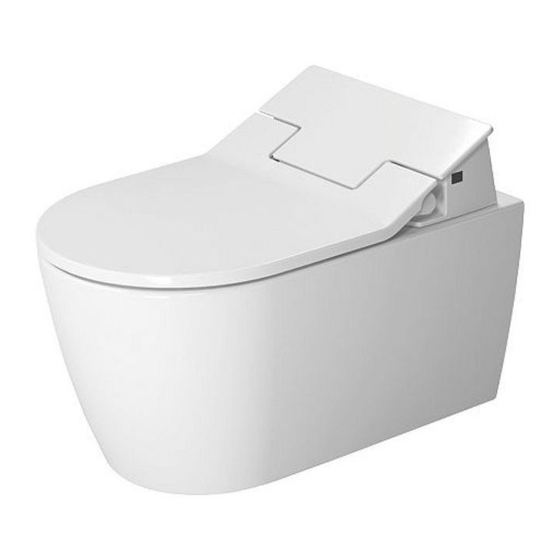
1. Brief overview 1.1 Toilet unit 1.2 Remote control Power Infrared transmitter Status LED Rearwash Rearwash Ladywash Ambient light sensor Comfortwash Ladywash Spray wand position Infrared receiver Water temperature Night light Stop Soft closing mechanism Battery Compartment The overviews referred to are collected toghether on the fold out page. -
Page 5: For Your Safety
These operating instructions correspond to the device’s state of technology at the time of printing. Duravit reserves the right to make changes in terms of further development. 3.1 Normal Use ®... - Page 6 Do NOT use the product if it is not working properly. Disconnect from the power supply immediately. Close the stop valve to interrupt the water supply. Contact help@duravit.com. Avoid malfunctions and damage to the product as a result of improper use.
- Page 7 Use of batteries CAUTION Health damage! > Avoid contact with skin, eyes and mucous membranes if battery acid has leaked. > In case of contact with the acid, flush the affected areas with large amounts of clean water and consult a doctor immediately. Keep batteries out of the reach of small children.
- Page 8 Do not use while bathing. Do not place or store product where it can fall or be pulled into a tub or sink. Do not place in or drop into water or other liquid. Do not reach for a product that has fallen into water. Unplug immediately.
- Page 9 GROUNDING INSTRUCTIONS This product should be grounded. In the event of an electrical short circuit, grounding reduces the risk of electric shock by providing an escape wire for the electric current. This product is equipped with a cord having a grounding wire with a grounding plug.
- Page 10 Adapter Grounded outlet Metal screw Grounding pin Tab for grounding screw Grounded outlet box Wiring Diagram (NOT FOR INSPECTOR’S USE) NOTICE Actual field installation maybe be slightly different from diagram. Provided fittings will be connected at the bottom of unit instead on the sides.
-
Page 11: Basics Of Operation
cy energy and, if not installed and used in accordance with the instructions, may cause harmful interference to radio communi- cations. However, there is no guarantee that interference will not occur in a particular installation. If this equipment does cause harmful interference to radio or television reception, which can be determined by turning the equipment off and on, the user is encouraged to try to correct the interference by one of the fol-... -
Page 12: Status Leds
> Press the lock of the “Battery Compartment” to open it. > Insert two lithium batteries (CR2032) with + facing upwards. > Close the “Battery Compartment” 4.2 Status LEDs ® Red illuminated: SensoWash is in the „Standby mode“, all func- tions cannot be used. -
Page 13: Switch Sensowash ® On
The “Status LED” is green illuminated. All functions can be used. 6. Operating A video of all operating functions of this shower toilet is available at duravit.com/vid_sewa_slim. Simply use this QR code ® 6.1 Switching the SensoWash on / off >... -
Page 14: Activating / Deactivating "Rearwash
Activating / deactivating “Rearwash” Gentle and safe rear cleansing. > Press Plus Rearwash is > Press Stop to or Minus active, the end Rearwash to activate spray wand or after 2 min. Rearwash. extracts slowly. auto stop. Alternatively press “Rearwash” on the seat unit to activate Rearwash. -
Page 15: Activating / Deactivating "Comfortwash
Activating / deactivating “Comfortwash” Forward and backward movement of spray wand during use of shower. Requirement: Rearwash or Ladywash function is activated. > Press Plus Comfortwash > Press Minus to stop to activate is active. Comfortwash. The function Comfortwash. (Rear- or Ladywash) that was previously set is still active. -
Page 16: Adjusting The Spray Wand Position
Same action for “Ladywash” Adjusting the spray wand position The spray wand position can be set individually to 5 different positions: Front < ––––––––––––––––––––––––––––––––––––––> Rear > Press Right > Press Left arrow to arrow to retract the extract the spray wand. spray wand. -
Page 17: Settings
6.3 Settings Adjusting the night light Illuminated inner bowl for night mode orientation, also visible with closed lid. In the Auto modus the night light will be switched on and off ac- cording to the surrounding brightness. The night light can be set individually in 3 modes: >... -
Page 18: Lock / Unlock The Remote Control
Short confirmation tone: Longer confirmation tone: Off Lock / unlock the remote control Blocking function via remote control. No function can be used while this function is activated. Press within 5 sec. the following button combination to lock / unlock the remote control. The stop button has to be pressed constantly. -
Page 19: Cleaning And Care
7. Cleaning and Care 7.1 Seat and lid For cleaning purpose seat and lid can be easily removed one- handed (see picture on foldout page). Yellow discolouration or paint delamination due NOTICE to incorrect cleaner! > Do not use abrasive cleaning agents or cleaning agents contain- ing chlorine or acid. -
Page 20: Self-Cleaning Of The Spray Wand And Nozzle
> Press and > Press Rear- > Clean the > Press Stop hold Stop. wash Plus. nozzle with a to end the cloth, sponge cleaning or or brush and after 2 min. mild cleaning auto stop. agent. Self-cleaning of the spray wand and nozzle Spray wand and nozzle are cleaned automatically. -
Page 21: Disposal
3 hours and then reconnect it again. If your unit does still not work properly after following the instructions mentioned below, contact help@duravit.com. Have the article and serial number ready. These can be found on the nameplate on the back of the operating instructions. - Page 22 > Cut off power supply. > After 30 sec. connect it again. The “Status Malfunction. > Contact LED” on the help@duravit.com unit flashes red three times each 3 seconds. The “Status Malfunction. > Turn off “Water LED” on the temperature”...
- Page 23 Problem Potential cause Solution General function ® ® SensoWash SensoWash > Switch on the main not working. not switched on. power supply. (“Status LED” not illuminated) ® SensoWash is in > Switch to “On Standby mode. mode”. (“Status LED” red illuminated) A water leak Malfunction.
- Page 24 Problem Potential cause Solution The remote No batteries > Insert batteries. control does are inserted. not work. The batteries > Change the are flat. batteries. The battery connec- > Insert the batteries tions are reversed. the correct way. The remote control >...
- Page 25 Problem Potential cause Solution The water tem- The water tempera- > Adjust the “Water perature is not ture has been set to temperature” warm enough. Off or Low. Medium or High. The water The function au- This is normal. spray from the tomatically stops spray wand after 2 minutes.
-
Page 26: Technical Data
Problem Potential cause Solution Manual cleaning function of the spray wand The spray wand The function auto- This is normal. retracts auto- matically stops after matically. 2 minutes. Automatic self-cleaning Water is drip- The spray wand is This is normal. ping out of the cleaned automa- retracted spray... - Page 27 Warranty Our warranty terms can be found in our General Terms and Conditions (GTC) at www.pro.duravit.com/gtc.
- Page 28 Contenido 1. Vista general breve ............27 1.1 Inodoro ..............27 1.2 Mando a distancia ............. 27 2. Descripción de símbolos ............ 27 3. Advertencias de seguridad ..........28 3.1 Uso normal ..............28 3.2 Instrucciones de seguridad ........28 4. Aspectos básicos de operación .......... 35 4.1 Mando a distancia ............
-
Page 29: Vista General Breve
1. Vista general breve 1.1 Inodoro 1.2 Mando a distancia Power Transmisor infrarrojo LED de estado Lavado general Lavado general Lavado femenino Sensor de luz ambiente Lavado confort Lavado femenino Posición del caño de lavado Receptor infrarrojo Temperatura del agua Luz nocturna Parada Mecanismo de cierre suave... -
Page 30: Advertencias De Seguridad
Se puede usar como un aseo normal en cualquier momento. Su uso está limitado exclusivamente a espacios cerrados. Cualquier otro uso se considerará como no conforme al uso nor- mal. Duravit no asume ninguna responsabilidad por cualquier uso que no sea normal. 3.2 Instrucciones de seguridad ¡Lea y observe las siguientes instrucciones de seguridad con cui-... - Page 31 Desconéctelo de inmediato de la fuente de alimentación. Cierre la llave de paso para interrumpir el suministro de agua. Póngase en contacto con help@duravit.com. Evite fallos de funcionamiento y daños en el producto como con- secuencia de un uso inadecuado.
- Page 32 Las reparaciones solo pueden ser realizadas por electricistas o técnicos cualificados. Las reparaciones realizadas de forma incorrecta pueden causar, accidentes, daños o funcionamientos defectuosos. NO use accesorios que no hayan sido recomendados por Duravit. Uso de las pilas ATENCIÓN ¡Daño para la salud! >...
- Page 33 con superficies calientes o la exposición directa a la luz del sol. De lo contrario, cabe el riesgo de que se salga ácido de las pilas. MEDIDAS DE SEGURIDAD IMPORTANTES Si se utilizan productos eléctricos y especialmente en presencia de niños hay cumplir siempre las precauciones básicas de seguri- dad, incluido lo siguiente: LEA TODAS LAS INSTRUCCIONES ANTES DEL USO.
- Page 34 re una superficie blanda, como una cama o sofá, en la que las aberturas de aire podrían quedar bloqueadas. Mantenga las aberturas de aire libres de pelusa, pelo y similares. El producto no se debe utilizar mientras se esté durmiendo o en estado de somnolencia.
- Page 35 jas amarillas, es el hilo de puesta a tierra. Este producto viene equipado de fábrica con un cable y enchufe específico para permitir la conexión a un circuito eléctrico ade- cuado. Asegúrese de que el producto está conectado a una toma de corriente que tiene la misma configuración que el enchufe.
- Page 36 Declaración de conformidad de la FCC Este dispositivo cumple con la Parte 15 del reglamento de la Co- misión Federal de Comunicaciones de Estados Unidos (FCC). El manejo está sujeto a estas dos condiciones: Este dispositivo no puede causar interferencias perjudiciales. Este dispositivo debe aceptar cualquier interferencia recibida, incluidas las que puedan provocar un funcionamiento no deseado.
-
Page 37: Aspectos Básicos De Operación
Departamento de Industria de Canadá. El manejo está sujeto a estas dos condiciones: Este dispositivo no puede causar interferencias. Este dispositivo debe aceptar cualquier interferencia recibida, incluidas las que puedan provocar un funcionamiento no desea- do del dispositivo. 4. Aspectos básicos de operación 4.1 Mando a distancia ®... -
Page 38: Led De Estado
4.2 LED de estado Encendido en SensoWash ® está en el "Modo standby", no se rojo: puede usar ninguna función. ® Encendido en SensoWash está en el "Modo activo", se pue- verde: den usar todas las funciones. ® Parpadeando en SensoWash se encuentra en el proceso de verde:... -
Page 39: Operación
El "LED de estado" se ha encendido en verde. Se pueden usar todas las funciones. 6. Operación Hay disponible un vídeo funcional sobre el manejo de este inodo- ro-ducha en www.duravit.com/vid_sewa_slim. Utilice para ello simplemente este código QR ® 6.1 Encender/apagar el SensoWash >... -
Page 40: Activar/Desactivar El "Lavado General
Activar/desactivar el "Lavado general" Lavado suave y seguro de las partes íntimas. > Pulse "Más" La función > Pulse "Stop" o "Menos" “Bidé” está para terminar el para activar activada y el lavado general el lavado surtidor se o se detendrá general. -
Page 41: Activar/Desactivar El "Lavado Confort
También puede pulsar "Lavado femenino" en el asiento para activar el lavado femenino. Pulse "Lavado femenino" en el asiento para detener el lavado femenino o se detendrá automáti- camente después de 2 min. Activar/desactivar el "Lavado confort" Movimiento hacia delante y hacia atrás del caño de lavado durante su aplicación. -
Page 42: Ajustar La Posición Del Caño De Lavado
> Pulse "Más" > Pulse para au- "Menos" para mentar la reducir la intensidad intensidad del lavado del lavado general. general. La misma acción para el "Lavado femenino" Ajustar la posición del caño de lavado La posición del caño de lavado se puede ajustar de forma indivi- dual en 5 posiciones diferentes: Delante <––––––––––––––––––-------–––––>... -
Page 43: Ajustar La Temperatura Del Agua
Ajustar la temperatura del agua La temperatura del agua se puede ajustar de forma individual en 4 niveles: Desactivada > Baja > Media > Alta > Pulse "Más" > Pulse "Me- para aumen- nos" para tar la tem- reducir la peratura del temperatura agua. -
Page 44: Activar/Desactivar El Sonido De Confirmación
> Pulse "Stop" > Pulse "Lava- y manténga- do femenino lo pulsado. menos". Activar/desactivar el sonido de confirmación Para indicar cualquier comando. Activada > Desactivado Pulse la combinación de botones Stop y "Lavado femenino más" para recorrer los ajustes del sonido de confirmación: >... -
Page 45: Limpieza Y Cuidado
> Pulse "Tem- > Pulse "Stop" > Pulse "Posi- > Pulse "Posi- y manténga- ción del caño ción del caño peratura lo pulsado. de lavado fle- de lavado fle- menos". cha izquier- cha derecha". da". > Pulse "Tem- peratura más". Los símbolos de posición del caño de lavado y de temperatura parpadean tres veces: Bloqueado... -
Page 46: Caño De Lavado Y Jets
> Siga las instrucciones del fabricante del producto de limpieza. > Nunca mezcle limpiadores. Una solución jabonosa suave es adecuada para la limpieza diaria. Limpie el asiento con regularidad o inmediatamente si está su- cio. Si la limpieza no se lleva a cabo con suficiente regularidad, la suciedad puede llegar a ser visible, lo que puede conducir a una suciedad persistente. -
Page 47: Limpieza Automática Del Caño De Lavado Y De Los Jets
Limpieza automática del caño de lavado y de los jets El caño de lavado y los jets se limpian automáticamente. > Pulse "Stop" > Pulse > Pulse "Stop" y manténga- "Lavado con- para terminar lo pulsado. fort más". la limpieza o se detendrá... -
Page 48: Asistencia Para La Resolución De Problemas
Si su unidad aún no funciona correctamente después de seguir las instrucciones que se mencionan a continuación, póngase en con- tacto con help@duravit.com. Tenga a mano el número de artículo y el número de serie. Estos se pueden encontrar en la placa de identificación en la parte trasera de las instrucciones de funciona-... - Page 49 > Vuélvala a conectar después de 30 se- gundos. El "LED de Funcionamiento > Póngase en contacto estado" de la defectuoso. unidad par- help@duravit.com padea en rojo tres veces cada 3 segundos. El "LED de Funcionamiento > Desactive estado" de la defectuoso.
- Page 50 Problema Causa potencial Solución Cap. Funcionamiento general SensoWash ® SensoWash ® no está > Conecte la fuente de funciona. encendido. (El "LED alimentación prin- de estado" no se cipal. ha encendido) ® El SensoWash está > Póngalo en el en modo standby. "Modo activo".
- Page 51 Problema Causa potencial Solución Cap. El mando a No se han insertado > Inserte pilas. distancia no pilas. funciona. No quedan pilas. > Cambie las pilas. Se han invertido las > Inserte las pilas de polaridades de las forma correcta. pilas.
- Page 52 Problema Causa potencial Solución Cap. La intensidad La intensidad del > Ajuste la "Intensidad del chorro de chorro de agua se del chorro de agua" agua es dema- ha configurado en a "Media" siado débil. "Baja". o "Alta". El tubo flexible de >...
- Page 53 Problema Causa potencial Solución Cap. La luz noctur- La luz nocturna Esto es normal. na permanece se ha configurado > Ponga la luz noc- encendida de en el modo "Activa- turna en el modo forma continua. do". "Auto" o "Desacti- vado".
-
Page 54: Datos Técnicos
Consumo del agua en el modo de pulverización 0,35 - 0,60 l/min Grado de protección IP X4 Protección contra el chorro de agua por todos los lados Disposiciones de garantía Encontrará nuestras disposiciones de garantía en nuestras condiciones comerciales generales (AGB) en www.pro.duravit.com/gtc. - Page 55 1. Sommaire 1. Bref aperçu ...............56 1.1 Toilette ..............56 1.2 Télécommande ............56 2. Description des symboles ..........56 3. Pour votre sécurité............57 3.1 Utilisation normale ............ 57 3.2 Instructions de sécurité ..........57 4. Opérations de base ............64 4.1 Télécommande ............64 4.2 LED d'état ..............65 5.
-
Page 56: Bref Aperçu
1. Bref aperçu 1.1 Toilette 1.2 Télécommande Puissance Transmetteur à infrarouge LED d'état Douche rectale Douche rectale Douche féminine Capteur d'éclairage am- Douche confort biant Position de la douche Douche féminine Température de l'eau Récepteur infrarouge Arrêt Éclairage de nuit Logement des piles Mécanisme de fermeture en douceur... -
Page 57: Pour Votre Sécurité
Ces instructions d'utilisation correspondent à l'état technologique du dispositif au moment de l'impression. Duravit se réserve le droit d'effectuer des changements en vue de développements futurs. 3.1 Utilisation normale ®... - Page 58 NE PAS utiliser le produit s'il ne fonctionne pas correctement. Débrancher immédiatement. Fermer la vanne d'arrêt pour arrê- ter l'arrivée d'eau. Contacter help@duravit.com. Éviter tout dysfonctionnement ou tout endommagement du produit résultant d'un défaut d'utilisation. Risques pour la santé et endommage- ATTENTION ment potentiel du produit !
- Page 59 Les travaux de réparation doivent être effectués par des électri- ciens ou des techniciens qualifiés. Des réparations mal effectuées peuvent occasionner des acci- dents, des dommages ou des dysfonctionnements. Ne PAS utiliser d'accessoires non recommandés par Duravit. Utilisation de piles ATTENTION Risques pour la santé ! >...
- Page 60 dans la télécommande. Nettoyer la pile et ses contacts avant de l'insérer. Tenir compte de la polarité. Ôter les piles lorsque la télécommande n'est pas utilisée pen- dant une longue période. Ne pas exposer les piles à des conditions extrêmes : éviter le contact avec les surfaces chaudes et les rayons directs du soleil.
- Page 61 Ne jamais faire fonctionner le produit si le cordon ou les prises est(sont) endommagé(es), s‘il ne fonctionne pas correctement, s‘il est endommagé ou s‘il est tombé parterre ou dans l‘eau. Retourner le produit à un centre de service autorisé, à des fins d‘inspection et de réparation.
- Page 62 DANGER Une utilisation non-conforme de la fiche de mise à la terre peut entraîner un risque de choc électrique! Ne brancher le fil de mise à la terre à aucune des broches plates lorsque des travaux de réparation ou de remplacement du cordon ou de la fiche doivent être effectués.
- Page 63 AVIS L’installation réelle sur le terrain peut être légèrement différen- te du schéma. Les raccords fournis seront connectés au bas de l’appareil au lieu des côtés. Déclaration de conformité FCC Cet appareil est conforme à la section 15 des règles de la FCC (Commission fédérale des communications).
-
Page 64: Opérations De Base
différent de celui auquel le récepteur est raccordé. Consulter le revendeur ou un technicien radio/télévision expéri- menté pour obtenir de l‘aide. Déclaration de conformité Industry Canada (IC) Cet appareil est conforme à la/aux norme(s) RSS exemptes de licence Industry Canada. Le fonctionnement est soumis aux deux conditions suivantes Cet appareil ne doit pas causer d‘interférences, et cet appareil doit accepter toute interférence, y compris des... -
Page 65: Led D'état
4.2 LED d'état Rouge : Le SensoWash ® est en « Mode Standby », toutes les fonctions ne peuvent pas être utilisées. ® Verte : Le SensoWash est en « Mode actif », toutes les fonctions peuvent être utilisées. ® Clignotement vert : Le SensoWash est en phase « Initialisation », seule la touche « Puissance »... -
Page 66: Activation Du Sensowash
La « LED d'état » brille en vert. Toutes les fonctions peuvent être utilisées. 6. Utilisation Vous trouverez une vidéo concernant l’utilisation de cet abattant douche sur www.duravit.com/vid_sewa_slim. Il vous suffit d’utiliser pour cela ce code QR ® 6.1 Mise sous/hors tension du SensoWash >... -
Page 67: Activation/Désactivation De La " Douche Rectale
Activation/désactivation de la « Douche rectale » Douche rectale douce et sécurisée. > Appuyer La douche > Appuyer sur Arrêt sur Plus ou rectale est pour terminer la Moins pour activée, la douche rectale. Elle activer la douchette sort s'arrête automati- douche rec- lentement. -
Page 68: Activation/Désactivation De La " Douche Confort
Presser alternativement « Douche féminine » sur la lunette pour activer la douche féminine. Appuyer à nouveau sur la touche « Douche féminine » sur la lunette pour arrêter la douche féminine. Elle s'arrête automatiquement au bout de 2 minutes. Activation/désactivation de la « Douche confort » Mouvement avant et arrière de la douche pendant son utili- sation. -
Page 69: Réglage De La Position De La Douche
> Appuyer sur > Appuyer sur Plus pour Moins pour augmenter diminuer l'intensité l'intensité de la douche de la douche rectale. rectale. Même action pour la « douche féminine » Réglage de la position de la douche La position de la douche peut être réglée sur 5 positions indivi- duelles: Avant <–––––––––––––––––––––––––––––>... -
Page 70: Réglage De La Température De L'eau
Réglage de la température de l'eau La température de l'eau peut être réglée en 4 niveaux: > > Medium > High > Appuyer sur > Appuyer sur Plus pour Moins pour augmenter diminuer la la tempéra- température ture de l'eau. de l'eau. -
Page 71: Activation/Désactivation Du Bip De Confirmation
> Appuyer sur > Appuyer la touche sur Douche Arrêt et la féminine maintenir Moins. enfoncée. Activation/désactivation du bip de confirmation Pour signaler toutes les commandes. > Appuyer sur la combinaison de touches Arrêt et Douche féminine Plus pour faire défiler les paramètres du bip de confirmation : >... -
Page 72: Verrouiller / Déverrouiller La Télécommande
Verrouiller / déverrouiller la télécommande Fonction de blocage via la télécommande. Aucune fonction ne peut être utilisée si cette fonction est activée. Saisissez la combinaison de touches suivantes dans les 5 se- condes afin de verrouiller/déverrouiller la télécommande. La touche stop doit restée enfoncée pendant tout ce temps. >... -
Page 73: Nettoyage Et Entretien
7. Nettoyage et entretien 7.1 Lunette et abattant Pour le nettoyage, la lunette et l'abattant peuvent être facilement retirés d'une main (voir l'image sur la page à déplier). Décoloration jaune due à un mauvais AVIS détergent ! > Ne pas utiliser de détergent abrasif ou de produits de nettoyage contenant du chlore ou des acides. -
Page 74: Auto-Nettoyage De La Douche Et De La Buse
> Appuyer sur > Appuyer sur > Nettoyer la > Appuyer sur la touche Douche rec- buse à l'aide Arrêt pour Arrêt et la tale Plus. d'un chif- terminer le maintenir fon, d'une nettoyage. enfoncée. éponge ou Il s'arrête d'une brosse automati- et d'un dé- quement... -
Page 75: Télécommande
7.3 Télécommande > Nettoyer la télécommande et le support mural à l'aide d'un chif- fon humide doux. 8. Mise au rebut Le symbole représentant une poubelle sur roues barrée d'une croix signifie une élimination séparée des déchets électriques et électroniques (WEEE). Les déchets élec- triques et électroniques peuvent contenir des substances dange- reuses et nocives. - Page 76 Si l'appareil ne fonctionne pas correctement alors que vous avez suivi les instructions ci-dessous, contacter help@duravit.com. Tenir le numéro d'appareil et le numéro de série prêts. Ceux-ci se trouvent sur la plaque signalétique à l'arrière des instructions d'utilisation. Problème Cause potentielle...
- Page 77 Problème Cause potentielle Solution Un bip de Dysfonctionnement. > Couper l'alimenta- confirmation tion électrique. continu retentit. > La rebrancher au bout de 30 se- condes. Fonctionnement général Le SensoWash ® Le SensoWash ® > Mettre sous tension. ne fonctionne n'est pas sous pas.
- Page 78 Problème Cause potentielle Solution La télécom- Absence de piles. > Insérer des piles. mande ne fonc- Les piles sont vides. > Remplacer les piles. 4.1 tionne pas. Les connexions des > Réinstaller piles sont inversées. correctement les piles. La télécommande >...
- Page 79 Problème Cause potentielle Solution L'eau n'est pas La température de > Régler la « tempé- assez chaude. l'eau a été réglée rature de l'eau » sur Off ou Low. sur Medium ou High. La pulvérisa- La fonction s'arrête Ceci est normal. tion d'eau de la automatiquement douche s'arrête après 2 minutes.
- Page 80 Problème Cause potentielle Solution L'éclairage de L'éclairage de nuit Ceci est normal. nuit est allumé a été réglé sur On. > Placer l'éclairage de en continu. nuit en mode Auto ou Off. L'éclairage de nuit Ceci est normal. est en mode Auto avec une faible lu- minosité...
-
Page 81: Données Techniques
Consommation d'eau en mode pulvérisation 0,35 - 0,60 l/min Degré de protection IP X4 Protection contre les pulvé- risations d'eau de tous côtés Conditions de garantie Vous trouverez nos conditions de garantie dans nos conditions générales de vente (CGV) sur www.pro.duravit.com/gtc. - Page 82 ................... 83 ................83 .................83 ................83 .................84 ................84 ................84 ................88 ................88 LED ..............89 ................89 ................89 ................90 ® SensoWash ............90 ................... 90 SensoWash ® .........90 ................90 ..........91 ..........91 ..........92 ..............92 ..............93 ................93 ................94 ................94 ............94 ............95 ................ 95 ..............95 ..............96 .............96 ..........96...
- Page 83 >...
- Page 84 ® SensoWash Duravit ® SensoWash Slim Duravit SensoWash ® > help@duravit.com...
- Page 85 > > SensoWash ® ® SensoWash 4 °C ® SensoWash ® SensoWash ® SensoWash Duravit > >...
- Page 87 —— Adapter Grounded outlet Metal screw Grounding pin Tab for grounding screw Grounded outlet box...
- Page 88 (FCC) (IC) ® SensoWash...
- Page 89 > > (CR2032) > ® SensoWash ® SensoWash SensoWash ® > > >...
- Page 90 > ® SensoWash ® SensoWash ® SensoWash > SensoWash ® ww.duravit.com/ vid_sewa_slim ® SensoWash > SensoWash ® ® > SensoWash ® SensoWash...
- Page 91 > > > >...
- Page 92 > > > > > >...
- Page 93 < ––––––––––––––––––––––––––> > > > > > > >...
- Page 94 > > > > > > >...
- Page 95 > > > > >...
- Page 96 > > > > > > > > > > >...
- Page 97 > > > > (WEEE) WEEE...
- Page 98 > help@duravit.com ® > SensoWash > ® SensoWash > > 30 > help@duravit.com > > > > 30...
- Page 99 ® ® > SensoWash SensoWash ® > SensoWash > > > > > > > > >...
- Page 100 > > > > > > >...
- Page 101 1050 W < 0.5 W 6.8 A 39 - 104 °F (4 - 40 °C) 90 - 104 °F (32 - 40 °C) 10 - 109 psi ( 0.07 - 0.75 MPa) 0.35 – 0.60 l/min IP X4 (GTC) www.pro.duravit.com/gtc...
Need help?
Do you have a question about the SensoWash Slim and is the answer not in the manual?
Questions and answers