Table of Contents
Advertisement
Quick Links
Advertisement
Chapters
Table of Contents

Related Manuals for i.t.works TM785


Summary of Contents for i.t.works TM785
- Page 1 TABLE T ODEL ...
-
Page 2: Table Of Contents
Table of Contents WARNINGS ........................ 2 IMPORTANT SAFETY INSTRUCTIONS ................ 2 PACKAGE CONTENTS ...................... 2 PRODUCT OVERVIEW ..................... 3 GETTING STARTED ...................... 4 Charging the battery ..................... 4 Powering ON and OFF .................. 4 Connecting to a PC .................... 4 Inserting a Micro SD/SDHC card ................ 4 USING THE TOUCH SCREEN .................... 5 ... -
Page 3: Warnings
WARNINGS This appliance is intended for domestic household use only and should not be used for any other purpose or in any other application, such as for non domestic use or in a commercial environment. CAUTION RISK OF EXPLOSION IF BATTERY IS REPLACED BY AN INCORRECT TYPE DISPOSE OF USED BATTERIES ACCORDING TO THE INSTRUCTIONS. IMPORTANT SAFETY INSTRUCTIONS This manual contains important safety instructions and information for proper use of the device. Please follow the instructions in this manual carefully. This is a high‐density electronic product; do not disassemble it by yourself. Avoid shocks and do not let the device fall. Avoid harsh conditions such as wet or damp places, rain, high humidity, strong vibration, extremely high or low temperatures, strong sunlight and places that are very dusty. To clean the product, gently wipe the product using only a slightly damp cloth. Do not use chemical solvents or strong detergents. Never allow water droplets to remain on the screen. Symbol This mark is applied to show the equipment conforms to European safety and electro‐magnetic compatibility standards. Battery handling and usage The product is supplied with one rechargeable Lithium polymer 3.7V battery incorporated in the product which is not accessible and cannot be replaced. Therefore when the product reaches the end of its useful life it must be disposed of at a recycling centre. ... -
Page 4: Product Overview
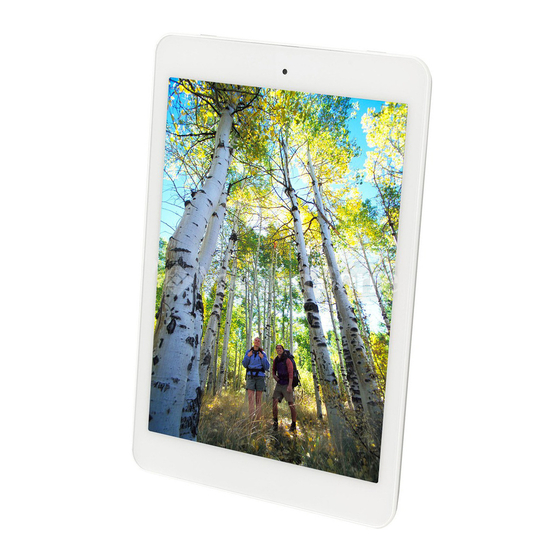
PRODUCT OVERVIEW 1. Front camera 7. Home button 2. Power button 8. Rear camera 3. USB port 9. Loudspeaker 4. HDMI port 10. DC‐5V jack 5. MIC (Built‐in microphone) 11. Micro SD/SDHC card slot 6. Earphone jack At full power, prolonged listening to the player can damage the ear of the use WARNING: To protect your hearing It is important that any headphones or earphones used in conjunction with this product are... -
Page 5: Getting Started
GETTING STARTED Charging the battery The tablet has a built‐in battery. Before using the tablet for the first time, fully charge the battery. Use only the 5V power adapter provided, or alternatively the tablet can be charged via a USB cable to a PC or other USB charging source. When your battery charge is low, the tablet will emit a warning tone and display a low battery message. The battery icon will also be empty. If the battery charge becomes too low, the tablet will automatically power off. When it is charging, the battery symbol in the bottom right hand corner of the desktop will show a charging (lightning) symbol . When the battery is fully charged (no lightning symbol in the battery icon), unplug the power adapter or USB cable from the tablet and then from the power socket. Powering ON and OFF Press and hold the power button until the tablet starts to boot. Once it has finished, the lock screen will be shown. To unlock, drag the “locked” symbol to the right until it becomes an “unlocked” symbol. Press and hold the power button until the Power off pop‐up appears on the desktop. Select the OK option to power off the tablet. Connecting to a PC You can connect the tablet directly to a PC or Laptop using the supplied USB cable. Once connected to a PC or Laptop, the tablet will appear as a mass storage device. 1. Connect the USB connector to a PC or Laptop. 2. -
Page 6: Using The Touch Screen
USING THE TOUCH SCREEN The main interface controls on the desktop are shown below. Icon Name Return Home Recent applications Volume ‐ / + All applications Status icons Use your fingers to manipulate icons, buttons, menus, the onscreen keyboard, and other items on the touch screen. To select or activate something, touch it. To type something, such as a name, password, or search terms, just touch where you want to type. A keyboard will popup and allow you to type into the field. Other common gestures include: ... -
Page 7: Applications
APPLICATIONS To access all the applications available on the tablet, touch (icon on the bottom). From this page you can run any application by touching the symbol for that application. To access more applications, scroll the window to the left by swiping your finger from right to left. BROWSER To open the web browser, tap the icon. To navigate to a website, touch the address bar and type in the website address for the website you would like to view. Use the popup keyboard to enter the address and then click Go. ... - Page 8 The Browser will open the last page you visited. Setting the homepage 1. Tap the icon on the top right corner. 2. Tap the Settings option. 3. Tap General. 4. Tap Set homepage to select the desired option. Setting a bookmark 1. Go to a website. 2. Tap the icon. 3. Tap OK to add this website to bookmarks. Opening a bookmark 1.
-
Page 9: Email
2. Tap the desired boomark to open the webpage. EMAIL To enable access to your email account, open Email by touching the icon. Before you can acess your email for the first time, you will need to enter the relevant account information for the email account you want to connect to. 1. Enter the Email address into the box using the popup keyboard. 2. Enter the Password into the box using the popup keyboard. 3. Touch Next and the application will try to finish the setup. If the setup does not automatically finish, you will have to manually enter the account information by selecting Manual setup. ... -
Page 10: Music
Tap the “Manual setup” button, select the mailbox type to be used (POP3 or IMAP) and enter all the account details. Sending an E‐mail 1. Tap the icon. 2. Enter the To, Subject and Compose email information to create the email. To add an attachment tap the icon and select the desired folder, you can then browser for the file to attach. 3. When finished tap the button. MUSIC To access the Music player, touch the icon. You can select a music track and open it in the player. To add music to playlist 1. -
Page 11: Video (4K Player)
VIDEO (4K player) To access the video player, touch the icon and navigate to a video folder. Select a video by touching it. Play / Pause Touch the play icon and the video will begin play. To pause the video, touch the screen anywhere to bring up the control bar and then touch the pause icon. To resume playing, touch the play icon. Seek Touching video player will display the control bar. The control bar will show the timestamp of that particular point in the vide. Press and hold the dot, then slide your finger, to move to the desired point in your video. HDMI port The tablet supports HDMI output by HDMI cable. Connect the tablet to a TV with an HDMI input using a HDMI cable (not supplied). The screen will transfer to HDMI output, and will output sound and image to the TV. SYSTEM SETTINGS To access all the available system settings for the tablet, tap the icon. Wireless & Networks 1. To enable Wi‐Fi, slide the Wi‐Fi switch to the ON position. 2. -
Page 12: Sound
3. Find the right network and touch it. If the network is secured, you are prompted to enter a password and then tap Connect. 4. The tablet will be connected to the network. Sound In this option, you can make the following settings: Volumes Allow you to configure the default volume settings for Music, video, games & other media, Notifications and Alarms. Default notification Allow a different sound for notifications to be selected. Touch sounds Allow you to turn the sound caused by touching the screen on or off. Screen lock sounds Allow you to turn the sound caused by unlocking the screen on or off. ... -
Page 13: Display
Display In this option, you can make the following settings: Brightness Allow you to configure the default brightenss of the screen. Wallpaper Select different desktop wallpaper from Gallery, Live Wallpaper or Wallpaper. Auto‐rotate screen Enable or disable automatic screen rotation when the tablet is rotated. Sleep Set the time period before the tablet enters sleep mode from never to 30 minutes. Daydream Allow you to select a screensaver from displaying Clock, Colors, (screensaver) Photo Frame or Photo Table. Font size Allow the default font size to be changed for easy reading of text. Accelerometer Allow you to calibrate accelerometer. coordinate system Screen adaption Allow you to adjust size of some games display screen. ... -
Page 14: Storage
Storage This option give a complete breakdown of how internal storage and any external cards are being used and how much space is available on them. ... -
Page 15: Security
Security This option allows you to setup how secure you want your tablet to be. You may want to set some form of automatic screen lock to prevent unauthorised access. Screen lock To adjust lock settings: 1. Touch Screen lock. 2. Touch the type of lock you want and follow the onscreen instructions. You can select among the following lock options: Slide Provide no protection, but let you get to the Home screen. Face Unlock Allow you to unlock the tablet with your face. Pattern Let you draw a simple pattern with your finger to unlock the tablet. PIN Require four or more numbers. Longer PINS tend to be more secure. Password Required four or more letters or numbers. ... -
Page 16: Language & Input
unlock the lock settings before you make any changes. If you forget your Pattern / PIN / Password, the only way to gain access to the device is to refresh firmware. Please consult a qualified person or have the firmware of the device refreshed professionally. Language & input This option allows you to select among different languages, also you can change the keyboard to different language and configure Voice Search and Text‐to speech output. Date & time This option allows you to configure the date and time settings. The following options are available: Automatic date & If enabled, the tablet will automatically update the date and time time if connected to the internet. Automatic time If enabled, the tablet will use network‐provided time zone. zone Set date Allow the date to be set manually. This option is only available if Automatic date & time is disabled. Set time Allow the time to be set manually. This option is only available if Automatic date & time is disabled. ... -
Page 17: Troubleshooting
Select time zone Allow your current time zone to be selected from the available options. Use 24‐hour format Allow time format to be switched between 12 and 24 hour formats. Choose date format Allow the format of the date to be changed. TROUBLESHOOTING Heat issues When running multiple applications, using the screen on its brightest setting, or when being charged, this device gets warm. This is normal and should not cause any inconvenience when in use. Device cannot connect to Wi‐Fi Ensure the wireless network is working by testing it using another wireless device. Ensure the device is within range of the wireless network to be connected. Walls or other obstructions will reduce the possible distances between wireless devices. Ensure the security password being used is correct. System has anomalies and doesn’t work correctly Installing some third‐party applications may cause the system to not operate ... -
Page 18: Specifications
SPECIFICATIONS CPU Processor Boxchip A31s.ARM cortex‐A7, 1.0GHZ, Quad core RAM 1GB NAND FLASH memory 8GB Wireless Wifi 802.11 b/g/n Size 7.85” Type of points Capacitive, P+G, IPS touch Screen Resolution 1024 x 768 pixels System Android 4.2 Battery Built‐in Lithium polymer battery DISPOSAL As a responsible retailer we care about the environment. As such we urge you to follow the correct disposal procedure for the product, packaging materials and if applicable, accessories and batteries. This will help conserve natural resources and ensure that the materials are recycled in a manner that protects health and the environment. ... - Page 19 EUROPEAN FRENCH ...
- Page 20 ABLET TTE DÈLE ...
- Page 21 Table des matières ATTENTION ............................ 3 MISES EN GARDE IMPORTANTES ..................... 3 CONTENU DE L’EMBALLAGE ....................4 DESCRIPTION DU PRODUIT ......................4 POUR COMMENCER ........................5 Recharger la batterie ........................5 Allumer et éteindre l'appareil ......................5 Connexion à...
-
Page 22: Attention
ATTENTION Cet appareil est exclusivement destiné à une utilisation domestique et ne doit pas être utilisé d'une autre manière ou pour d'autres applications, notamment dans un environnement non‐domestique ou commercial. ATTENTION IL EXISTE UN RISQUE D’EXPLOSION SI LES PILES SONT REMPLACÉES PAR DES PILES DE TYPE INADÉQUAT. LES PILES USAGÉES DOIVENT ÊTRE MISES AU REBUT D’UNE MANIÈRE CONFORME AUX INSTRUCTIONS. MISES EN GARDE IMPORTANTES Ce mode d'emploi contient des informations importantes sur la sécurité et le mode d'utilisation correct de l'appareil. Veuillez suivre attentivement les instructions du mode d'emploi. Ceci est un produit électronique à haute densité; n'essayez pas de le démonter par vous‐même. L'appareil ne doit pas subir de choc ou de chute. Évitez d’utiliser l’appareil dans un environnement difficile (pièces humides, mouillées ou très poussiéreuses, air très humide, pluie, fortes vibrations, températures très élevées ou très basses, emplacement trop ensoleillé). Pour nettoyer l'appareil, frottez‐le délicatement à l'aide d'un chiffon légèrement humide (et rien d'autre). N'utilisez pas de solvants chimiques ou de détergents puissants. Ne laissez en aucun cas des gouttes d'eau sur l'écran sans les enlever. Symbole Ce symbole indique que l'appareil est conforme aux normes européennes de sécurité et de compatibilité électromagnétique. Manipulation et utilisation des piles Le produit est livré avec une batterie rechargeable Lithium polymère intégrée de 3,7 V; celle‐ci n'est pas accessible et ne peut pas être changée. C'est pourquoi le produit doit être apporté à un centre de recyclage à la fin de sa durée de vie. ... -
Page 23: Contenu De L'emballage
CONTENU DE L’EMBALLAGE 1 tablette de 7,85" 1 adaptateur secteur 1 câble USB 1 mode d'emploi 1 livret de mises en garde DESCRIPTION DU PRODUIT 1. Caméra avant 7. Bouton d'accueil 2. Bouton marche/arrêt 8. Caméra arrière 3. Port USB 9. Haut‐parleur 4. Port HDMI 10. Prise DC 5V 5. Microphone intégré 11. Logement pour carte micro 6. Prise écouteurs SD/SDHC ... -
Page 24: Pour Commencer
Afin d’éviter des dommages auditifs éventuels, ne pas écouter à un niveau sonore élevé pendant une longue durée. POUR COMMENCER Recharger la batterie Cette tablette est équipée d'une batterie intégrée. Avant d'utiliser la tablette pour la première fois, vous devrez charger complètement la batterie. Utilisez pour cela l'adaptateur secteur 5V fourni (et aucun autre); vous pouvez également charger la tablette avec un câble USB relié à un PC ou à une autre source de charge USB. Lorsque la batterie est bientôt épuisée, la tablette émet un signal sonore et affiche un message d'avertissement. L'icône de la batterie apparaît comme vide. Lorsque la batterie est épuisée, la tablette s'éteint automatiquement. Pendant la recharge, l'icône de batterie située en bas à droite du bureau contient un symbole d'éclair . Lorsque le symbole d'éclair disparaît, la batterie est entièrement chargée; séparez l'adaptateur (ou le câble USB) de la tablette, puis débranchez‐le de la prise de courant. ... -
Page 25: Insérer Une Carte Micro Sd/Sdhc
3. Vous pouvez maintenant copier des fichiers depuis l'ordinateur ou le laptop vers la tablette. Insérer une carte micro SD/SDHC 1. Insérez la carte micro SD/SDHC dans la fente prévue à cet effet. 2. Dans les applications, allez dans ES File Explorer. 3. Allez dans Favoris pour afficher les fichiers de la carte. UTILISATION DE L'ÉCRAN TACTILE Les principaux contrôles sur le bureau sont les suivants. Icône Nom Retour Écran d’accueil Applications récentes Volume ‐ / + Toutes les applications Icônes d'état ... -
Page 26: Applications
APPLICATIONS Pour accéder à toutes les applications de la tablette, touchez l'icône (en bas). Apps = Applications Widgets = Widgets SHOP = MAGASIN 4kPlayer = Lecteur 4K Aldiko = Aldiko Browser = Navigateur Calculator = Calculatrice Calendar = Calendrier Camera = Appareil photo Chrome = Chrome Clock = Horloge Documents to Go = Documents to Go Downloads = Téléchargements Email = Courriel ES File Explorer = Explorateur fichiers ES File manager = Gestionnaire de fichiers Gallery = Galerie Gmail = Gmail Google = Google Google settings = Paramètres Google ... -
Page 27: Navigateur
enregistreur de sons Hi‐Q MP3 Recorder = Local = Local Maps = Cartes Music = Musique Navigation = Navigation Play Movies & TV = Films & TV Play Music = Lecteur musique Play Store = Play Store Settings = Réglages SlideME Market = SlideME Market Sound recorder = Enregistreur vocal Talk = Talk Voice search = Recherche vocale Dans cette page, vous pouvez activer n'importe quelle application en appuyant sur le symbole correspondant. Pour accéder aux autres applications, faites défiler la fenêtre vers la gauche en faisant glisser votre doigt de droite à gauche. NAVIGATEUR Pour ouvrir le navigateur Web, appuyez sur . Pour accéder à un site web, touchez la barre d'adresse et tapez l'adresse du site souhaité. Tapez l'adresse à l'aide du clavier virtuel, puis cliquez sur Accéder. Le navigateur ouvre la dernière page consultée. ... - Page 28 Définir la page d'accueil 1. Appuyez sur l'icône en haut à droite. 2. Allez dans Réglages. 3. Allez dans Général. 4. Allez dans Définir la page d'accueil pour sélectionner l'option souhaitée. General = Général Privacy & Security = Confidentialité et sécurité Accessibility = Accessibilité Advanced = Avancé Bandwidth management = Gestion de bande passante Labs = Lavs Browser mode = mode de navigation Set homepage = Définir page d’accueil AUTO‐FILL = REMPLISSAGE AUTOMATIQUE Form auto‐fill = Remplissage automatique de formulaires Fill out… = Remplissez les formulaires en ligne d’une seule touche Auto‐fill text = Saisie automatique de texte Set up… = Configurer le texte pour le remplissage automatique de formulaires en ligne Mettre un marque‐page 1. Allez sur un site. 2. Appuyez sur . ...
-
Page 29: Courriel
Bookmarks = Marque‐pages History = Historique Saved pages = Pages sauvegardées Local = Local All other names are unchanged 2. Appuyez sur le marque‐page correspondant à la page souhaitée. COURRIEL Pour accéder à votre compte de courrier électronique, appuyez sur l'icône . Avant de consulter vos e‐mails pour la première fois, vous devez au préalable configurer le compte souhaité en saisissant les informations nécessaires. 1. Tapez l'adresse e‐mail dans le champ correspondant à l'aide du clavier virtuel. 2. Tapez le mot de passe dans le champ correspondant à l'aide du clavier virtuel. 3. Appuyez sur Suivant; l'application termine la configuration. ... - Page 30 Account setup = Configuration de compte Email account = Compte e‐mail You can…. = Quelques étapes suffisent pour configurer la plupart des comptes de courrier électronique Email address = Adresse e‐mail Password = Mot de passe Manual setup = Configuration manuelle Next = Suivant Si la configuration ne se termine pas automatiquement, vous devrez saisir manuellement les informations du compte; pour cela, allez dans Configuration manuelle. Appuyez sur "Configuration manuelle", choisissez le type de compte à utiliser (POP3 ou IMAP) puis saisissez les détails du compte. Envoyer un e‐mail 1. Appuyez sur . 2. Composez votre e‐mail en remplissant les différents champs (À, Objet et Composer). Pour attacher un fichier‐joint, appuyez sur , sélectionnez le dossier contenant le fichier souhaité puis cliquez sur celui‐ci. 3. Lorsque vous avez fini, appuyez sur . ...
-
Page 31: Musique
MUSIQUE Pour accéder au lecteur de musique, appuyez sur . Sélectionnez une piste et ouvrez‐la dans le lecteur. Album cover = Couverture d’album View current playlist = Voir liste de lecture en cours Random play = Lecture aléatoire Repeat mode = Mode de répétition Artist = Artiste Album = Album Music = Musique Time played = Durée écoulée Previous song = Titre précédent Pause = Pause Next song = Titre suivant Play progress bar = Barre d’avancement Total play time = Durée totale Ajouter un titre à une liste de lecture 1. Gardez le doigt appuyé sur le titre; une liste s'affiche. 2. Sélectionnez Ajouter à une liste de lecture; la liste correspondante s'affiche. 3. Sélectionnez Liste de lecture en cours ou Nouvelle. Le titre sélectionné sera ajouté à la liste. Si vous avez choisi Nouvelle, saisissez le nom de la nouvelle liste puis appuyez sur Sauvegarder. Supprimer un titre d'une liste de lecture ... -
Page 32: Vidéo (Lecteur 4K)
1. Gardez le doigt appuyé sur le titre; une liste s'affiche. 2. Allez sur Supprimer, puis appuyez sur OK. VIDÉO (lecteur 4K) Pour accéder au lecteur vidéo, appuyez sur et allez dans le dossier souhaité. Sélectionnez une vidéo en la touchant. Lecture/Pause Appuyez sur l'icône de lecture pour lancer la lecture de la vidéo. Pour interrompre la lecture, touchez n'importe quelle partie de l'écran de manière à faire apparaître la barre de contrôle, puis appuyez sur l'icône de pause. Pour reprendre la lecture, appuyez sur l'icône de lecture. Recherche Touchez le lecteur vidéo pour faire apparaître la barre de contrôle. La barre de contrôle indique l'emplacement en cours dans la barre d'avancement de la vidéo. Pour aller directement à un endroit précis de la vidéo, appuyez sur le point puis, tout en gardant le doigt dessus, faites‐le glisser jusqu'à l'endroit en question. Port HDMI Cette tablette peut recevoir un câble HDMI. Reliez la tablette à un téléviseur comportant une entrée HDMI, par l'intermédiaire d'un câble HDMI (non fourni). L'écran passe en mode HDMI et le son et les images sont transmis vers le téléviseur. RÉGLAGES SYSTÈME Appuyez sur ... - Page 33 Settings = Réglages Wireless & Networks = Réseaux & Sans‐fil Wi‐Fi = Wi‐Fi On = On Data usage = Utilisation des données More = Plus Device = Appareil Sound = Son Display = Affichage Storage = Stockage Battery = Batterie Apps = Applications Personal = Personnel Location access = Accès location Security = Sécurité Secured with.. = Sécurisé par… Available = Disponible 3. Cherchez le réseau qui convient, puis appuyez dessus. Si le réseau est sécurisé, vous devez saisir le mot de passe puis appuyer sur Connecter. 4. La tablette est maintenant connectée au réseau. ...
-
Page 34: Son
Son Cette section permet d'effectuer les réglages suivants: Volumes Permet de configurer les volumes par défaut pour la musique, les vidéos, les jeux & autres médias, les notifications et les alarmes. Notification par Permet de choisir un son différent pour les notifications. défaut Bip touches Permet d'activer ou de désactiver le son produit à chaque appui sur l'écran. Bip verrouillage Permet d'activer ou de désactiver le son produit lors du verrouillage et du déverrouillage de l'écran. Settings = Réglages Wireless & Networks = Réseaux & Sans‐fil Wi‐Fi = Wi‐Fi On = On Data usage = Utilisation des données More = Plus Device = Appareil Sound = Son Display = Affichage Storage = Stockage Battery = Batterie ... -
Page 35: Écran
Apps = Applications Personal = Personnel Location access = Accès location Security = Sécurité Volumes = Volumes System = Système Default notification sound = Notification par défaut Touch sounds = Bip touches Screen lock sound = Bip verrouillage Écran Cette section permet d'effectuer les réglages suivants: Luminosité Permet de configurer la luminosité par défaut de l'écran. Papier‐peint Permet de choisir différents types de papier‐peint pour le bureau: Galerie, Papier‐peint animé ou juste Papier‐peint. Rotation Activer ou désactiver la rotation automatique de l'écran lorsque automatique de la tablette est retournée. l'écran Mise en sommeil Régler le délai au‐delà duquel la tablette se met en veille (de jamais à 30 minutes). Économiseur Permet de choisir parmi différents types d'économiseurs d'écran d'écran: Horloge, Couleurs, Cadre photo ou Tableau photo. Taille police Permet de changer la taille de la police de caractères pour une ... - Page 36 Settings = Réglages Wireless & Networks = Réseaux & Sans‐fil Wi‐Fi = Wi‐Fi On = On Data usage = Utilisation des données More = Plus Device = Appareil Sound = Son Display = Affichage Storage = Stockage Battery = Batterie Apps = Applications Personal = Personnel Location access = Accès location Security = Sécurité Language & input = Langue et saisie Brightness = Luminosité Wallpaper = Papier‐peint Auto‐rotate screen = Rotation automatique d’écran Sleep = Mise en sommeil After… = Après 2 minutes d’inactivité Daydream = Daydream Off = Off Font size = Taille police Normal = Normal ...
-
Page 37: Stockage
Accelerometer coordinate system = Coordonnées de l’accéléromètre Accelerometer uses … = Utiliser le système de coordonnées par défaut. Screen adaptation = Adaptation d’écran Used to… = Adapter la taille de l’écran pour certains jeux Smart color = Couleur intelligente Stockage Vous trouverez dans cette section le détail du contenu de la mémoire interne et des cartes externes, de la quantité d'espace utilisée et de la quantité d'espace disponible. Settings = Réglages Wireless & Networks = Réseaux & Sans‐fil Wi‐Fi = Wi‐Fi On = On Data usage = Utilisation des données More = Plus Device = Appareil Sound = Son Display = Affichage Storage = Stockage Battery = Batterie Apps = Applications Personal = Personnel Location access = Accès location ... -
Page 38: Sécurité
Security = Sécurité Language & input = Langue et saisie Internal storage = Stockage interne Total space = Espace total Available = Disponible Apps… = Applications (données et contenu médias) Cached data = Données en cache Sécurité Permet de régler le niveau de sécurité de la tablette. Le verrouillage automatique de l'écran permet d'en empêcher l'accès aux personnes non autorisées. Settings = Réglages Device = Appareil Sound = Son Display = Affichage Storage = Stockage Battery = Batterie Apps = Applications Personal = Personnel Location access = Accès location Security = Sécurité Language & input = Langue et saisie Backup & reset = Sauvegarde et réinitialisation Accounts = Comptes Add account = Ajouter un compte ... - Page 39 System = Système Screen security = Sécurité d’écran Screen lock = Verrouillage d’écran Slide = Glissement Owner info = Infos propriétaire Passwords = Mots de passe Make passwords visible = Rendre visibles les mots de passe Device administration = Administration de l’appareil Device administrators = Administrateurs de l’appareil View or.. = Visualiser ou désactiver les administrateurs de l’appareil Unknown sources = Sources inconnues Allow… = Autoriser l’installation d’applications provenant de sources inconnues Verify apps = Vérifier applications Disallow or warn… = Interdire ou avertir avant l'installation d'applications pouvant causer des dommages Credential storage = Stockage des identifiants Trusted credentials = Identifiants fiables Verrouillage écran Pour accéder aux paramètres de verrouillage: 1. Appuyez sur Verrouillage écran. 2. Appuyez sur le type de verrouillage souhaité et suivez les indications à l'écran. Les options de verrouillage disponibles sont les suivantes: Direct Laisse libre l'accès à l'écran d'accueil, sans protection. Déverrouillage par Permet de déverrouiller la tablette par reconnaissance de votre reconnaissance visage. faciale Figure ...
-
Page 40: Langue Et Entrée
d'accéder à votre tablette consiste à actualiser le firmware. Faites appel à une personne qualifiée ou faites actualiser le firmware par un professionnel. Langue et entrée Cette option vous permet de choisir parmi les différentes langues (notamment pour le clavier) et de configurer la recherche vocale et la synthèse vocale (TTS). Settings = Réglages Battery = Batterie Apps = Applications Personal = Personnel Location access = Accès location Security = Sécurité Language & input = Langue et saisie Backup & reset = Sauvegarde et réinitialisation Accounts = Comptes Add account = Ajouter un compte System = Système Date & time = Date et heure Accessibility = Accessibilité Developer options = Options pour les développeurs About tablet = À propos de la tablette Language = Langue English (United States) = Français (France) Spell checker = Correcteur orthographique ... -
Page 41: Date Et Heure
Personal dictionary = Dictionnaire personnel Keyboard & input methods = Clavier et modes de saisie Default = Défaut English (US).. = Français (France) – Clavier Android Android keyboard = Clavier Android Google voice typing = Saisie vocale Google Automatic = Automatique Speech = Vocal Voice search = Recherche vocale Date et heure Cette option vous permet de régler la date et l'heure. Les options suivantes sont disponibles: Date/heure Lorsque cette option est activée, la tablette met à jour la date automatique et l'heure automatiquement à partir du moment où elle est connectée à Internet. Fuseau horaire Lorsque cette option est activée, la tablette détecte automatique automatiquement le fuseau horaire du réseau. Réglage de la date Permet de régler la date manuellement. Cette option n'est disponible que si la fonction Date/heure automatique est désactivée. Réglage de l 'heure Permet de régler l'heure manuellement. Cette option n'est disponible que si la fonction Date/heure automatique est désactivée. Réglage de fuseau Permet de choisir le fuseau horaire parmi les options ... - Page 42 Settings = Réglages Battery = Batterie Apps = Applications Personal = Personnel Location access = Accès location Security = Sécurité Language & input = Langue et saisie Backup & reset = Sauvegarde et réinitialisation Accounts = Comptes Add account = Ajouter un compte System = Système Date & time = Date et heure Accessibility = Accessibilité Developer options = Options pour les développeurs About tablet = À propos de la tablette Automatic date & time = Date/heure automatique Use … = Utiliser l’heure fournie par le réseau Automatic time zone = Fuseau horaire automatique Set date = Réglage de la date Set time = Réglage de l’heure Select time zone = Réglage de fuseau horaire GMT.. = GMT+02:00, Heure d'été d'Europe centrale Use 24‐hour format = Format horaire 24h Choose date format = Format date ...
-
Page 43: Dépannage
DÉPANNAGE Chaleur anormale L'appareil est anormalement chaud lorsqu'il se charge, lorsque la luminosité de l'écran est au maximum et lorsque plusieurs applications sont ouvertes en même temps. Ce phénomène est normal et ne devrait pas créer d'inconvénient lors de l'utilisation. La fonction Wi‐Fi de l'appareil ne marche pas Essayez de vous connecter avec un autre appareil pour vérifier que le réseau sans fil fonctionne normalement. Vérifiez que l'appareil se trouve à portée du réseau sans fil en question. Les obstacles (cloisons etc.) peuvent réduire la portée des appareils sans fil. Vérifiez que le mot de passe est correct. Anomalies et dysfonctionnements dans le système L'installation d'applications tierces peut entraîner des dysfonctionnements du système. Essayez de désinstaller les applications installées récemment; elles peuvent être à l'origine du problème. Appuyez sur la touche RESET (réinitialisation) située sur le côté de l'appareil, et regardez si celui‐ci redémarre normalement. SPÉCIFICATIONS ... - Page 44 DUTCH ...
- Page 45 TABLE T ODEL TM M785 NDLEID ING ...
- Page 46 Inhoudsopgave WAARSCHUWINGEN ..................... 3 . BELANGRIJKE VEILIGHEIDSVOORZORGEN .............. 3 . INHOUD VAN DE VERPAKKING .................. 4 . OVERZICHT VAN HET PRODUCT .................. 4 . AAN DE SLAG ......................... 5 . De batterij opladen .................... 5 . IN EN UIT SCHAKELEN .................. 5 . Aansluiten op een pc ................... 5 . ...
-
Page 47: Waarschuwingen
WAARSCHUWINGEN Dit product is uitsluitend bedoeld voor huishoudelijk gebruik en mag niet worden gebruikt voor andere doeleinden of in andere toepassingen, zoals voor niet-huishoudelijk gebruik of in een commerciële omgeving. OPGELET ONTPLOFFINGSGEVAAR WANNEER DE BATTERIJ IS VERVANGEN DOOR EEN BATTERIJ VAN HET VERKEERDE TYPE. OUDE BATTERIJEN WEGWERPEN VOLGENSDE INSTRUCTIES. BELANGRIJKE VEILIGHEIDSVOORZORGEN Dezehandleiding bevat belangrijke veiligheidsvoorzorgenen informatiebetreffende het juiste gebruik van dit apparaat. Gelieve de instructies in deze handleiding nauwlettend te volgen. ... -
Page 48: Inhoud Van De Verpakking
INHOUD VAN DE VERPAKKING 1 x 7.85” tablet 1 x netadapter 1 x USB‐kabel 1 x handleiding 1 x boekje met veiligheidsvoorzorgen OVERZICHT VAN HET PRODUCT 1. Camera voorzijde 7. Start‐toets 2. AAN/UIT‐toets 8. Camera achterzijde 3. USB‐poort 9. Luidspreker 4. HDMI‐poort 10. DC‐5V contact 5. MIC (ingebouwde microfoon) 11. Sleuf voor micro‐SD/SDHC‐kaart 6. Oortelefooncontact Een langdurige blootstelling aan een hoog volume met gebruik van een kop- of oortelefoon kan het gehoor van de gebruiker beschadigen. -
Page 49: Aan De Slag
Om gehoorbeschadiging te vermijden, luister niet gedurende een lange periode aan een hoog volumeniveau. AAN DE SLAG De batterij opladen Deze tablet is uitgerust met eeningebouwdebatterij. De batterij dient volledig te worden opgeladen voordat men de tablet voor het eerst in gebruik neemt. Gebruik uitsluitend de meegeleverde5V‐netadapterof laad de tablet op via eenUSB‐kabelen een pc of een andere USB‐laadbron. Wanneer uwbatterijbijna leeg is laat de tableteenwaarschuwingstoon horen en verschijnt hierover een berichtop het scherm. Hetbatterij‐icoonzal ook blank zijn. De tablet schakelt automatisch uit wanneer de batterij helemaal leeg is. Tijdens het laden wordt het laadsymbool (bliksem) aangegeven bij hetbatterijsymbool in de rechterbenedenhoek van het bureaublad. Wanneer debatterijvolledig is opgeladen (het bliksemsymboolis verdwenen), haalt u de stekker van denetadapterof USB‐kabeluit de tablet en daarna uit het stopcontact. IN en UIT schakelen Houd destroomtoetsingedrukt tot de tablet opstart. Eenmaal klaar verschijnt het vergrendelscherm. Sleep het “slotsymbool” naar rechts tot het in een “ontgrendeld” ... -
Page 50: Een Micro-Sd/Sdhc-Kaart Inzetten
Een micro‐SD/SDHC‐kaart inzetten 1. Zet een micro‐SD/SDHC‐kaartin de kaartsleuf. 2. Open ES‐bestandverkenner in applicaties. 3. Selecteer de optieFavorietenom de bestanden op de kaart te bekijken. HET AANRAAKSCHERM GEBRUIKEN Hier volgt een overzicht van de belangrijkste interface‐controles op het bureaublad. Icoon Benaming Terugkeren Startvenster Recente applicaties Volume ‐ / + Alleapplicaties Statusiconen Gebruik uw vingers om de iconen, buttons, menu’s, het virtuele toetsenbord en andere items op het aanraakscherm te manipuleren. Raak een item aan om het te selecteren of activeren. ... -
Page 51: Applicaties
APPLICATIES Raak (icoon op de onderkant) aan voor toegang tot alleapplicatiesdie opde tablet beschikbaar zijn. English Dutch APPS APPS WIDGETS WIDGETS SHOP WINKEL 4KPlayer 4K‐speler Aldiko Aldiko Browser Browser Calculator Rekenmachine Calendar Kalender ... - Page 52 Camera Camera Chrome Chrome Clock Klok Documents ToGo Documenten GaNaar Downloads Downloads Email E‐mail ES File Explorer ES‐bestandverkenner File Manager Bestandmanager Gallery Galerie Gmail Gmail Google Google Google Settings Google‐instellingen Hi‐Q MP3 Rec (Lit.. Hi‐Q MP3‐opname (lit.. Local Locaal Maps Kaarten Music Muziek Navigation Navigatie Play Movies & TV Films & tv weergeven Play Music Muziek weergeven Play Store Winkel weergeven Settings ...
- Page 53 SoundRecorder Geluidopname Talk Spreken Voice Search Stem zoeken U kunt vanuit deze pagina alle applicaties openen door het symbool van een applicatie aan te raken. Om andere applicaties te openen gaat u over naar een ander venster door met uw vinger van rechts naar links over het scherm te gaan. BROWSER Tik op het icoon om de webbrowser te openen. Om naar een website te navigeren raakt u de adresbalk aan en typt u het adres van de te openen website. Gebruik het virtuele toetsenbord om een adres in te voeren en klik dan opGaan. De browser opent de laatst bezochte pagina. Destartpaginainstellen 1. Tik op het icoon in de rechterbovenhoek. 2. Tik op deoptie Instellingen. 3. Tik opAlgemeen. 4.
- Page 54 English Dutch General Algemeen Privacy & security Privacy & beveiliging Accessibility Toegankelijkheid Advanced Geavanceerd Bandwidth management Bandbreedte beheren Labs Labs Browser mode Browsermodus Set homepage Startpagina instellen AUTO‐FILL AUTOMATISCH INVULLEN Form auto‐fill Automatisch formulieren Fill out web forms with a single invullen touch Vul webformulieren in met één aanraking Auto‐fill text Automatisch tekst invullen ...
- Page 55 Set up text to auto‐fill in web Stel tekst in om automatisch op forms webformulieren in te vullen Bladwijzers instellen 1. Ga naar een website. 2. Tik op het icoon . 3. Tik opOK om deze website toe te voegen aan uw bladwijzers. Bladwijzers openen 1. Tik op het icoon . De lijst van bladwijzers verschijnt op het scherm. English Dutch BOOKMARKS BLADWIJZERS HISTORY HISTORIEK SAVED PAGES OPGESLAGEN PAGINA’S Local Locaal 2. Tik op de gewenste bladwijzer om de webpagina te openen. ...
-
Page 56: E-Mail
E‐MAIL Raak het icoon aan om de applicatieE‐mailte openen en toegang te krijgen tot uw e‐mail‐account. Voordat u voor het eerst uwe‐mailkan binnengaan, moet de overeenkomstige account‐informatie van uwe‐mail‐account worden ingesteld. 1. Voer in het veld hetE‐mail‐adresin op het virtuele toetsenbord. 2. Voer in het veldhetWachtwoordin op het virtuele toetsenbord. 3. RaakVolgendeaan zodat de applicatie de instelling kan voltooien. English Dutch Account setup Account instellen Email account E‐mail‐account You can set up email U kunt voor de meeste accounts in for most accounts in een handomdraai uw e‐mail instellen just a few steps Manual setup Handmatig instellen ... -
Page 57: Muziek
Email address E‐mail‐adres Password Wachtwoord Next Volgende Als de instelling niet automatisch verloopt, moet u de account‐informatie handmatig invoeren doorHandmatig instellente selecteren. Tik op de buttonHandmatig instellen, selecteerhet type mailbox dat u wilt gebruiken(POP3 of IMAP) en voer uw accountgegevensin. E‐mails verzenden 1. Tik op het icoon . 2. Voer de velden Ontvanger en Onderwerp in en type de informatie van uwe‐mailin de overeenkomstige velden om eene‐mail aan te maken. Tik op het icoon als u een bijlage wilt toevoegen en selectereerde gewenste map. U kunt dan bladeren naar de gewenste bijlage. 3. Tik wanneer u klaar bent op de verzendbutton . MUZIEK ... - Page 58 English Dutch Album cover Albumcover View current speellijst Huidige speellijst bekijken Random play Willekeurige weergave Repeat mode Herhaalmodus Artist Artiest Album Album Music Muziek Time played Weergavetijd Previous song Vorige song Pause Pauze Next song Volgende song Play progress bar Vooruitgangsbalk weergave ...
-
Page 59: Video(4K-Speler)
Totale playtime Totale speelduur Ommuziekaan een speellijst toe te voegen 1. Raak eenmuzieknummer aan en hou vast tot een lijst verschijnt. 2. SelecteerToevoegen aanspeellijsten het vensterToevoegen aanspeellijstverschijnt op het scherm. 3. SelecteerHuidigespeellijst ofNieuw. Hetgeselecteerdemuzieknummerwordt aandespeellijst toegevoegd. Als u de optieNieuwselecteertdient u eennaamvoor de nieuwe speellijst in te voeren en danOpslaan aan te raken. Ommuziekuit eenspeellijstte wissen 1. Raak eenmuzieknummer aan en hou vast tot een lijst verschijnt. 2. Selecteer de optieWissenen raak danOK aan. VIDEO(4K‐speler) Raak het icoon aan om de videospeler binnen te gaan en navigeer naar een videobestand. Selecteer een video door deze aan te raken. Weergave/pauze Raak het weergave‐icoon aan om de videoweergave te starten. Raak eender welke plaats op het scherm aan om de controlebalk te openen en druk dan op het pauze‐icoon om de weergave te onderbreken. Hervat de weergave door het weergave‐icoon aan te raken. Zoeken ... -
Page 60: Systeeminstellingen
SYSTEEMINSTELLINGEN Tik op het icoon om alle beschikbaresysteeminstellingenvan de tablet binnen te gaan. Draadloos & netwerken 1. Verschuif de Wi‐Fi‐schakelaar naar de stand AANom Wi‐Fi te activeren. 2. Nadat Wi‐Fi is ingeschakeld scant de tablet automatischnaar beschikbare Wi‐Fi‐netwerken en toont de namen van de gevonden netwerken op het scherm. Bij beveiligenetwerken is een Sloticoon aangegeven. De tablet maakt automatisch verbinding met gevonden netwerken waarmee u al eerder had verbonden. English Dutch Settings Instellingen WIRELESS & NETWORKS DRAADLOOS & NETWERKEN Wi‐Fi Wi‐Fi ... -
Page 61: Geluid
ON AAN Data usage Data gebruik More… Meer… DEVICE APPARAAT Sound Geluid Display Display Storage Opslag Battery Batterij Apps Apps PERSONAL PERSOONLIJK Location address Locatieadres Security Beveiliging Secured with WPA/WPA2 Beveiligd met WPA/WPA2 (WPS (WPS available) beschikbaar) Secured with WEP Beveiligd met WEP Guest Gast 3. Vind het gewenste netwerk en raak het aan. Als dit netwerk beveiligd is wordt u gevraagd om hetwachtwoordin te voeren en dan opVerbindente tikken. 4. - Page 62 Geluid U kunt in deze optie de volgende instellingen doen: Volumes Hierin kunt u de standaardinstellingen van het volume voormuziek, video, games&andere media, berichtenenwekkers instellen. Standaard Hierin kunt u een andergeluidvoor de berichtgeving selecteren. berichtgeving Aanraakgeluiden Hierin kunt u het geluid bij het aanraken van het scherm in of uitschakelen. Geluid van de Hierin kunt u het geluid bij het vergrendelen van het scherm in schermvergrendeling of uitschakelen. English Dutch Settings Instellingen WIRELESS & DRAADLOOS & NETWERKEN NETWORKS Wi‐Fi Wi‐Fi ...
- Page 63 ON AAN Data usage Data gebruik More… Meer… DEVICE APPARAAT Sound Geluid Display Display Storage Opslag Battery Batterij Apps Apps PERSONAL PERSOONLIJK Location address Locatieadres Security Beveiliging Volumes Volumes SYSTEM SYSTEEM Default notification Standaardgeluid berichtgeving sound Touch sounds Aanraakgeluiden Schermvergrendeling Geluiden schermvergrendeling sounds ...
- Page 64 Display U kunt in deze optie de volgende instellingen doen: Helderheid Hierin kunt ude helderheid van het scherm configureren. Wallpaper Selecteer verschillende wallpapers voor uw bureaublad uitgalerie, live wallpaper ofwallpaper. Automatisch scherm Schakelt het automatische draaien van het scherm als de tablet draaien wordt gedraaid in of uit. Sleep Voor het instellen van de tijd waarna de tablet overschakelt naar de slaapmodusvan nooit tot 30 minuten. Dagdroom Hierin kunt ueen screensaver kiezen uitklok, kleuren, fotolijst (screensaver) offototabel. Fontgrootte Hierin kunt u destandaardfontgrootteinstellen om tekst gemakkelijk te kunnen lezen. Coördinatiesysteem Hierin kunt udeversnellingsmeter callibreren. versnellingsmeter Schermaanpassing Hierin kunt ude grootte van het displayscherm van sommige games instellen. Intelligente kleuren Voor het activeren of deactiveren van intelligente kleurenvoor het spelen van games, video’s and foto’s. Demomodus ...
- Page 65 English Dutch Settings Instellingen WIRELESS & DRAADLOOS & NETWERKEN NETWORKS Wi‐Fi Wi‐Fi ON AAN Data usage Data gebruik More… Meer… DEVICE APPARAAT Sound Geluid Display Display Storage Opslag ...
- Page 66 Battery Batterij Apps Apps PERSONAL PERSOONLIJK Location address Locatieadres Security Beveiliging Display Display Brightness Helderheid Wallpaper Wallpaper Auto‐rotate screen Automatisch scherm draaien Sleep Slapen After 2 minutes of Na 2 minuten zonder activiteit inactivity Daydream Dagdromen Off Uit Font size Fontgrootte Normal Normaal Accelerometer Coördinatiesysteem coordinate system versnellingsmeter Accelerometer uses the De versnellingsmeter gebruikt het standard coordinate standaard coördinatiesysteem. system. Screen adaption ...
- Page 67 Used to adjust size of Gebruikt om de schermgrootte van some games display sommige games in te stellen screen. SMART COLOR INTELLIGENTE KLEUREN Opslag Deze optie geeft een volledige breakdown van het gebruik van de interneopslagen eventuele externekaartenen hoeveel ruimte erop beschikbaar is. English Dutch Settings Instellingen WIRELESS & DRAADLOOS & NETWERKEN NETWORKS ...
- Page 68 Wi‐Fi Wi‐Fi ON AAN Data usage Data gebruik More… Meer… DEVICE APPARAAT Sound Geluid Display Display Storage Opslag Battery Batterij Apps Apps PERSONAL PERSOONLIJK Location address Locatieadres Security Beveiliging Storage Opslag INTERNAL STORAGE INTERNE OPSLAG Total space Totale ruimte Available Vrij Apps (app data & Apps (app‐gegevens en media content) media‐inhoud) Cached data Gegevens in cache Total space ...
- Page 69 Beveiliging U kunt in deze optieinstellen hoe uw tablet is beveiligd. U kunt ook een bepaalde vorm van automatische schermvergrendeling instellen om ongeoorloofde toegang te voorkomen. English Dutch Settings Instellingen DEVICE APPARAAT Sound Geluid Display Display Storage Opslag Battery Batterij Apps Apps PERSONAL PERSOONLIJK Location access Locatie toegang ...
-
Page 70: Taal & Input
Security Beveiliging Language & input Taal & input Backup & reset Back‐up & terugstellen ACCOUNTS ACCOUNTS Add account Account toevoegen SYSTEM SYSTEEM Security Beveiliging SCREEN SECURITY SCHERMBEVEILIGING Screen lock Schermvergrendeling Slide Verschuiven Owner info Informatie over eigenaar PASSWORDS WACHTWOORDEN Make passwords visible Wachtwoorden zichtbaar maken DEVICE APPARATUURADMINISTRATIE ADMINISTRATION Device administrators Apparatuuradministrators View or deactivate Apparatuuradministrators zien of device administrators deactiveren Unknown sources Onbekende bronnen Allow installation of Installatie van apps van onbekende apps from unknown bronnen toestaan ... - Page 71 Verify apps Apps verifiëren Disallow or warn Installatie van apps die schade before installation of kunnen aanrichten niet toelaten of apps that may cause waarschuwen harm CREDENTIAL STORAGE OPSLAG VAN IDENTIFICATIE Trusted credentials Vertrouwde identificaties Schermvergrendeling Om de instellingen van de vergrendeling te wijzigen: 1. RaakSchermvergrendeling aan. 2. Raak hetgewenste type vergrendeling aan en volg de instructies die op het scherm verschijnen. U kunt kiezen uit de volgende opties voor vergrendeling: Verschuiven Biedt geen beveiliging doch laat u terugkeren naar het Startvenster. Gezicht Hiermee kunt u de tablet ontgrendelen met uw gezicht. ontgrendelen Patroon Hiermee kunt met uw vinger een eenvoudig patroon tekenen waarmee u de tablet kunt ontgrendelen. PIN ...
- Page 72 een gekwalificeerde technieker of laat het apparaat professioneel hernieuwen. Taal & input U kunt in deze optieuit verschillende talen kiezen, het toestenbord instellen voor verschillende talenen zoeken via Stemherkenning en Tekst‐naar‐spraak configureren. English Dutch Settings Instelllingen Battery Batterij Apps Apps PERSONAL PERSOONLIJK Location access Locatie toegang Security Beveiliging Language & input Taal & input Backup & reset Back‐up & terugstellen ...
-
Page 73: Datum & Tijd
ACCOUNTS ACCOUNTS Add account Account toevoegen SYSTEM SYSTEEM Date & time Datum & tijd Accessibility Toegankelijkheid Developer options Opties voor ontwikkelaars About tablet Over tablet Language & input Taal & input Language Taal English (United States) Engels (Verenigde Staten) Spellchecker Spellingcontrole Personal dictionary Persoonlijk woordenboek KEYBOARD & INPUT TOETSENBORD & INPUTMETHODES METHODS Default Standaard English (United States) Engels (Verenigde Staten) – – Android keyboard Android‐toetsenbord Android keyboard Android‐toetsenbord English (United States) Engels (Verenigde Staten) Google voice typing Google spraak‐naar‐tekst ... - Page 74 Voice search Zoeken via stemherkenning Datum & tijd U kunt in deze optiede instellingen voor datum en tijd wijzigen. U kunt kiezen uit de volgende opties: Automatischedatum Als dit is ingeschakeld updatet de tablet de datum en tijd & tijd automatischals er internetverbinding is. Automatische Als dit is ingeschakeld neemt de tablet de tijdzone van het tijdzone netwerk over. Datum instellen Hierin kunt u de datum handmatig instellen. Deze optie is alleen beschikbaar als de Automatischedatum & tijd is uitgeschakeld. Tijd instellen Hierin kunt u de tijd handmatig instellen. Deze optie is alleen beschikbaar als de Automatische datum & tijd is uitgeschakeld. Tijdzone selecteren Hierin kunt u uw huidige tijdzone selecteren uit de beschikbare opties. 24‐uur format Hierin kunt u afwisselen tussen de 12 en 24 uur‐formats. gebruiken Datumopmaak Hierin kunt u een opmaak kiezen voor de datum. kiezen ...
- Page 75 English Dutch Settings Instellingen Battery Batterij Apps Apps PERSONAL PERSOONLIJK Location access Locatie toegang Security Beveiliging Language & input Taal & input Backup & reset Back‐up & terugstellen ACCOUNTS ACCOUNTS Add account Account toevoegen SYSTEM SYSTEEM ...
- Page 76 Date & time Datum & tijd Accessibility Toegankelijkheid Developer options Opties voor ontwikkelaars About tablet Over tablet Date & time Datum & tijd Automatic date & time Automatische datum & tijd Use network‐provided Tijd van netwerk overnemen time Automatic time zone Automatische tijdzone Use network‐provided Tijdzone van netwerk overnemen time Set date Datum instellen Set time Tijd instellen Select time zone Tijdzone selecteren GMT+02:00 Central GMT+02:00 Centraal‐Europese European Summer zomertijd Time Use 24‐hour format 24‐uur format gebruiken Choose date format Datumopmaak kiezen ...
-
Page 77: Problemen Oplossen
PROBLEMEN OPLOSSEN Problemen met warmte Dit apparaat warmt op wanneer meerdereapplicaties geopend zijn, het scherm op de helderste standis ingestelden tijdens het opladen. Dit is normaal en zou geen ongemak tijdens het gebruik mogen veroorzaken. Het apparaat kan geen Wi‐Fi‐verbinding maken Controleer of het draadloze netwerk werkt door er een ander draadloos apparaat mee te verbinden. Controleer of het apparaat zich binnen het bereik bevindt van het draadloze netwerk waarmee uwilt verbinden. Door muren en andere obstakelskan de gebruiksafstand tussen draadloze apparaten aanzienlijk kleiner worden. Controleer of hetgebruikte beveiligendewachtwoordcorrect is. Het systeem vertoont afwijkingen en lijkt niet normaal te werken De installatie vanapplicatiesvan derden kan soms de werking van het systeem verstoren. Probeer recent geïnstalleerde applicaties die de oorzaak van het probleem kunnen zijn te verwijderen. Druk op de RESET‐toetsop de zijkant van het apparaaten controleer of het dan normaal opstart. TECHNISCHE GEGEVENS CPU‐processor Boxchip A31s.ARM cortex‐A7, 1.0GHZ, 4‐kern ... -
Page 78: Afdanken
AFDANKEN Als een verantwoordelijke verkoper dragen wij zorg voor het milieu. Daarom sporen wij u aan bij het afdanken van dit product, de verpakkingsmaterialen en, voor zover van toepassing, de accessoiresen batterijende correcte werkwijze te volgen. Dit helpt bij het behoud van natuurlijke grondstoffen en verzekeren dat de materialen gerecycled kunnen worden op een manier die goed is voor de gezondheid en het milieu. U dient de wetten en reglementering betreffende het afdanken van dit product te respecteren. Afgedankte elektrische apparaten en batterijen horen aan het eind van hun levensduur niet bij het huisvuil. Neem contact op met de winkel waar u dit apparaat kocht of uw plaatselijke overheid om meer te weten overafdankenen recycling. De batterijen moeten naar een plaatselijk recycling‐puntworden gebracht. Wij verontschuldigen ons voor eventueel ongemak door kleine onnauwkeurigheden, die ondanks onze zorgen in deze gebruiksaanwijzing kunnen voorkomen omdat wij onze producten voortdurend ontwikkelen en verbeteren. Kesa Electricals © UK: EC1N 6TE13/ 08 / 2013 ... - Page 79 European Spanish ...
- Page 80 ABLET TA DELO TM M785 NUAL D E INSTR RUCCCIO O NES ...
- Page 81 Índice ADVERTENCIAS ....................... 3 INSTRUCCIONES SOBRE SEGURIDAD IMPORTANTES ............. 3 CONTENIDO DEL ENVASE .................... 4 DESCRIPCIÓN DEL PRODUCTO .................. 4 PREPARACIÓN ........................ 5 Carga de la batería .................... 5 Encendido y Apagado ................... 5 Conexión a PC ....................... 5 Inserción de tarjeta Micro SD/SDHC .............. 6 UTILIZACIÓN DE LA PANTALLA TÁCTIL ................ 6 ...
-
Page 82: Advertencias
ADVERTENCIAS Este aparato ha sido concebido para una utilización exclusivamente doméstica y no debe ser utilizado con ningún otro objetivo o aplicación, como un uso no doméstico o con fines comerciales. PRECAUCIÓN RIESGO DE EXPLOSIÓN SI LA BATERÍA SE SUSTITUYE POR OTRA DE TIPO INCORRECTO ELIMINE LAS BATERÍAS GASTADAS DE ACUERDO A LAS INSTRUCCIONES. INSTRUCCIONES SOBRE SEGURIDAD IMPORTANTES Este manual contiene instrucciones sobre seguridad importantes e información para la utilización adecuada del aparato. Siga atentamente las instrucciones de este manual. Este es un producto electrónico de alta densidad; no lo desmonte usted mismo. Evite los golpes y no deje caer el aparato. Evite condiciones adversas como lugares mojados o húmedos, la lluvia, la humedad alta, fuertes vibraciones, temperaturas extremamente altas o bajas, fuerte luz del sol y lugares con mucho polvo. Para limpiar el producto, utilice un pañoligeramente húmedo. No utilice sustancias químicas ni detergentes fuertes. Nunca deje que las gotas de agua se queden en la pantalla. Símbolo Esta marca se utiliza para indicar que el aparato cumple con las normativas europeas de seguridad y compatibilidad electro‐magnética. Utilización y manipulación de la batería El producto incluye una batería recargable de 3,7V de polímero de Litio, incorporada en el producto y no accesible ni sustituible. Por ello, al final de su vida útil, el producto debe ser eliminado en un centro de reciclado. ... -
Page 83: Contenido Del Envase
CONTENIDO DEL ENVASE 1 x tableta de 7.85” 1 x Adaptador eléctrico 1 x Cable USB 1 x Manual de instrucciones 1 x Folleto de instrucciones sobre seguridad DESCRIPCIÓN DEL PRODUCTO 1. Cámara frontal 7. Botón de inicio 2. Botón de conexión 8. Cámara posterior 3. Puerto USB 9. Altavoz 4. Puerto HDMI 10. Clavija DC‐5V 5. MIC (Micrófono incorporado) 11. Ranura para tarjeta Micro 6. Clavija para auriculares SD/SDHC A pleno volumen, la escucha prolongada del reproductor portátil puede dañar la capacidad auditiva del usuario ¡ADVERTENCIA! Para proteger su capacidad auditiva tenga en cuenta lo siguiente: Es de suma importancia que cualquier tipo de auriculares o audífonos utilizado con este producto... -
Page 84: Preparación
A fin de prevenir posibles lesiones auditivas, no escuche a niveles de volumen elevados por largos periodos de tiempo. PREPARACIÓN Carga de la batería La tabletatiene una batería incorporada. Antes de utilizar la tabletapor primera vez, cargue la batería por completo. Utilice solo el adaptador eléctrico de 5V suministrado, o, alternativamente, puede cargar la tableta a través de un cable USB a PC o de otra fuente de alimentación por USB. Cuando la carga de la batería esté baja, la tableta emitirá un sonido de advertencia y mostrará un mensaje de batería baja. El icono de la batería también aparecerá vacío. Si la carga de la batería está demasiado baja, la tabletase apagará automáticamente. Cuando esté cargándose, el símbolo de la batería en el ángulo inferior derecho del escritorio mostrará un símbolo de carga (un rayo) . Cuando la batería esté completamente cargada (desaparecerá el símbolo del rayo en el icono de la batería), desenchufe el adaptador eléctrico o el cable USB de la tableta y entonces de la toma de alimentación eléctrica. ... -
Page 85: Inserción De Tarjeta Micro Sd/Sdhc
Inserción de una tarjeta Micro SD/SDHC 1. Introduzca una tarjeta Micro SD/SDHC en la ranura para tarjetas. 2. Abra el Explorador Archivo ES en las aplicaciones. 3. Seleccione la opción Favoritospara ver los archivos en la tarjeta. UTILIZACIÓN DE LA PANTALLA TÁCTIL Los mandos principales de interfaz son los mostrados a continuación. Icono Nombre Retroceder Inicio Aplicaciones recientes Volumen ‐ / + Todaslas aplicaciones Iconos de estado Utilice sus dedos para manipular los iconos, botones, menús, el teclado en pantalla, y otras opciones en la pantalla táctil. ... -
Page 86: Aplicaciones
APLICACIONES Paraaccedertodas las aplicaciones disponibles en la tableta, pulse (iconoen la parte inferior). Desde esta página puede ejecutar cualquier aplicación pulsando el símbolo de esa aplicación. Para acceder a más aplicaciones, desplácese por la ventana hacia la izquierda deslizando su dedo de derecha a izquierda. NAVEGADOR Para abrir el navegador web, pulse el icono . Para navegar a una página web, pulse la barra de direcciones y escriba en ella la dirección web de la página web que desea ver. Utilice el teclado que se abre para escribir la dirección y entonces haga click enGo. ... - Page 87 El Navegador abrirá la última página que haya visitado. Configuración de la página de inicio 1. Pulse el icono en el ángulo superior derecho. 2. Pulse la opción Configuraciones. 3. PulseGeneral. 4. PulseEstablecer página de iniciopara seleccionar la ocpión deseada. Establecimiento de un marcador 1. Vaya a la página web. 2. Pulse el icono . 3. PulseOK para añadir esta página web a los marcadores. Apertura de un marcador 1. Pulse el icono . Aparecerá una lista de marcadores. ...
-
Page 88: Email
2. Pulse el marcador deseado para abrir la página web. EMAIL Para activar el acceso a su cuenta de email, abra Email pulsando el icono . Antes de que pueda acceder a su email por primera vez, deberá introducir la información relevante de la cuenta para la cuenta email a la que desea conectarse. 1. Introduzca la Dirección emailen el recuadro utilizando el teclado que se abre. 2. Introduzca laContraseñaen el recuadro utilizando el teclado que se abre. 3. PulseSiguiente y la aplicación tratará de finalizar la configuración. Si la configuración no se finaliza de manera automática, tendrá que introducir de manera manual la información de la cuenta seleccionado Configuración manual. ... -
Page 89: Música
Pulse el botón “Configuración manual”, seleccione el tipo de buzón electrónico que utilizará (POP3 o IMAP) e introduzca la información de la cuenta. Envío de un Email 1. Pulse el icono . 2. Introduzca el A, Asuntoy Componga la información del email para crear el email. Para añadir un documento adjunto pulse el icono y seleccione la carpeta deseada, entonces podrá navegar para buscar el archivo que adjuntar. 3. Cuando haya finalizado pulse el botón . MÚSICA Para acceder al reproductor musical, pulse el icono . Puede seleccionar una pista musical y abrirla en el reproductor. Cubierta del álbum (Album cover) Ver la lista de reproducción actual (View current playlist) Reprodución aleatoria (Random play) Modo de repetición (Repeat mode) Artista (Artist) Álbum (Album) Música (Music) Tiempo reproducido (Time played) ... -
Page 90: Vídeo(Reproductor 4K)
Canción anterior (Previous song) Pausa (Pause) Canción siguiente (Next song) Barra de progreso de la reproducción (Play progress bar) Tiempo de reproducción total (Total play time) Para añadir música a la lista de reproducción 1. Pulse y mantenga pulsada una pista musical y aparecerá una lista. 2. SeleccioneAñadir a la lista de reproduccióny la lista Añadir a la lista de reproducción aparecerá. 3. SeleccioneLista de reproducción actual oNueva. La pista musical seleccionada será añadida a la lista de reproducción. Si se selecciona la opción Nueva, introduzca un nombre para su nueva lista de reproducción y pulse entonces Guardar. Para borrar música de la lista de reproducción 1. Pulse y mantenga pulsada una pista musical y aparecerá una lista. 2. Seleccione la opción Borrary pulse entonces OK. VÍDEO(reproductor 4K) Para acceder al reproductor de vídeo, pulse el icono y navegue a una carpeta de vídeo. Seleccione un vídeo pulsando sobre él. Reproducción / Pausa Pulse el icono de reproducción y el vídeo comenzará su reproducción. Para pausarel vídeo, pulse en cualquier lugar sobre la pantalla para que aparezca la barra de control y entonces pulse el icono de pausa. Para reanudar la reproducción, pulse el icono de reproducción. ... -
Page 91: Configuración Del Sistema
CONFIGURACIONES DEL SISTEMA Para acceder todas las configuraciones del sistema disponibles para la tableta, pulse el icono . Inalámbrico y Redes 1. Para activar la Wi‐Fi, deslice el interruptor Wi‐Fi a la posiciónACTIVADO (ON). 2. Una vez activada la Wi‐Fi, la tableta buscará automáticamente las redes Wi‐Fi disponibles y mostrará los nombres de las que haya localizado. Las redes protegidas están indicadas mediante un icono de Bloqueo. Si la tabletaencuentra una red a la que se ha conectado previamente, se conectará automáticamente a ella. 3. Localice la red adecuada y pulse sobre ella. Si la red está protegida, se le solicitará que introduzca una contraseña y entonces podrá pulsarConectar. 4. La tabletase conectará a la red. ... -
Page 92: Sonido
Sonido En esta opción, puede usted realizar las siguientes configuraciones: Volúmenes Le permite configurar los ajustes de volumen predeterminadospara Música, vídeo, juegos yotros contenidos, Notificaciones yAlarmas. Notificación Le permite seleccionar un sonido diferentepara notificationes. predeterminada Sonidos de Le permite activar o desactivar el sonido emitido al realizar pulsaciones pulsaciones en la pantalla. Sonidos de bloqueo Le permite activar o desactivar el sonido emitido al de pantalla desbloquear la pantalla. Pantalla En esta opción, puede usted realizar las siguientes configuraciones: Brillo Le permite configurarel brillo predeterminado de la pantalla. Fondode pantalla Seleccione diferentesfondos de pontalla de Galería, Fondos Vivos oFondos. Pantalla rotativa Active o desactive la rotación automática de la pantallacuando ... - Page 93 se gira la tableta. Sleep Ajuste el período de tiempo antes de que la tabletapase al modo sleep desde cero a 30 minutos. Sueño diurno Le permite seleccionar un salvapantallas que muestre Reloj, (salvapantallas) Colores, Marco de Fotos oCuadro de Fotos. Tamaño de fuente Le permite cambiar el tamaño de fuente predeterminado para una fácil lectura de texto. Sistema de Le permite calibrar el acelerómetro. coordinación del Acelerómetro Adaptación de Le permite ajustar el tamaño de la pantalla para algunos juegos. pantalla Color inteligente Activa o desactiva el color inteligente para jugar a juegos, ver vídeos y fotos. Modo demo Activa o desactiva el modo demo para el efecto de color inteligente. Retroiluminación Activa o desactiva la retroiluminación inteligente. inteligente Modo demo Activa o desactiva el modo demo para la retroiluminación inteligente. ...
-
Page 94: Almacenamiento
Almacenamiento Esta opción le da una información completamente detallada sobre la utilización de la capacidad de almacenamiento interna, sobre tarjetas externas y sobre el espacio disponible en ellas. Seguridad Esta opción le permite configurar según su deseo la seguridad para su tableta. Quizá desee configurar alguna forma de bloqueo automático de pantalla para evitar el acceso no autorizado. ... - Page 95 Bloqueo de pantalla Para ajustar la configuración de bloqueo: 1. Pulse Bloqueo de pantalla. 2. Pulse el tipo de bloqueo que desea y siga las instrucciones en pantalla. Puede usted seleccionar entre las siguientes opciones de bloqueo: Deslizamiento No proporciona protección, pero le permite ir a la Página de inicio. Desbloqueo facial Le permite desbloquear la tabletacon su cara. Figura Le permite dibujar una figura simple con su dedo para desbloquear la tableta. PIN Requiere cuatro o más números. Los PINsmás largos tienden a ser más seguros. Contraseña Requierecuatro o más letras o números. Nota: Una vez establecido el bloqueo de la pantalla, la pantalla quedará bloqueada cuando la pantalla de la tableta se desactive automáticamente. ...
-
Page 96: Idioma Y Selección
cualquier cambio. Si se le olvida la Figura / PIN / Contraseña, la única manera de poder acceder al aparato es actualizar el firmware.Consultecon una persona cualificada o lleve el aparato a un profesional para actualizar el firmware. Idioma y selección Esta opción le permite seleccionar entre diferentes idiomas, cambiar el teclado a otro idioma y configurar la salida de Búsqueda de Voz y Texto a voz. Fecha y hora Esta opción le permite configurar la fecha y hora. Están disponibles las siguientes opciones: Fecha y hora Cuando se activa, la tabletaactualizará automáticamente la automáticas fecha y la hora cuando se conecte a internet. Huso horario Cuando se activa, la tabletautilizará el huso horario automático proporcionado por la red. Ajuste de fecha Le permite ajustar manualmente la fecha. Esta opción solo está disponible si se ha desactivado la Fecha y hora automáticas. Ajuste de hora Le permite ajustar manualmente la hora. Esta opción solo está disponible si se ha desactivado la Fecha y hora automáticas. ... -
Page 97: Resolución De Problemas
Selección de huso Le permite seleccionar su huso horario actual entre las horario opciones disponibles. Utilización del Le permite cambiar el formato horario entre los formatos de 12 formato 24‐horas y 24 horas. Selección del Le permite cambiar el formato de la fecha. formato de fecha RESOLUCIÓN DE PROBLEMAS Calentamiento Cuando esté utilizando varias aplicaciones, utilizando la pantalla a su nivel máximo de brillo, o cuando lo esté cargando, este aparato se calienta. Esto es normal y nodebe causar ningún inconveniente durante su utilización. El aparato no puede conectarse a Wi‐Fi Asegúrese de que la red inalámbrica está funcionando probándola con otro aparato inalámbrico. Asegúrese de que el aparato esté dentro del alcance de la red inalámbrica a la que va a ser conectado.Las paredes u otros obstáculos reducirán la distancia de funcionamiento de los aparatos inalámbricos. Asegúrese de que la contraseña de seguridad utilizada es correcta. ... -
Page 98: Especificaciones
La instalación de aplicaciones de tercerospuedecausarque el sistema no funcione correctamente. Trate de desinstalar las aplicaciones recientemente instaladas que pudieran causar este problema. Pulse el botón REINICIAR (RESET) en el lateral del aparato y compruebe si se reinicia con normalidad o no. ESPECIFICACIONES Procesador CPU Boxchip A31s.ARM cortex‐A7, 1.0GHZ, Cuádruple núcleo RAM 1GB Memoria NAND FLASH 8GB Conexión inalámbrica Wifi 802.11 b/g/n Tamaño 7.85” Tipode puntos Capacitivos, P+G, IPS táctiles Pantalla Resolución 1024 x 768 pixels Sistema Android 4.2 Batería Batería de polímero de Litio incorporada ELIMINACIÓN Como minoristas responsables, nos preocupamos por el medio ambiente. Por ello, le rogamos que siga el procedimiento correcto de eliminación para el ... - Page 99 CZECH ...
- Page 100 TABLE T ...
- Page 101 Obsah UPOZORNĚNÍ ......................... 3 . DŮLEŽITÉ BEZPEČNOSTNÍ POKYNY ................ 3 . OBSAH BALENÍ....................... 3 . PŘEHLED VÝROBKU ....................... 4 . ZAČÍNÁME ........................ 5 . Nabíjení baterie .................... 5 . ZAPNUTÍ a VYPNUTÍ ................... 5 . Připojení k počítači .................... 5 . Vložení Micro SD/SDHC karty ................ ...
-
Page 102: Upozornění
UPOZORNĚNÍ Tento přístroj je navržen pouze pro domácí použití, nesmí být použit na žádné jiné účely a nesmí se tedy používat např. mimo domácnosti nebo pro komerční účely. POZOR V PŘÍPADĚ POUŽITÍ NESPRÁVNÉHO TYPU BATERIE HROZÍ NEBEZPEČÍ VÝBUCHU. POUŽITÉ BATERIE LIKVIDUJTE PODLE POKYNŮ. DŮLEŽITÉ BEZPEČNOSTNÍ POKYNY Tento návod obsahuje důležité bezpečnostní pokyny a instrukce pro správné používání zařízení. Řiďte se pokyny v tomto návodu. Toto je elektronický výrobek s vysokou hustotou, nesnažte se jej sami rozebírat. Vyvarujte se nárazům a dbejte na to, aby zařízení nespadlo. Vyhýbejte se použití výrobku v nepříznivých podmínkách, jako jsou mokré nebo vlhké prostory, vysoká vlhkost vzduchu, silné vibrace, extrémně vysoké nebo nízké teploty, silné sluneční záření a velmi prašná místa. Výrobek čistěte utřením vlhkou utěrkou. Nepoužívejte chemická rozpouštědla nebo silné čisticí prostředky. Na obrazovce nikdy nenechávejte kapky vody. Symbol Tato značka znamená, že přístroj vyhovuje evropským bezpečnostním a elektromagnetickým směrnicím. Používání a manipulace s bateriemi Přístroj je dodáván s jednou vestavěnou dobíjecí 3,7V baterií, která není dostupná a není vyměnitelná. Proto se musí přístroj po skončení životnosti recyklovat ve sběrném středisku. OBSAH BALENÍ 1x 7,85” tablet ... -
Page 103: Přehled Výrobku
PŘEHLED VÝROBKU 1. Přední kamera 7. Tlačítko domů 2. Tlačítko napájení 8. Zadní kamera 3. USB port 9. Reproduktor 4. HDMI port 10. Zdířka pro napájení DC‐5V 5. MIC (vestavěný mikrofon) 11. Slot pro Micro SD/SDHC kartu 6. Výstup pro sluchátka Na plný výkon může dlouhý poslech poškodit sluch uživatele. UPOZORNĚNÍ: ochranu sluchu... -
Page 104: Začínáme
ZAČÍNÁME Nabíjení baterie Tablet má vestavěnou baterii. Před prvním použitím tabletu ji plně nabijte. Používejte pouze dodaný 5V napájecí adaptér, případně můžete tablet dobíjet přes USB kabel z PC nebo jiného USB zdroje napájení. Když bude baterie slabá, tablet vydá upozorňující zvuk a zobrazí upozornění o slabé baterii. Ikona baterie bude prázdna. Pokud se baterie vybije úplně, tablet se automaticky vypne. Během nabíjení se v pravém spodním rohu plochy zobrazí značka nabíjení (blesk) . Když je baterie plně nabita (značka blesku v ikoně baterie není zobrazena), odpojte napájecí adaptér nebo USB kabel z tabletu a poté ze zásuvky. ZAPNUTÍ a VYPNUTÍ Stiskněte a podržte tlačítko napájení, dokud se tablet nezačne startovat. Po dokončení se zobrazí zamykací obrazovka. Pro odemčení táhněte symbol „uzamčení“ doprava, dokud se nezmění na symbol „odemčení“. Stiskněte a podržte tlačítko napájení, dokud se na ploše nezobrazí obrazovka vypnutí. Pro vypnutí tabletu zvolte možnost OK. Připojení k počítači Tablet můžete připojit přímo k počítači nebo notebooku pomocí dodaného USB kabelu. Po připojení k počítači nebo notebooku se bude tablet zobrazovat jako velkokapacitní paměťové zařízení. 1. USB konektor připojte k počítači nebo notebooku. 2. -
Page 105: Použití Dotykové Obrazovky
POUŽITÍ DOTYKOVÉ OBRAZOVKY Hlavní ovládací prvky rozhraní na ploše jsou popsány níže. Ikona Jméno Zpět Domů Poslední aplikace Hlasitost‐ / + Všechny aplikace Stavové ikony K manipulaci s ikonami, tlačítky, nabídkami, virtuální klávesnicí a jinými položkami na dotykové obrazovce použijte prsty. Pro výběr nebo aktivaci položky na ni poklepejte. Pro psaní věcí jako jsou jméno, heslo nebo položky k vyhledání nejdřív poklepejte do místa, kam chcete psát. Zobrazí se klávesnice, která umožní psaní do políček. Ostatní běžná gesta jsou: ... -
Page 106: Prohlížeč
APPS – APLIKACE Email ‐ E‐Mail Play Movies&TV ‐ Přehrávač WIDGETS – WIDGETY ES File Explorer ‐ ES prohlížeč filmů a TV SHOP ‐ OBCHOD souborů Play Music ‐ Přehrávač hudby 4K Player ‐ 4K přehrávač File Manager ‐ Správce Play Store ‐ Obchod Play Aldiko ‐ Aldiko souborů Settings ‐ Nastavení Browser ‐ Prohlížeč Gallery ‐ Galerie SlideMe Market ‐ SlideMe Calculator ‐ Kalkulačka Gmail ‐ Gmail Market Calendar ‐ Kalendář Google ‐ Google Sound Recorder ‐ Záznam Camera ‐ Fotoaparát Google Settings ‐ Google zvuku Chrome ‐ Chrome nastavení Talk ‐ Talk Clock ‐ Hodiny Local ‐ Místní Voice Search ‐ Hlasové Documents ToGo ‐ Documents Maps ‐ Mapy vyhledávání ToGo Music ‐ Hudba Downloads ‐ Stahování ... - Page 107 Na klávesnici zadejte adresu a poklepejte na Go (spustit). Prohlížeč zobrazí naposledy otevřenou stránku. Nastavení domovské stránky 1. Poklepejte na ikonu v pravém horním rohu. 2. Poklepejte na možnost Settings (nastavení). 3. Poklepejte na General (obecné). 4. Pro nastavení požadované stránky poklepejte na Set homepage (nastavit domovskou stránku). General ‐ Obecné AUTO‐FILL – AUTOMATICKÉ VYPLNĚNÍ Privacy&security – Soukromí a bezpečnost Form auto‐fill – Automatické vyplnění formuláře Accessibility ‐ Usnadnění Fill out web forms with a single touch – Vyplnit Advanced ‐ Pokročilé webové formuláře jedním dotykem Bandwidth management – Správa přenosu dat Auto‐fill text – Automatické vyplnění textu Labs ‐ Laboratoř Set up text to auto‐fill in web forms – Nastavení Browser mode – Režim prohlížeče automatického vyplnění webových formulářů ...
-
Page 108: E-Mail
Uložení záložky 1. Přejděte na internetovou stránku. 2. Poklepejte na ikonu . 3. Pro uložení internetové stránky do záložek poklepejte na OK (ok). Otevření záložky 1. Poklepejte na ikonu . Zobrazí se seznam záložek. BOOKMARKS ‐ ZÁLOŽKY HISTORY ‐ HISTORIE SAVED PAGES – ULOŽENÉ STRÁNKY Local ‐ Místní 2. Pro zobrazení požadované stránky poklepejte na záložku. E‐MAIL Pro přístup k vašemu e‐mailovému účtu otevřete aplikaci E‐mail poklepáním na ikonu . Dříve než budete moct přistoupit ke svému e‐mailovému účtu, musíte zadat náležité informace o účtu, ke kterému se chcete připojit. ... -
Page 109: Hudba
Account setup – Nastavení účtu Email account – E‐mailový účet You can set up email for most accounts in just a few steps – Nastavení e‐mailu pro většinu účtů v několika krocích Email address – E‐mailová adresa Password ‐ Heslo Manual setup – Ruční nastavení Next ‐ Další Pokud se proces nastavení nedokončí automaticky, musíte zadat informace o účtu ručně poklepáním na Manual setup (ruční nastavení). Poklepejte na tlačítko „Manual setup (ruční nastavení)”, zvolte typ použité schránky (POP3 nebo IMAP) a zadejte všechny detaily účtu. Posílání e‐mailu 1. Poklepejte na ikonu . 2. Pro vytvoření nové e‐mailové zprávy zadejte do pole informace Pro, Předmět a Napsat e‐mail. Pro přiložení přílohy poklepejte na ikonu a zvolte požadovanou složku. Poté můžete ve složce vyhledat soubor pro přiložení. 3. Po skončení poklepejte na tlačítko . HUDBA Pro spuštění hudebního přehrávače poklepejte na ikonu ... -
Page 110: Video (4K Přehrávač)
Album cover – Obal alba Repeat mode – Režim opakování Artist ‐ Interpret Time played – Čas přehrávání Album ‐ Album Previous song – Předcházející skladba Music ‐ Hudba Pause ‐ Pozastavit View current playlist – Zobrazit aktuální seznam Next song – Další skladba stop Play progress bar – Indikátor průběhu přehrávání Random play – Náhodné přehrávání Total play time – Celkový čas přehrávání Přidání skladby do seznamu stop 1. Poklepejte a podržte prst na skladbě, zobrazí se seznam. 2. Vyberte Add to playlist (přidat do seznamu stop) a zobrazí se možnost Add to playlist (přidat do seznamu stop). 3. Vyberte Current playlist (aktuální seznam stop) nebo New (nový). Vybraná skladba bude přidána do seznamu stop. Pokud jste vybrali možnost New (nový), zadejte název pro nový seznam stop a poklepejte na Save (uložit). Smazání skladby ze seznamu stop 1. Poklepejte a podržte prst na skladbě, zobrazí se seznam. 2. Vyberte možnost Delete (smazat) a poté poklepejte na OK (ok). VIDEO (4K přehrávač) ... -
Page 111: Systémová Nastavení
Přehrát / Pozastavit Poklepejte na ikonu přehrávání a video se začne přehrávat. Pro pozastavení videa poklepejte kamkoliv na obrazovce a zobrazí se ovládací panel. Poklepejte na ikonu pozastavení. Pro obnovení přehrávání poklepejte na ikonu přehrávání. Vyhledat Poklepáním na obrazovku zobrazíte ovládací panel. Ovládací panel zobrazí čas na konkrétním místě videa. Poklepejte a podržte prstem tečku a přesuňte ji na požadované místo ve videu. HDMI port Tablet podporuje HDMI výstup přes HDMI kabel. Připojte tablet k HDMI vstupu televizoru pomocí HDMI kabelu (není součástí balení). Obraz a zvuk bude přenášen přes HDMI výstup na obrazovku televizoru. SYSTÉMOVÁ NASTAVENÍ Pro zobrazení všech dostupných systémových nastavení tabletu poklepejte na ikonu . Bezdrátová připojení a sítě 1. Pro zapnutí bezdrátového připojení přepněte přepínač bezdrátového připojení do polohy ON (zapnuto). 2. Po zapnutí bezdrátového připojení tablet automaticky vyhledá dostupné bezdrátové sítě a zobrazí jejich názvy. Zabezpečené sítě jsou označeny ikonou zámku. Pokud tablet nalezne síť, ke které již byl připojen, automaticky se k ní připojí. ... -
Page 112: Zvuk
Settings ‐ Nastavení Battery ‐ Baterie WIRELESS&NETWORKS ‐ BEZDRÁTOVÁ PŘIPOJENÍ A Apps ‐ Aplikace SÍTĚ PERSONAL ‐ OSOBNÍ Data usage ‐ Použití dat Location access ‐ Služby pro zjišťování polohy More... ‐ Více... Security ‐ Zabezpečení Sound ‐ Zvuk Secured with WPA/WPA2 (WPS available) ‐ Display ‐ Obrazovka Zabezpečeno WPA/WPA2 (WPS je k Storage ‐ Úložiště dispozici) 3. Vyberte správnou síť a poklepejte na ni. Pokud je síť zabezpečena, budete požádáni o vložení hesla a poté poklepejte na Connect (připojit). 4. Tablet se připojí k síti. Zvuk V této nabídce můžete nastavit následující položky: Hlasitost Umožní nastavení výchozí hlasitosti pro hudbu, video, hry a jiná média, oznamování a budík. Výchozí oznamování ... -
Page 113: Obrazovka
Settings ‐ Nastavení Apps ‐ Aplikace WIRELESS&NETWORKS ‐ BEZDRÁTOVÁ PŘIPOJENÍ A PERSONAL ‐ OSOBNÍ SÍTĚ Location access ‐ Služby pro zjišťování polohy Wi ‐ Fi ‐ Bezdrátová síť Security ‐ Zabezpečení ON ‐ ZAPNUTA Sound ‐ Zvuk Data usage ‐ Použití dat Volumes ‐ Hlasitost More... ‐ Více... SYSTEN ‐ SYSTÉM Sound ‐ Zvuk Default notification sound ‐ Výchozí zvuk Display ‐ Obrazovka oznamování Storage ‐ Úložiště Touch sounds ‐ Zvuky tlačítek Battery ‐ Baterie Screen lock sound ‐ Zvuk uzamknutí obrazovky Obrazovka V této nabídce můžete nastavit následující položky: Jas Umožní nastavit výchozí jas obrazovky. Pozadí Nastavte různé motivy pozadí z Gallery (galerie), Live Wallpaper (živá pozadí) nebo Wallpaper (pozadí). Automaticky otočit Povolí nebo zakáže automatické otočení obrazovky, pokud se ... - Page 114 Snění (spořič Umožní nastavení spořiče obrazovky mezi Clock (hodiny), obrazovky) Colors (barvy), Photo Frame (fotografie) nebo Photo Table (přehled fotografií). Velikost písma Umožní změnit výchozí velikost písma pro snadné čtení textu. Koordinovat systém Umožní kalibrovat akcelerometr. akcelerometru Přizpůsobení Umožní upravení velikosti obrazovky v některých hrách. obrazovky Inteligentní barvy Povolí nebo zakáže inteligentní barvy pro hraní her, přehrávání videí a fotografií. Předváděcí režim Povolí nebo zakáže předváděcí režim inteligentní barvy. Inteligentní Povolí nebo zakáže inteligentní podsvícení. podsvícení Předváděcí režim Povolí nebo zakáže předváděcí režim inteligentního podsvícení. Settings ‐ Nastavení Storage ‐ Úložiště WIRELESS&NETWORKS ‐ BEZDRÁTOVÁ PŘIPOJENÍ A Battery ‐ Baterie SÍTĚ Apps ‐ Aplikace Wi ‐ Fi ‐ Bezdrátová síť ...
-
Page 115: Úložiště
obrazovky koordinace akcelerometru Sleep ‐ Časový limit Accelerometer uses the default coordinate system ‐ After 2 minutes of inactivity ‐ Po 2 minutách Akcelerometr používá výchozí systém nečinnosti koordinace Daydream ‐ Snění Screen adaption ‐ Přizpůsobení obrazovky Off ‐ Vypnuto Used to adjust size of some games display screen ‐ Font size ‐ Velikost písma Pro úpravu velikosti obrazovky v některých Normal ‐ Normální hrách Accelerometer coordinate system ‐ Systém SMART COLOR ‐ INTELIGENTNÍ BARVY Úložiště Tato nabídka nabízí úplný přehled o využití vnitřní paměti a externích paměťových karet a o tom, kolik místa na nich ještě zbývá. Settings ‐ Nastavení Location access ‐ Služby pro zjišťování polohy WIRELESS&NETWORKS ‐ BEZDRÁTOVÁ PŘIPOJENÍ A Security ‐ Zabezpečení SÍTĚ INTERNAL STORAGE ‐ VNITŘNÍ PAMĚŤ Data usage ‐ Použití dat Total space ‐ Úplná kapacita More... ‐ Více... GB ‐ GB Sound ‐ Zvuk Available ‐ Dostupná Display ‐ Obrazovka Apps (app data&media content) ‐ Aplikace (data ... -
Page 116: Zabezpečení
Zabezpečení Tato nabídka umožní nastavení úrovně zabezpečení vašeho tabletu. Doporučujeme nastavit určitou formu automatického zamknutí obrazovky, aby se zabránilo neoprávněnému použití. Settings ‐ Nastavení Owner info ‐ Informace o majiteli DEVICE ‐ ZAŘÍZENÍ PASSWORDS ‐ HESLA Sound ‐ Zvuk Make passwords visible ‐ Viditelná hesla Display ‐ Obrazovka DEVICE ADMINISTRATION ‐ SPRÁVA ZAŘÍZENÍ Storage ‐ Úložiště Device administrators ‐ Správci zařízení Battery ‐ Baterie View or deactivate device administrators ‐ Zobrazit Apps ‐ Aplikace nebo zakázat správce zařízení PERSONAL ‐ OSOBNÍ Unknown sources ‐ Neznámé zdroje Location access ‐ Služby pro zjišťování polohy Allow installation of apps from unknown sources ‐ Security ‐ Zabezpečení Povolit instalaci aplikací z neznámých zdrojů Language&input ‐ Jazyk a zadávání Verify apps ‐ Ověření aplikací Backup&reset ‐ Záloha a obnovení Disallow or warn before installation of apps that ACCOUNTS ‐ ÚČTY may cause harm ‐ Zakázat nebo upozornit na Add account ‐ Přidat účet aplikace, které mohou škodit SYSTEM ‐ SYSTÉM CREDENTIAL STORAGE ‐ ÚLOŽIŠTĚ PŘIHLAŠOVACÍCH SCREEN SECURITY ‐ ZABEZPEČENÍ OBRAZOVKY ÚDAJŮ Screen lock ‐ Uzamknutí obrazovky Trusted credentials ‐ Důvěryhodné přihlašovací ... -
Page 117: Jazyk A Zadávání
Uzamknutí obrazovky Nastavení zámku: 1. Poklepejte na Screen lock (uzamknutí obrazovky). 2. Poklepejte na požadovaný typ zamčení a následujte pokyny na obrazovce. Můžete si vybrat z následujících možností zamčení: Přejetí Nenabízí žádné zabezpečení, umožní přístup na domovskou obrazovku. Odemčení tváří Umožní odemčení tabletu tváří. Vzor Umožní vám prstem nakreslit jednoduchý vzor pro odemčení tabletu. PIN Vyžaduje čtyři nebo více číslic. Delší PIN kódy bývají bezpečnější. Heslo Vyžaduje čtyři nebo více písmen nebo číslic. Poznámka: Pokud je nastaveno uzamčení obrazovky, obrazovka se uzamkne, když se tablet přepne do pohotovostního režimu. ... -
Page 118: Datum A Čas
Settings ‐ Nastavení About tablet ‐ O tabletu Battery ‐ Baterie Language ‐ Jazyk Apps ‐ Aplikace English (United States) ‐ Angličtina (Spojené státy) PERSONAL ‐ OSOBNÍ Spell checker ‐ Kontrola pravopisu Location access ‐ Služby pro zjišťování polohy Personal dictionary ‐ Osobní slovník Security ‐ Zabezpečení KEYBOARD&INPUT METHODS ‐ KLÁVESNICE A Language&input ‐ Jazyk a zadávání MOŽNOSTI ZADÁVÁNÍ Backup&reset ‐ Záloha a obnovení Default ‐ Výchozí ACCOUNTS ‐ ÚČTY Android keyboard ‐ Klávesnice androidu Add account ‐ Přidat účet Google voice typing ‐ Hlasové zadávání Google SYSTEM ‐ SYSTÉM Automatic ‐ Automatické Date&time ‐ Datum a čas SPEECH ‐ ŘEČ Accessibility ‐ Usnadnění Voice search ‐ Hlasové vyhledávání Developer options ‐ Možnosti pro vývojáře Datum a čas Tato nabídka umožňuje nastavit datum a čas. K dispozici jsou následující možnosti: Automatické datum Pokud je tato možnost aktivní, tablet po připojení k internetu a čas automaticky aktualizuje datum a čas. Automatické časové Pokud je tato možnost aktivní, tablet nastaví časové pásmo ... -
Page 119: Řešení Problémů
Nastavit časové Umožňuje nastavení aktuálního časového pásma z dostupných pásmo možností. Použít 24hodinový Umožňuje přepnutí mezi 12 a 24hodinovým formátem času. formát Vyberte formát data Umožňuje změnu formátu data. Settings ‐ Nastavení About tablet ‐ O tabletu Battery ‐ Baterie Automatic date&time ‐ Automatický datum a čas Apps ‐ Aplikace Use network‐provided time ‐ Použít čas ze sítě PERSONAL ‐ OSOBNÍ Automatic time zone ‐ Automatické časové pásmo Location access ‐ Služby pro zjišťování polohy Use network‐provided zone ‐ Použít časové pásmo Security ‐ Zabezpečení ze sítě Language&input ‐ Jazyk a zadávání Set date ‐ Nastavit datum Backup&reset ‐ Záloha a obnovení Set time ‐ Nastavit čas ACCOUNTS ‐ ÚČTY Select time zone ‐ Nastavit časové pásmo Add account ‐ Přidat účet Central European Summer Time ‐ Středoevropský SYSTEM ‐ SYSTÉM letní čas Date&time ‐ Datum a čas Use 24‐hour format ‐ Použít 24 hodinový formát ... -
Page 120: Technické Údaje
Toto je normální a nemělo by způsobit žádné problémy během použití. Zařízení se nemůže připojit k bezdrátové síti Zkontrolujte, zda bezdrátová síť funguje připojením jiného bezdrátového zařízení. Zkontrolujte, zda je zařízení v dosahu bezdrátové sítě, ke které se má připojit. Zdi a jiné překážky snižují příjem bezdrátových zařízení. Zkontrolujte, zda je použité heslo správné. Systém se chová neobvykle a nefunguje správně Instalace aplikací třetích stran může způsobit nesprávné fungování systému. Zkuste odinstalovat nedávno nainstalované aplikace, které by mohly tyto problémy způsobovat. Stiskněte tlačítko RESET (resetování) na boční straně zařízení a zkontrolujte, zda zařízení nastartovalo správně. TECHNICKÉ ÚDAJE Procesor Boxchip A31s.ARM cortex‐A7, 1,0GHZ, čtyřjádrový RAM 1 GB NAND FLASH paměť 8 GB Bezdrátové sítě Wi‐Fi 802.11 b/g/n Velikost 7,85” ... - Page 121 SLOVAK...
- Page 122 TABLET MODEL TM785 NÁVOD NA POUŽÍVANIE ...
- Page 123 Obsah VAROVANIA ..................................4 DÔLEŽITÉ BEZPEČNOSTNÉ POKYNY ........................4 OBSAH BALENIA ................................4 PREHĽAD PRODUKTU ..............................5 ZAČÍNAME ..................................6 Nabíjanie akumulátora ..............................6 VYPNUTIE a ZAPNUTIE ............................. 6 Pripojenie k PC ................................6 ...
-
Page 124: Varovania
VAROVANIA Toto zariadenie bolo navrhnuté iba na používanie v domácnosti a nesmie byť používané na žiadny iný účel ani aplikáciu, ako napríklad na iné než domáce používanie alebo používanie v obchodnom prostredí UPOZORNENIE AK NAHRADÍTE BATÉRIU NESPRÁVNYM TYPOM, HROZÍ NEBEZPEČENSTVO VÝBUCHU. POUŽITÉ... -
Page 125: Prehľad Produktu
PREHĽAD PRODUKTU Predná kamera Tlačidlo Home (Domov) Tlačidlo napájania Zadná kamera USB port Reproduktor HDMI port Zdierka napájania DC-5V mikrofón (zabudovaný mikrofón) Slot na karty Micro SD/SDHC Výstup na slúchadlá... -
Page 126: Začíname
Pri vysokej hlasitosti môže dlhé počúvanie poškodiť sluch používateľa. UPOZORNENIE: pre ochranu sluchu Je dôležité, aby akékoľvek slúchadlá používané s týmto produktom boli v súlade s francúzskou vyhláškou z 8. novembra 2005, ktorá obsahuje článok L. 5232-1. Tým je zaistené, že hladina zvuku nebude vyššia ako 100 dB SPL. -
Page 127: Vkladanie Micro Sd/Sdhc Karty
2. Dotykom aktivujte možnosť Turn on USB storage (Zapnúť úložný priestor USB). 3. Prejdite ku kopírovaniu súborov z PC alebo laptopu na tablet. Vkladanie Micro SD/SDHC karty 1. Do slotu na pamäťové karty vložte kartu Micro SD/SDHC. 2. V skupine aplikácií spustite program ES File Explorer . 3. -
Page 128: Aplikácie
APLIKÁCIE Prístup ku všetkým aplikáciám dostupným v tablete získate po kliknutí na ikonu (ikona v spodnej časti obrazovky). Apps = Aplikácie Widgets= Doplnky 4KPlayer = 4KPrehrávač Aldiko = Aldiko Browser = Prehliadač Calculator = Kalkulačka Calendar = Kalendár Camera = Fotoaparát Chrome = Chrome Clock = Hodiny Documents to Go = Dokumenty na cestu... -
Page 129: Prehliadač
Hi Q MP3 Rec= HQ MP3 Zázn. Local= Miestne Maps = Mapy Music = Hudba Navigation = Navigation Play Movies & TV = Prehrať filmy a TV Play Music = Prehrať hudbu Play Store = Play Store Settings = Nastavenia SlideME Market = SlideME Market Sound Recorder = Záznamník hlasu Talk = Talk... - Page 130 3. Kliknite na kartu General (Všeobecné). 4. Poklepte na položku Set homepage (Nastaviť domovskú stránku), aby ste vybrali požadovanú možnosť. General = Všeobecné Privacy & security = Súkromie a zabezpečenie Accessibility = Dostupnosť Advanced = Rozšírené Bandwidth Management = Správa šírky pásma Labs = Laboratóriá...
-
Page 131: Email
Bookmarks = Záložky History = História Saved pages = Uložené stránky Local = Miestne 2. Webovú stránku otvoríte poklepaním na požadovanú záložku. EMAIL Ak chcete aktivovať prístup do svojho e-mailového účtu, spustite E-mailovú službu kliknutím na ikonu Pred prvým použitím e-mailovej služby bude potrebné, aby ste zadali príslušné... - Page 132 Account Setup = Nastavenie účtu Email account = Emailový účet You can set up email for most accounts in just a few steps. = Emailový účet môžete pri väčšine účtov nastaviť vykonaním pár krokov. Email address - Emailová adresa Password = Heslo Manual setup = Manuálne nastavenie Next = Ďalej...
-
Page 133: Hudba
HUDBA Ak chcete spustiť Prehrávač hudby, dotknite sa ikony . Môžete si vybrať hudobnú stopu a otvorte ju v prehrávači. Annotations to picture: Album cover – obal albumu View current playlist – zobraziť aktuálny zoznam stop Random play – náhodné prehrávanie Repeat mode – režim opakovania Total play time – celkový čas prehrávania Play progress bar – Indikátor priebehu prehrávania Next song – ďalšia stopa Pause – prerušenie Previous song – predchádzajúca stopa Time played – čas prehrávania Music – stopa Album – album Artist ‐ autor Pridanie hudby do zoznamu stôp 1. -
Page 134: Video (4K Prehrávač)
Odstránenie zo zoznamu stôp 1. Dotknite sa príslušnej skladby na displeji, podržte ju. Zobrazí sa zoznam. 2. Vyberte možnosť Delete (Odstrániť) a potom poklepte na možnosť OK. VIDEO (4K prehrávač) Ak chcete spustiť prehrávač videa, dotknite sa ikony a premiestnite sa do priečinka s video súborom. - Page 135 Settings = Nastavenia WIRELESS & NETWORKS = BEZDR TOVÉ PRIPOJENIE A SIETE Wi‐Fi = Wi‐Fi Data usage = Využitie dát More… = Viac… DEVICE = ZARIADENIE Sound = Zvuk Display = Displej Storage = Úložný priestor Battery = Batéria Apps = Aplikácie PERSONAL = OSOBNÉ Location access = Prístup v mieste Security = Zabezpečenie Secured with WPA/WPA2 (WPS available) = Zabezpečená protokolom WPA/WPA2 (dostupné aj WPS) Secured with WEP = Zabezpečená protokolom WEP 3. Nájdite správnu sieť a poklepte na jej názov. Ak je sieť zabezpečená, tablet vás vyzve na zadanie hesla, ktoré potvrdíte poklepaním na možnosť...
-
Page 136: Sound (Zvuk)
Sound (Zvuk) V tejto sekcii môžete vykonať tieto nastavenia: Volumes Umožňuje nakonfigurovať predvolené úrovne hlasitosti pre hudbu, video, hry a iné médiá, upozornenia a alarmy. (Hlasitosť) Default notification Umožní nastaviť odlišný zvuk pre upozornenia. (Predvolené upozornenie) Umožní vám zapnúť alebo vypnúť zvuk, ktorý tablet vydá pri dotknutí Touch sounds (Zvuky dotyku) sa displeja. -
Page 137: Display (Zobrazenie)
Location access = Prístup v mieste Security = Zabezpečenie Volume = Hlasitosť SYSTEM = SYSTÉM Default notification sound = Predvolený zvuk notifikácie Touch sounds = Zvuky dotyku Screen lock sound = Zvuky zablokovania displeja Display (Zobrazenie) V tejto sekcii môžete vykonať tieto nastavenia: Umožňuje nakonfigurovať predvolený jas displeja. Brightness (Jas) Wallpaper (Tapeta) Vyberte si inú tapetu plochy z galérie, pohyblivých tapiet alebo tapiet. Auto-rotate screen Zapne alebo vypne automatické otáčanie displeja pri otočení tabletu. ... - Page 138 Settings = Nastavenia WIRELESS & NETWORKS = BEZDR TOVÉ PRIPOJENIE A SIETE Wi‐Fi = Wi‐Fi Data usage = Využitie dát More… = Viac… DEVICE = ZARIADENIE Sound = Zvuk Display = Displej Storage = Úložný priestor Battery = Batéria Apps = Aplikácie PERSONAL = OSOBNÉ Location access = Prístup v mieste Security = Zabezpečenie Brightness = Jas Wallpaper = Tapeta Auto‐rotate screen = Automatické otáčanie displeja Sleep (after two minutes of inactivity) = Úsporný režim (po 2 min. nečinnosti) Daydream (Off) = Denný sen (vypnutý) Font size (normal) = Veľkosť písma (normálna) Accelerometer coordinate system = Systém koordinácie akcelerometra Accelerometer uses the default coordinate system = Akcelerometer využíva predvolený system koordinácie Screen adaption = Prispôsobenie displeja ...
-
Page 139: Storage (Ukladanie)
Used to adjust size of some games display screen = Využíva sa na úpravu zobrazenia pri niektorých hrách SMART COLOR = INTELIGENTNÉ FARBY Storage (Ukladanie) Pomocou tejto sekcie si zobrazíte úplný rozpis využitia interného a akéhokoľvek externého úložného priestoru a podielu voľnej kapacity v takýchto úložných priestoroch. Settings = Nastavenia WIRELESS & NETWORKS = BEZDR TOVÉ PRIPOJENIE A SIETE Wi‐Fi = Wi‐Fi Data usage = Využitie dát More… = Viac… DEVICE = ZARIADENIE Sound = Zvuk Display = Displej Storage = Úložný priestor Battery = Batéria ... -
Page 140: Security (Zabezpečenie)
Apps (app data & media content) = Aplikácie (dáta aplikácií a mediálny obsah) Cached data = Údaje vo vyrovnávacej pamäti Security (Zabezpečenie) Pomocou tejto možnosti nastavíte stupeň zabezpečenia svojho tabletu. Je možné, že sa rozhodnete pre niektorú formu automatického blokovania displeja, aby ste predišli neoprávnenému prístupu. Settings = Nastavenia Sound = Zvuk Display = Displej Storage = Úložný priestor Battery = Batéria Apps = Aplikácie PERSONAL = OSOBNÉ Location access = Prístup v mieste Security = Zabezpečenie Language & Inputy =Jazyk a zadávanie ... -
Page 141: Language & Input (Jazyk A Zadávanie Vstupu)
Owner info = Informácie o vlastníkovi PASSWORDS = HESLÁ Make passwords visible = Ukázať heslá DEVICE ADMINISTRATION = SPRÁVA ZARIADENIA Device administrators = Správcovia zariadenia View or deactivate device administrators = Zobraziť alebo deaktivovať správcov zariadenia Unknown sources = Neznáme zdroje Allow installation of apps from unknown sources = Povoliť inštaláciu aplikácií z neznámych zdrojov Verify apps = Overiť aplikácie Disallow or warn before installation of apps that may cause harm = Zakázať inštaláciu aplikácií, ktoré môžu spôsobiť poškodenie alebo varovať pred nimi CREDENTIAL STORAGE = UKLADANIE PRÍSTUP.DÁT Trusted credentials = Dôveryhodné prístup. data Screen lock (Blokovanie displeja) Úprava nastavení blokovania: 1. Dotknite sa možnosti Screen lock (Blokovanie displeja). 2. Poklepte na typ blokovania, ktoré chcete aktivovať a riaďte sa pokynmi na displeji. ... - Page 142 Settings = Nastavenia Battery = Batéria Apps = Aplikácie PERSONAL = OSOBNÉ Location access = Prístup v mieste Security = Zabezpečenie Language & Inputy =Jazyk a zadávanie Backup & Reset = Zálohovanie a Návrat k predvoleným nastaveniam ACCOUNTS = ÚČTY Add account = Pridať účet SYSTEM = SYSTÉM Date & Time = Dátum a čas Accessibility = Dostupnosť Developer options = Možnosti developera About tablet = O tablete Language (English – United States) = Jazyk (Angličtina – Spojené štáty) Spell checker = Kontrola pravopisu Personal Dictionary = Vlastný slovník KEYBOARD AND INPUT METHODS = KLÁVESNICA A METÓDY VSTUPU DÁT Default = Predvolené English (US) – Android keyboard = Angličtina (US) – klávesnica Android Android keyboard = klávesnica Android English (US) = Angličtina (US) Google Voice Typing (automatic) = Hlasové zadávanie Google (automatické) SPEECH = REČ ...
-
Page 143: Date & Time (Dátum/Čas )
Voice Search = Hlasové vyhľadávanie Date & time (Dátum/čas ) Táto sekcia umožňuje nakonfigurovanie nastavení dátumu a času. Možné sú nasledujúce možnosti: Automatic date & time Ak je táto možnosť povolená, tablet automaticky aktualizuje datum a čas po (Automatický datum a pripojení k internetu. čas) ... -
Page 144: Riešenie Problémov
Apps = Aplikácie PERSONAL = OSOBNÉ Location access = Prístup v mieste Security = Zabezpečenie Language & Inputy =Jazyk a zadávanie Backup & Reset = Zálohovanie a Návrat k predvoleným nastaveniam ACCOUNTS = ÚČTY Add account = Pridať účet SYSTEM = SYSTÉM Date & Time = Dátum a čas Accessibility = Dostupnosť Developer options = Možnosti developera About tablet = O tablete Automatic date & time = Automatický datum a čas Use network‐provided time = Použiť čas poskytnutý sieťou Automatic time zone = Automatické časové pásmo Use network‐provided time zone = Použiť časové pásmo poskytnuté sieťou Set date =Nastaviť dátum Set time = Nastaviť čas Select time zone = Vybrať časové pásmo Use 24‐hour format = Použiť 24 hodinový format Choose date format = Vybrať format dátumu RIEŠENIE PROBLÉMOV Problémy s prehrievaním Toto zariadenie sa zahrieva pri používaní viacerých aplikácií, zobrazení displeja pri najvyššej úrovni jasu alebo pri nabíjaní. -
Page 145: Technické Údaje
TECHNICKÉ ÚDAJE CPU Procesor Boxchip A31s.ARM cortex-A7, 1.0GHZ, Quad core Pamäť RAM Pamäť NAND FLASH Wifi 802.11 b/g/n Bezdrôtové pripojenie Veľkosť 7.85” Typ dotykových kapacitné, P+G, IPS bodov Displej 1024 x 768 pixelov Rozlíšenie Android 4.2 Operačný systém Akumulátor Vstavaný Li‐pol akumulátor ...
Need help?
Do you have a question about the TM785 and is the answer not in the manual?
Questions and answers