Table of Contents
Advertisement
Quick Links
Advertisement
Table of Contents

Related Manuals for i.t.works TM904


Summary of Contents for i.t.works TM904
- Page 1 MARQUE: IT WORKS REFERENCE: TM904 CODIC: 1387758 PROVISOIREMENT EN ANGLAIS...
- Page 2 MODEL TM904 ...
-
Page 3: Table Of Contents
Table of Contents WARNINGS ........................ 2 IMPORTANT SAFETY INSTRUCTIONS ................ 2 PACKAGE CONTENTS ...................... 2 PRODUCT OVERVIEW ..................... 3 GETTING STARTED ...................... 4 Charging the battery .................... 4 Powering ON and OFF .................... 4 Connecting to a PC ..................... 4 Inserting a TF card ...................... 4 USING THE TOUCH SCREEN .................... 5 APPLICATIONS ........................ ... -
Page 4: Warnings
WARNINGS This appliance is intended for domestic household use only and should not be used for any other purpose or in any other application, such as for non domestic use or in a commercial environment. CAUTION RISK OF EXPLOSION IF BATTERY IS REPLACED BY AN INCORRECT TYPE DISPOSE OF USED BATTERIES ACCORDING TO THE INSTRUCTIONS. IMPORTANT SAFETY INSTRUCTIONS This manual contains important safety instructions and information for proper use of the device. Please follow the instructions in this manual carefully. This is a high‐density electronic product; do not disassemble it by yourself. Avoid shocks and do not let the device fall. Avoid harsh conditions such as wet or damp places, rain, high humidity, strong vibration, extremely high or low temperatures, strong sunlight and places that are very dusty. To clean the product, gently wipe the product using only a slightly damp cloth. Do not use chemical solvents or strong detergents. Never allow water droplets to remain on the screen. Symbol This mark is applied to show the equipment conforms to European safety and electro‐magnetic compatibility standards. Battery handling and usage The product is supplied with one rechargeable Lithium polymer 3.7V battery incorporated in the product which is not accessible and cannot be replaced. Therefore when the product reaches the end of its useful life it must be disposed of at a recycling centre. ... -
Page 5: Product Overview
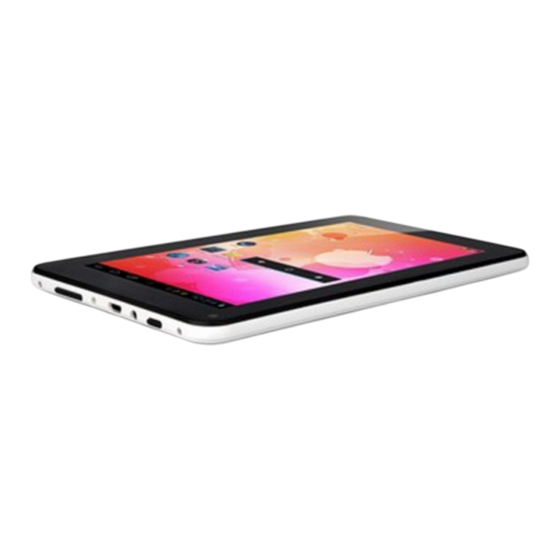
PRODUCT OVERVIEW 5. DC‐5V jack Return button Earphone jack TF card slot Power button 3. HDMI port USB port At full power, prolonged listening to the player can damage the ear of the user. WARNING: To protect your hearing, it is important that any headphones or earphones used in conjunction with this product are compliant with French Decree of 8 November 2005 implementing Article L.5232‐1. This ensures that the sound level does not exceed 100 dB SPL. The prolonged listening at high volume for more than five hours a week can damage your hearing. To prevent possible hearing damage, do not listen at high volume levels for long periods. ... -
Page 6: Getting Started
GETTING STARTED Charging the battery The tablet has a built‐in battery. Before using the tablet for the first time, fully charge the battery. Use only the 5V power adapter provided, or alternatively the tablet can be charged via a USB cable to a PC or other USB charging source. When your battery charge is low, the tablet will emit a warning tone and display a low battery message. The battery icon will also be empty. If the battery charge becomes too low, the tablet will automatically power off. When it is charging, the battery symbol in the bottom right hand corner of the desktop will show a charging (lightning) symbol . When the battery is fully charged (no lightning symbol in the battery icon), unplug the power adapter or USB cable from the tablet and then from the power socket. Powering ON and OFF Press and hold until the tablet starts to boot. Once it has finished, the lock screen will be shown. To unlock, drag the “locked” symbol to the right until it becomes an “unlocked” symbol. Press and hold until the Power off pop‐up appears on the desktop. Select Power off and then select the OK option to power off the tablet. Connecting to a PC You can connect the tablet directly to a PC or Laptop using the supplied USB cable. Once connected to a PC or Laptop, the tablet will appear as a mass storage device. 1. -
Page 7: Using The Touch Screen
USING THE TOUCH SCREEN The main interface controls on the desktop are shown below. Icon Name Return Home Recent applications Volume ‐ / + Take a screenshot Status icons All applications Use your fingers to manipulate icons, buttons, menus, the onscreen keyboard, and other items on the touch screen. To select or activate something, touch it. ... -
Page 8: Applications
APPLICATIONS To access all the applications available on the tablet, touch (icon on the upper right corner). From this page you can run any application by touching the symbol for that application. To access more applications, scroll the window to the left by swiping your finger from right to left. BROWSER To open the web browser, tap the icon. To navigate to a website, touch the address bar and type in the website address for the website you would like to view. Use the popup keyboard to enter the address and then click Go. The Browser will open the last page you visited. ... - Page 9 Setting the homepage 1. Tap the icon on the top right corner. 2. Tap the Settings option. 3. Tap General. 4. Tap Set homepage to select the desired option. Setting a bookmark 1. Go to a website. 2. Tap the icon. 3. Tap OK to add this website to bookmarks. Opening a bookmark 1. Tap the icon. A list of bookmarks will be shown. ...
-
Page 10: Email
2. Tap the desired boomark to open the webpage. EMAIL To enable access to your email account, open Email by touching the icon. Before you can acess your email for the first time, you will need to enter the relevant account information for the email account you want to connect to. 1. Enter the Email address into the box using the popup keyboard. 2. Enter the Password into the box using the popup keyboard. 3. Touch Next and the application will try to finish the setup. If the setup does not automatically finish, you will have to manually enter the account information by selecting Manual setup. Tap the “Manual setup” button, select the mailbox type to be used (POP3 or IMAP) and enter all the account details. Sending an E‐mail 1. Tap the icon. 2. Enter the To, Subject and Compose email information to create the email. ... -
Page 11: Music
MUSIC To access the Music player, touch the icon. You can select a music track and open it in the player. To add music to playlist 1. Touch and hold a music track and a list will pop up. 2. Select Add to playlist and the Add to playlist list will pop up. 3. Select Current playlist or New. The selected music track will be added to playlist. If the New option is selected, input a name for your new play list and then touch Save. To delete music from playlist 1. Touch and hold a music track and a list will pop up. 2. Select the Delete option and then touch OK. VIDEO (GALLERY) To access the video player, touch the ... -
Page 12: System Settings
Seek Touching video player will display the control bar. The control bar will show the timestamp of that particular point in the vide. Press and hold the dot, then slide your finger, to move to the desired point in your video. HDMI port The tablet supports HDMI output by HDMI cable. Connect the tablet to a TV with an HDMI input using a HDMI cable (not supplied). The screen will transfer to HDMI output, and will output sound and image to the TV. SYSTEM SETTINGS To access all the available system settings for the tablet, tap the icon. Wireless & Networks 1. To enable Wi‐Fi, slide the Wi‐Fi switch to the ON position. 2. Once Wi‐Fi has been turned on, the tablet will automatically scan for avialable Wi‐Fi networks and display the names of those it finds. Secured networks are indicated with a Lock icon. If the tablet finds a network that you connected to previously, it will automatically connect to it. ... -
Page 13: Sound
Sound In this option, you can make the following settings: Volumes Allow you to configure the default volume settings for Music, video, games & other media, Notifications and Alarms. Default notification Allow a different sound for notifications to be selected. Touch sounds Allow you to turn the sound caused by touching the screen on or off. Screen lock sounds Allow you to turn the sound caused by unlocking the screen on or off. Display In this option, you can make the following settings: Brightness Allow you to configure the default brightenss of the screen. Wallpaper Select different desktop wallpaper from Gallery, Live Wallpaper or Wallpaper. Sleep Set the time period before the tablet enters sleep mode from never to 30 minutes. ... -
Page 14: Storage
Storage This option give a complete breakdown of how internal storage and any external cards are being used and how much space is available on them. Security This option allows you to setup how secure you want your tablet to be. You may want to set some form of automatic screen lock to prevent unauthorised access. ... - Page 15 Screen lock To adjust lock settings: 1. Touch Screen lock. 2. Touch the type of lock you want and follow the onscreen instructions. You can select among the following lock options: Slide Provide no protection, but let you get to the Home screen. Face Unlock Allow you to unlock the tablet with your face. Pattern Let you draw a simple pattern with your finger to unlock the tablet. PIN Require four or more numbers. Longer PINS tend to be more secure. Password Required four or more letters or numbers. Note: If a screen lock has been set, the screen will lock when the tablet display goes to sleep. ...
- Page 16 1) Restart the device and while restarting system, press and hold for 4 seconds, and then press once. The screen below will appear. 2) Repeatedly press to select the Wipe data / factory reset option. 3) Press and hold for 4 seconds to enter the option. 4) Repeatedly press to select [Yes]. 5) Press and hold for 4 seconds to confirm. The system starts to wipe data. 6) Once data has been wiped, the menu on the screen will show and the Reboot system now option is higlighted. 7) Press and hold for 4 seconds to confirm. The device will restart. ...
-
Page 17: Language & Input
Language & input This option allows you to select among different languages, also you can change the keyboard to different language and configure Voice Search and Text‐to speech output. Date & time This option allows you to configure the date and time settings. The following options are available: Automatic date & If enabled, the tablet will automatically update the date and time time if connected to the internet. Set date Allow the date to be set manually. This option is only available if Automatic date & time is disabled. Set time Allow the time to be set manually. This option is only available if Automatic date & time is disabled. Select time zone Allow your current time zone to be selected from the available options. Use 24‐hour format Allow time format to be switched between 12 and 24 hour formats. Choose date format Allow the format of the date to be changed. ... -
Page 18: Troubleshooting
TROUBLESHOOTING Heat issues When running multiple applications, using the screen on its brightest setting, or when being charged, this device gets warm. This is normal and should not cause any inconvenience when in use. Device cannot connect to Wi‐Fi Ensure the wireless network is working by testing it using another wireless device. Ensure the device is within range of the wireless network to be connected. Walls or other obstructions will reduce the possible distances between wireless devices. Ensure the security password being used is correct. System has anomalies and doesn’t work correctly Installing some third‐party applications may cause the system to not operate correctly. Try uninstalling any recently installed applications that could cause this problem. Press the RESET button on the side of the device and check if it restarts normally or not. ... -
Page 19: Specifications
SPECIFICATIONS Processor CPU:Action ATM7029 quad core, 1.2GHz (CPU + GPU) GPU:GC1000 RAM 1GB NAND FLASH memory 8GB Wireless Wifi 802.11 b/g/n Size 9.7” Type and number of Capacitive, G+G, IPS, points touch 5‐point touch Screen Resolution 1024 x 768 pixels System Android 4.1 Battery Built‐in Lithium polymer battery ... - Page 20 ...
Need help?
Do you have a question about the TM904 and is the answer not in the manual?
Questions and answers