Table of Contents
Advertisement
Available languages
Available languages
Quick Links
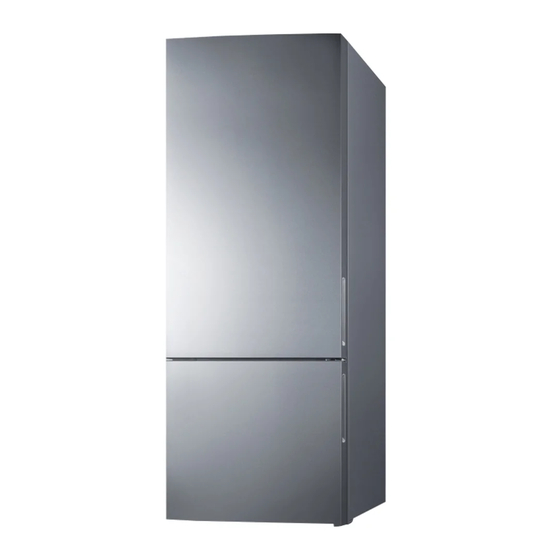
TWO-DOOR REFRIGERATOR WITH
BOTTOM FREEZER
RÉFRIGÉRATEUR À DEUX PORTES AVEC CONGÉLATEUR
INFÉRIEUR
User Manual
Model/Modele: FFBF279SSBI
BEFORE USE, PLEASE READ AND FOLLOW ALL SAFETY RULES AND OPERATING
INSTRUCTIONS
AVANT UTILISATION, VEUILLEZ LIRE ET SUIVRE TOUTES LES RÈGLES DE SÉCURITÉ ET
INSTRUCTIONS D'OPERATIONS
Felix Storch, Inc.
Summit Appliance Division
An ISO 9001:2015 registered company
770 Garrison Avenue
Bronx, NY 10474
www.summitappliance.com
Advertisement
Chapters
Table of Contents

Related Manuals for Summit FFBF279SSBI


Summary of Contents for Summit FFBF279SSBI
- Page 1 TWO-DOOR REFRIGERATOR WITH BOTTOM FREEZER RÉFRIGÉRATEUR À DEUX PORTES AVEC CONGÉLATEUR INFÉRIEUR User Manual Model/Modele: FFBF279SSBI BEFORE USE, PLEASE READ AND FOLLOW ALL SAFETY RULES AND OPERATING INSTRUCTIONS AVANT UTILISATION, VEUILLEZ LIRE ET SUIVRE TOUTES LES RÈGLES DE SÉCURITÉ ET INSTRUCTIONS D’OPERATIONS Felix Storch, Inc.
-
Page 2: Table Of Contents
TABLE OF CONTENTS Important Safeguards Location of Parts Installing your Appliance Locating your Appliance Leveling your Appliance Reversing the Door Swing 8-11 Operating your Appliance 11-12 Cleaning and Care 12-13 Exterior Cleaning Interior Cleaning Door Seals Cleaning Defrosting Replacing the LED Light Troubleshooting Disposal Limited Warranty... -
Page 3: Important Safeguards
IMPORTANT SAFEGUARDS Before the appliance is used, it must be properly positioned and installed as described in this manual, so read the manual carefully. To reduce the risk of fire, electrical shock or injury when using the appliance, follow basic precautions, including the following: •... - Page 4 • WARNING: Do not use mechanical devices or other means to accelerate the defrosting process, other than those recommended by the manufacturer. • WARNING: Do not damage the refrigerant circuit. • WARNING: Do not use electrical appliances inside the food storage compartments of the appliance, unless they are of the type recommended by the manufacturer.
-
Page 5: Location Of Parts
LOCATION OF PARTS NOTES: • Due to unceasing modifications of our products, your refrigerator may be slightly different from this user manual, but its functions and methods of use remain the same. • To get the best energy efficiency of this product, please place all shelves, drawers, and baskets on their original position, as illustrated above. - Page 6 Door Rack This rack is suitable for storage of canned liquid, bottled drinks, and packaged foods. Do not place too many heavy items in these racks. Shelf Refrigerator Chamber The shelves in the refrigerator can be removed for cleaning. The crisper is suitable for storage of vegetables and fruits. Pull the crisper out in a level motion. Tip the drawer up to remove it.
-
Page 7: Installing Your Appliance
INSTALLING YOUR APPLIANCE • For proper installation, this refrigerator must be placed on a level surface of hard material that is the same height as the rest of the flooring. The surface should be strong enough to support a fully loaded refrigerator. •... -
Page 8: Reversing The Door Swing
NOTE: To allow the doors to self-close, tilt the appliance backwards by 10-15mm (1/3” – 2/3”). Reversing the Door Swing CAUTION: When reversing the door, the appliance must not be connected to the power source. Ensure the appliance is not plugged in before reversing the door. - Page 9 4. Remove the upper door from the middle hinge by carefully lifting the door straight up. 5. Place the upper door on a smooth surface with its panel facing upwards. 6. Loosen the self-tapping screw and remove the stop block and the door stopper. Install the replacement door stopper (left) provided (in the plastic bag) and left stop block to the left side, using the self-tapping screws.
- Page 10 9. Install the replacement door stopper (provided in the plastic bag) and left stop block to the left side with the self-tapping screws. Keep the door stopper and right stop block for future use. 10. Chane the screw hole covers and screw on the middle cover plate from the left to the right (as shown below).
-
Page 11: Operating Your Appliance
14. Stand the refrigerator upright and carefully slot the lower door onto the hinge pin, and hold the door in position. Install the middle hinge-left (provided in the plastic bag), ensuring the lower door is secured in place. 15. Carefully slot the upper door onto the middle hinge pin and hold the door in position. -
Page 12: Cleaning And Care
We recommend that when you start your refrigerator for the first time, the temperature for the refrigerator is set to 39°F and the freezer to -2°F. If you want to change the temperature, follow the instructions below. NOTE: When you set a temperature, you set an average temperature for the whole refrigerator cabinet. -
Page 13: Exterior Cleaning
CAUTION: The appliance must not be connected to the power source during cleaning as there is a danger of electrical shock. Before cleaning, turn the appliance off and unplug the unit. It is recommended the appliance (interior and exterior) should be cleaned regularly at least every two months. -
Page 14: Replacing The Led Light
Replacing the LED Light The LED light should only be replaced by a competent person. If the LED light is damaged, contact the customer service helpline for assistance. To replace the LED light, follow these steps: 1. Unplug the appliance. 2. -
Page 15: Disposal
• The ambient temperature where the appliance is located is too high. The motor runs • The doors are kept open too long or is opened too often. continuously. • After installing the appliance or if the appliance has been turned off for an extended period. -
Page 16: Limited Warranty
Note: Nickel is a component in all stainless steel and some other metal compositions. Felix Storch, Inc. For parts and accessory ordering, Summit Appliance Division troubleshooting and helpful hints, visit: An ISO 9001:2015 registered company www.summitappliance.com/support 770 Garrison Avenue... - Page 17 TABLE DES MATIÈRES Garanties importantes 18-20 Emplacement des pièces 20-22 Installation de votre appareil 22-26 Localisation de votre appareil Mise à niveau de votre appareil Inverser la porte battante 23-26 Utilisation de votre appareil 27-28 Entretien et Maintenance 28-29 Nettoyage extérieur Nettoyage intérieur Nettoyage des joints de porte Décongélation...
-
Page 18: Garanties Importantes
GARANTIES IMPORTANTES Avant d'utiliser l'appareil, il doit être correctement positionné et installé telle que décrit dans ce manuel, lisez-le attentivement. Pour réduire le risque d'incendie, de choc électrique ou de blessure lors de l'utilisation de l'appareil, suivez les précautions de base, notamment les suivantes: •... - Page 19 • Ne stockez pas de substances explosives telles que des bombes aérosols avec un propulseur inflammable dans cet appareil. • AVERTISSEMENT: connectez à l'alimentation en eau potable uniquement. • AVERTISSEMENT: n'utilisez pas d'appareils mécaniques ou d'autres moyens pour accélérer le processus de dégivrage, autres que ceux recommandés par le fabricant.
-
Page 20: Emplacement Des Pièces
cubes d'espace sont requis. La quantité de liquide de refroidissement dans l'appareil est indiquée sur la plaque signalétique à l'arrière de l'appareil. Il est dangereux pour quiconque autre qu'un technicien agréé d'effectuer des réparations ou des réparations sur cet appareil. •... - Page 21 NOTES: • En raison de modifications incessantes de nos produits, votre réfrigérateur peut être légèrement différent de ce manuel d'utilisation, mais ses fonctions et méthodes d'utilisation restent les mêmes. • Pour obtenir la meilleure efficacité énergétique de ce produit, veuillez placer toutes les étagères, tiroirs et paniers dans leur position d'origine, comme illustré...
-
Page 22: Installation De Votre Appareil
INSTALLATION DE VOTRE APPAREIL • Pour une installation correcte, ce réfrigérateur doit être placé sur une surface plane en matériau dur de la même hauteur que le reste du revêtement de sol. La surface doit être suffisamment solide pour supporter un réfrigérateur entièrement chargé. •... -
Page 23: Mise À Niveau De Votre Appareil
Mise à niveau de votre appareil Pour une mise à niveau et une circulation d'air suffisantes dans la partie arrière inférieure de votre appareil, les pieds inférieurs peuvent être ajustés. Vous pouvez les ajuster manuellement à la main ou en utilisant une clé... - Page 24 19. Retirez le cache-vis du coin avant gauche de l'armoire avec un tournevis à tête plate et installez le cache-vis droit dans le coin avant droit. Placez le couvercle de charnière supérieur (à droite) et la partie de charnière supérieure (à droite) dans le sac en plastique fourni avec votre appareil. 20.
- Page 25 24. Placez la porte inférieure sur une surface lisse, panneau vers le haut. Desserrez la vis auto- taraudeuse et retirez le bloc d'arrêt et la butée de porte. 25. 9. Installez la butée de porte de remplacement (fournie dans le sac en plastique) et le bloc d'arrêt gauche sur le côté...
- Page 26 30. Tenez le réfrigérateur à la verticale et insérez délicatement la porte inférieure sur l'axe de charnière, et maintenez la porte en position. Installez la charnière centrale gauche (fournie dans le sac en plastique), en vous assurant que la porte inférieure est bien fixée 31.
-
Page 27: Utilisation De Votre Appareil
UTILISATION DE VOTRE APPAREIL Panneau de configuration Nous recommandons que lorsque vous démarrez votre réfrigérateur pour la première fois, la température du réfrigérateur soit réglée à 39 °F et celle du congélateur à -2 °F. Si vous souhaitez modifier la température, suivez les instructions ci-dessous. NOTE: Lorsque vous définissez une température, vous définissez une température moyenne pour l'ensemble de l'armoire du réfrigérateur. -
Page 28: Entretien Et Maintenance
• Lorsque la fonction de super congélation est activée, vous pouvez désactiver la fonction de super congélation en appuyant sur la partie centrale du bouton et le réglage de la température du congélateur reviendra au réglage précédent. Vacances Si vous devez vous absenter pendant une longue période, vous pouvez activer cette fonction en appuyant sur la partie centrale du bouton pendant 3 secondes jusqu'à... -
Page 29: Décongélation
Décongélation Bien que cet appareil se dégivre automatiquement, une couche de givre peut s'accumuler sur les parois intérieures du compartiment congélateur si la porte du congélateur est ouverte trop fréquemment ou maintenue ouverte trop longtemps. Si le givre est trop épais, choisissez un moment où... -
Page 30: Dépannage
DÉPANNAGE Si vous rencontrez un problème avec votre appareil ou si vous craignez que l'appareil ne fonctionne pas correctement, vous pouvez effectuer quelques vérifications faciles avant d'appeler le service, veuillez voir ci-dessous. Problemes Causes et Solutions Possibles Vérifiez si le cordon d'alimentation est correctement branché sur la prise de courant. -
Page 31: Disposition
Les portes ne peuvent Vérifiez si le haut du réfrigérateur est incliné vers l'arrière de 10 à 15 mm (1/3-2/3”) pour permettre aux portes de se fermer automatiquement ou si pas être fermées facilement. quelque chose empêche les portes de se fermer. Si vous avez vérifié... -
Page 32: Garantie Limitée
Remarque: Le nickel est un composant de tout l'acier inoxydable et de certaines autres compositions métalliques. Felix Storch, Inc. Summit Appliance Division Pour la commande de pièces et d’accessoires, le An ISO 9001:2015 registered company 770 Garrison Avenue dépannage et des conseils utiles, visitez Bronx, NY 10474 www.summitappliance.com/support...
Need help?
Do you have a question about the FFBF279SSBI and is the answer not in the manual?
Questions and answers