Stalgast KG-4 Series Instruction Manual
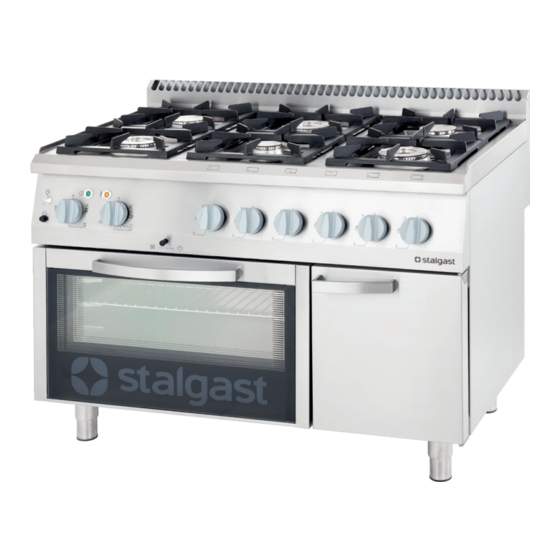
Adjustable gas range + electrical oven
Hide thumbs
Also See for KG-4 Series:
- Instruction manual (132 pages) ,
- Instruction manual / instructions for the installer (96 pages) ,
- Manual (95 pages)
Table of Contents
Advertisement
Quick Links
ADJUSTABLE GAS RANGE + ELECTRICAL OVEN
KG-4(*)(**), KG-6(*)(**) + Electrical Oven:
9715110, 9715130, 9715210, 9715230, 9715310, 9715330,
9716110, 9716130, 9716210, 9716230, 9716310, 9716330,
9717110, 9717130, 9717210, 9717230, 9718110,
Instruction manual - Instructions for the installer
The digit indicates the number of burners
(*) - variant of burners system indicating thermal power
(**) - type of stove as regards its size and equipment
9718130,9718210, 9718230
v.3-6.2018
Advertisement
Table of Contents

Subscribe to Our Youtube Channel
Related Manuals for Stalgast KG-4 Series


Summary of Contents for Stalgast KG-4 Series
- Page 1 ADJUSTABLE GAS RANGE + ELECTRICAL OVEN KG-4(*)(**), KG-6(*)(**) + Electrical Oven: 9715110, 9715130, 9715210, 9715230, 9715310, 9715330, 9716110, 9716130, 9716210, 9716230, 9716310, 9716330, 9717110, 9717130, 9717210, 9717230, 9718110, 9718130,9718210, 9718230 v.3-6.2018 Instruction manual - Instructions for the installer The digit indicates the number of burners (*) - variant of burners system indicating thermal power (**) - type of stove as regards its size and equipment...
- Page 2 Fig. 1 Fig. 2 Fig. 3 - 4 -...
-
Page 3: Safety Instructions
Thank you for purchasing our product. Please carefully read this instruction manual before first use. Reproduction of this manual without the consent of the manufacturer is prohibited. The photos and drawings are for illustrative purposes only and may differ from the purchased device. CAUTION: The manual should be kept in a safe place, available to the staff. -
Page 4: Health And Safety Precautions
from the heat and moisture in the room in which it is installed. Make sure that the kitchen is well venti- lated; keep natural ventilation open or install mechanical vents (the hood with mechanical exhauster). • Long-term intensive use of the gas appliance may require additional ventilation, such as opening a win- dow, or more effective ventilation, i.e. - Page 5 • The weight of the dish, together with its contents, which are placed on a single grate (Fig. 1, item 3) must not exceed 100 kg. • It is forbidden to pour water over gas burners, especially when they are heated. Also avoid spilling the contents of the pots onto the unit (e.g.
- Page 6 9715130 9715230 9715330 9715110, 9715130, 97161110, 9715210, 9715230, 9716210, 9715310, 97915330, 9716310, 9716130 9716230 9716330 9716130 9716230 9716330 9715130 9715230 9715330 Figure 4. Burner location in the four-burner stove (schematic) 9716130 9716230 9716330 9717130 9717230 9718130 9718230 9717130 9717230 9717110, 9717130, 9718110, 9718130 9717210, 9717230, 9718210, 9718230 9718130 9718230...
- Page 7 Specifications of the electrical oven Stove Dimensions of Grate size Oven heater Supply Power cord model the oven [mm] [mm] power [W] voltage 9715110 9715130 9715210 600x400 and 660x450x285 GN 1/1 9715230 9715310 9715330 9716110 9716130 Top heater 3000W 400V 9716210 650x530 and 660x545x285...
- Page 8 The bottom should Concave bottom Bottom too small for this be suitably larger for burner this burner • Do not use any dishes other than those intended for warming up. Use of inappropriate dishes (e.g. plastic ones) may result in fire hazards. •...
- Page 9 Figure 8. Setting of the knob in which the burner operates at its maximum power. Figure 9. Setting of the knob in which the burner operates at its minimum power (about 1/3 of the maximum power). • If you temporarily do not use the burner, turn the pilot knob to the „pilot burner” position (Fig. 7). •...
- Page 10 Markings on oven equipped with 3 heating systems (Fig. 11) in models 9715110, 9715130, 9715210, 9715230, 9715310, 9715330, 9717110, 9717130, 9717210, 9717230: Position 1- The oven is heated by means of the top heater Position 2- The oven is heated by means of the bottom heater Position 3- The oven is heated by means of the top and bottom heater and the fan, which generates air movement (using this heating method allows a uniform heat circulation around the food in the oven) 1.
-
Page 11: Maintenance
contain-ers (e.g. plastic) or to place in the oven items other than food and utensils, in which it is thermally processed. Failure to observe these rules may result in oven damage and fire The device should not be moved when: •... -
Page 12: Warranty
WARRANTY The seller shall be liable under the warranty or guarantee. Damage resulting from the formation of lime scale deposits in the device are not subject to repair under the warranty. Warranty exchange does not cover such elements as: light bulbs, rubber components, heating elements damaged by lime scale, screws and elements undergoing natural wear, e.g. - Page 13 8.2. Characteristics of burners Thermal power of burner: 3,5 kW Thermal efficiency: >50% Nominal pressure Nozzle diameter Approximate gas Type of gas (mbar) (mm) consumption 2Lw (G27) 1,55 0,41m 20-25 1,35 0,41m 2E/2L (G20←→G25) Natural 2E (G20) 1,35 0,36m 2H (G20) 1,35 0,36m 2H (G20)
- Page 14 Thermal power of burner: 7 kW Thermal efficiency: >50% Nominal pressure Nozzle diameter Approximate gas Type of gas (mbar) (mm) consumption 2Lw (G27) 2,20 0,81m 2E/2L (G20←→G25) 20-25 1,90 0,81m Natural 2E (G20) 1,90 0,73m 2H (G20) 1,90 0,73m 2H (G20) 1,80 0,73m 3B/P (G30)
- Page 15 Thermal power of pilot burner: 140W Type of gas Nominal pressure (mbar) Nozzle diameter (mm) 3B/P (G30) 0,20 3(B/P)P (G30/31) 28-30/37 0,20 3B/P (G30) 0,20 Liquid 3P (G31) 0,20 3B/P (G30) 0,20 3P (G31) 0,20 Setting the burner shutter Alignmentof air Type of gas pressure shutter (mm)
-
Page 16: Installation
8.3. Installation The stove may be connected to the gas installation or to the gas cylinder only by a person authorized to perform installation services. Conversion of the stove to another type of gas must be carried out by an authorized installer •... - Page 17 b. In the case of appliances connected to a natural gas installation: • Natural-gas stoves (2E; 2H; 2LW; 2L) should be connected to the gas system inside the building as fixed connection or with flexible metal hoses bearing the valid safety mark. The stove has a gas connection with an R ½”...
- Page 18 Attention! After conversion of the stove to another type of gas, stickers packaged with the nozzles, specifying the type of gas for which the stove is adapted, should be put on the nameplate and the warranty card. Example: Convert the stove adapted to combustion of LPG into combustion of natural gas. After the conversion, the sticker G20 2E (20mbar) packaged with the nozzles should be put on the name plate (Fig.19 item 1, Fig.25).
- Page 19 PE – protective wire (yellow-green) N – neutral wire (blue) L1, L2, L3 – phase wires (other colors) Figure 18. onnecting the unit to the mains • Only an authorized technician with a certificate for electrical works may connect the device to the electrical grid.
- Page 20 Stalgast Sp. z o.o. Plac Konesera 9, Budynek O, 03-736 Warszawa tel.: 22 517 15 75 fax: 22 517 15 77 www.stalgast.com email: stalgast@stalgast.com • DE • • EN • • FR • ES • Stalgast GmbH Tel.: +48 22 509 30 77 Tel.: +48 22 509 30 55...
Need help?
Do you have a question about the KG-4 Series and is the answer not in the manual?
Questions and answers