Table of Contents
Advertisement
Available languages
Available languages
Quick Links
MANUALE DI ISTRUZIONI MASCHERA ELETTRONICA
COMPLETA DI SISTEMA DI PURIFICAZIONE ARIA
ELECTRONIC WELDING MASK WITH PURIFYING
AIR SYSTEM INSTRUCTIONS MANUAL
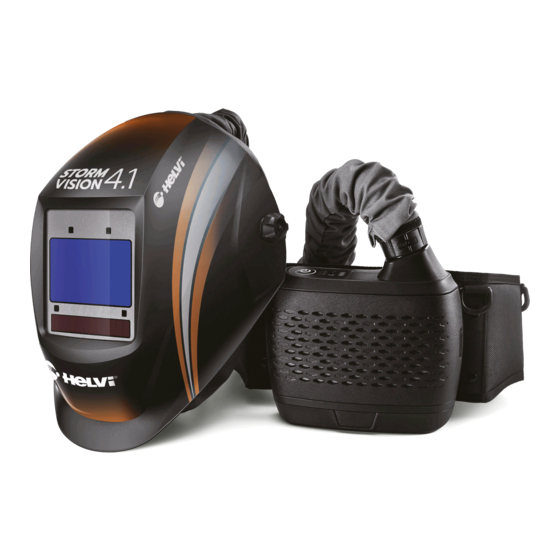
STORM VISION 4.1
Leggete con attenzione questo manuale prima di usare la vostra nuova maschera elettronica.
Read this instructions manual carefully before using your new electronic welding mask.
Advertisement
Table of Contents
Troubleshooting

Related Manuals for Helvi STORM VISION 4.1


Summary of Contents for Helvi STORM VISION 4.1
- Page 1 COMPLETA DI SISTEMA DI PURIFICAZIONE ARIA ELECTRONIC WELDING MASK WITH PURIFYING AIR SYSTEM INSTRUCTIONS MANUAL STORM VISION 4.1 Leggete con attenzione questo manuale prima di usare la vostra nuova maschera elettronica. Read this instructions manual carefully before using your new electronic welding mask.
-
Page 2: Table Of Contents
INDICE / TABLE OF CONTENTS MASCHERA WELDING HELMET INTRODUZIONE INTRODUCTION SAFETY WARNING ASSEMBLAGGIO ALIMENTAZIONE FEATURES ON/OFF (FIG.2) ASSEMBLY AVVERTENZE DI SICUREZZA POWER SUPPLY CARATTERISTICHE ON/OFF (FIG.2) METODO DI IMPIEGO METHOD OF OPERATION IMPOSTAZIONE MODE (FIG.2) OPERATING MODE (FIG.2) REGOLAZIONI (FIG.2-3-4-5) SETTING (FIG.2-3-4-5) INDICATORE BATTERIA (FIG.6) BATTERY INDICATOR (FIG.6) -
Page 3: Introduzione
oscurarsi completamente e causarvi seri danni. INTRODUZIONE • Non cercate di smontare il filtro, in caso di problemi ri- volgetevi al vostro rivenditore o a un centro di assistenza. La vostra nuova maschera elettronica è un prodotto • Non allontanatevi dal posto di lavoro con la ma- di nuova generazione per la protezione nel lavoro. -
Page 4: Impostazione Mode (Fig.2)
• Premere brevemente il tasto A - On /Mode per veri- • All’innescare dell’arco la finestra di osservazione si ficare se il filtro sta lavorando correttamente ed impo- oscura immediatamente. stare il livello di oscuramento, il tempo di ritardo e la sensibilità. -
Page 5: Regolazione Maschera (Fig.7-8)
Regolazione maschera (Fig.7-8) ed in modo corretto. Riposizionate il gruppo filtro sulla • Le dimensioni crani- maschera. che variano da persona a Pulizia persona, la posizione di lavoro e l’angolo di osser- • Pulite regolarmente la maschera ed il filtro con un vazione rendono perciò... -
Page 6: Specifiche Tecniche
Alimentazione Celle solari e 2 batterie SPECIFICHE TECNICHE CR2450 Accensione/Spegnimento Manuale: ON/OFF Classe Ottica 1/1/1/1 Automatica: OFF Dimensioni del filtro 133x114x9mm Allarme Batteria Scarica Si, indicatore livello di Visuale 97x62mm carica Sensori Impostazione Minima Amp/TIG ≥ 2A AC - DC Grado di luce Molatura si, DIN 4 fisso... -
Page 7: Prima Di Cominciare
• A velocità di lavoro molto elevate la pressione nel dispositivo può diventare negativa al momento del pic- STORM VISION 4.1 è un sistema completo che combi- co del flusso di inalazione. na la vostra maschera elettronica Vision 4.1 a un siste- •... -
Page 8: Assemblaggio
to HE (HEPA) installati. Ricarica Durata della batteria: 9 h - bassa velocità • Sostituire sempre il filtro quando danneggiato o veloce con (170 + lpm); 5 - 6 h - alta velocità (210 + lpm) bloccato. Non tentare di lavare, pulire o riutilizzare batteria Tempo di ricarica della batteria: 1 ora quelli sporchi. -
Page 9: Prestazioni Della Batteria Con Differenti Combinazioni Di Filtraggio
BATTERIA FIG. 17 AVVERTENZA • La batteria deve essere caricata in un luogo elettri- camente sicuro. • Il tempo di ricarica di diversi tipi di batteria è diver- so. Il tempo di ricarica effettivo dipende dalla capacità Carica della batteria residua della batteria. -
Page 10: Assemblaggio
Assemblaggio Tubo di respirazione Inserire le due punte sul tubo di respirazione nell’unità Accertarsi che il tubo non sia danneggiato e sia colle- soffiante e nella presa del casco (Vedi fig.21), ruotare gato correttamente all'unità soffiante e al casco. di 1/4 di giro in direzione contraria al verso di apertura Batteria - “OPEN”... -
Page 11: Test Della Portata Del Flusso D'aria
STORAGE Se la sfera all’interno del tubo galleggia sopra la linea di limite in modalità bassa velocità, il funzionamento è Il sistema di purificazione Storm Vision 4.1 non è intrin- normale. secamente sicuro. Conservare lontano da atmosfere Se la sfera non galleggia fino alla linea di limite, fare infiammabili o esplosive. -
Page 12: Ricambi
Tubo bloccato o Controllare le perdita di aria condizioni del tubo Test flusso aria fallito Filtro sporco da Installare un nuovo sostituire filtro Sostituire la Batteria guasta batteria La durata Caricare della batteria Carica non corretta completamente la è breve anche batteria quando Installare un nuovo... -
Page 13: Introduction
• Do not leave the workplace with the welding helmet INTRODUCTION in the lowered position; a bright light source could cau- se the filter to darken unexpectedly. Your automatic welding helmet is a new generation • Failure to follow these warnings and/or failure to product for labour protection. -
Page 14: Operating Mode (Fig.2)
• Quick press the A - On / Mode button to check whe- Sensitivity Selection ther the filter is working correctly and to set the darke- • Press the B - Function button to select “SENSITIVI- ning level, the delay time and the sensitivity. TY”. -
Page 15: Maintenance
Helmet adjustment (Fig.7-8) the new filter with care and properly. Reposition the • Because the shapes of filter cartridge on the helmet. men’s head vary from per- Cleaning son to person, the work position and the observing • Regularly clean the helmet and the filter with a dry angle is different and wel- soft cloth. -
Page 16: Technical Specifications
Power Supply Solar cells and 2 TECHNICAL SPECIFICATIONS CR2450 batteries ON/OFF Manual: ON/OFF Optical Class 1/1/1/1 Automatic: OFF Filter size 133x114x9mm Low Battery alarm Yes, battery indicator Viewing area 97x62mm Min Amp/TIG Rating ≥ 2A AC - DC Sensors Grinding Yes, DIN 4 fix Light Shade Operating Temperature... -
Page 17: Before You Start
BEFORE YOU START DESCRIPTION & SPECIFICATION A complete Strom Vision 4.1 includes a blower, filtra- STORM VISION 4.1 is a complet system that combines tion unit, breathing tube assembly, battery, and a wel- your Vision 4.1 autodarkening welding helmet to a pu- ding helmet with auto darkening filter. -
Page 18: Assembling
Filter Filter efficiency: 99.97% FIG. 14 Alarms: Visible, audible and vibrate ASSEMBLING Particulate Pre-Filter Filter Spark The power must be turned off when replacing the fil- Latch Filter Screen Cover ters. Install the spark screen, pre-filter, and particulate GAS FILTER filter (gas filter if any) in filter cover. -
Page 19: Battery Performance For Different Combinations Of Filter Assembly
Battery is divided into fast-charging standard battery When four sections show up, the battery is fully char- and fast-charging extended battery. ged. When these two types of battery are used with diffe- rent filter components, the battery duration is different. When just one section left (See fig.18), bleeping soun- Choose the appropriate battery according to actual si- ds on, accompanied by vibration to remind users to... -
Page 20: Shoulder Strap & Belt Cushion
Face seal Breathing tube Inspect face seal for damage and replace if necessary. Make sure the air is supplied to helmet. O-Ring Always exit the contaminated area immediately if any of the following conditions occur: FIG. 22 • IF some problem is shown in any part of the product, for example, the air supply is stopped or its amount is decreased;... -
Page 21: Airflow Rate Test
STORAGE Take airflow test always before using this product. Make sure all the components are fully assembled be- The Storm Vision 4.1 system is not intrinsically safe. fore testing. Keep away from flammable, or explosive atmosphere. Connect the end of hose to the bottom of airflow indica- Storage should be in a clean, dry, cool place with filter. -
Page 22: Spares
SPARES Ref. Description Code Spark screen 21905159 Face seal 21905171 Pre-filter 21905158 Shoulder strap 21905162 Particle filter 21905157 Belt cushion (Including Screws & Gas filter 21905161 21905163 Washers) Hose assembly (cover + O-rings) 21905164 Body 21905154 O-ring 21905165 Standard battery 21905155 Battery charger 21905166... - Page 23 SMALTIMENTO DI APPARECCHI DA ROTTAMARE DA PARTE DI PRIVATI NELL’UNIONE EUROPEA Questo simbolo che appare sul prodotto o sulla confezione indica che il prodotto non deve essere smaltito assieme agli altri rifiuti domesti- ci. Gli utenti devono provvedere allo smaltimento delle apparecchiature da rottamare portandole al luogo di raccolta indicato per il riciclag- gio delle apparecchiature elettriche ed elettroniche.
Need help?
Do you have a question about the STORM VISION 4.1 and is the answer not in the manual?
Questions and answers