Advertisement
Quick Links
Please Contact Moen First
For Installation Help, Missing or
Replacement Parts
(USA)
1-800-BUY-MOEN (1-800-289-6636)
Mon - Fri 8:00 AM to 7:00 PM, Eastern
Sat. 9:00 AM to 3:00 PM Eastern
WWW.MOEN.COM
(Canada)
1-800-465-6130
Mon - Fri 7:30 AM to 7:00 PM, Eastern
WWW.MOEN.CA
Por favor, contáctese primero con Moen
Para obtener ayuda de instalación, piezas
faltantes o de recambio
01-800-718-4345
Lunes a viernes de 8:00 a 20:00 hs.
(Costa Este)
Sáb. 8:00 a 18:30 hs. (Costa Este)
WWW.MOEN.COM.MX
Veuillez d'abord contacter Moen
En cas de problèmes avec l'installation, ou pour
obtenir toute pièce manquante ou de rechange
1-800-465-6130
Du lundi au vendredi :
de 7 h 30 à 19 h, HE
WWW.MOEN.CA
HELPFUL TOOLS
For safety and ease of faucet replacement,
Moen recommends the use of these
helpful tools.
Installation Guide
Guía de Instalación
Guide d'installation
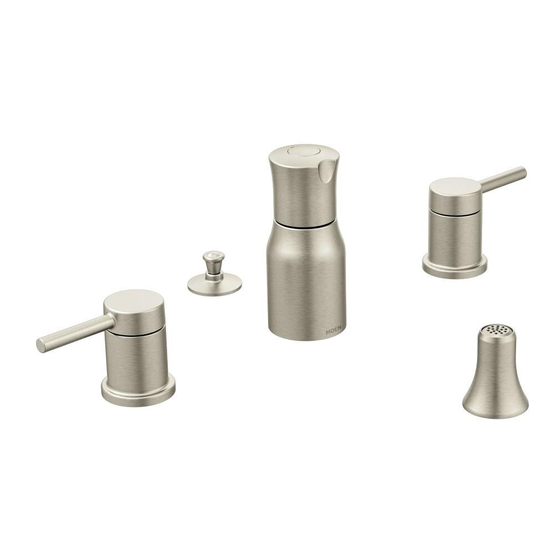
4 HOLE BIDET FAUCET TRIM
MODEL TL5265, T5210, T5191, T5220, T5225, T5245, T5269 SERIES
TERMINACIÓN PARA MEZCLADORA DE
BIDET DE 4 ORIFICIOS
MODELO TL5265, T5210, T5191, T5220, T5225, T5245, T5269 SERIES
GARNITURE DE ROBINET POUR BIDET
À 4 OUVERTURES
MODÈLES TL5265, T5210, T5191, T5220, T5225, T5245, T5269 SERIES
Style varies by model.
El estilo varía por el modelo.
Le style varie selon le modèle
HERRAMIENTAS ÚTILES
Para que el cambio de la llave sea fácil y
seguro, Moen le recomienda usar estas
útiles herramientas.
1
INS10469 - 6/15
OUTILS UTILES
Par mesure de sécurité et pour faciliter
l'installation, Moen suggère l'utilisation des
outils suivants.
Sealant
Sellador
Mastic
Advertisement

Related Manuals for Moen TL5265 Series


Summary of Contents for Moen TL5265 Series
- Page 1 WWW.MOEN.COM (Canada) 1-800-465-6130 Mon - Fri 7:30 AM to 7:00 PM, Eastern WWW.MOEN.CA Por favor, contáctese primero con Moen Para obtener ayuda de instalación, piezas faltantes o de recambio 01-800-718-4345 Lunes a viernes de 8:00 a 20:00 hs. (Costa Este) 4 HOLE BIDET FAUCET TRIM Sáb.
-
Page 2: Parts List
CAUTION — TIPS FOR Optional/Optionnel/Opcional REMOVAL OF OLD FAUCET: Blue Always turn water supply OFF before removing existing Rojo Azul faucet or disassembling the valve. Open faucet handle to Rouge Bleu relieve water pressure and ensure that complete water shut-off has been accomplished. PRECAUCIÓN —... - Page 3 INS10469 - 6/15 Cold Frio Froid Caliente Chaud Turn off water supply. 1) Install Escutcheon (Q) and Escutcheon Nut (P) onto diverter valve. 2) Tighten Escutcheon Nut (P) by hand until secure. Cierre la toma de agua. Couper l’alimentation en eau. 1) Instale el chapetón (Q) y la tuerca del chapetón (P) en la válvula derivadora.
- Page 4 Ensure stops are in the off position. Use a wrench to adjust. Install Handles (E) and Handle Inserts (F) on top of valve bodies. Asegúrese de que los topes estén en posición cerrado. Use una llave para ajustar. Instale los manerales (E) y las piezas de inserción (F) sobre los cuerpos de las válvulas. S'assurer que les robinets d'arrêt sont fermés.
- Page 5 INS10469 - 6/15 Sealant Sellador Mastic 1) Apply a bead of sealant to underside of Waste Seat (K). To begin pop-up and drain seat installation steps, remove protective drain cover. 2) Flip Waste Seat (K) over and install into drain hole, into drain body. 3) Hand tighten drain nut.
- Page 6 1) Thread Shank (D) to Lift Rod Escutcheon (B). Insert Lift Rod (A) through Lift Rod Escutcheon (B). 2) Place Shank (D), Lift Rod Escutcheon (B), and Gasket (C) through lift rod hole. Inserte la la barra de cierre vertical (A) a través del chapetón de la barra de cierre vertical (B). Attach Washer (G) and Nut (H) from underneath to Shank (D).
- Page 7 INS10469 - 6/15 Cold Frio Froid Caliente Chaud Turn on water supply. Installation is complete. Abra el suministro de agua. La instalación está completa. Ouvrir l’alimentation en eau. L’installation est terminée.
- Page 8 (the “Warranty Period" for non-homeowners). Si en esta llave mezcladora se llegara a producir alguna fuga o gotera durante el periodo de garantía, Moen le Si ce robinet fuit ou dégoutte durant la période de If this faucet should ever develop a leak or drip during proporcionará...
Need help?
Do you have a question about the TL5265 Series and is the answer not in the manual?
Questions and answers