
Related Manuals for Sola VESTA-2813 NS PLUS


Summary of Contents for Sola VESTA-2813 NS PLUS
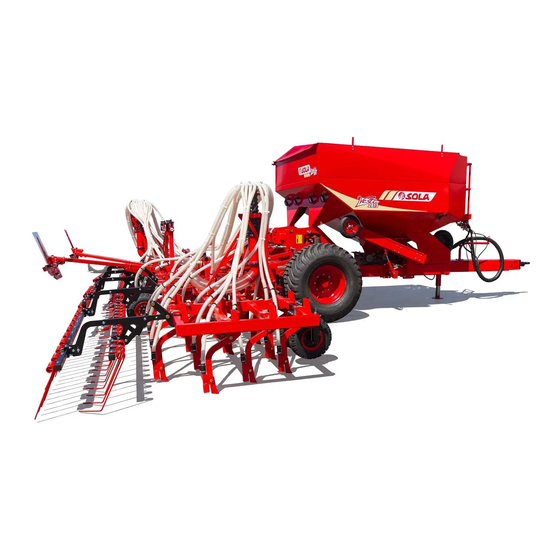
- Page 1 VESTA-2813 NS PLUS MANUAL STARTING MAINTENANCE AND DOSAGE Please read and follow this operating manual before putting the machine into operation. M A Q U I N A R I A A G R Í C O L A...
- Page 2 SOLÁ seed drills and fertilizer spreaders are manufactured in a highly specialized environment and our factory has a vast customer-endorsed experience. SOLÁ machines use highly advanced technology and are guaranteed to work without malfunctions in a great variety of conditions. They are provided with easy-to-use and efficient devices. SOLÁ...
-
Page 3: Table Of Contents
TABLE OF CONTENTS TABLE OF CONTENTS 1. INTRODUCTION ................................5 2. SAFETY INSTRUCTIONS ............................. 6 2.1 SAFETY SYMBOLS ..................................6 2.2 GENERAL SAFETY REGULATIONS ............................7 2.3 LOADING AND UNLOADING INSTRUCTIONS ......................... 7 3. OVERVIEW .................................. 8 3.1 SEED DRILL OVERVIEW ................................8 3.2 TECHNICAL CHARACTERISTICS .............................. - Page 4 TABLE OF CONTENTS TABLE OF CONTENTS 9. MAINTENANCE ................................. 32 9.1 CHECKING FREQUENCY ................................32 9.2 SCREWS ....................................... 33 9.3 CLEANING THE SEED DRILL ..............................33 9.4 GREASING AND LUBRICATION ..............................33 9.5 TYRES PRESSURE ..................................34 10. DOSAGE TABLE ............................... 34 10.1 SEEDS TABLE (FOR 1 METERING UNIT) ..........................
-
Page 5: Introduction
INTRODUCTION 1- INTRODUCTION It is essential to read and follow the instructions and recommendations in this manual before operating the seed drill A-6000 NS PLUS. Careful reading enables maximum operator efficien- cy, prevents accidents and damage, and increases the seed drill’s capacity and life expectancy. Please ensure that this manual has been read by any person involved in performing opera- tional tasks, (including preparation, dealing with mechanical problems and supervising the machine), maintenance (inspection and technical assistance) and transport. -
Page 6: Safety Instructions
SAFETY INSTRUCTIONS 2. SAFETY INSTRUCTIONS 2.1 SAFETY SYMBOLS In this operating manual you will find three different symbols relating to safety: TO WORK MORE EASILY WITH THE SEED DRILL. TO PREVENT DAMAGE TO THE SEED DRILL AND OPTIONAL EQUIPMENT. TO PREVENT PHYSICAL INJURY. On the machine you will find the following warning pictograms: Danger of infection from escaping hydraulic... -
Page 7: General Safety Regulations
SAFETY INSTRUCTIONS 2.2 GENERAL SAFETY REGULATIONS - Before starting the machine, please check the - Never leave the tractor’s driver’s seat while the machine is in good condition for work and is machine is in operation. safe for road use. - Do not deposit external elements inside the - Check that visibility is clear around the machi- hopper. -
Page 8: Overview
OVERVIEW WARNING: IN ORDER TO KNOW THE LOAD - FRONT PART: one tow rope must be faste- TO BE SUPPORTED BY THE BRIDGE CRANE, SEE ned to the coupling point placed in the inner SECTION 3.2 TECHNICAL CHARACTERISTICS front side of the hopper (Fig. 2). The following pictures show how to place the tow - REAR PART: two tow ropes must be fastened ropes in order to perform the operation:... -
Page 9: Machine Identification
8- CE certificate. Fig. 5 3.4 USE ACCORDING TO DESIGN The user must observe all regulations concer- The seed drill VESTA-2813 NS PLUS has been ning safety, traffic and hygiene. designed specifically for the sowing of cereal and other grain seeds. -
Page 10: Standard Equipment
ESSENTIAL SOWING CONCEPTS 3.5 STANDARD EQUIPMENT 3.6 OPTIONAL EQUIPMENT - 6000 L Seed Hopper (in model VESTA-2813 NS PLUS). - Combined hopper: 3600 L for seeds and 2400 L for fertiliser - Sieve (in models VESTA-2813 NS PLUS-COMBI). - Kit for dosing test. - Page 11 ESSENTIAL SOWING CONCEPTS Fig. 6 THE RECOMMENDED SEED PLANTING DEPTHS ARE FROM 3 TO 5 CENTIMETRES. PLANTING TOO DEEP CAU- SES PROBLEMS AS RHIZOME CANNOT REACH THE SURFACE AND THE PLANT WILL DIE. IT DOES NOT MATTER THAT SOME GRAINS ARE VISIBLE BECAUSE THE HARROW’S. TINES WILL COVER THEM EVENTUALLY. Normal Planting Depth: from 2 to 4 Deeper Planting: from 5 to 6 cm Very deep planting: from 8 to 10 cm...
-
Page 12: Starting
5.1 COUPLING THE SEED DRILL 3- Couple the seed drill’s swivelling ring to the tractor Seed drill VESTA-2813 NS PLUS is equipped with a cou- using the trailer coupling point (Fig. 7). pling of type axle-swivelling ring. -
Page 13: Connecting And Adapting The Pto Shaft
STARTING 5.2 CONNECTING AND ADAPTING 5- Secure the PTO shaft using the chain (Fig. 10). THE PTO SHAFT Fig. 10 Once the seed drill is coupled with the tractor, the PTO shaft should be adapted if the machine is equipped with mecha- nical fan. -
Page 14: Transport Position
STARTING 5.4 TRANSPORT POSITION To smoothly hydraulically fold and unfold the seed drill, the- re are two flow regulators (Fig. 11) that perform both actions respectively. Once the machine is coupled to the tractor and the hydraulic Fig. 11 circuits are connected to the tractor’s hydraullic connections, They should be adjusted de- follow these steps in order to set the machine for transport pending on the hydraulic flow... -
Page 15: Filling And Emptying The Hopper
STARTING 5.5 FILLING AND EMPTYING THE To EMPTY the hopper, follow these steps: HOPPER 1- Place a container or a sack in front ot the metering unit’s emptying trapdoor (Fig. 20). In order to safely and quickly fill the hoppers, the best way 2- Pull and turn the handle to open the trapdoor and empty is using a worm drive. -
Page 16: Supporting Legs
STARTING 5.6 SUPPORTING LEGS 5.6.2 REAR SUPPORTING LEGS The rear supporting legs are The seed drill is equipped with a supporting leg for the ho- placed in the sowing equip- pper (see section 5.6.1 FRONT SUPPORTING LEG) and two ment. To RAISE or LOWER the supporting legs for the sowing equipment (see section 5.6.2 supporting leg, follow these REAR SUPPORTING LEGS). -
Page 17: Adjustments
This chapter shows the adjustments to be performed to the been adjusted, the rat- seed drill VESTA-2813 NS PLUS in order to adjust it to the type chets should be folded of seed and terrain properties. Values shown in this manual... -
Page 18: Tine Coulters
ADJUSTMENTS 1- Unlock the wheel using the fi- Pressure performed by the Fig. 33 REGULABLE tine coulters can be adjusted xing handle. by using the nut of the spring 2- Place the wrench (A, Fig. 35) (1, fig. 35). These tine coulters and turn it towards the right or are fixed to their support by the left in order to lower or rai-... -
Page 19: Regular Seeds (Position N)
ADJUSTMENTS 6.3.2 FINE SEEDS (position F) 6.3.1 REGULAR SEEDS (position N) To adjust the sowing to FINE SEEDS, proceed as following: To adjust the sowing to REGULAR SEEDS, proceed as fo- llowing: Fig. 41 Fig. 38 Fig. 39 Fig. 42 Fig. -
Page 20: Seed Dosing Adjustments
SOWN. position (the sowing equipment must be not in contact with the ground). MAQUINARIA AGRÍCOLA SOLA, S.L., RECOM- 3- UNLOCK the 2 LOCKS (1, Fig. 46) that secure the lid of the MENDS THAT THE FARMER SEEKS PROFESSIO- venturi injector sluice so that the lid can be opened. -
Page 21: Dosing Field Test
ADJUSTMENTS 6.6 DOSING FIELD TEST 6- Next, place the crank (Fig. 48) in the drive wheel of the seed drill. Turn the wheel clockwise as many turns as in- dicated in the next table, which depends on the machine If differences exist between the test and the actual dose dis- model. -
Page 22: Harrow
ADJUSTMENTS 6.7 HARROW 6.9 TRACK ERASER Some adjustments can be performed on the harrow so that To erase the tractor’s tracks, the seed drill is equipped with it can adapt to all types of ground: track erasers with adjustable height. HEIGHT ADJUSTMENT To adjust the working depth, loosen the fixing screws, move by operating the lower nut (1, fig. -
Page 23: Adjusting Track Marker'slength
ADJUSTMENTS 6.10.1 ADJUSTING TRACK MARKER’S 6.10.2 ADJUSTING TRACK DISC’S ORIEN- LENGTH TATION Track marker’s arms are extensible. To calculate the horizon- To adjust the track disc’s orientation, follow these steps: tal spacing BETWEEN TRACK DISCS AND THE LAST METE- RING UNIT (B, Fig. 55), use following formula: Fig. -
Page 24: Types Of Distribution
TYPES OF DISTRIBUTION 7- TYPES OF DISTRIBUTION CONNECTIONS Connect the fan’s small hydraulic hose line to a pressurised tractor control unit. The fan’s 1/2’’ hydraulic hose line should IMPORTANT: BEFORE THE WHEEL CONTRO- be connected to a depressurised return tractor control unit. LLING THE DISTRIBUTOR’S TRANSMISSION STARTS TURNING, PLEASE ENSURE THAT THE FAN’S TURNING SPEED IS BETWEEN 4200 AND... -
Page 25: Electronical Controller
ELECTRONICAL CONTROLLER 8. ELECTRONICAL CONTROLLER 8.1 FRONT PANEL DESCRIPTION Fig. 60 Screen Shut-off sowing from left folding part NEUMASEM Shut-off sowing from Selected channel right folding part Hopper level C1 C2 C4 C5 C6 Microdosing Shutting-off controller Shutting-off controller of the left folding part of the right folding part Auto-calibration programming Central button... -
Page 26: Total Area / Seed Drill Width - C2
ELECTRONICAL CONTROLLER PLEASE NOTE: THE IMPULSE NUMBER AU- Working in micro mode TO-CALIBRATION MODE IS MORE ACCURATE AND A FIELD TEST PERFORMANCE IS REQUIRED. When working with the distributor in the micro-dosing mode (for small hoppers and minimal doses), press and hold Auto-calibrating the speed sensor button for more than 3 seconds until the arrow indica- ting the micro mode is displayed. -
Page 27: Tramlining - C3
ELECTRONICAL CONTROLLER 8.5 TRAMLINING – C3 Symmetric Tramlining Sequence 2+2 seed spouts are closed during the tramline bout only. The displays defaults to the channels after 10 seconds (unless the Area Total was selected). The instrument will beep once the beginning of the tramline bout, and the display will continue flashing for the duration There are 5 systems of tramlining –... - Page 28 ELECTRONICAL CONTROLLER Asymmetric Left Tramlining Sequence Asymmetric Right Tramlining Sequence Two seed spouts are closed on the left hand side of the drill Two seed spouts are closed on the right hand side of the drill on the tramline bouts. on the tramline bouts.
- Page 29 ELECTRONICAL CONTROLLER 10 Bout Tramlining Sequence The electronical controller will beep in each tramline bout. To be used in a combination of a 4 metre seed drill and a 10 metre sprayer, or a 8 metre seed drill and a 20 metre sprayer Fig.
-
Page 30: Fan Rpm / Fan Alarms - C4
ELECTRONICAL CONTROLLER Setting the Tramline Bout 1- TO SELECT PROGRAMMING MODE 2, DO THE FOLLOWING: WHILE SWITCHING ON THE ELECTRONICAL CONTROLLER 1- PRESS and RELEASE the button to toggle between USING REAR SWITCH, PRESS IN MACHINE MODELS the tramline sequence and tramline bout number display. The 3rd and 4th digits flash indicating the tramline bout NEUMASEM OR PIN MODEL NEUMASEM PLUS. -
Page 31: Total Sowing Shut-Off (Optional)
ELECTRONICAL CONTROLLER 8.9 TOTAL SOWING SHUT-OFF (OPTIONAL) NEUMASEM NEUMASEM NEUMASEM control panel Press the , button to lock the seed’s exit. The screen will display the flickering text «CORT» (Fig. 76). Fig. 80 Fig. 81 Press . button again to return to a normal working posi- tion and open the exits. -
Page 32: Maintenance
MAINTENANCE 9- MAINTENANCE - Prolonged and/or repetitive skin contact with fuel and lubri- cants is harmful. In case these products come accidentally into contact with the eyes or other sensitive parts, wash well IN CASE OF MALFUNCTION, STOP THE SEED the affected parts with clean water. -
Page 33: Screws
MAINTENANCE 9.4 GREASING AND LUBRICATION A careful maintenance of the seed drill ensures proper func- tioning and long service life of the machine. Every non-painted metallic component of the seed drill is BEFORE PERFORMING THESE OPERATIONS, THE exposed to atmospheric and weather conditions, which may SEED DRILL’S ENGINE MUST BE TURNED OFF oxidize them. -
Page 34: Tyres Pressure
DOSAGE TABLES 9.5 TYRE PRESSURE Before starting working with the seed drill, check that the TYRE TYPE DESCRIPTION AIR PRESSURE (bar) tyre pressure is correct. 550/60-22.5 Floating wheel In general use and especially when working on irregularly 3.5 - 8 Drive wheel tilled terrains, it is recommended to use a slightly lower pres- 18x7”... - Page 35 DOSAGE TABLES When the dose to be planted (Kg/Ha) is very small (position in the graduated sector <=10), it is possible to obtain a more uniform planting by means of microdosing, even with a regular range of seeds (cereal and big seeds). 6 METRES 7 METRES NORMAL...
-
Page 36: Seeds Table (For 2 Metering Units)
DOSAGE TABLES 10.2 DOSAGE TABLES (FOR 2 METERING UNITS) MICRO-6 METRES MICRO-7 METRES FINE SEED FINE SEED Specific Specific Weight 0,65 0,77 0,39 Weight 0,65 0,77 0,39 (Kg/l) (Kg/l) Position Position in the in the gra- FINE SEED (Kg/Ha) FINE SEED (Kg/Ha) graduated duated sector... - Page 37 DOSAGE TABLES When the dose to be planted (Kg/Ha) is very small (position in the graduated sector <=10), it is possible to obtain a more uniform planting by means of microdosing, even with a regular range of seeds (cereal and big seeds). 6 METRES 7 METRES NORMAL...
-
Page 38: Micro-Fertiliser Table (Optional)
DOSAGE TABLES 10.3 MICRO-FERTILISER TABLE (OP- TIONAL) WORKING WIDTH This micro-fertiliser equipment has several metering units. Next table show the values to be distributed by them. 6 (metres) 7 (metres) WORKING SPEED They are adjusted turning the adjusting knob (1, Fig. 90). 8 - 10 12 - 14 8 - 10... -
Page 39: Warranty
WARRANTY 11- WARRANTY MAQUINARIA AGRÍCOLA SOLÀ, S.L. ensures the smooth functioning of any product according sold to the technical specifications of the WARRANTY CERTIFICATE provided with each machine. Any deli- very note accompanying the goods will eventually result in a VAT invoice. If the BUYER considers the goods to be in warranty and they should not be invoiced, the problem will be analyzed and, if appro- priate, your account will be credited. -
Page 41: Notes
NOTES 12- NOTES DATE NOTES... - Page 42 NOTES DATE NOTES...
Need help?
Do you have a question about the VESTA-2813 NS PLUS and is the answer not in the manual?
Questions and answers