Advertisement
Available languages
Available languages
Quick Links
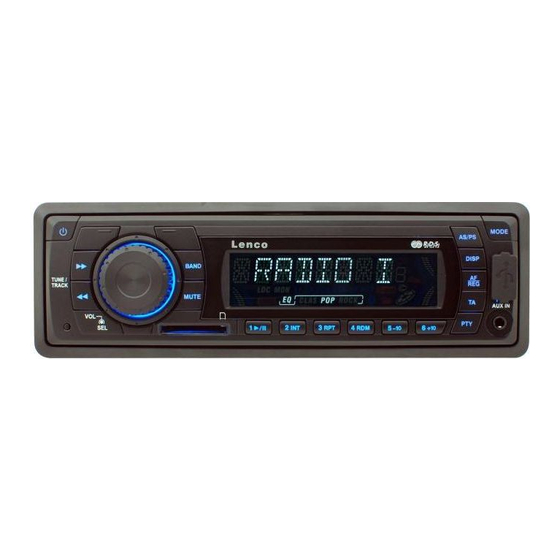
MODE D'EMPLOI
Système audio portable
Radio synthétiseur PLL stéréo
Mise en mémoire automatique
Avec fonction RDS (Radio Data System)
Interface USB
Interface SD/MMC
Entrée auxiliaires
for information and support,www.lenco.eu
1
Advertisement

Related Manuals for LENCO CS-321


Summary of Contents for LENCO CS-321
- Page 1 MODE D'EMPLOI Système audio portable Radio synthétiseur PLL stéréo Mise en mémoire automatique Avec fonction RDS (Radio Data System) Interface USB Interface SD/MMC Entrée auxiliaires for information and support,www.lenco.eu...
- Page 2 TABLES DES MATIERES Mise en mémoire automatique et Montage ..........3 Balayage des stations ....... 9 Montage din face avant/arriere ..... 3 Mise en mémoire d'une station ..10 Montage façade DIN (Méthode A)..3 Fonctionnement du RDS (radio data Montage de l'appareil ......
- Page 3 MONTAGE montage, veuillez consulter la section Remarques : illustrée ci-dessous. Installez l'appareil à un endroit où il ne gênera pas la conduite. Avant de procéder au montage de MONTAGE FACADE DIN (Méthode A) l'appareil, branchez-le provisoirement Logement de l'appareil et vérifiez que les raccordements Cet appareil peut être installé...
- Page 4 MONTAGE 5. Montez le support en encastrant celui-ci dans la découpe du tableau de située sous le tableau de bord. Cette bord et courbez les languettes situées attache permet également d'assurer la autour support à l'aide d'un mise en terre correcte de l'appareil. tournevis.
- Page 5 MONTAGE support de montage et l'attache métallique ne MONTAGE FACE ARRIERE servent pas pour un (Méthode B) montage selon la méthode B. Si vous avez un véhicule de la marque Nissan ou Toyota, veuillez suivre les consignes suivantes. Utilisez les orifices affichant T (Toyota), N (Nissan) sur les côtés de l'appareil pour fixer l'appareil aux crochets de montage radio d'usine de votre véhicule.
- Page 6 CABLAGE...
- Page 7 FONCTIONNEMENT GENERAL ALLUMER/ETEINDRE L'APPAREIL station avec une identification Appuyez sur l'une des touches (1) pour différente mais les mêmes allumer l'appareil. Lorsque l'appareil est en informations TP. marche, appuyez sur la touche (1) Lorsque les informations TP ne sont pour éteindre l'appareil. plus reçues sur la station REGLAGE DU SON sélectionnée, l'autoradio démarrera...
- Page 8 FONCTIONNEMENT se fera entendre. programme n'est pas détectée durant Lorsque les informations TP de la le délai de syntonisation fixé, la radio station sélectionnée sont perdues, cherchera la prochaine station ayant le bip se fait entendre. le même PI. Si aucune station ayant le même PI Lorsque la station sélectionnée n'a n'est détectée au bout d'un cycle de pas de signal RDS, “PI SEEK”...
- Page 9 FONCTIONNEMENT Ne masque que les stations AF SELECTION D'UNE STATION dont correspond Appuyez rapidement sur la touche pas.Mode MASK ALL Masque les la touche (24) pour activer la stations dont fonction de recherche automatique. correspond pas ou ayant un signal Appuyez pendant plusieurs...
- Page 10 FONCTIONNEMENT été trouvé sur un cycle de recherche, le FONCTION RDS message NO PTY s'affiche. pour enregistrer la station actuelle sur la Les 2 types de programme sont touche correspondant au numéro de SPEECH (PROGRAMMES présélection. MUSICAUX) MUSIC 1. AF (PROGRAMMES MUSICAUX).
- Page 11 FONCTIONNEMENT MEMOIRE TYPE DE MEMOIRE TYPE DE PROGRAMME PROGRAMMES PROGRAMME PROGRAMMES MUSICAUX NON MUSICAUX NEWA ACTUALITES ROCK IMPORTANTES SPORT EASY EDUCATION LEGERE PIECES RADIOPHONIQUES MUSIQUE CULTURE CLASSIQUE SCIENCES AUTRES DIVERS METEO JAZZ FINANCE COUNTRY ENFANTS MUSIQUE SOCIAL NATIONALE RELIGION ANCIENS SUCCES QUESTIONS PAR TELEPHONE VOYAGES...
- Page 12 FONCTIONNEMENT pour arrêter l'intro et démarrer la lecture. doit être activé à l’aide d’un stylo à bille REPETITION ou d’un objet métalique fin. Le bouton Appuyez sur la touche RPT (19) pour RESETdoit être activé dans les cas passer en boucle le même fichier. Appuyez suivants : de nouveau sur cette touche pour arrêter le Première...
- Page 13 CARACTERISTIQUES TECHNIQUES CARACTERISTIQUES GENERALES Alimentation requise : CC 12 volts, Terre négative Dimensions du boitier : 178 (L) x 107 (P) x 50 (H) Réglages du son Graves (à 100 Hz) : ±10 dB Aigus (à 10 kHz) : ±10 dB Puissance nominale maximale 4 x 40 watts Drain courant...
- Page 14 DEPANNAGE Avant de consulter cette liste, vérifiez les raccordements. Si le problème persiste, demandez conseil à votre atelier de réparation le plus proche. Symptôme Cause Solution Le contact est coupé. Si l'alimentation est raccordée aux circuits d'accessoires de la d'alimentation. voiture, mais que le moteur ne tourne pas, tournez la clé...
- Page 15 CS-321 OWNER’S MANUAL Mobile Audio System PLL Synthesizer Stereo Radio Automatic Memory Storing RDS (Radio Data System) Operation USB Interface SD/MMC Interface Auxiliary Input Function for information and support,www.lenco.eu...
- Page 16 TABLE OF CONTENTS Automatic memory storing& Installation........... 3 program scanning ......9 DIN Front-Mount (Method A)....3 Station storing ........9 Installing the unit ....... 3 RDS (radio data system) operation... 9 Removing the unit ......4 USB play operation....... 11 DIN Rear-Mount (Method B) ....
- Page 17 INSTALLATION Notes: DIN FRONT-MOUNT (Method A) Choose the mounting location where Installation Opening the unit will not interfere with the This unit can be installed in any dashboard normal driving function of the driver. having an opening as shown below: Before finally installing...
- Page 18 INSTALLATION Spring Washer Hex Nut screwdriver. Not all tabs will be able to Metal Strap make contact, so examine which ones Mounting Bolt will be most effective. Bending open the Plain Washer appropriate tabs behind the dashboard Tapping Screw to secure the sleeve in place. Dashboard Tabs 9.econnect the cable to the vehicle...
- Page 19 INSTALLATION Side View showing T, N Screw Screw Dashboard or Console Hook To fasten the unit to the factory radio mounting brackets. 1.e a screwdriver to loose the hook’s screws on the front left and right sides of the unit and remove the hooks. 2.ign the screw holes on the bracket with the screw holes on the unit, and then tighten the screws (5x5mm) on each...
- Page 20 WIRING CONNECTION...
- Page 21 GENERAL OPERATION station which has not the same SWITCHING ON/OFF THE UNIT station (PI) as the last station, but Press any button (1) to turn on the unit. has the TP information. When system is on, press button (1) to When TP information gets lost at the turn off the unit.
- Page 22 OPERATION When newly tuned station has not - RETUNE L mode: signal, “PI SEEK” - Selected as 90 seconds.RETUNE suppressed somewhat. S mode: b).I SOUND or PI MUTE Selected as 30 seconds. While AF switching is implemented in d).ASK DPI or MASK ALL mode C201 station, AF can switch to 100 The AF frequency (which has different MHz, which is non genuine AF (where,...
- Page 23 OPERATION DISPLAY INFORMATION current frequency and checks the signal - Press DISP button (9) to show the time. strength until one cycle search is finished. LIQUID CRYSTAL DISPLAY And then the strongest stations are stored into the corresponding preset AUXILIARY INPUT number button.
- Page 24 OPERATION When TA is ON, traffic program M1-M6 keys can be used to select the identification code is not received desired program type. during specified time. TA ALARM : NO MUSIC MENORY TA / TP is displayed and alarm is set off PROGRAM TYPE TA SEEK : TA SEEK is activated.
- Page 25 OPERATION CAUTION: : : : USB PLAY OPERATION When there are important files in the USB On the front panel of the unit, there is an device, do not connect it to the main unit to USB interface (12). You can connect an play, because any wrong operation may USB driver through this interface (12).
- Page 26 SPECIFICATION GENERAL Power Supply Requirements : DC 12 Volts, Negative Ground Chassis Dimensions : 178 (W) x 107 (D) x 50 (H) Tone Controls : ±10 dB Bass (at 100 Hz) : ±10 dB Treble (at 10 kHz) Maximum Output Power 4x40 watts Current Drain 15 Ampere (max.) (For High Power Version)
- Page 27 TROUBLE SHOOTING Before going through the checklist, check wiring connection. If any of the problems persist after checklist has been made, consult your nearest service dealer. Symptom Cause Solution The car ignition switch is power supply No power. not on. connected to the car accessory circuits, but the engine is not moving, switch the ignition key...
- Page 28 CS-321 MANUAL DEL USUARIO Sistema de audio móvil Radio estéreo con sintetizador PLL Almacenamiento de memorias automático Función de RDS (Sistema de datos por radio) Interfaz USB Interfaz SD/MMC Función de entrada auxiliar for information and support,www.lenco.eu...
- Page 29 Tabla de contenido Instalación ........... 3 Almacenamiento de memorias Montage transfero/frontal din ....3 automático & exploración de programas Montaje frontal en DIN (Método A)..3 ............9 Instalación de la unidad..... 3 Almacenamiento emisoras ....10 Quitar la unidad ......... 4 Funcionamiento RDS (Sistema de datos Montaje trasero en DIN (Método B) ..
- Page 30 INSTALACIÓN Notas: DIN, usando orificios taladrados a los costados de la unidad del chasis). Escoja una ubicación de montaje Para más detalles, remítase a los donde la unidad no interfiera con las siguientes métodos de instalación funciones normales de manejo del ilustrados.
- Page 31 INSTALACIÓN hex (M5mm) y arandela de resorte) para Sleeve L Key fijar una punta de la tira al tornillo de Outer Trim Ring montaje en la parte trasera de la 9.unidad. Si es necesario, doble la tira metálica para que encaje en el área de montaje de su vehículo.
- Page 32 INSTALACIÓN Levante la tapa del anillo decorativo 1.Use un destornillador para soltar los externo y luego hálelo para quitarlo. tornillos de enganche en los costados 3.Inserte ambas llaves suministradas en derecho e izquierdo del frente de la las ranuras en el centro de los costados unidad y retírelos.
- Page 33 CONEXIÓN DEL CABLEADO...
- Page 34 FUNCIONAMIENTO GENERAL ENCENDIDO/APAGADO DE LA UNIDAD TP por varios segundos, la radio re Presione cualquier botón (1) para sintoniza con la siguiente encender la unidad. Cuando el sistema emisora que no tiene la misma (PI) esta encendido, presione el botón que la ultima emisora, pero que para apagar la unidad.
- Page 35 FUNCIONAMIENTO anterior (DIP) se escucha de vez en doble pito (ALARMA) es la salida. cuando, el sonido DIP se escuchará Cuando emisora recién por un corto tiempo. sintonizada no recibe información Modo PI MUTE (SILENCIADO PI): varios segundos, En la misma situación, un silenciado escuchará...
- Page 36 FUNCIONAMIENTO resione el botón MODE (11) brevemente acuerdo con PI SOUND o PI MUTE) para seleccionar el modo radio, luego el puede ser escuchado en la emisora modo radio se mostrará en la pantalla junto AF la cual no tiene señal RDS y de la con la banda de memoria y frecuencia.
- Page 37 FUNCIONAMIENTO Presione botón AS/PS (10) Cuando TA esta encendido, el código brevemente para explorar de identificación del programa de emisoras pre establecidas. Cuando el tráfico no es recibido durante una hora nivel de potencia de campo es mayor especifica. TA ALARM: NO se muestra que el nivel del umbral de parada, la TA / TP y la alarma se desactiva.
- Page 38 FUNCIONAMIENTO MEMORIA DE TIPO DE PROGRAMA MEMORIA DE TIPO DE PROGRAMA MÚSICA DISCURSO NEWA AFFAIRS ROCK INFORMATION SPORT SUAVE EDUCATION LIGERA DRAMA CULTLURE CLASICA SCIENCE OTRA VARIED WEATHER JAZZ FINANCE COUNTRY CHILDREN SOCIAL NACIONAL RELIGION VIEJA PHONE IN TRAVEL FOLCLOR LEISURE DOCUMENT...
- Page 39 FUNCIONAMIENTO FUNCIONAMIENTO REPETIR LA REPRODUCCIÓN REPRODUCCIÓN USB Presione el botón RPT (19) para repetir En el panel frontal de la unidad, hay una continuamente el mismo archivo. interfaz USB (12). Usted puede conectar Presiónelo de nuevo para detener la una unidad USB a través de esta interfaz repetición.
- Page 40 FUNCIONAMIENTO FUNCIÓN DE REINICIO El botón RESET (25) deberá accionarse con un bolígrafo o un objeto metálico delgado. botón RESET deberá accionarse por las siguientes razones: Instalación inicial de la unidad después de realizarse todas las conexiones. Ningún botón función puede utilizarse.
- Page 41 ESPECIFICACIONES GENERAL Requisitos de alimentación eléctrica : DC 12 Voltios, tierra a negativo Dimensiones del chasis : 178 (Ancho) x 107 (Fondo) x 50 (Alto) Controles de tonos Graves (a 100 Hz) : ±10 dB Agudos (a 10 kHz) : ±10 dB Potencia de salida máxima 4x40 watios Corriente de drenaje...
- Page 42 RESOLUCIÓN DE PROBLEMAS Antes de usar esta lista verifique la conexión del cableado. Si cualquiera de los problemas persiste después de la lista de verificación, consulte con su proveedor de servicio más cercano. Síntoma Causa Solución La ignición del vehículo no Si la fuente de alimentación del está...
- Page 43 CS-321 BENUTZERHANDBUCH Tragbares Audiosystem Stereoradio mit PLL-Synthesizer Automatisches Speichern von Sendern RDS-Funktion (Radio Data System) USB-Anschluss SD/MMC-Slot Aux-Eingang for information and support,www.lenco.eu...
- Page 44 INHALT Speichern von Sendern..... 9 Einbau..........3 RDS-Funktion (Radio Data System) . 10 Din vorder-/rückseiteneinbau ....3 USB-Wiedergabe........11 DIN Vordereinbau (Methode A)..... 3 SD/MMC-Betrieb ........12 Einbau des Geräts......3 Technische Daten ....... 13 Herausnehmen des Geräts ....4 Fehlerbehebung........
- Page 45 EINBAU Anmerkungen: (normaler DIN-Vordereinbau) oder von hinten (DIN-Rückseiteneinbau mit Montieren Sie das Gerät an einen Flachgewindeschraubenfassungen an den geeigneten Ort, an dem es nicht die Seiten des Gerätegehäuses) eingebaut normalen Fahrfunktionen des Fahrers werden. Für genauere Informationen, lesen beeinflussen kann. Sie bitte die folgende bebilderte Bevor Gerät...
- Page 46 EINBAU 7.Schieben Gerät 5.Schlitzen an der rechten und linken Einbaurahmen, bis es einrastet. Seitenmitte. Ziehen dann 8.Zur zusätzlichen Befestigung an der Einbaurahmen vom Gerät herunter. Rückseite des Geräts dient der mitgelieferte Metallstreifen. Benutzen Sie Sleeve die mitgelieferten Metallteile (5mm L Key Sechskantmutter und Federscheibe), Outer Trim Ring um das eine Ende des Metallstreifens...
- Page 47 EINBAU Side View showing 9. Schließen Sie das Stromkabel wieder T, N am Minuspol (-) der Autobatterie an. Setzen Sie dann den Außenring zurück Screw auf das Gerät. Herausnehmen des Geräts 1.rgewissern Sie sich, dass die Zündung Screw ausgestellt ist und trennen Sie das Kabel am Minuspol (-) der Autobatterie ab.
- Page 48 KABELANSCHLUSS...
- Page 49 GRUNDLEGENDE BEDIENUNG Wenn ein neu eingestellte Sender für EIN-/AUSSCHALTEN DES GERÄTS mehrere Sekunden keine Betätigen Sie eine beliebige Taste (1), um das Gerät einzuschalten. Wenn das TP-Informationen bekommt, geht das System angeschaltet ist, können Sie es Radio zum nächsten Sender (PI) der durch Betätigung der Taste (1) das über TP-Informationen verfügt.
- Page 50 BEDIENUNG TP-Informationen angibt, wird ein RETUNE L / RETUNE S Alarmsignal ausgegeben. Ersteinstellung automatischen TA- oder PI-Suche ist Wenn die TP-Informationen beim eingestellt. aktuellen Sender verloren gehen, Wenn PI-Informationen nicht bei der wird ein Alarmsignal ausgegeben. Sendersuche gefunden wurden, Wenn ein neu gefundener über startet das Radio eine erneute kein RDS-Signal verfügt, wird PI Suche, um den gleiche PI-Sender zu...
- Page 51 BEDIENUNG momentane AF-Sender, RADIOBETRIEB ausgegeben. UMSCHALTEN IN DEN RADIOBETRIEB Dieses Problem tritt allerdings nur Betätigen Sie die MODE-Taste (11) zur vereinzelt auf und ist in Europa eher Auswahl Radiomodus. selten. Radiomodus wird zusammen mit der - MASK DPI-Modus: Frequenz und dem Frequenzband im Maskiert Display angezeigt.
- Page 52 BEDIENUNG Bei eingeschaltetem TA-Modus, können Frequenz ausgehend bis die Suche die SEEK, SCAN, AUTO, beendet ist. MEMORY-Funktionen nur wenn der Die jeweils stärksten Sender werden Verkehrsprogrammerkennungscode dann unter entsprechenden empfangen wurde, benutzt und Speichernummer gespeichert. gespeichert werden. - Programmsuche Wenn der TA-Modus angeschaltet ist, Betätigung der AS/PS-Taste (10) zur wird der Suche nach gespeicherten Sendern.
- Page 53 BEDIENUNG MUSIKPROGRAMM PROGRAMMINHALT INFORMATIONSPROGR PROGRAMMINHALT NACHRICHTEN POLITIK ROCK INFORMATIONEN SPORT EASY BILDUNG LEICHTE MUSIK DRAMA KULTUR KLASSIK WISSENSCHAFT WEITERES VERSCHIEDENES WETTER JAZZ FINANZ COUNTRY KINDERPROGRAMM SOZIALES NATIONALMUSIK RELIGION OLDIES TELEFONPROGRAM REISE FOLK ENTSPANNUNG DOKUMENTATIONEN...
- Page 54 BEDIENUNG USB-WIEDERGABE DIREKTE MUSIKTITELAUSWAHL An der Gerätevorderseite des Geräts Benutzen Sie die Taste (24) bzw. befindet sich eine USB-Schnittstelle (12). (2), um zum vorigen oder nächsten Sie können ein USB-Laufwerk an dieser Musiktitel springen. Schnittstelle (12) anschließen. Musiktitelnummer erscheint entsprechend Wenn Sie ein USB-Laufwerk am Gerät in der Anzeige.
- Page 55 BEDIENUNG - Bei der Inbetriebnahme, nachdem alle Anschlüsse getätigt wurden. - Keine der Funktionstasten funktioniert. - Eine Fehlermeldung erscheint auf dem Display.Hinweis: Wenn RESET-Taste (25) betätigen und das Gerät danach immer noch nicht funktioniert, verwenden Sie ein mit etwas Isopropylalkohol getränktes Wattestäbchen Reinigung Bedientafelkontakte.
- Page 56 TECHNISCHE DATEN ALLGEMEIN Stromversorgungsanforderungen : DC 12V, Negative Erdung Gehäuseabmessungen : 178 (B) x 107 (T) x 50 (H) Tonausgleich : ±10 dB Bässe (bei 100 Hz) : ±10 dB Höhen (bei 10 kHz) Maximale Ausgangsleistung 4 x 40 W Stromentnahme 15 Ampere (max.) (Starkstromvariante) RADIO...
- Page 57 FEHLERBEHEBUNG Bevor Sie durch diese Fehlerbehebungstabelle gehen, sollten Sie die Verkabelung überprüfen. Wenn das Problem danach immer noch nicht bewältigt werden kann, wenden Sie sich bitte an Ihren Händler. Symptom Ursache Behebung Die Zündung ist nicht an. Wenn Strom richtig Gerät schaltet angeschlossen ist und der nicht an.
- Page 58 CS-321 GBERUIKERSHANDLEIDING Mobiel Audio Systeem PLL Synthesizer Stereo Radio Automatische Geheugen Opslag RDS (Radio Data Systeem) Bediening USB Interface SD/MMC Interface Aux Invoer Functie for information and support,www.lenco.eu...
- Page 59 INHOUDSOPGAVE Automatische geheugenopslag & Installatie ..........3 programma zoeken ......9 DIN montage voorzijde (Methode A)..3 Zenders opslaan ....... 10 Installeren van het apparaat....3 RDS (radio data systeem) bediening 10 DIN montage achterzijde (Methode B).. 4 USB afspelen........11 Draadverbindingen......
- Page 60 INSTALLATIE Opmerkingen: DIN MONTAGE VOOR- / ACHTERZIJDE Bevestig het apparaat op een plek waar het de bestuurder niet stoort. Dit apparaat kan zowel aan de Sluit de bedrading tijdelijk aan voorkant geïnstalleerd worden voordat u het apparaat definitief (conventionele DIN voorzijde montage) installeert en controleer of alles als aan de achterkant (DIN achterzijde goed...
- Page 61 INSTALLATIE 4. De twee bijgeleverde Dashboard verwijdersleutels zitten in de hoes Tabs van de unit geschoven, trek ze eruit. Voer de sleutels zo ver mogelijk in (met de inkepingen naar boven) in Screwdriver daarvoor bedoelde sleuven midden op de zijkanten links en rechts van het apparaat.
- Page 62 INSTALLATIE Gebruik de met T (Toyota) of N (Nissan) Spring Washer Hex Nut gemarkeerde schroefgaten aan beide Metal Strap kanten van de unit, om hem vast te Mounting Bolt maken aan de montagebeugels die in Plain Washer Tapping Screw auto geleverd zijn.
- Page 63 DRAADVERBINDINGEN...
- Page 64 ALGEMENE BEDIENING SEEK of TA ALARM AAN/UIT ZETTEN TA SEEK stand: APPARAAT U kunt op elke knop drukken om het Wanneer een nieuw afgestemde apparaat aan te zetten. Als de unit al zender enkele seconden geen aanstaat, drukt u op de knop (1) om TP informatie ontvangt, zal de het apparaat uit te zetten.
- Page 65 BEDIENING - PI SOUND stand: standen niet geactiveerd. Alleen Als een verschillend PI geluid een dubbel piepgeluid (ALARM) (DIP) eens in de zoveel tijd is de uitvoer. gehoord wordt, dan is kort het nieuw afgestemde DIP geluid te horen. zender enkele seconden geen PI MUTE mode: TP informatie heeft, klinkt de In dezelfde als bovengenoemde...
- Page 66 BEDIENING AUX INVOER aarzelen om naar echte AF’s te Op het apparaat kan een draagbare zoeken. Om deze reden heeft het audio speler worden aangesloten door apparaat gebruikers optie de AUX IN stekkeringang (13). (MASK DPI) die niet de AF of GEEN RDS signaal met hoge veld USB INTERFACE sterkte verbergt.
- Page 67 BEDIENING Druk een paar seconden op de Wanneer verkeersaankondigingen AS/PS knop (10) en de radio zoekt worden uitgezonden, ongeacht de vanaf de huidige frequentie en stand waar de radio in staat, controleert signaalsterkte worden ze door de radio ontvangen. helemaal rond. De sterkste signalen Als TA aan staat, kunnen de worden opgeslagen...
- Page 68 BEDIENING Druk 2 seconden op SEL → TA SEEK / ALARM → RETUNE L / RETUNE S → PI SOUND / MUTE → ON/OFF MUZIEK GEHEUGEN PROGRAMMA TYPE SPEECH PROGRAMMA TYPE GEHEUGEN NIEUWS AFFAIRS ROCK INFORMATIE EASY SPORT EDUCATIE LIGHT DRAMA KLASSIEK CULTLUUR...
- Page 69 BEDIENING AFSPELEN HERHALEN BEDIENING VOOR AFSPELEN Druk op de RPT knop (19) om dezelfde steeds herhalen. Druk nogmaals in om het herhalen te laten Op het voorpaneel van het apparaat zit ophouden. een USB interface (12). U kunt een USB apparaatje aansluiten op deze WILLEKEURIG VOLGORDE interface (12).
- Page 70 BEDIENING RESET FUNCTIE De RESET knop (25) moet geactiveerd worden met ofwel een balpen of een dun metalen voorwerp. De RESET knop moet worden geactiveerd om de volgende redenen: - Initiële installatie van het apparaat, wanneer alle bedrading afgerond is. - Alle functieknoppen werken niet.
- Page 71 SPECIFICATIES ALGEMEEN Stroomtoevoer vereisten : DC 12 Volts, Negatief geaard Chassis afmetingen : 178 (W) x 107 (D) x 50 (H) Toon regulering : ±10 dB Bass (bij 100 Hz) : ±10 dB Treble (bij 10 kHz) Maximum uitvoervermogen 4x40 watt Current Drain 15 Ampere (max.) (voor hoge stroom Versie) RADIO...
- Page 72 PROBLEEM OPLOSSEN Controleer voor u de checklist hieronder bekijkt of alle verbindingen goed zijn. Als een probleem zich blijft voordoen na het bekijken van de checklist hieronder, raadpleeg dan de dichtstbijzijnde service dealer. Verschijnsel Oorzaak Oplossing Het contactslot van de stroomtoevoer Geen stroom auto is niet aan.
- Page 73 CS-321 INSTRUKCJA OBSŁUGI Samochodowy System Audio Radiowy Syntezator Stereofoniczny PLL Funkcja Automatycznego Przechowywania Pamięci Obsługa RDS (System Danych Radiowych) Port USB Port Kart Pamięci SD/MMC Funkcja Wejścia Pomocniczego Informacje oraz pomoc uzyskasz na stronie internetowej www.lenco.eu...
- Page 74 SPIS TREŚCI Automatyczne przechowywanie pamięci MontaŜ ..........3 ............. 9 MontaŜ kieszeni przedniej DIN (Metoda A) Skanowanie programów ....... 9 .............. 3 Przechowywanie stacji ......9 Instalacja urządzenia......3 Obsługa RDS (system danych radiowych) DemontaŜ urządzenia ....... 4 ............. 9 MontaŜ...
- Page 75 MONTAś DIN) lub na ”Tylniej stronie” (Tylni montaŜ Informacje: kieszeni DIN wymaga wywiercenia 1. Zamontuj urządzenie w takim miejscu, otworów na śruby na bocznych stronach aby nie przeszkadzało ono kierowcy podwozia). Spójrz na następujące ilustracje podczas normalnych czynności metod montaŜu, aby uzyskać szczegóły. związanych z kierowaniem pojazdu.
- Page 76 MONTAś umieszczonych na środkowej lewej i prawej stronie urządzenia. Następnie Dashboard wysuń obudowę z tylniej strony Tabs urządzenia. Outer Trim Ring – Zewnętrzna Ozdobna Screwdriver Pokrywa L Key –Lewy Klucz R Key – Prawy Klucz Sleeve – Obudowa Sleeve Sleeve 5.
- Page 77 MONTAś urządzeniu właściwe uziemienie elektryczne. Pamiętaj tym, Ŝeby 4. WłóŜ dołączone klucze zamontować krótką końcówkę do bolca otworów umieszczonych na środkowej montaŜowego znajdującego się na tylniej lewej i prawej stronie urządzenia a stronie urządzenia a drugą dłuŜszą następnie wysuń urządzenie z tablicy końcówkę...
- Page 78 MONTAś Side View showing T, N Screw Screw Dashboard or Console Hook Przymocowywanie urządzenia fabrycznych wsporników montaŜowych radia. 1. UŜyj śrubokręta, aby poluzować śruby na uchwytach znajdujących się na przedniej lewej prawej stronie urządzenia i wyjąć uchwyty. 2. Wyrównaj otwory śrub na wsporniku z otworami śrub na urządzeniu i dokręć...
- Page 79 PODŁĄCZANIE PRZEWODÓW...
- Page 80 OBSŁUGA TA SEEK or ALARM→PI SOUND or MUTE→ WŁĄCZANIE /WYŁĄCZANIE RETUNE L or S→ MASK DPI or ALL→ BEEP URZĄDZENIA 2’nd,ALL or OFF Wciśnij przycisk włączyć a).TA SEEK lub ALARM urządzenie, Podczas gdy system jest Tryb TA SEEK: włączony wciśnij przycisk X (1), aby Jeśli nowo ustawiona stacja nie odbiera wyłączyć...
- Page 81 OBSŁUGA -Tryb TA ALARM - W takich szczególnych przypadkach Jeśli tryb został wybrany, moŜna wybrać pomiędzy 2 trybami, wówczas Ŝaden automatyczny tryb zgodnie z poniŜszym rysunkiem: przestrajania nie jest aktywny. Wyłącznie podwójne sygnały dźwiękowe (ALARM) są odtwarzane. Jeśli nowo ustawiona stacja nie odbiera informacji TP przez kilka PI: C201 PI: XXX...
- Page 82 OBSŁUGA ukryta podczas sprawdzania PI, w Ukrywa częstotliwości które chwili urządzenie wyszukuje posiadają inny kod PI a sygnał NO częstotliwości Urządzenie posiada duŜe pole wyszukuje niniejszej częstotliwości AF elektromagnetyczne. (DIP) przez kilka minut. W przypadku e) BEEP odebrania częstotliwości AF lub NORDS Tryb WŁĄCZENIA/WYŁĄCZENIA SYGNAŁY DŹWIĘKOWE...
- Page 83 OBSŁUGA CZĘSTOTLIWOŚCI Wciśnij krótko przycisk BAND (4), aby poziom progowy poziomu zatrzymania, wybrać poŜądane pasmo. Odbierane wówczas radio będzie ustawione na tym pasmo będzie się zmieniało w następującej numerze zapisu przez kilka sekund z kolejności: włączonym tłumieniem, a następnie ponownie rozpocznie wyszukiwanie. WYBIERANIE STACJI PRZECHOWYWANIE STACJI Wciśnij...
- Page 84 OBSŁUGA kodu identyfikacyjnego programu MÓWIONE emitującego informacje ruchu PROGRAM TYPE drogowym. PROGRAMU Jeśli funkcja TA jest włączona, RDS OPTION - OPCJA RDS WCIŚNIJ 2 SEKUNDY – SEL => TA wówczas kod identyfikacyjny programu SEEK => ALARM => RETUNE L => emitującego informacje ruchu...
- Page 85 OBSŁUGA ZAPROGRAMO ZAPROGRAMO TYP PROGRAMU WANE PROGRAMU WANE PROGRAMY PROGRAMY MUZYCZNE MÓWIONE MUZYKA NAJŚWIEśSZE ROZRYWKO INFORMACJE PUBLICYSTYCZNY MUZYKA ROCKOWA INFORMACYJNY MUZYKA SPORTOWY ŁATWA EDUKACYJNY MUZYKA LEKKA DRAMAT MUZYKA KULTURALNY KLASYCZNA NAUKOWY INNA RÓśNORODNY MUZYKA PROGNOZA JAZZOWA POGODY FINANSOWY MUZYKA COUNTRY DLA DZIECI MUZYKA SPOŁECZNY...
- Page 86 OBSŁUGA OBSŁUGA USB POWTARZANIE ODTWARZANIA Na przednim panelu urządzenia znajduje Wciśnij przycisk RPT (19), aby ciągle się port USB (12). MoŜesz podłączyć odtwarzać ten sam utwór. Wciśnij przycisk urządzenie USB do tego portu (12). ponownie, aby wstrzymać powtarzanie. Gdy podłączysz urządzenie USB do portu, urządzenie wyszuka plików MP3 lub WMA ODTWARZANIE W KOLEJNOŚCI urządzeniu...
- Page 87 OBSŁUGA Gdy na karcie SD/MMC znajdują się waŜne pliki, wówczas nie podłączaj karty do urządzenia. Funkcja RESET Przycisk RESET (25) musi byc wciśniety przy pomocy ciekiego wkladu. Ten przycisk aktywuj przy nastepujacych komunikatach. -Instalacja urzadzenia zostala zakonczona -Kiedy funcjonowanie przyciskow jest nieprawidlowe -Pojawi sie symbol Error na wysfietlaczu.
- Page 88 DANE TECHNICZNE OGÓLNE Zasilanie DC12 Volt, Ujemne Uziemienie Wymiary Urządzenia 178 (SZ) x 107 (G), x 50 (W) Kontrola Tonów - Niskie Tony (przy 100 kHz) : X 10dB - Wysokie Tony (przy 10 kHz) : X 10dB Maksymalna Moc Wyjścia 4x40 Wat ZuŜycie Prądu - 15 Amperów (maks.)
- Page 89 ROZWIĄZYWANIE PROBLEMÓW Przed sprawdzeniem poniŜszej listy problemów sprawdź podłączenia przewodów. Jeśli jeden z problemów wciąŜ występuje po sprawdzeniu poniŜszej listy, skonsultuj się z najbliŜszym sprzedawcą Problem Przyczyna Rozwiązanie Brak zasilania Stacyjka samochodu Jeśli zasilanie jest podłączone jest wyłączona. obiegu elektrycznego obsługującego akcesoria Bezpiecznik...
- Page 90 800-0C3023-01...
Need help?
Do you have a question about the CS-321 and is the answer not in the manual?
Questions and answers