Advertisement
Quick Links
BEFORE YOU START
Carefully read these instructions and refer to them constantly during each stage of construction. If you do not have all the necessary
tools or information contact Stratco for advice. Before starting, lay out all components and check them against the delivery docket.
The component description identifies each key part and the component layout diagram indicates their fastening position.
Double check all dimensions, levels and fixing locations before cutting or fastening componentry. It is recommended that the
installers erecting the structure have had some previous building experience.
IMPORTANT NOTE:
There are two Stratco Ezi-Slat Fencing options available.
Engineered Fence Solution:
Design fence loading determined in accordance with ASCE/SEI 7-10: Minimum Design Loads for Buildings and other structures.
Non-Engineered Panels:
Suitability of the slat supporting structure has not been considered and the installer is responsible for ensuring the supporting
structure is capable of sustaining imposed loading. If in doubt, seek professional engineering advice.
Note:
Ezi-Slat horizontal panels are not designed as a balustrade or railing system.
TOOLS REQUIRED
•
Drill
• 1/8" (3mm) and 1/4" (6mm) drill bits
• 25/64" (10mm) masonry drill bit
• Phillips head driver
• Hex head driver
• Rubber mallet
• Tape Measure
• String line
• Spirit Level
• Saw (either a drop saw with a fine-tooth blade or hacksaw)
• Manual or mechanical auger
STRATCO EZI-SLAT FENCING
ADDITIONAL ITEMS
The components supplied do not include fixings to attach
the unit to an existing structure or concrete/masonry
anchors for the column installation. If required they must be
purchased as additional items.
INSTALLATION GUIDE
INSTALLATION GUIDE
Advertisement

Related Manuals for Stratco Fence Sanctuary Ezi-Slat Fencing


Summary of Contents for Stratco Fence Sanctuary Ezi-Slat Fencing
- Page 1 Carefully read these instructions and refer to them constantly during each stage of construction. If you do not have all the necessary tools or information contact Stratco for advice. Before starting, lay out all components and check them against the delivery docket.
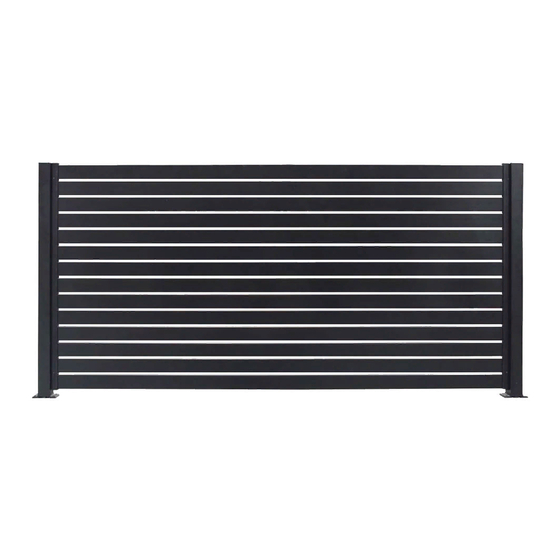
- Page 2 STRATCO EZI-SLAT FENCING INSTALLATION GUIDE COMPONENTS Post Post Cap Post Base Plate Spacer Aluminum or Steel SHS Aluminum or Steel SHS Rail Packer Receiving Rail Receiving Rail Cap Slat - Plain Slat - Reinforced 10g x 5/8” (16mm) Hex 12g x 11/2”(39mm) Hex 8g x 11/5”...
- Page 3 PANEL COMPONENT DIAGRAM 8g x 11/5” (30mm) COUNTERSUNK SCREWS RECEIVING RAIL CAPS RECEIVING RAIL SPACER SLAT...
- Page 4 Tables suitable for use for fencing with aspect ratio (i.e. environments, increased inspection and maintenance is Fence Length over Height) of 2 or more. required, refer to the ‘Stratco Product Maintenance - Severe Post grade (minimum): Yield: 50750 PSI (350MPa) Environment Considerations’ brochure.
- Page 5 FOOTINGS PANEL ONLY Footings shall be founded in natural soil only. Concrete shall For Ezi-Slat being used in ‘Panel Only’ applications, i.e. have a minimum strength of 3000 PSI. The top of footings secured between timber, steel or brickwork structural shall be shaped to direct water away from the base of posts supports designed by others the following panel spans are and steel contact with moisture retaining material such as...
- Page 6 STRATCO EZI-SLAT FENCING INSTALLATION GUIDE INSTALLING POSTS Final layer Bitumen Paint POST LOCATIONS shaped to required for slope away Aluminum Posts Determine the location for the Ezi-Slat Fence using a temporary from posts. string line (Figure 1.0). Measure and mark the required distance between posts.
-
Page 7: Panel Assembly
PANEL ASSEMBLY PRE-DRILL RECEIVING RAIL Post Measure and mark the holes for mounting the Receiving Base Plate Rail to the posts. The top and bottom holes are to be a maximum of 4/5” (20mm) from the end of the rail. The remaining holes are to be spaced evenly at a maximum of 18”... - Page 8 STRATCO EZI-SLAT FENCING INSTALLATION GUIDE FIX RECEIVING RAIL TO POST Spacer Screw the receiving rail onto the post using 10g x 4/5” (20mm) wafer head screws through the pre-drilled holes (Figure 2.2). Post* Receiving Rail Receiving Rail 10g x ⁄...
-
Page 9: Gate Assembly
GATE ASSEMBLY GATE INSTALLATION SLAT INSTALLATION HINGE INSTALLATION Screw the bottom Receiving Rail Caps into the pre- Measure and mark the required locations of the gate drilled Gate Receiving Rails using 8g x 11/5” (30mm) hinges as per the hinge manufacturer’s instructions. Rail countersunk screws. -
Page 10: Maintenance
‘Selection, Use and Maintenance’ brochure for more information. « SCAN THIS QR CODE TO FIND A STRATCO NEAR YOU (407) 915-7442 stratcousa.com All brands and logos/images accompanied by ® or ™ are trade marks of Stratco (Australia) Pty Limited. ® Copyright December 2020...
Need help?
Do you have a question about the Fence Sanctuary Ezi-Slat Fencing and is the answer not in the manual?
Questions and answers