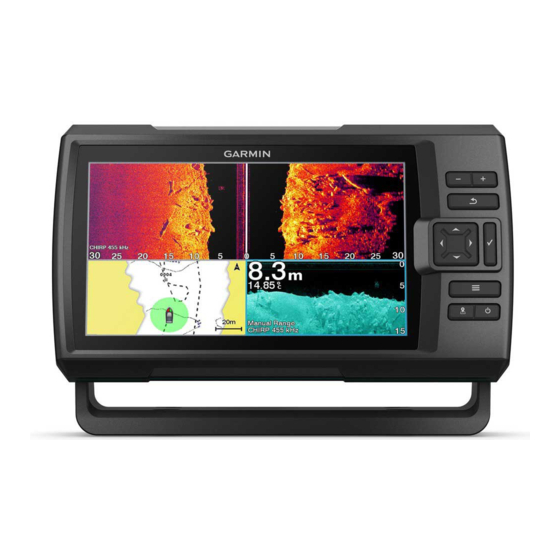
Garmin STRIKER VIVID Owner's Manual
Hide thumbs
Also See for STRIKER VIVID:
- User manual ,
- Owner's manual (41 pages) ,
- Owner's manual (41 pages)
Table of Contents
Advertisement
Advertisement
Table of Contents

Related Manuals for Garmin STRIKER VIVID


Summary of Contents for Garmin STRIKER VIVID
- Page 1 STRIKER VIVID ™ Owner’s Manual...
- Page 2 © 2020 Garmin Ltd. or its subsidiaries All rights reserved. Under the copyright laws, this manual may not be copied, in whole or in part, without the written consent of Garmin. Garmin reserves the right to change or improve its products and to make changes in the content of this manual without obligation to notify any person or organization of such changes or improvements.
- Page 3 Sonar Appearance Settings ........... 6 Sharing and Managing User Data....... 12 Sonar Noise Rejection Settings ..........6 Connecting to a Garmin Device to Share User Data ....12 Overlay Number Settings ............7 User Data Sharing Cable Wiring Diagram ......13 Garmin Quickdraw Contours Mapping......
-
Page 5: Device Keys
Returns to the home screen when held. Scrolls, highlights options, and moves the cursor. Zooms in and out of a view. Zooming on the STRIKER Vivid 4 Closes a menu, when applicable. Opens a menu of options for the page, when applicable. -
Page 6: Adjusting The Backlight
® technology. • To change the name, select Name, and enter a new You can connect a mobile device to the STRIKER Vivid device name. using the ActiveCaptain app. The app provides a quick and easy • To change the arrangement of the information on the way for you to interact with your chartplotter and complete such screen, select Change Layout, and select a new layout. -
Page 7: Updating Software With The Activecaptain App
The ActiveCaptain app downloads the update to the mobile similar to the shape of the beam in a copying machine. These device. When you reconnect the app to the STRIKER Vivid beams provide a clearer, picture-like image of what is beneath device, the update is transferred to the device. -
Page 8: Split-Screen Frequency
This device is compatible with a range of accessory transducers, including Garmin ClearVü transducers, which are available at garmin.com/transducers. Select Settings > My Vessel > Transducer Type. Select an option: •... -
Page 9: Adjusting The Zoom
definition and thermocline definition can be better when using a From a sonar screen, select > Zoom. higher frequency. Select an option: Lower frequencies use wider beam widths, which can let the • Select Bottom Lock to lock the screen to the water fisherman see more targets, but could also generate more bottom. -
Page 10: Sonar Setup
> Sonar Setup > aspect ratio and appear less distorted. When viewing Appearance > Fish Symbols. Garmin ClearVü or SideVü sonar views, it is recommend Select an option. to use the Auto setting. • To use a very fast scroll speed, select Ultrascroll ®... -
Page 11: Garmin Quickdraw Contours Mapping
Contours Map This control is best used for situations when you want to You can add labels to a Garmin Quickdraw Contours map to control and suppress clutter or noise near the water surface. mark hazards or points of interest. -
Page 12: Map Settings
From the ActiveCaptain app on your mobile device, select Sync with Plotter > Contribute to Community. The next time you connect the ActiveCaptain app to the STRIKER Vivid device, your contour maps are transferred to the community automatically. From 0 to 1.5 m (from 0 to 5 ft.) Orange From 1.5 to 3 m (from 5 to 10 ft.) -
Page 13: Stopping Navigation
If you are off course, follow the purple line (corrected course) Select User Data > Manage Data > Clear User Data > to go to your destination, or steer back to the magenta line Waypoints > All. (direct course). Navigation with the STRIKER Vivid... - Page 14 • Select Entire Log. You can indicate the frequency at which the track plot is Viewing a List of Saved Tracks recorded. Recording more frequent plots is more accurate but Select User Data > Tracks > Saved Tracks. Navigation with the STRIKER Vivid...
-
Page 15: Device Configuration
Garmin Devices: Provides information about connected Garmin Setting the Water Temperature Offset devices. You can set the temperature offset to compensate for the Reset: Restores the device to factory settings. -
Page 16: Sharing And Managing User Data
User Data detected. You can connect the STRIKER Vivid device to a compatible Unit Settings Garmin device to share user data, such as waypoints. If the devices are mounted near each other, you can connect the blue Select Settings >... -
Page 17: Specifications
Go to my.garmin.com/registration. Even if the cable seems to be connected, you should push Sign in to your Garmin account. firmly so that it is fully seated. Enter the serial number. • Press , and ensure sonar is enabled. - Page 18 Map datum is a math model which depicts a part of the surface of the earth. Latitude and longitude lines on a paper map are referenced to a specific map datum. Find out which map datum and position format was used when the original waypoint was created.
- Page 19 5 gain 5 factory settings 11, 12 Garmin ClearVü 3 fishfinder. See sonar interference 6 SideVü 4 surface noise 6 Garmin ClearVü 3 suspended targets 6 To 8 views 3–5 GPS 13 waypoint 5 settings 11 zoom 4, 5 signals 1 SOS 9...
- Page 20 November 2020 GUID-C3C9935A-44AD-4A64-8690-B6176625C6BC v1...
- Page 27 • STRIKER Vivid 5: 30 cm (11.8 in.) • STRIKER Vivid 7: 40 cm (15.75 in.) • STRIKER Vivid 9: 45 cm (17.7 in.) • Compass Safe Distance • Distance de sécurité du compas • Distanza di sicurezza dalla bussola •...
- Page 28 Push cables FIRMLY. Not all models have three connectors. Poussez les câbles FERMEMENT. Tous les modèles ne disposent pas de trois connecteurs. Inserire SALDAMENTE i cavi. Non tutti i modelli hanno tre connettori. ➊ ➊ Drücken Sie die Kabel FEST ein. Nicht alle Modelle verfügen über drei Anschlüsse.
-
Page 29: Installation Instructions
To obtain the best performance and to avoid damage to your star washers , and screws boat, you must install the Garmin device according to these ® instructions. Read all installation instructions before proceeding with the installation. -
Page 30: Testing The Installation
Installing the Transom-Mount Hardware If you marked a pilot hole in step 7, choose the appropriate drill bit to drill a pass-through hole completely through the NOTICE transom: If you are mounting the bracket on fiberglass with screws, it is •... -
Page 31: Software Update
Windows ® software. Assembling the Trolling Motor Mount NOTE: You can contact Garmin customer support to order a Using the 8 mm M4 screws and 4 mm star washers preloaded software update card if you do not have a computer... - Page 32 Garmin ® and the Garmin logo are trademarks of Garmin Ltd. or its subsidiaries, registered in the USA and other countries. These trademarks may not be used without the express permission of Garmin. Windows ® is a registered trademark of Microsoft Corporation in the United States and other countries.
- Page 34 Правила техники безопасности и сведения об изделии 15 produto Važne informacije o proizvodu i sigurnosti Belangrijke veiligheids- en productinformatie Σημαντικές πληροφορίες για την ασφάλεια και το προϊόν Vigtige produkt- og sikkerhedinformationer 重要安全和产品信息 April 2017 190-00720-32_0F © 2013–2017 Garmin Ltd. or its subsidiaries...
- Page 35 This device does not relieve you from the of any country. Garmin navigation products are intended to be used only as a travel aid and must not responsibility of safely operating your vessel. Avoid navigational hazards and never leave the helm be used for any purpose requiring precise measurement of direction, distance, location or topography.
Need help?
Do you have a question about the STRIKER VIVID and is the answer not in the manual?
Questions and answers