
Related Manuals for MrPEX SALUS ST880ZB Optima Zigbee


Summary of Contents for MrPEX SALUS ST880ZB Optima Zigbee
- Page 1 CONNECTED WIRELESS SYSTEM GUIDE MODULE 3 – Wireless HVAC Thermostats SMC-GM-WCSG-M4-2019.10v1_2019-11-10...
-
Page 2: Table Of Contents
System Overview . . . . . . . . . . . . . . . . . . . . . . . . . . . . . . . . . . . . . . . . . . . . . . . . . . . . . . . . . . . . . . . . . . . . . . . . . . . . . . . . . . . . . . . . .1-2 Salus ST880ZB Optima Zigbee Thermostat Included Parts / Installation Tools . -
Page 3: Using This Manual
Wireless Products without requiring customers to download unnecessary ® documentation, the Wireless System Guide has been divided into 5 volumes. Volume 1 is required for all wireless systems since it covers installation of the Gateway and the MrPEX Smart Home application. ®... -
Page 4: System Overview
If the internet connection is interrupted or dis connected, the HVAC component will continue to operate together. By connecting the Gateway to your home network, the system is connected to the worldwide web. Monitor or adjust your HVAC system from anywhere via the MrPEX Smart Home application. If the ®... -
Page 5: Salus St880Zb Optima Zigbee Thermostat
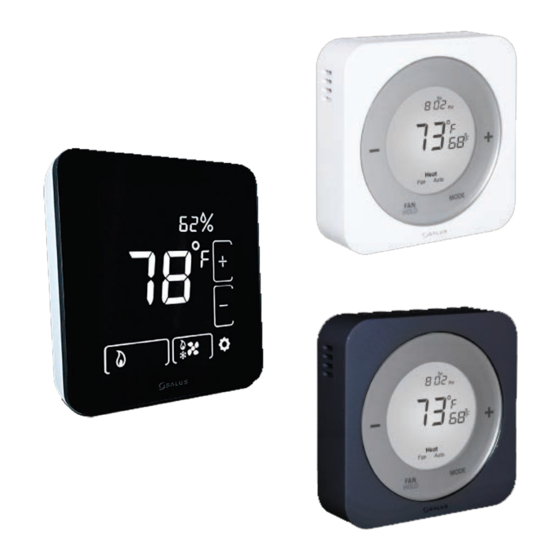
MODULE 3 – WIRELESS HVAC THERMOSTATS SECTION 2 SALUS ST880ZB OPTIMA ZIGBEE THERMOSTAT INCLUDED PARTS Thermostat with Trim Plate Screws & Anchors Mounting Plate Optima Thermostat Wire Labels AA Alkaline Optima Thermostat User Manual Batteries Quick Start Guide Tools Required... -
Page 6: Installation - Mounting & Wiring
(Non-HP) and heat pump (HP) installations. Appendix A provides reference wiring diagrams for typical thermostat installations. TABLE 2.1: SALUS ST880ZB OPTIMA ZIGBEE THERMOSTAT WIRING REFERENCE GAS, ELECTRIC OR OIL (NON-HP) - Page 7 MODULE 3 – WIRELESS HVAC THERMOSTATS SECTION 2 SALUS ST880ZB OPTIMA ZIGBEE THERMOSTAT To cover screw holes or paint disturbance from the Use the wall anchors and screws supplied with the old thermostat, install the Trim Plate between the Optima Thermostat to attach the Mounting Plate wall and the Mounting Plate.
- Page 8 MODULE 3 – WIRELESS HVAC THERMOSTATS SECTION 2 SALUS ST880ZB OPTIMA ZIGBEE THERMOSTAT Step 7. Configure the initial parameters • After the batteries are inserted, all segments will be briefly displayed on the LCD screen. • Next, the firmware version number will be displayed Country Selection •...
-
Page 9: Controls & Display
MODULE 3 – WIRELESS HVAC THERMOSTATS SECTION 2 SALUS ST880ZB OPTIMA ZIGBEE THERMOSTAT • Align connector pins and retention posts • Push the Thermostat onto the Mounting Plate • BE SURE that the connector pins are not bent • BE SURE that the Thermostat is FULLY SEATED on the Mounting Plate Turn on the power to the HVAC System. -
Page 10: Home Screen
MODULE 3 – WIRELESS HVAC THERMOSTATS SECTION 2 SALUS ST880ZB OPTIMA ZIGBEE THERMOSTAT HOME SCREEN The display returns to the default Home Screen after 3 seconds of inactivity. DISPLAY INDICATOR DESCRIPTION Room Temperature Room temperature at the thermostat sensor Indicates the state of the appliance... -
Page 11: Pairing Instructions
MODULE 3 – WIRELESS HVAC THERMOSTATS SECTION 2 ST880ZB OPTIMA ZIGBEE THERMOSTAT PAIRING INSTRUCTIONS While the Optima Zigbee Thermostat doesn’t need to be installed to be paired with a Universal Gateway, it should be at or near the intended installation location to account for potential signal interference. - Page 12 MODULE 3 – WIRELESS HVAC THERMOSTATS SECTION 2 SALUS ST880ZB OPTIMA ZIGBEE THERMOSTAT Step 5. Open the MrPEX Smart Home application, select the drop-down menu from the upper right of the ® screen and select: All Devices Add New Device ...
- Page 13 MODULE 3 – WIRELESS HVAC THERMOSTATS SECTION 2 SALUS ST880ZB OPTIMA ZIGBEE THERMOSTAT Step 8. Enter a unique descriptive Step 9. Press “Please click here to Step 10. Choose from setup name to identify each device. setup”. options specific to the device.
-
Page 14: Time & Date
MODULE 3 – WIRELESS HVAC THERMOSTATS SECTION 2 SALUS ST880ZB OPTIMA ZIGBEE THERMOSTAT TIME & DATE The ST880ZB Optima Thermostat should be configured by an experienced or authorized installer. TABLE 2.1: TIME ZONES Newfoundland Standard Time Atlantic Standard Time Eastern Standard Time... -
Page 15: Settings
MODULE 3 – WIRELESS HVAC THERMOSTATS SECTION 2 SALUS ST880ZB OPTIMA ZIGBEE THERMOSTAT Step 6. When DATE is Step 7. Set the Day (D) and Year Step 8. Use the +/- buttons to displayed, the Month value (M) (Y) similarly, pressing MODE to toggle between DST ON and DST begins flashing. -
Page 16: Firmware Update
MODULE 3 – WIRELESS HVAC THERMOSTATS SECTION 2 SALUS ST880ZB OPTIMA ZIGBEE THERMOSTAT TABLE 2.2: SALUS ST880ZB OPTIMA ZIGBEE THERMOSTAT – SETTINGS United States of America Country Canada O – Rev Valve Energized in Cooling (default) B – Rev Valve... -
Page 17: Factory Reset
MODULE 3 – WIRELESS HVAC THERMOSTATS SECTION 2 SALUS ST880ZB OPTIMA ZIGBEE THERMOSTAT FACTORY RESET When resetting the Optima Thermostat to its factory default settings, it is necessary to delete the device from the MrPEX ® Smart Home Application. Step 1. Choose tile icon Step 2. -
Page 18: Salus St898Zb Optima S Thermostat
MODULE 3 – WIRELESS HVAC THERMOSTATS SECTION 3 SALUS ST898ZB OPTIMA S THERMOSTAT INCLUDED PARTS Thermostat with Trim Plate Screws & Anchors Mounting Plate Optima S Thermostat Wire Labels AA Alkaline Optima S Thermostat User Manual Batteries Quick Start Guide TOOLS REQUIRED Power Drill (Optional) -
Page 19: Installation - Mounting & Wiring
(Non-HP) and heat pump (HP) installations. Appendix A provides reference wiring diagrams for typical thermostat installations. TABLE 2.1: SALUS ST880ZB OPTIMA ZIGBEE THERMOSTAT WIRING REFERENCE Gas, Electric or Oil (Non-HP) - Page 20 MODULE 3 – WIRELESS HVAC THERMOSTATS SECTION 3 SALUS ST898ZB OPTIMA S THERMOSTAT Step 4. Install the Mounting Plate. Use the wall anchors and screws supplied with To cover screw holes or paint disturbance from the Optima Thermostat to attach the Mounting the old thermostat, install the Trim Plate between Plate to the wall, making sure the wires go the wall and the Mounting Plate.
-
Page 21: Display Boot Sequence
When the Thermostat finds a network, times out after 10 minutes or pairing is cancelled by the user, the timer will begin Initial Configuration, described later in Section 3. Step 1. Open the MrPEX Smart Home application, select the drop-down menu from the upper right ®... - Page 22 MODULE 3 – WIRELESS HVAC THERMOSTATS SECTION 3 SALUS ST898ZB OPTIMA S THERMOSTAT Step 2. Press Scan Devices. After pressing “Scan Devices”, Step 3. Choose the check box the MrPEX Smart Home that corresponds to the device to ® application scans for devices. pair.
-
Page 23: Initial Configuration
MODULE 3 – WIRELESS HVAC THERMOSTATS SECTION 3 SALUS ST898ZB OPTIMA S THERMOSTAT Step 7. Press “Finish” to complete pairing. INITIAL CONFIGURATION After pairing is complete, the Salus ST898ZB Thermostat begins a configuration procedure • When the screen is displayed, use the +/- buttons to toggle between to select country in which the thermostat is installed. - Page 24 MODULE 3 – WIRELESS HVAC THERMOSTATS SECTION 3 SALUS ST898ZB OPTIMA S THERMOSTAT HEAT PUMP OPTIONS • If is selected, the following options are available by pressing +/- O/B reversing valve terminal energized for cooling O/B reversing valve terminal energized for heating •...
-
Page 25: Home Screen & Controls
MODULE 3 – WIRELESS HVAC THERMOSTATS SECTION 3 SALUS ST898ZB OPTIMA S THERMOSTAT HOME SCREEN & CONTROLS INDICATOR DESCRIPTION MODE Message Display Alphanumeric status display Simple/Full Time Display Time in 12- or 24-hour format if provided by the NETWORK Full Main Temperature Display Room temperature or setpoint as require Simple/Full... -
Page 26: Operation
Without further configuration, the Optimal S Thermostat can be used as a manual thermostat. To access enhanced features, additional settings must be configured. See Configuring the Thermostat later in this section for more details. The MrPEX Smart Home system can be used to set up a schedule on the device. -
Page 27: Configuration
MODULE 3 – WIRELESS HVAC THERMOSTATS SECTION 3 SALUS ST898ZB OPTIMA S THERMOSTAT CONFIGURATION Instructions for Thermostat configuration are intended for qualified installation/service professionals. Do not make adjustments without a thorough understanding of the HVAC system. Pressing the Settings Icon will begin cycling through all available configuration settings and three setup functions. - Page 28 MODULE 3 – WIRELESS HVAC THERMOSTATS SECTION 3 SALUS ST898ZB OPTIMA S THERMOSTAT SETTINGS / FUNCTIONS (CONTINUED): 6 - Frost Protection 7 - Temperature Offset Temperature below which the thermostat will call for heat Temperature added to measured temperature to regardless of mode.
-
Page 29: Remote Thermostat Operation & Parameters
Wireless System Guide provides information about downloading ® and using the MrPEX Smart Home application from your computer or smart device. ® Step 1. Press On the MrPEX Step 2. When the tile flips, Step 3. Choose the setup icon ® Smart Home dashboard, click choose the device description to access parameters. -
Page 30: Schedules & Status Options
Status to determine the temperatures. This process is the same for both the Salus ST880ZB, Optima, and Salus ST898ZB, Optima S, Thermostat. The following shows how to change between Schedule (the default value) and Status. Step 1. On the MrPEX Smart Step 2. When the tile Step 3. - Page 31 Use a similar process to change back to “Linked to Schedule”. Individual thermostats can be set differently if accessed from the menu under Status. SCHEDULE SETUP – SMART HOME Step 1. On the MrPEX Step 2. When the tile Step 3. Scroll down to the Smart ®...
- Page 32 MODULE 3 – WIRELESS HVAC THERMOSTATS SECTION 4 REMOTE THERMOSTAT OPERATION & PARAMETERS Step 4. Choose the icon To duplicate a schedule of another thermostat on the network, press “Duplicate schedule”. A list of thermostats available to to edit the schedule. duplicate, similar to the above, will appear.
- Page 33 “Save”. on the type of schedule. STATUS FOR THERMOSTAT CONTROL – SMART HOME Step 3. Choose a status Step 1. On the MrPEX Smart Step 2. Scroll down to the Status ® for which to change the Home dashboard, click menu.
- Page 34 MODULE 3 – WIRELESS HVAC THERMOSTATS SECTION 4 REMOTE THERMOSTAT OPERATION & PARAMETERS Step 4. Choose “Thermostats” Step 5. Choose the desired Step 6. Change the Heating from the House Check tab. Thermostat. and Cooling setpoints to the desired value. Step 7.
- Page 35 The corresponding To change current status, Choose your new status from temperature values and any simply click status on the choices shown. other automations that are the MrPEX Smart Home ® linked to the new status will dashboard. take affect.
-
Page 36: Troubleshooting
MODULE 3 – WIRELESS HVAC THERMOSTATS SECTION 5 TROUBLESHOOTING TROUBLESHOOTING INFORMATION 1. The thermostat does not call for heat and/or cooling. • Check that connector pins are straight and intact • Check that the thermostat is fully seated on the mounting plate. If the terminals are not fully engaged, the firmware cannot activate the relays.
Need help?
Do you have a question about the SALUS ST880ZB Optima Zigbee and is the answer not in the manual?
Questions and answers