
Related Manuals for Air OPUS OP2


Summary of Contents for Air OPUS OP2
- Page 1 PCT Patent Pending GB/2017/050391 & Australian Patent Pending 2017220045, 2018204104 Design registration No OWNERS 201714813, 201714812, 201714811, 201714810 HANDBOOK...
- Page 2 PCT Patent Pending GB/2017/050391 & Australian Patent Pending 2017220045, 2018204104 Design registration No 201714813, 201714812, 201714811, 201714810...
- Page 3 CONTENTS PCT Patent Pending GB/2017/050391 & Australian Patent Pending 2017220045, 2018204104 Design registration No 201714813, 201714812, 201714811, 201714810 opuscamper.com.au...
-
Page 4: Vehicle Identification Number (Vin)
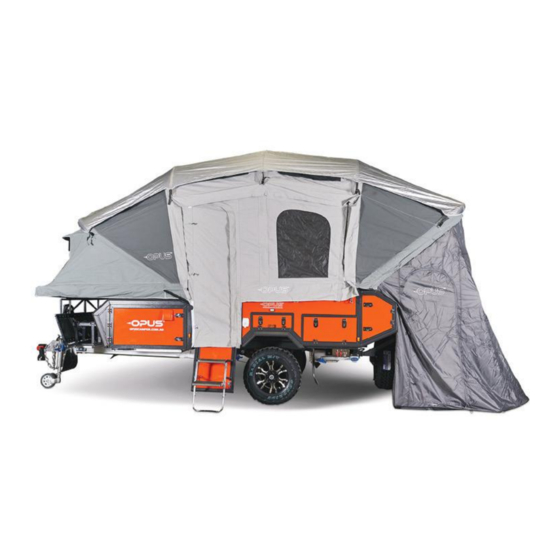
VEHICLE IDENTIFICATION NUMBER (VIN) About Your Vehicle Identification Number opuscamper.com.au... - Page 5 SPECIFICATIONS - 2 SLEEPER Features Kitchen opuscamper.com.au...
- Page 6 SPECIFICATIONS - 2 SLEEPER Electrical Tent/Canopy Optional Accessories opuscamper.com.au...
- Page 7 DIMENSIONS - 2 SLEEPER opuscamper.com.au...
- Page 8 11 QUICK TIPS TO SET UP AND PACK UP YOUR AIR OPUS® TIP 4 opuscamper.com.au...
- Page 9 11 QUICK TIPS TO SET UP AND PACK UP YOUR AIR OPUS® To OPEN valve turn counter clockwise. External Inflating / DeflatingAir Valve To CLOSE valve turn clockwise until firm. CLOSED OPEN IMPORTANT Remember to open the main valve while inflating.
- Page 10 HITCHING & TRAILER ELECTRICS About your Coupling About your Electrical Plugs IMPORTANT Wheel nuts should be checked after first 100km and then 7 PIN FLAT PLUG every 1000km. ANDERSON PLUG opuscamper.com.au...
- Page 11 Air OPUS® BRAKE SET UP About your Brakes BREAK-AWAY SWITCH MAINTENANCE IMPORTANT The break-away switch is not a security device! When cable is pulled, switch will drain power f rom batteries opuscamper.com.au...
- Page 12 SETTING UP YOUR Air OPUS® CAMPER Initial Steps IMPORTANT Corner support legs are only to support the Air OPUS® NOT to be used to level or lift. STEP 5 opuscamper.com.au...
- Page 13 SETTING UP YOUR Air OPUS® CAMPER Initial Steps Take care not to stand underneath the lid as it comes down. IMPORTANT Ensure lid is lowered slowly & does not drop suddenly. REPEAT STEPS 1-12 IN REVERSE TO PACK AWAY. REMEMBER TO ZIP UP YOUR DOORS AND WINDOWS &...
- Page 14 UNDERSTANDING THE Air OPUS® SWITCHBOARD Main features of your switchboard 240v Circuit Breaker Located inside the camper Quick steps to turn Air Quick steps to check pump on for inflation battery level STEP 1 STEP 1 STEP 2 STEP 2...
- Page 15 UNDERSTANDING THE AIR VALVES WHEN SETTING UP YOUR Air OPUS® CAMPER Tube/ Air Valve / Valve Valve OPEN (vertical/in line) IMPORTANT Failure to CLOSE the Main inflation valve switch after inflation will cause the Annexe and Canopy to slowly deflate.
- Page 16 Air OPUS® WATER SYSTEM Water System Set up opuscamper.com.au...
- Page 17 Air OPUS® WATER SYSTEM IMPORTANT A SMALL AMOUNT OF WATER MAY BE PRESENT FROM THE CONNECTORS AND WASTE HOSE, SO A CLOTH IS USEFUL TO REMOVE ANY EXCESS WATER. Draining your Tanks prior to storage opuscamper.com.au...
- Page 18 Air OPUS® GAS SYSTEM Safe operating procedures for your gas system IMPORTANT CHECK THE INSTRUCTIONS FOR CORRECT FITMENT AND SAFE USE WITH THE GAS CYLINDER MANUFACTURER/SUPPLIER. TIP - If your igniter on your stove is not clicking, check your D battery hasn’t dislodged.
- Page 19 Air OPUS® 240 VOLT MAINS POWER 240V - Safe operating procedures opuscamper.com.au...
-
Page 20: Volt Power
12 Volt - Safe operating procedures TOWING WIRING The trailer lights and electric brakes are wired to a standard 7 pin trailer plug. The Air OPUS® is fitted with electric brakes. While in transit if the tow vehicle has the Anderson Plug connected this will also be topping up the batteries. - Page 21 Air OPUS® FRIDGE SLIDE LIGHT POWER Be careful not to catch or crush your f ridge’s power cable in the IMPORTANT slide mechanism TIP - If you wish to travel with your f ridge powered and fan running, you must leave the red power key in and switched on, and the LIGHT and FRIDGE switches activated.
- Page 22 SETTING UP THE ADDITIONAL DAY BED Seating moved to create additional bed opuscamper.com.au...
- Page 23 INSTALLING YOUR Air OPUS® ANNEXE Attaching annexe to canopy STEP 1 STEP 2A STEP 2B opuscamper.com.au...
- Page 24 INSTALLING YOUR Air OPUS® ANNEXE STEP 3 Inflating the annexe when attached to canopy STEP 4 STEP 5 STEP 6 STEP 7 opuscamper.com.au...
- Page 25 INSTALLING YOUR Air OPUS® ANNEXE Inflating the annexe when attached to canopy continued... STEP 8 STEP 9 STEP 10 opuscamper.com.au...
- Page 26 INSTALLING YOUR Air OPUS® ENSUITE Attaching annexe to canopy IMPORTANT Remove the ensuite every pack down to prevent any moisture being trapped inside the camper. opuscamper.com.au...
- Page 27 INSTALLING YOUR Air OPUS® ANNEXE Changing a faulty bladder when product is not inflated/in use STEP 1 STEP 2 STEP 3 STEP 4 While unzipping or zipping be careful NOT to allow the zipper to pinch the air tube. STEP 5...
- Page 28 Air OPUS® CARE AND MAINTENANCE IMPORTANT THE OPUS® CAMPER MUST NOT BE STORED WET/DAMP STORAGE RETURN TO THE ROAD opuscamper.com.au...
- Page 29 CARING FOR YOUR CANVAS All Air OPUS® tents and annexes must be “weathered” before use. To do this you will need to thoroughly saturate the canvas by hosing it down with water and then allow it to dry prior to its first use.
- Page 30 Air OPUS® CARE AND MAINTENANCE EXTERNAL CARE FOR YOUR AIR OPUS® Contact your dealer or Air OPUS® camper directly for further information. opuscamper.com.au...
- Page 31 Air OPUS® CARE AND MAINTENANCE CONDENSATION There are a few main causes of condensation: opuscamper.com.au...
- Page 32 Air OPUS® CARE AND MAINTENANCE VENTILATION When cooking in the Air OPUS® Annexe it is crucial to ensure the ventilation vents located above and below kitchen slide out are clear and not covered. IMPORTANT WHEN COOKING DO NOT HAVE THE ROOM DIVIDER CLOSED BEHIND KITCHEN SLIDE OUT.
- Page 33 Air OPUS® WARRANTY INTRODUCTION OPUS will always deal with warranty claims reasonably and in good faith. We offer a 12 month warranty on all fittings and fixtures, plus the following specific warranties: 5 Year Suspension Warranty 3 Year Canvas & Tent Warranty 5 Year Structural Warranty OPUS warranties apply for the use of your OPUS on any road or track that is trafficable to...
- Page 34 Air OPUS® WARRANTY OPUS Campers are designed for use on any road or track that is trafficable to normal four-wheel-drive vehicles. The following items are not covered under the OPUS warranty: Rust Paint opuscamper.com.au...
- Page 35 Air OPUS® WARRANTY TENTS & DAMAGED GOODS LODGING A CLAIM CONTACT opuscamper.com.au...
- Page 36 OPUS® Service 1000 KM 10000 KM 20000 KM 30000 KM 50000 KM 40000 KM SERVICE INTERVAL 3 MONTHS 1 YEAR 2 YEARS 3 YEARS 4 YEARS 5 YEARS opuscamper.com.au...
- Page 37 LOCATION BOLT SIZE BOLT GRADE TORQUE opuscamper.com.au...
- Page 38 NOTES opuscamper.com.au...
-
Page 39: Warranty
FOLLOW US ON FACEBOOK AND INSTAGRAM TO SEE WHAT WE'RE UP TO! WARRANTY opuscamper.com.au... - Page 40 PCT Patent Pending GB/2017/050391 & Australian Patent Pending 2017220045, 2018204104 Design registration No 201714813, 201714812, 201714811, 201714810 03 9588 2959 opuscamper.com.au...
Need help?
Do you have a question about the OP2 and is the answer not in the manual?
Questions and answers