
Subscribe to Our Youtube Channel
Related Manuals for R2 MTZ HI

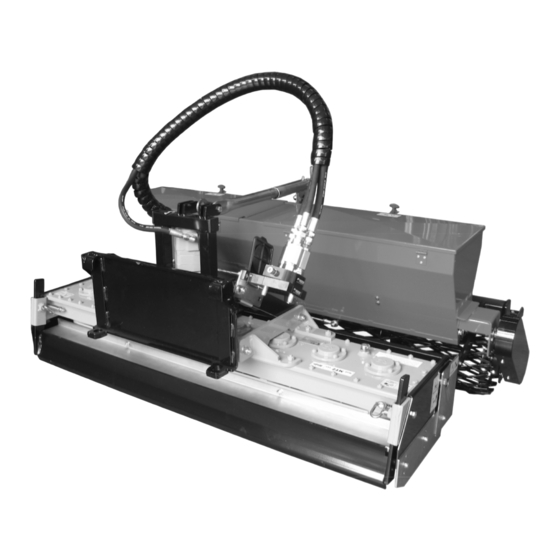
Summary of Contents for R2 MTZ HI
- Page 1 ENGLISH Mill Grader Mod. MTZ HI Instructions and maintenance manual (Translation of the original instructions) Rev. 01 – 10 – 2014...
-
Page 3: Table Of Contents
TABLE OF CONTENTS Page Identification of residual risks ....................4 Introduction ..........................5 Identification of the implement....................5 Description of the implement and its appropriate use.............. 6 Technical characteristics and dimensions ................8 Transporting and handling the implement ................10 Accident prevention ........................ -
Page 4: Identification Of Residual Risks
WARNING Read this instruction manual before using the implement Before working on the implement, lean the implement on earth, turn off the loader, release the residual pressure, remove the key and read the present instruction manual Keep a safe distance from the side and from the rear of the implement to prevent the... -
Page 5: Introduction
1- Implement identification Each R2 implement bears a plate with the CE mark indicating main identification data for R2 and the implement (Fig. 1).The plate is located on the main casing of the implement (milling unit). -
Page 6: Description Of The Implement And Its Appropriate Use
By installing the seeder unit (optional) a seeding operation can be added. The use of the MILL GRADER Mod MTZ HI consists in preparing the soil for lawns, gardens, sports fields, vegetable gardens and in optimal milling, levelling and compacting the soil. - Page 7 Fig. 2 A. Roller assembly D. Grader blade G. Seeder assembly B. Roller adjuster E. Milling group (optional) C. Quick attach plate F. Side panel and side panel extension ENGLISH...
-
Page 8: Technical Characteristics And Dimensions
3 - Technical characteristics and dimensions Model 100 + SM 120 +SM 135 +SM 150 + SM 170 + SM Milling width (cm) (Fig. 3a – Rif. A) Levelling width (cm) (Fig. 3a – Rif. B) Compacting width (roller width) (cm) (Fig. - Page 9 Fig. 3a Fig. 3b Fig. 4a Fig. 4b Fig. 5 ENGLISH...
-
Page 10: Transporting And Handling The Implement
To keep low the center of gravity during transport, keep the MTZ HI mill grader in the lowest position and as close as possible to the loader. Follow the instructions given in the operation and maintenance manual of the loader. - Page 11 Fig. 6 Fig. 6a 22° Fig. 7 Fig. 7a SM 135- 150- 170 SM 100 – 120 Fig. 8 ENGLISH...
-
Page 12: Accident Prevention
6. When mounting the implement to the loader, ensure that the locking pins of the loader's quick attach plate are in the lower position and that they have locked the mill grader MTZ HI to the loader. Never lift or transport the implement if it has not been locked. - Page 13 23. The MILL GRADER mod. HI implement has been built for a precise work. It must always be in perfect working condition and should be repaired using only original R2 spare parts. 24. Make sure all persons and animals are clear from the work area prior to powering up your implement or during use.
-
Page 14: Component Assembling
NOTE 1: in the MTZ HI 135, 150 and 170 models, replace the end part of the standard screw register with the part supplied with the seeder unit and apply the screw register in the opposite direction as to the standard application (Fig. - Page 15 Fig 9 ENGLISH...
- Page 16 Fig. 10a Mod. MTZ HI 135 – 150 – 170 Fig. 10b ENGLISH...
- Page 17 Fig. 11 Mod. MTZ HI 100 - 120 Fig. 12 ENGLISH...
-
Page 18: Hitching The Implement To The Loader
7 – Attaching the implement to the loader (original instructions) Attaching the implement to the loader is quick and easy, but it must be done carefully. The implement is mounted to the loader boom by using the quick attach plate and the counterpart on the implement. - Page 19 Fig. 13 STEP 1 300 – 700 series loaders 200 series loaders Fig 14 STEP 2 300 – 700 series loaders 200 series loaders Fig 15 STEP 3 300 – 700 series loaders 200 series loaders ENGLISH...
-
Page 20: Connecting And Disconnecting The Hydraulic Hoses
8 – Connecting and disconnecting the hydraulic hoses On 400-700 series loaders hydraulic hoses are connected using the multiconnector system. If you have an Avant 300-700 series loader with the conventional quick couplers and wish to change to the multiconnector system, contact your Avant dealer or service point for instructions or installation services. -
Page 21: Preparing For Use
9 – Preparing for use Before using the implement, always perform the following checks with the tractor turned off and the key removed. 1. Perform a general visual inspection of the implement. Verify the correct mounting of the components (mechanical parts and guards). Do not use the implement if you experience an oil leak and/or if you see that parts of the implement are damaged, missing or not properly secured. - Page 22 Fig. 18 Fig. 19 Fig. 20 Fig. 21 Fig. 22 ENGLISH...
-
Page 23: Adjusting And Use Of The Seeder (Optional)
12 – Adjustment and use of the seeder SM Fill the hopper with seed and close the door. To adjust the quantity of seed that should fall, use the knob on the hopper opening lever (Fig. 23 – Ref A) and set it to the desired position on the graduated scale. Using the open/close lever (Fig. 23 –... -
Page 24: Using The Implement
13.2 - Locking the milling assembly The MILL GRADER Mod. MTZ HI has been designed and constructed to minimize the risk that the milling assembly could lock up while tilling the soil. Anyway, you cannot exclude that this occur when there are big stones in the soil, wire or other elements that can get into or wind around the hoes. -
Page 25: Maintenance
Any intervention for breakage and damage must be performed by personnel skilled in maintenance of mechanical agricultural equipment. In this case, contact your dealer or R2 technicians directly. For maintenance on the seeder assembly (optional), read the relevant operation and maintenance manual. - Page 26 Fig. 24 Fig. 25 Fig. 26 Fig. 27 ENGLISH...
-
Page 27: Replacing The Hoes
15 – Replacing the hoes Working the soil determines a gradual consumption of the hoes. When the hoes have become a length of 8 cm, they must be replaced. Using the implement with tools of a length less than 8 cm may cause a reduction of the tillage quality and increase the risk of clamping and damages to the milling group. - Page 28 Fig. 28 Fig. 29 Fig. 30 A. Hoe support bracket B. Self-locking steel nut M10 fine pitch – DIN C. Nut seat D. Hoe E. Drilled plate F. Reinforced Grower washer DIN 127/B G. Steel screw M 10 x 1,25 x 45 fine pitch partial thread DIN 960 –...
-
Page 29: Finishing Work And Storing The Implement
16 – End of work and storage of the implement If the Mill Grader MTZ HI should stay inactive for a long period of time, the following operations must be done: 1. Wash the implement carefully and wipe it dry. WARNING (for implements with optional seeder): to avoid solidification and/or germination of seed residues inside the seeder, do not use water to clean the inside of the hopper;... -
Page 30: Warranty And Certification
• our implements are not used in accordance with the instructions in the manual; • the operator uses the equipment improperly. R2 reserves the right to modify at its own discretion the data contained in this manual whenever the company deems it necessary for a technical or commercial improvement of the product. - Page 32 R2 S.a.s. di Rinaldi Roberto & C. Registered Office Via Valsellustra, 25-29 40060 – Toscanella di Dozza Dozza – Bologna (ITALY) Head office Via degli Artigiani, 23 40024 – Castel San Pietro Terme Bologna (ITALY) Tel. (0039) 051.94.30.42 Fax (0039) 051.69.42.086 www.R2RINALDI.com...
Need help?
Do you have a question about the MTZ HI and is the answer not in the manual?
Questions and answers