Table of Contents
Advertisement
Quick Links
READ ALL INSTRUCTIONS AND WARNINGS BEFORE USING THIS PRODUCT.
This manual provides important information on proper operation & maintenance. Every effort has been
made to ensure the accuracy of this manual. These instructions are not meant to cover every possible
condition and situation that may occur. We reserve the right to change this product at any time without
prior notice.
IF TH ERE IS AN Y Q U ESTIO N ABO U T A C O N DITIO N BEIN G SAFE O R U N SAFE,
DO N O T U SE TH IS PRODUCT!
DO N O T RETU RN TH IS PRO DU CT TO TH E RETAILER - CO N TACT CU STO M ER
SERVICE FIRST.
If you experience a problem, have questions or need parts for this product, visit our website
http://www.buffalotools.com
Central Time. A copy of the sales receipt is required.
KEEP THIS MANUAL, SALES RECEIPT & APPLICABLE WARRANTY FOR FUTURE
REFERENCE
ATTENTION: Assembly of this oven involves many large components. It
is advisable to have two people assemble the unit.
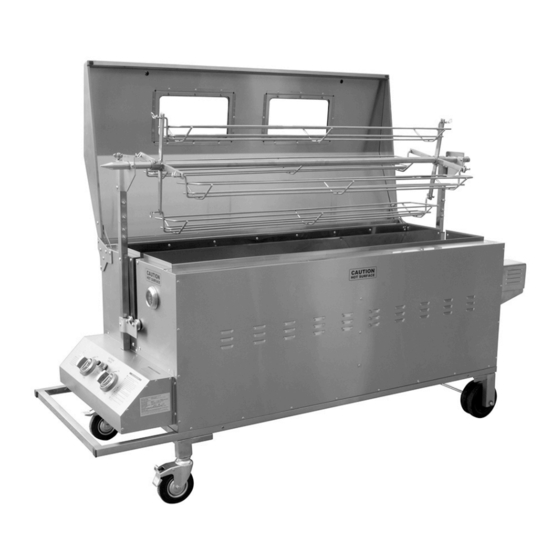
BPROASTER
DELUXE PIG ROASTER
INSTRUCTIONS
or call Customer Service at 1-888-287-6981, Monday-Friday, 8 AM - 4 PM
Advertisement
Table of Contents

Related Manuals for Buffalo Tools BPROASTER


Summary of Contents for Buffalo Tools BPROASTER
- Page 1 BPROASTER DELUXE PIG ROASTER INSTRUCTIONS READ ALL INSTRUCTIONS AND WARNINGS BEFORE USING THIS PRODUCT. This manual provides important information on proper operation & maintenance. Every effort has been made to ensure the accuracy of this manual. These instructions are not meant to cover every possible condition and situation that may occur.
- Page 2 READ THE INSTRUCTIONS BEFORE USING THE APPLIANCE. USE OUTDOORS ONLY. WARNING! ACCESSIBLE PARTS MAY BE VERY HOT! KEEP YOUNG CHILDREN AWAY. DO NOT MOVE THE APPLIANCE DURING USE. TURN OFF THE GAS SUPPLY AT THE GAS CYLINDER AFTER USE. DO NOT MODIFY THE APPLIANCE. THIS APPLIANCE MUST BE KEPT AWAY FROM FLAMMABLE MATERIALS DURING USE.
- Page 3 FEATURES Ÿ Easy to transport with two swivel caster wheels (with brakes) and two double-wide stationary wheels Ÿ Partially assembled upon delivery. Just attach wheels, motor mount, motor and carving rack. Ÿ Uses propane gas. Propane tank not included. Gas pressure: BTU=13.5 KW * 3412 = 46062 Ÿ...
- Page 4 IM PO RTAN T Upon receipt, your oven will be covered in a thin layer of oil which is used in the manufacturing process. This needs removing prior to first use with either hot soapy water or a remover such as white spirit. If you don’t remove this prior to getting the oven hot on the first occasion, the burnt oil will tarnish the metal, especially on the inside.
- Page 5 IMPORTANT Read the following instructions carefully and be sure your oven is properly installed, assembled and cared for. Failure to follow these instructions may result in serious bodily injury and/or property damage. If you have any questions concerning assembly or operation, call 888-287-6981. When used on the ground always place the appliance and cylinder on flat level ground.
- Page 6 Parts sealed by the manufacturer must not be altered by the user. No modifications should be made to any part of this oven and repairs and maintenance should only be carried out by a registered service engineer. Rotisserie and Motor WARNING Rotisserie and motor must not be exposed to water or damp conditions or used when raining.
- Page 7 Lighting Instructions for barbecue 1. Open the hood of the oven before attempting to light the burners and remove the 4 stainless steel trays. 2. Turn all the control knobs clockwise to “OFF” position. 3. Connect the regulator to the gas bottle. Turn the gas supply “ON” at the regulator. Check with the use of soapy water for any gas leakage between the bottle and the regulator.
- Page 8 CLEANING THE BURNER ASSEMBLY Turn the gas OFF at the control knob and disconnect the cylinder. Clean the burner with a soft brush or blow clean with compressed air and wipe with a cloth. Clean any clogged ports with a pipe cleaner or stiff wire (such as an opened paper clip). Inspect burner for any damage (cracks or holes).
Need help?
Do you have a question about the BPROASTER and is the answer not in the manual?
Questions and answers