Advertisement
TREE ASSEMBLY INSTRUCTIONS
Congratulations on purchasing your new tree from Polytree®. Carefully follow the instructions below on
how to quickly and easily set up your new tree.
1. Before you start to assemble your tree, choose an appropriate location near a wall outlet.
2. Assemble the tree stand and place on a level surface.(See Fig. A) Then insert the tree pole tightly into the stand.
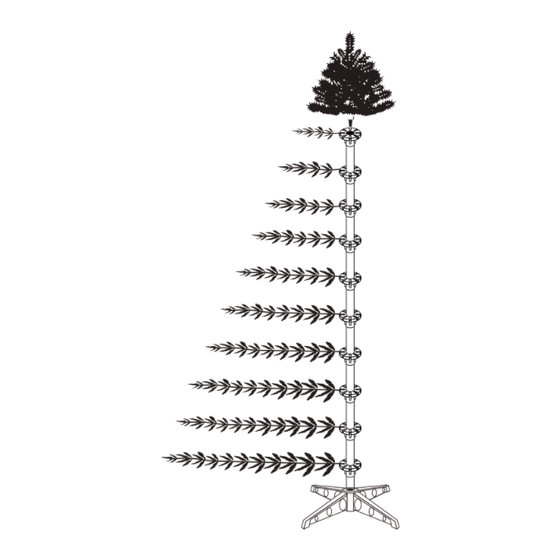
3. Sort all branches according to color codes marked on the end of each branch. Below is a list of the color codes for
your tree. (See Fig. B) (Please note: the number of rows may vary with different tree sizes.)
SHAPING AND ADDING BRANCHES
1. Shape each branch by either placing the branch in a bracket which is at a comfortable level to work (Fig. 1), or
holding the branch in your hand with the hooked end pointing down. (Fig.2) BEGIN WITH THE BRANCHES AT THE
BOTTOM OF THE TREE AND WORK UP TOWARDS THE TOP.
2. When shaping each branch, work from the branch hook and move outwards to the end tip of the branch. Start by
wrapping the back tip around the end of the branch stem to cover the branch wire. (Fig. 3)
3. Working from the branch's hook moving outwards, fan each tip out using this pattern: one tip to the right of the
branch's center wire, one tip to the left of the branch's center wire, one tip parallel to the branch's center wire.
(Fig. 4) Tips should be slightly offset from each other so that they do not line up exactly one behind the other. All
tips should be curved upwards when looked at from the side. (Fig. 5)
4. As each branch is shaped, place the color coded branch securely into the matching color coded bracket. (Fig. 6)
As you finish each level of branches, make sure the rows look evenly distributed to the levels above and below it.
Adjust tips as needed to even appearance. (If your tree includes branches with side wings, arrange these
branches so that the wings are on every other branch if necessary.)
5. When all the branches are shaped and put into their color coded matching brackets, shape the top section. Do
this by pulling down each row of tips in an even, circular pattern. (Fig. 7)
6. Start from the bottom layer of the tree topper and work upwards to the top tip.
Fig. 1
Fig. 2
Fig. 7
Fig. 6
MODEL #: SCP100785B
Fig.B
Fig. 3
Fig. 4
Branch
Fig. 8
Fig. 9
Insert and slide the legs
upward into the slots of the
base until firmly secured.
ROW
COLOR CODED
TREE TOP
WITHOUT COLOR
A
BLACK
B
RED
C
YELLOW
D
GREY
F
BLUE
G
PURPLE
G
PURPLE
H
GREEN
I
ORANGE
J
BLACK
Fig. 5
Side view
Advertisement
Table of Contents

Related Manuals for Polytree SCP100785B

Summary of Contents for Polytree SCP100785B
- Page 1 TREE ASSEMBLY INSTRUCTIONS Congratulations on purchasing your new tree from Polytree®. Carefully follow the instructions below on how to quickly and easily set up your new tree. 1. Before you start to assemble your tree, choose an appropriate location near a wall outlet.
- Page 2 S T O R A GE TIPS 1 . R em o v e all lig h ts and o r name n ts 2 . S ta r t b y r em o ving the t r ee t op and then r em o ving each l ay er of b r anches going f r om t op t o b ot t om of the t r e e . 3.
Need help?
Do you have a question about the SCP100785B and is the answer not in the manual?
Questions and answers