
Subscribe to Our Youtube Channel
Related Manuals for C. Crane CC RADIO SOLAR


Summary of Contents for C. Crane CC RADIO SOLAR
- Page 1 INSTRUCTION MANUAL PLEASE READ ALL THE INSTRUCTIONS COMPLETELY BEFORE USE AND SAVE THIS MANUAL FOR FUTURE REFERENCE CCRadio Solar Page 1...
-
Page 2: Owners Record/Unpacking
Owners Record/Unpacking CAUTION • Before turning the unit on, set your volume control to a low setting. • Slowly increase the sound until you can hear it comfortably and clearly without distortion. • Long-term exposure to loud sounds may cause hearing damage. It is best to avoid high volume levels when using headphones/earbuds, especially for extended periods. -
Page 3: Introduction/Safety Instructions
The CCRadio Solar is likely the first emergency radio that doesn’t look like one. The idea simmered at C. Crane for over five years while 10 prototypes were designed. It has an oversized AM antenna for superior long distance reception. FM reception is good thanks to the latest chip technology. The solar panel is oversized to help keep the battery charged. - Page 4 Safety Instructions Please read IMPORTANT SAFETY INSTRUCTIONS before use. It is important to read and understand all instructions. WARNING: To prevent fire or electric shock hazard do not expose this product to rain or moisture. CAUTION: To reduce the risk of electric shock, do not remove the CAUTION radio back.
- Page 5 Only use attachments or accessories specified by C. Crane. Note: If the radio is unused for more than 6 months, we recommend winding the crank for at least 30 seconds to keep the battery healthy. Thereafter we recommend charging the battery fully before returning to storage.
- Page 6 Safety Instructions 4) KEEP AWAY FROM WATER AND MOISTURE Keep the radio dry. Liquids and moisture can damage the radio. If a liquid leaks into the radio do not operate and seek a qualified service shop. 5) KEEP AWAY FROM EXTREME TEMPERATURES Extreme temperatures can damage the radio.
-
Page 7: Table Of Contents
Table of Contents Phone Charger Jack (USB)....... Owners Record/Unpacking......Setting the Clock..........Introduction/Safety Instructions....... Setting the Alarm..........Getting Started..........Disable Beep............. Installing the Batteries........Designate Frequency or Clock......Display Screen Identification......Activate 9 or 10 kHz Tuning......Powering the Radio......... Enable High Power Audio Mode...... -
Page 8: Getting Started
Getting Started Power using the Solar Panel - Place the solar panel in direct sunlight. It is best to angle the solar panel so that it is pointed directly at the sun. Do not charge the radio in a hot area like a car. To charge the internal Li-ion battery with the solar panel, it is best to leave the radio OFF. -
Page 9: Installing The Batteries
Getting Started INSTALLING “AA” OR “18650” BATTERIES 1) Position the radio face down on a soft surface to protect it. 2) Remove the Battery Cover using your fingernail or a small tool. Press and lift the area indicated 3) Insert (3) “AA” cell batteries (optional) or one (1) 18650 Li-ion battery (included) into the compartment as indicated. -
Page 10: Display Screen Identification
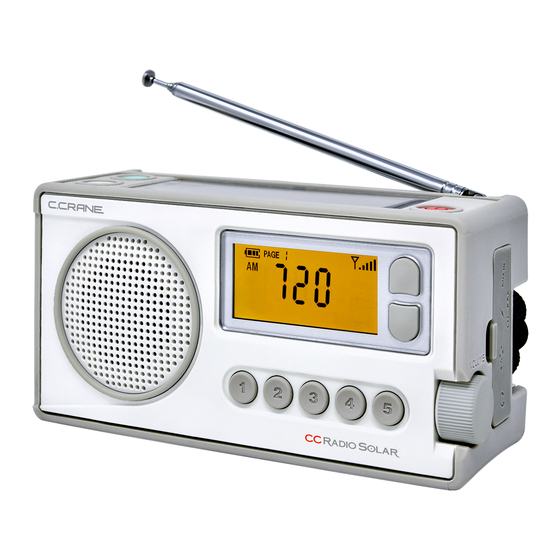
Radio Identification A) Battery Icon E) Band Indicator (AM, FM, Weather) I) Alarm is activated B) Page Number (for station F) Frequency/Time J) Stereo FM reception memories) G) Beep ON/OFF K) Sleep Timer is activated C) Station Memories 1 - 5 H) Alert is activated L) Lock Switch is activated D) Reception Signal Strength... -
Page 11: Powering The Radio
Radio Identification 1. Power button / Sleep Timer To turn the radio “ON” just press and release the red button. To use the Sleep Timer, press and hold the red button. The Sleep Timer will automatically shut off the radio after the set amount of time expires. The display will cycle through minutes 120, 90, 60, 45, 30, 15, and OFF. - Page 12 Radio Identification Front View CCRadio Solar Page 13...
-
Page 13: Saving A Station To Memory
Radio Operation 5. Station Memory Buttons 1 - 5 Save your favorite stations to memory buttons. To save a station, press and hold any memory button for 2 seconds while the station is playing. To play a saved station, press the same button once quickly. 6. - Page 14 Radio Operation CCRadio Solar Page 15...
-
Page 15: Earphone Jack
Radio Operation 7. Earphone Jack To listen using earphones, connect your earphones to the lower round jack behind the rubber cover. When earphones are plugged in, stereo sound can be heard from strong FM stations offering stereo sound. Weak FM stations, all AM stations, and Weather stations will be received in mono sound. 8. -
Page 16: Flashlight
Radio Operation 11. Flashlight Located on the left side of the CCRadio Solar is a flashlight consisting of one super bright LED. To turn the flashlight on, press the “Light” button once and release. The “Light” button will glow in the dark to help you locate the radio in a power outage. -
Page 17: Phone Charger Jack (Usb)
Radio Operation 13. Phone Charger Jack (Standard USB Port) In an emergency, you may need to power your cell phone to make an important call. Cranking the radio for just 90 seconds should give you enough time to make a few quick calls. This, of course, will depend on the make and model of your cell phone. -
Page 18: Setting The Clock
Radio Operation Setting the Clock 1. With the power OFF, press and hold memory button #1 for two seconds. Up/Down Release. Tuning Buttons 2. While the Hour is flashing, press the Up or Down Tuning buttons until the hour and AM/PM time is correct. 3. -
Page 19: Setting The Alarm
Radio Operation Setting the Alarm 1. With the power OFF, press and hold memory button #2 for two seconds. Up/Down Release. Tuning Buttons 2. While the Hour is flashing, press the Up or Down Tuning buttons until the hour and AM/PM time is correct. -
Page 20: Disable Beep
Radio Operation Disable Beep Sound 1. With the power OFF, press and hold memory button #3 for two seconds. All beeps are disabled except ALARM and WX ALERT. 2. Repeat sequence to enable beep again. Memory Button #3 (Hold for 2 seconds to disable beep). Designate Frequency or Clock while Listening to the Radio 1. -
Page 21: Activate 9 Or 10 Khz Tuning
Radio Operation Activate 9 or 10 kHz AM Tuning (also expands FM band) 1. With the power OFF, press and hold memory button #5 for two seconds to activate 9 kHz AM tuning mode. This will also expand the FM band from 76 MHz to 108 MHz. -
Page 22: Activate 1 Khz Am Tuning Steps
Radio Operation Activate 1 kHz AM Tuning Steps Quickly press memory buttons #1 and #4 at the same time while listening to your desired AM station. Press again to return to normal (10 kHz) tuning. Note: This setting can tune AM stations that are slightly off frequency for various reasons. -
Page 23: Reset To Factory Defaults
Radio Operation Reset to Factory Defaults With power OFF, press and hold memory buttons #1 and #5 for five seconds. Memory Buttons #1 and #5 (Press and hold for 2 seconds to reset to factory defaults). Change Memory Pages (Hidden Setting) The Page function gives you 20 additional presets for AM and FM. -
Page 24: Troubleshooting Guide
Troubleshooting Guide None of the buttons work, but the display screen is on: The Radio may be Locked. If the radio is locked then the LCD display screen will show a key. To release the lock, press and hold the BAND and POWER buttons at the same time for 2 seconds and the key icon will disappear in the LCD Display. - Page 25 Troubleshooting Guide The AM reception is poor: You may need to rotate your radio until the reception is best. Many buildings that use brick, metal, or stucco can absorb or reflect the AM signal. Computers, cell phones, tablets, wireless chargers and other electronic equipment, including fluorescent lights, can cause noise that interferes with your AM reception.
-
Page 26: Specifications
Specifications: POWER CONSUMPTION: FREQUENCY RANGE: Low Power Mode 40-100mA DC (depending on FM Band: 87.5 – 108 MHz (regular Mode). headphone or speaker usage and volume level). FM Band: 76 – 108 MHz (Expanded Mode – See High Power Mode: 50-200mA DC (depending on page 11). - Page 27 Notice: Any changes or modifications not expressly approved by the party responsible for compliance could void the user’s authority to operate the equipment. Copyright ©2020 by C. Crane, Fortuna, CA 95540 Phone: 1-800-522-8863 Web: ccrane.com All rights reserved. No part of this booklet may be reproduced, in any form or means whatsoever, without permission in writing from C.
Need help?
Do you have a question about the CC RADIO SOLAR and is the answer not in the manual?
Questions and answers