Table of Contents
Advertisement
Quick Links
400PTHF206
Impuls-Abschaltschrauber
Pulse Shut-Off Nutsetter
Serreuse a déclenchement d'impulsion
Avvitatore pneumo-idraulico a stacco automatico
Aprietatuercas de impulso
max. Kapazität / Rated Capacity
400 - 400Nm
Ausführung / Style
- Pistolengriff / Pistol grip
P
Abschaltung / Torque control
Impulsmechanismus / Hydraulic pulse mechanism
NORTH AMERICA
CooperTools
P.O. Box 1410
Lexington, South Carolina 29071-1410
400
P
T
H
Parts Manual • Betriebsanleitung
P1686E
F
20
6
6 - 3/4" Vierkant / square
20 - 2000 min
¹ / rpm
-
Sonderfunktion / Special Feature
F - Frequenzverstellung
Frequency Adjustment
EUROPE
Cooper Power Tools GmbH &. CO.
Postfach 30
D-73461 Westhausen
07/03
Abtrieb / Final drive
Drehzahl / Speed Code
Advertisement
Table of Contents

Subscribe to Our Youtube Channel
Related Manuals for Cooper Tools Cleco 400PTHF206


Summary of Contents for Cooper Tools Cleco 400PTHF206
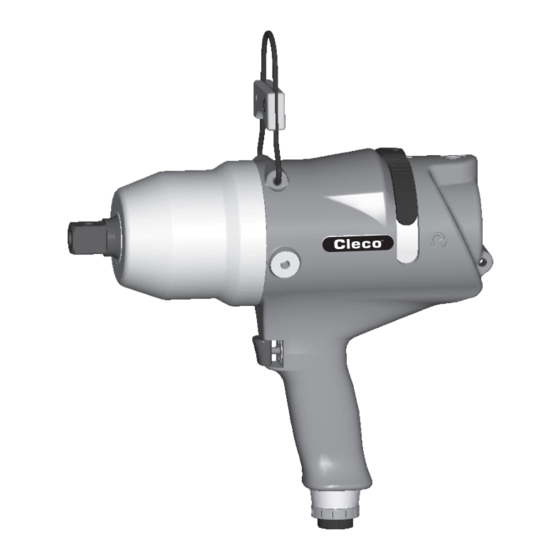
- Page 1 Parts Manual • Betriebsanleitung P1686E 07/03 400PTHF206 Impuls-Abschaltschrauber Pulse Shut-Off Nutsetter Serreuse a déclenchement d'impulsion Avvitatore pneumo-idraulico a stacco automatico Aprietatuercas de impulso max. Kapazität / Rated Capacity Abtrieb / Final drive 400 - 400Nm 6 - 3/4" Vierkant / square Drehzahl / Speed Code Ausführung / Style 20 - 2000 min...
- Page 2 400PTHF206 Diese Betriebsanleitung vor dem Auspacken Read and carefully observe these operating Lisez et observez ce manuel d'instructions und vor Inbetriebnahme des Werkzeugs le- instructions before unpacking and operating avant déballage et mise en marche de l'outil. sen und genau beachten! Der Schrauber darf the tool! The tool must be operated, main- Cet outil ne doit être utilisé, entretenu et réparé...
-
Page 3: Table Of Contents
400PTHF206 Leggere e osservare scrupolosamente le Antes de desembalar y de poner en marcha la istruzioni di utilizzo prima di togliere l’utensile herramienta, ¡léanse cuidadosamente estas dall’imballo. L’utensile deve essere usato, intrucciones!. La herramienta solamente debe revisionato e riparato esclusivamente da per- ser manipulada, mantenida y reparada por sonale che abbia già... -
Page 4: Dati Tecnici
400PTHF206 1. T · T · D · D · D ECHNISCHE ATEN ECHNICAL DATA ONNÉES TECHNIQUES ATI TECNICI ATOS TÉCNICOS · · · · BMESSUNGEN IM ENS ION S I ME N S I O N S ISURE IMENSIONES Anwendung mit Luftanschluß... - Page 5 400PTHF206 2. P 4. I RODUKTBESCHREIBUNG NSPEKTION UND ARTUNG Der Impulsschrauber Um Ausfälle zu verhindern: • ist ein Abschaltschrauber Siehe "Ergänzung zur Betriebsanleitung P1770E • hat einen alternativen Luftanschluß von oben. Um diesen zu nutzen, muß die Verschlußschraube <9> in den unteren Luftan- 5.
- Page 6 400PTHF206 6. R EPARATURANLEITUNG 6.1 D EMONTAGE DES OTORS Werkzeug am Pistolengriff <1> in einen Schraubstock mit Abschaltstössel <33> wieder in Rotor einschieben. Kunststoffbacken einspannen. Motorbaustein darf nur mit aufgesteckter Impulseinheit <55> und montiertem Gehäuse <92> eingeschaltet Achtung! Achtung! Gummibeschichtung am Griff nicht beschädigen. werden.
- Page 7 400PTHF206 6.6 Ö LBEFÜLLUNG 1. Impulseinheit mit Hilfe der Injektionsspritze <B> mit ESSO UNIVIS Kugellager <90> in Gehäuse <92> einbauen. O-Ring <91> einle- J26 vorfüllen. gen. 2. Impulseinheit mittels Adapter <A2> an die Schnellkupplung an- Impulseinheit auf Motorbaustein abtecken. schließen. Ausgleichsscheibe <89>...
- Page 8 400PTHF206 2. P 4. M RODUCT ESCRIPTION AINTENANCE AND ERVICE The pulse nutsetter Check "Supplement to Operating Manual P1770E" • is a shut-off nutsetter 5. W • has an optional top air inlet. To use it the plug screw <9> must be HAT TO removed and screwed into the bottom inlet port.
- Page 9 400PTHF206 6. R EPAIR NSTRUCTIONS 6.1 D ISASSEMBLING THE OTOR The motor module must be switched on only when it has Clamp tool at the pistol grip <1> in a vice with plastic jaws. been completely assembled with pulse unit <55> and housing <92>.
- Page 10 400PTHF206 6.6 F ILLING WITH Lock pulse unit to motor module. 1. Prefill the pulse unit with ESSO UNIVIS J26 using the injection syringe <B>. Install equalizing washer <89> to hydraulic cylinder <86>. 2. Connect the pulse unit to the quick-action coupling using the Screw housing <92>...
- Page 11 400PTHF206 2. D 4. C ESCRIPTION DU PRODUIT ONTRÔLE ET MAINTENANCE Le tournevis à impulsion Voir "Complément à la notice d'utilisation P1770E" • est un tournevis à déclenchement 5. Q • dispose d'une entrée alternative d'air comprimé sur le haut. Pour UE FAIRE LORSQUE l'utiliser, il est nécessaire de remplacer la vis de fermeture<9>...
- Page 12 400PTHF206 <39> et <40> dans le carter du pistolet. 6. I NSTRUCTIONS DE RÉPARATION Pour des raisons de montage il est nécessaire de d'enduire également de graisse les goupilles <39> et <40>. 6.1 D ÉMONTAGE DU MOTEUR Insérer les palettes <43> dans les fentes du rotor<41>. Fixer l'outil à...
- Page 13 400PTHF206 6.6 R EMPLISSAGE DE L HUILE Tirer l'axe de satellite <63> puis remplir la chambre de 1. Procéder à la première injection de l'unité d'impulsion d'huile déclenchement située derrière à l'aide de la petite pompe à ESSO UNIVIS J26 à l'aide d'une petite pompe à injection <B>. injection <B>...
-
Page 14: Descrizione Del Prodotto
400PTHF206 2. D 4. C ESCRIZIONE DEL PRODOTTO ONTROLLO E MANUTENZIONE L'avvitatore a impulsi Guarda "Supplemento alle istruzioni per l'uso P1770E • è un avvitatore a stacco 5. C • ha una presa d'aria alternativa dall'alto. Per utilizzarla, la vite di OSA SI FÀ... -
Page 15: Istruzioni Per La Riparazione
400PTHF206 6. I STRUZIONI PER LA RIPARAZIONE 6.1 S MONTAGGIO DEL MECCANISMO MOTORE Per migliore il montaggio, ingrassare anche le spine <39> e <40>. Bloccare l'impugnatura a pistola <1> in una morsa a vite con ganasce di plastica. Infilare le palette <43> negli intagli <41> del rotore. Installare il cuscinetto a sfere <45>... -
Page 16: Riempimento Olio
400PTHF206 6.6 R IEMPIMENTO OLIO Montare il cuscinetto a sfere <90> nel corpo <92>. Inserire l'anello 1. Riempire l'unità impulsi a mezzo della siringa <B> con olio di tipo ad O <91>. ESSO UNIVIS J26. Innestare l'unità impulsi sul modulo motore. 2. -
Page 17: 14 2. Descripción Del Producto
400PTHF206 2. D 4. I ESCRIPCIÓN DEL PRODUCTO NSPECCIÓN Y MANTENIMIENTO El destornillador de impulsos Ver "Complemento al Manual de Instrucciones P1770E" • es un destornillador de desconexión, 5. ¿Q • tiene una conexión de aire alternativa por arriba. Para poderla UÉ... -
Page 18: 14 6. Instrucciones De Reparación
400PTHF206 6. I NSTRUCCIONES DE REPARACIÓN 6.1 D EMONTAJE DEL MOTOR Meter las láminas <43> en la ranura del rotor <41>. Sujetar la herramienta por la empuñadura de pistola <1> en un tornillo de banco con mordazas de plástico. Montar el cojinete de bolas <45> en la tapa del rotor <44> y montar después completo en la carcasa de la pistola. -
Page 19: Carga De Aceite
400PTHF206 6.6 C ARGA DE ACEITE Montar de nuevo el rodillo de aguja <63>. 1. Cargar previamente la unidad de impulso con ayuda de la jeringuilla de inyección <B> con ESSO UNIVIS J26. Apretar el anillo roscado <56> al momento de apriete requerido 400+50 Nm (8. - Page 20 400PTHF206 7. E · · RSATZTEIL E I C H N U N G PARE PARTS EXPLODED V I E W UE ÉCLATÉE · SPLOSO ESPIECE DE ECAMBIOS Versand erfolgt mit Werkzeug in Plastiktasche (nicht montiert) Shiped with tool in plastic bag (not assembled) Expédition avec outil en sac de plastique (ne pas assemblé) Spedizione con l’utensile in sacchetto di plastica (smontato) Enviro con herramienta en bolsa de plástico...
-
Page 21: 20 7. Lista De Piezas De Recambio
400PTHF206 7. E · S · L · E · L RSATZTEIL ESTELLISTE PARE ARTS ISTE DE PIÈCES DE RECHANGE LENCO RICAMBI ISTA DE PIEZAS DE RECAMBIO é é f õ i l o t ä . l p t e l . -
Page 22: 16 7. Despiece De Recambios
400PTHF206 7. E · · RSATZTEIL E I C H N U N G PARE PARTS EXPLODED V I E W UE ÉCLATÉE · SPLOSO ESPIECE DE ECAMBIOS Teil des Hydraulik Service Kits # 542873 Included in hydraulic service kit # 542873 Comprise dans le hydraulique service kit # 542873 Contenuto nel service kit idraulico # 542873 Viene con la service kit hidráulica # 542873... -
Page 23: 22 7. Lista De Piezas De Recambio
400PTHF206 7. E · S · L · E · L RSATZTEIL ESTELLISTE PARE ARTS ISTE DE PIÈCES DE RECHANGE LENCO RICAMBI ISTA DE PIEZAS DE RECAMBIO é é f õ i t i n é t i ' d à... -
Page 24: 23 8. Instrucciones De Montaje
400PTHF206 8. M · · ONTAGEHINWEISE SSEMBLY INSTRUCTIONS NSTRUCTIONS DE MONTAGE · S T R U Z I O N I PER I L MONTAGGIO NSTRUCCIONES DE ONTAJE Montage des Motors Motor assembly Montage du moteur Montaggio del motore Montaje del motor 1. - Page 25 400PTHF206 4. Montage Abschaltkolben <30> Assembly of shut-off bolt <30> Montage de piston à declenchement <30> Montaggio del pistone di stacco <30> Montaje del émbolo desconexión <30> <30> <31> <32> 3x <42> <35> <36>/<37> <33> <41> <G> Demontage der Impuls-Einheit Dismounting of the pulse unit Démontage de l’unité...
- Page 26 400PTHF206 Montage der Impuls-Einheit Assembly of the pulse unit Montage de l’unité d’impulsion Montaggio dell' unità idraulica Montaje de la unidad de impulso <B> Montage der Hydro-Lamelle Assembly of the hydraulic blade <70> (2) Montage de la palette hydropneumatique Montaggio della paletta idraulica Montaje de la paleta hidráulica <73>...
- Page 27 400PTHF206 Montage der Steuer-Lamelle Assembly of the control blade Montage de la lame à côntrole Montaggio della paletta di controllo Montaje de la paleta de control <62> <71> <72> Anziehen des Lagerrings <56> Tightening of the bearing ring <56> Serrage de la bague du palier <56> Montaggio della ghiera filettata <56>...
-
Page 28: 24 9. Lista De Utillajes
400PTHF206 9. V · · ORRICHTUNGS ESTELLISTE IXTURES ORDER L I S T ISTE DE COMMANDE DES DISPOSITIFS · L E N C O DISPOSITIVI PER LA MANUTENZIONE ISTA DE TILLAJES é é f õ i f i t i i t i e l l l Ö... - Page 29 400PTHF206 Axialspiel des Rotors siehe 8. Montagehinweise, Bild 1-2 Abdeckung <51> zurückstülpen und Befestigungsschraube Axial movement of the rotor see 8. Assembly Instructions, mit Gabelschlüssel SW13 mit Gewinde in Gehäuse ansetzen. fig. 1-2 Vor dem Festziehen Griff in gewünschte Position bringen und Jeu axial du rotor voir 8.
- Page 30 Cooper Power Tools GmbH & Co. CooperTools Postfach 30 P.O. Box 1410 D-73461 Westhausen Lexington, SC 29071-1410 Germany Tel: (49)7363-810 Phone: 803-359-1200 Fax: (49)7363-81222 Fax: 803-808-6735 www.coopertools.com...
Need help?
Do you have a question about the Cleco 400PTHF206 and is the answer not in the manual?
Questions and answers