Table of Contents
Advertisement
Quick Links
Advertisement
Table of Contents

Related Manuals for AVERATEC N3440TH1E-1


Summary of Contents for AVERATEC N3440TH1E-1
- Page 1 N3400 Series User’s Guide Space Saving Contemporary Design...
-
Page 2: Regulations Information
Regulations Information This equipment has been tested and found to comply with the limits for a Class B digital device, pursuant to part 15 of the FCC rules. These limits are designed to provide reasonable protection against harmful interference in a residential installation. - Page 3 This device complies with part 15 of the FCC Rules. Operation is subject to the following two conditions : 1. This device may not cause harmful interference. 2. This device must accept any interference received, including interference that may cause undesired operation. 1.
-
Page 4: Safety Guideline For Using Lithium Battery
Safety Guideline for Using Lithium Battery (Danish) ADVARSEL! Lithiumbatteri --- Eksplosionsfare ved fejlagtig håndtering. Udskiftning må kun ske med batteri af same fabrikat og type. Levé det brugte batteri tilbage til leverandøren. (Deutsch) VORSICHT: Explosionsgefahr bei unsachgemäßem Austausch der Batterie. Ersatz nur durch denselben oder einen vom Hersteller empfohlenen gleich-wertigen Typ. -
Page 5: Macrovision Notice
Optical Device Drive Notice CAUTION This appliance contains a laser system and is classified as a “CLASS 1 LASER PRODUCT.” To use this model properly, read the instruction manual carefully and keep this manual for your future reference. In case of any trouble with this model, please contact your nearest “AUTHORIZED service station.”... -
Page 6: Safety Instructions
Safety Instructions 1. Read the safety instructions carefully and thoroughly. 2. Save this User Guide for possible use later. 3. Keep this equipment away from humidity and high temperature. 4. Lay this equipment on a stable surface before setting it up. 5. - Page 7 11. Never pour any liquid into the opening that could damage the equipment or cause an electrical shock. 12. Do not leave the equipment in an unconditioned environment with a storage temperature of 60°C (140°F) or above, which may damage the equipment. 13.
-
Page 8: Information About Energy Star
Environmental Protection Agency ENERGY STAR specifications for computers. The EPA ENERGY STAR Logo does not imply endorsement by the EPA. As an ENERGY STAR Partner, Trigem Computer (AVERATEC) has determined the products marked with the ENERGY STAR Logo are ENERGY STAR qualified as per the applicable ENERGY STAR guidelines for energy efficiency. - Page 9 - Both the computer and monitor can be woken from “sleep” mode through user interaction with any of the computer’s input devices (ex: mouse, keyboard, etc). - When configured with Wake On LAN (WOL) enabled, the computer can also be awoken by a network signal. More information on the energy and financial savings potential of the Power Management Feature can be found at the EPA’s ENERGY STAR Power Management Web site : www.energystar.gov/powermanagement<http://www.energystar.gov/powermanagement>...
-
Page 10: Weee Statement
WEEE Statement Before You Start... -
Page 11: Trademarks
Trademarks All trademarks are the properties of their respective owners. Microsoft is a registered trademark of Microsoft Corporation. Windows98/ME, 2000/XP are registered trademarks of Microsoft Corporation. PCMCIA and CardBus are registered trademarks of the Personal Notebook Memory Card International Association. Release History Version Revision Note... -
Page 12: Before You Read
AVERATEC is a trademark or registered trademark of TriGem Computer, Inc. in the United States and/or other countries. All other product and brand names are trademarks of their respective owners. -
Page 13: Table Of Contents
Table of Content Regulations Information Safety Guideline for Using Lithium Battery Optical Device Drive Notice Macrovision Notice Power management status Safety Instructions Information about ENERGY START WEEE Statement Trademarks Release History Before You Read Unpacking Introduction Connecting to a Power Source Turning On Your Notebook Computer Operating on Battery Power Charging the Battery Pack... - Page 14 the Internet Entering the BIOS Setup Screen Leaving the BIOS Setup Screen BIOS Action Keys Modifying the BIOS Settings Display Devices Display Settings Color Correction Hot Keys Audio Problems Hard Disk Problems Display Problems Keyboard and Mouse Problems CMOS Battery Problem Memory Problems PC Card Problems Performance Problems...
-
Page 15: Introduction
Chapter Introduction Chapter 1 Introduction... - Page 16 First, unpack the notebook from the shipping carton and check all items carefully. If any item is damaged or missing, please contact your local dealer immediately. Keep the box and packing materials in case you need to ship the unit in for service in the future.
- Page 17 Congratulations on your purchase of the Notebook PC. Your Notebook features the latest advances in portable computing technology. The Notebook’s modular design provides maximum expandability without compromising portability. Opening the LCD Panel WARNING To avoid damage to the display panel: 1.
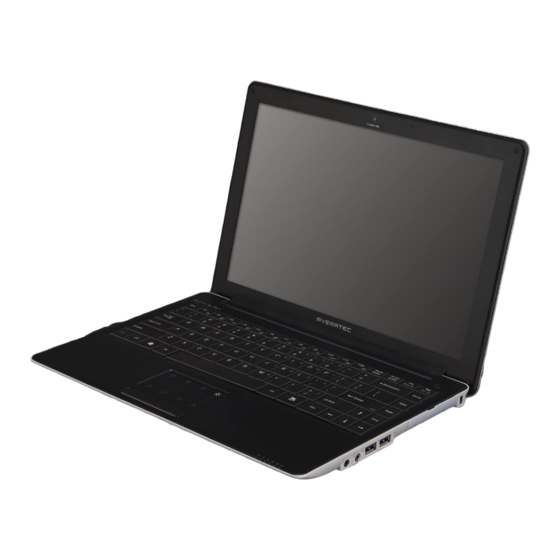
- Page 18 With the LCD screen open, you will see several features important for operating your Notebook computer. Front View To open, lift the top cover (LCD Panel). The image of the top-open view and descriptions below will help you to get familiarized with the main features of your notebook.
- Page 19 4. Power button / Power Indicator • Press momentarily to turn on the system. • Press and hold for at least 4 seconds to turn off the system. • Persistent green light indicates the Power is ON 5. Keyboard 6. Touchpad 7.
- Page 20 Left Views 1. Power jack (DC-in) 2. Ventilation grill 3. USB connector 4. 4-in-1 card reader The 4-in-1 Card Reader supports SD Card, MMC Card, MS and MS-Pro Card. Chapter 1 Introduction...
- Page 21 Right View 1. Headphone/Speaker/SPDIF jack 2. Microphone jack 3. USB connectors 4. Network connector (LAN) Note When using a LAN, please use an EMI Shielding Cable to minimize an inteference when transmitting. 5. VGA port 6. Kensington lock Chapter 1 Introduction...
- Page 22 Bottom View 1. Ventilation grill 2. CPU/Hard disk drive / Battery pack / Main memory cover 3. Integrated speakers Chapter 1 Introduction...
-
Page 23: Getting Started
Chapter Getting Started Chapter 2 Getting Started... - Page 24 A universal AC adapter is provided to supply your computer with power and also charge the computer’s battery pack. The adapter’s AC input voltage can range anywhere from 100 to 240 volts, covering the standard voltages available in almost every country. To connect the computer to an external power source: WARNING Do not use inferior extension cords as this may result in damage to your Notebook.
- Page 25 Turn on your Notebook by pressing the power button. Hold the button down for a second or two and release. The Power- On Self Test (POST) runs automatically. After the POST is completed, the computer reads the operating system from the hard disk drive into computer memory (this is commonly referred to as “booting”...
- Page 26 The installed battery pack charges automatically any time the computer is connected to the AC adapter and an external power source. It is a good idea to occasionally discharge the battery pack fully to preserve its operating performance. Chapter 2 Getting Started...
-
Page 27: Using The Notebook Computer
Chapter Using the Notebook Computer Chapter 3 Using the Notebook Computer... - Page 28 The LCD screen display can be adjusted by the following key combinations. KEYS Fn + F5 LCD Panel Off Fn + F6 Changes Display Mode: LCD-only, CRT-only and LCD & CRT. Fn + F7 Increases the brightness level. Fn + F8 Decreases the brightness level.
- Page 29 You can hook up an external monitor through the 15-pin CRT connector. Three configurations are available: • LCD only • CRT only • Simultaneous display of the LCD screen and CRT monitor You can switch between these display configurations by pressing the key combination [Fn] + [F6]. Chapter 3 Using the Notebook Computer...
- Page 30 Graphic Symbol Action Fn + F1 Fn + F2 Fn + F3 Fn + F4 Fn + F5 Fn + F6 Fn + F7 Fn + F8 Fn + F9 Fn + F10 Fn + F11 System Control Enters Suspend Mode. Bluetooth function On/Off.
-
Page 31: The Touchpad
The touchpad is a rectangular electronic panel located just below your keyboard. You can use the static-sensitive panel of the touchpad and slit it to move the cursor. You can use the buttons below the touchpad as left and right mouse buttons. The TouchPad is a pressure sensitive device. - Page 32 Double click the Finger-sensing Pad icon in the task bar. After selecting the Pointer Options tab, set the point speed option in the Motion menu. Then select the Enhance pointer precision option and press the OK button. Chapter 3 Using the Notebook Computer...
- Page 33 Adjusting the Finger-sensing Pad Double click the Finger-sensing Pad icon in the task bar. Select the Finger-sensing Pad tab, and see if the touch pad program is selected in the Available information and configuration items menu. Then press the OK button. Chapter 3 Using the Notebook Computer...
- Page 34 Features Simulate the page up / page down command. Applications • Microsoft Office : Word, Excel, PowerPoint, Outlook, …, etc. • Adobe Acrobat Reader/ Editor. • Windows Photo Gallery. • Windows File Explorer. • Browsers : IE, Firefox • Editor : Notepad, Wordpad and common text editors. •...
- Page 35 Features Simulate the forward and backward operation. Applications • Windows Photo Gallery • Windows File Exploer. • Browsers : IE, Firefox • Any application which support next page and previous page. Usage 1. Activate the window you want. 2. Put two fingers on pad at the same time. 3.
- Page 36 Features • Simulate the zoom in / out operation with ctrl + scroll command. • Zoom in/ out operation in an intuitive way. • Continuously zooming until fingers removed from pad. • Support any application which supports ctrl + scroll command. Applications •...
- Page 37 Features • Simulate rotating functions. • User can use rotating function in an intuitive way. • Support any application with has rotation command. Applications • Windows Photo Gallery • Adobe Acrobat Reader / Editor • Any application which supports rotation command. Usage 1.
-
Page 38: Dual Pad Function
If you wish to use the Dual Pad function while the Touch Pad is active, follow the instructions below. When the Dual Pad function is active, the Touch Pad backlight will blink once. 1. Dual Pad switch key If the <Dual Pad> key is pressed, the Touch Button icon will change. (Press the <Dual Pad> key to use the Dual Pad function.) Chapter 3 Using the Notebook Computer... - Page 39 2. Windows Media Player key If the Windows Media Player key is pressed while the Dual Pad is active, the Windows Media Player will be launched. 3. Internet key If the Internet key is pressed while the Dual Pad is active, the Internet Explorer will be launched. 4.
- Page 40 Select the Finger-sensing Pad tab, select the User-Defined Function #1 in the Available on-pad icons menu. Select the Open in the Enable icon function menu. Chapter 3 Using the Notebook Computer...
- Page 41 Select a pre-defined application or select your own application by selecting Open... then choosing your application. Once you have selected your pre-defined application, click the OK button to finish. 6. Volume key If the Dual Pad is active, you can control the volume with the Volume key. Chapter 3 Using the Notebook Computer...
- Page 42 This section contains information on the Notebook’s power system, including the AC Adapter, the battery system, recharging the battery, and tips for conserving battery power. The power system is comprised of two parts, the AC Adapter and the battery system. The AC Adapter converts AC power from a wall outlet to the DC power required by the computer.
- Page 43 Before using the battery pack for the first time, the Smart Battery IC within the battery pack should be calibrated in order to get accurate reporting of remaining battery life status. To calibrate the battery pack follows the instructions below: 1.
- Page 44 To charge the battery, while the battery pack is in the notebook, plug the AC adapter into the notebook and an electrical outlet. The charging time is approximately 4-6 hours when the notebook is turned off and approximately 6-10 hours when the notebook is turned on.
- Page 45 When the pack initially reaches the “Battery Low” state approximately 7 ~ 10 minutes of the usable battery life is left. You will hear an audible beep signal every 15 seconds alerting you to the “Battery Low” status. When the battery power reaches the “Battery Low Low”...
- Page 46 WARNING Danger of explosion if battery is incorrectly replaced. Replace only with the same or equivalent type recommended by the manufacturer. Dispose of used batteries according to the manufacturer's instructions. Never remove the battery pack while the power is on as this may result in data loss when the system loses power. To adjust the brightness on the LCD screen, press and hold down the [Fn] key in the lower left hand corner of the keyboard and press the [F8] key to reduce the brightness or [F7] to increase the brightness.
- Page 47 For Windows Vista help, click Start Help and Support icon will open the dialog box. Desktop may vary differently on the software installed in your notebook with different or additional shortcuts. Recycle Bin Taskbar Notification Start Button Chapter 3 Using the Notebook Computer...
- Page 48 Recycle Bin Used for storing deleted files in case you want to recover and save it in your system. The files will only be deleted from the Recycle Bin permanently only if you empty it by right clicking your mouse and select the “Empty Recycle Bin”. Start Button Allows easy access to all Windows programs.
- Page 49 Taskbar When you open a program, its icon is displayed at the taskbar for you to conveniently move between programs by clicking the relevant button. To add or remove toolbars from the taskbar: right click an empty spot on the taskbar, select Toolbars choose the toolbar you want to add.
- Page 50 Control Panel It is in this area that you can change how Windows looks and works. Click Start Control Panel dialog box. There are two interfaces - Classic View. Chapter 3 Using the Notebook Computer...
- Page 51 Your system has a built-in Bluetooth module, so you can use any Bluetooth device after pairing it with your system. To use a Bluetooth device, refer to the next steps: 1. Pair your Bluetooth device with your system. To pair your Bluetooth device with your system, refer to the manual that came with your device. 2.
-
Page 52: Desktop Operation
Chapter Desktop Operation Chapter 4 Desktop Operation... -
Page 53: Audio
Your notebook is capable of providing you with efficient and productive mobile computing, it also has the speed and capacity to service as a desktop system. This chapter discusses those functions of your notebook that are typical of desktop systems. The Notebook’s built-in audio capabilities allow you to take advantage of a wide range of education and entertainment multimedia software. - Page 54 The Notebook is equipped with hot-key volume controls: Pressing the [Fn]+[F11] hot-key combination decreases the audio output volume, press the [Fn]+[F10] hot-key combination increases the audio output volume. Your notebook comes equipped with an integrated sound system capable of providing you with quality audio sound through the builtin speakers or through external speakers connected via the system ports.
-
Page 55: Internet Connection
Chapter Internet Connection Chapter 5 Internet Connection... -
Page 56: The Internet
There are numerous ways to connect to the Internet. This may vary from the user’s working environment as well as system specifications. • Using a wired LAN • Using a wireless LAN For you connect to the Internet, a wired LAN environment normally uses the company’s LAN or a broadband modem. Chapter 5 Internet Connection... - Page 57 Chapter 5 Internet Connection...
-
Page 58: Running Bios Setup
Chapter Running BIOS Setup Chapter 6 Running BIOS Setup... -
Page 59: Modifying The Bios Settings
The Setup Utility is a hardware configuration program built into your computer’s BIOS (Basic Input/Output System). It runs and maintains a variety of hardware functions. It is menu-driven software, which allows you to easily configure and change the settings. The BIOS contains manufacture’s default settings for the computer’s standard operations. However, there are occasions when you may be required to modify the default settings in the BIOS. - Page 60 Function Key Command Exit Enter Go to Sub Screen General Help Save and Exit <Tab> Select a field Select an item Select an item Lower value Higher value Description Leaves a sub-menu to return to the previous menu OR exits the BIOS setup while saving changes. Shows the Sub Menu Shows the Help Screen Saves changes and reboots the computer.
- Page 61 The AMI BIOS setup main menu is subdivided into sub-menus. Each menu item is described in this section. Under this menu, you may change time/date and view basic processor and system memory information. Chapter 6 Running BIOS Setup...
- Page 62 Chapter 6 Running BIOS Setup...
-
Page 63: Vga Utilities
Chapter VGA Utilities Chapter 7 VGA Utilities... - Page 64 After you have restarted Windows, click on the Intel® Graphics Media Accelerator Driver for Mobile icon on the lower right corner of the screen. Click on the Graphics Properties to enter the Intel® Graphics Media Accelerator Driver for Mobile display window. You can also click the touchpad or mouse right button and select the Personalize item.
- Page 65 Click on the Advanced Settings tab to enter Generic PnP Monitor and Mobile Intel® 4 Series Express Chipset Family window display. Select the Intel ® Graphics Media Accelerator Driver for Mobile and click on the Graphics Properties tab. Chapter 7 VGA Utilities...
-
Page 66: Display Devices
This feature allows you to connect external display devices. This feature allows you to adjust the color scheme, resolution, refresh rate for your display. Chapter 7 VGA Utilities... -
Page 67: Hot Keys
This feature allows you to adjust the color rate of your display. This feature allows you to set the corresponding hot keys in executing the program you frequently use. Chapter 7 VGA Utilities... -
Page 68: Troubleshooting
Chapter Troubleshooting Chapter 8 Troubleshooting... - Page 69 Your computer has been fully tested and complies with the system specifications before shipping. However, incorrect operations and/or mishandling may cause problems. This chapter provides a reference for identifying and correcting common hardware and software problems that you may encounter. When you encounter a problem, you should first try to go through the recommendations in this chapter.
- Page 70 • If external devices such as USB cameras, scanners, printers do not function correctly when connected to the system, it is usually a problem with the device driver or the device itself. Consult the device’s manufacturer first before contacting TriGem USA support center. •...
-
Page 71: Audio Problems
• Software volume control is turned down in Microsoft Sound System or is muted. Double-click the speaker icon on the lower right corner of the taskbar to see if the speaker has been muted or turned down all the way. •... - Page 72 • If you had just performed a hard disk upgrade, make sure the hard drive connector is not loose and the hard disk drive is also correctly seated. Remove it and reinsert it firmly, and restart your PC. • The new HDD may need to be partitioned and reformatted. O/S and drivers will need to be re-installed as well. •...
- Page 73 • If you have been using the drive for a period, the files may be fragmented. Go to [Start > Programs > Accessories > System Tools > Disk Defragmenter] to perform a disk defragmentation. This operation may take a while. •...
- Page 74 • Make sure there is no excess perspiration or humidity on your hand when using the touch pad. Keep the surface of the touch pad clean and dry. • Do not rest your palm or wrist on the surface of the touch pad while typing or using the touch pad. •...
- Page 75 • Try to reboot the system. • If the message “CMOS Checksum Failure” appears during the booting procedure even after rebooting, it may indicate failure of the CMOS battery. If so, you need to replace the battery. This battery normally lasts two to five years. The battery is of type CR2032 (3V). Send the battery to the dealer for replacement.
- Page 76 Note Some system may not have the PC Card Slot option. • Make sure you have properly installed the driver for the card. • Consult the card’s manual or contact the vendor for troubleshooting. • Make sure the card is fully inserted; the outer end of the card should be even with the edge of the computer. •...
- Page 77 • In a 60°F environment, the certain areas of the computer’s back case are expected to reach 50 degrees. • Make sure the air vents are not blocked. • If the fan does not seem to be working at high temperature (50 degrees Celsius and up), contact the service center. •...
- Page 78 • Check the settings in the Windows Control Panel. • Make sure you have installed the necessary device drivers. • Contact the device vendor for additional support. Chapter 8 Troubleshooting...
-
Page 79: Recovering Your Original Software
Recovering Your Original Software - If you recover your hard disk, you will lose all the data and programs on your hard disk. After recovering, you must reinstall any software not originally installed from the factory. Be sure to backup your own data before running the recovery process. - Page 80 Windows Vista starts and the registration program runs. To set up and register with Microsoft for using your computer, follow the displayed messages. (For more information, refer to “Getting Started with Windows Vista.”) Note Do not delete the Recovery partition on the Computer Management window for recovery. (This partition takes about 2GB hard disk space.) Chapter 8 Troubleshooting...
-
Page 81: Specification
Chapter Specification Chapter 9 Specification... -
Page 82: Core Logic
• Intel CPU : Core 2 Duo / Pentium Dual core up to 1066Mhz, up to 6M L2 Cache • Package : uFPGA 478 Memory • DDRII 667/800 • DDRII RAM socket * 2 • DDR2 up to 4GB total Core Logic Support DDRII 667/800 SO-DIMM module per channel Chapter 9... -
Page 83: Audio Codec
• Supports DX9 & DX10 • Dynamic Video Memory Technology (DVMT) 4.0 support • WMV9(VC-1) and H.264(AVC)support • Spread spectrum clocking (SSC) support. • Analog CRT DAC interface support. Audio Codec • Support 5.1 multi-channels • Azalia standard support • Windows Vista Premium support Card reader (4 in 1) •... -
Page 84: Wireless Lan (Optional)
LAN Controller • Supports 10 and 100 Mb/sec. Full/Half Duplex operation • RTL8111 Wireless LAN (Optional) • PCIe Mini card • 2 antenna supported • IEEE 802.11 b/g/n/Draft-N compliant Keyboard • 86 Keys K/B Pointing Device • PS2 Touch Pad with 2 buttons w/o scroll up/down Chapter 9 Specification... -
Page 85: Battery Pack
• LCD is 13.3’’ WXGA, resolution 1280X800 or 1366X768 • Glare & non Clare panel/Wide view type • Support SATA II HDD, 1 x 2.5’’( 9.5mm) • 5400rpm support. Battery Pack 2cell pack, 7.3V/5000mAh AC-Adapter • Auto Voltage adjustment between 100 and 240VAC 50/60Hz •... -
Page 86: Physical Dimensions
BIOS • Support AMD BIOS Physical Dimensions • 327(W) x 227.5(D) x 10 - 25(H) mm (w/o rubber foot) • 1.75Kg(+0.5 Kg) w/ 2 cells battery Camera module • 1.3M module • USB interface Fixed LENs. Chapter 9 Specification...
Need help?
Do you have a question about the N3440TH1E-1 and is the answer not in the manual?
Questions and answers