Table of Contents

Related Manuals for JUKI MO-623N


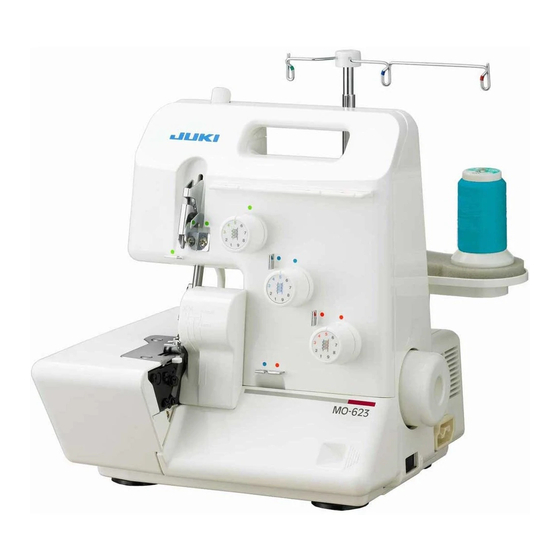
Summary of Contents for JUKI MO-623N
- Page 1 1-Needle, 3-Thread Overlock Sewing Machine MO-623N INSTRUCTION MANUAL IMPORTANT: Read all safety regulations carefully and under-stand them before using your sewing machine. Retain this in- struction manual for future reference.
-
Page 2: Safety Instructions
“IMPORTANT SAFETY INSTRUCTIONS” When using an electrical appliance, basic safety precautions should always be followed, including the following: Read all instructions before using this sewing machine. “DANGER To reduce the risk of electric shock:” ____ 1. The appliance should never be left unattended when plugged in. 2. - Page 3 Congratulations on your purchase of a JUKI sewing machine. Please be sure to read safety precautions in “To use the sewing machine safely” in the Instruction Manual before use to fully understand the functions and operating procedures of the sewing machine so as to use the sewing machine for a long time.
- Page 4 WARNING For the combination of the material and the thread and needle, in particular, refer to the explanation table in “Replacement of the needle”. If the needle or thread does not match the material used such as in the case that an extra heavy- weight material (e.g., denim) is sewn with a thin needle (#11 or higher), the needle can break result- ing in an unexpected personal injury.
-
Page 5: Table Of Contents
Contents Safety instructions ········································ 1-3 Contents························································4 Details of the machine ··································· 5-6 • Accessories ·················································6 Assembling thread stand ··································7 Preparing the machine ·····································8 Operation and function ································ 9-13 Threading ··············································· 14-17 Trial sewing ················································· 18 Adjusting the thread tension ···························· 19 Sewing in tape ··············································... -
Page 6: Details Of The Machine
Details of the machine Details of the machine 1. Looper cover 2. Looper cover opening handle 3. Chip guard cover 4. Cloth plate 5. Throat plate 6. Presser foot 7. Lower looper thread tension dial 8. Upper looper thread tension dial 9. -
Page 7: Accessories
Details of the machine View with cloth plate open 1. Lower knife adjusting knob 2. Stitch length adjusting knob Accessories 1. Foot controller 2. Nets 3. Spool caps 4. Tweezers 5. Cleaning brush 6. Looper threader 7. Needles in the needle box 8. -
Page 8: Assembling Thread Stand
Assembling thread stand Raise the support rod fully. Turn the thread stand until it engages the positioning stopper (A) with a click. For overlock spools For large spools If large industrial spools are used, position the anti-vibration cone upside down on the spool holder pin, i.e. with the wider edge at the top. -
Page 9: Preparing The Machine
Preparing the machine Attaching the foot controller 1. Plug foot controller into machine socket. 2. Plug foot controller into power supply socket. 3. Lay your foot on the foot controller. Step on the foot controller strongly (deeply), and the sewing speed increases. -
Page 10: Operation And Function
Operation and function Handwheel (Pulley) The handwheel turns toward you. ・ Upon completion of threading, at sewing start or sewing end, be sure to turn the handwheel toward you. Opening and closing the looper cover Opening : To open the looper cover, pull the looper cover opening handle to the right, and tilt the looper cover toward you. - Page 11 Operation and function Presser foot lifter (To raise the presser foot by the presser foot lifter) A : For regular sewing operation (sewing a medium-weight materi- al), raise the presser foot to position (A) illustrated in the figure. B : When you sew a heavy-weight material, raise the presser foot to position (B) illustrated in the figure, to provide more space between presser foot and throat plate.
- Page 12 Operation and function Stitch length adjusting knob (to adjust the stitch length) Stitch length is adjustable within the range from 1 to 4 while sewing. To adjust the stitch length, turn the stitch length adjusting knob and move the knob upwards or downwards. ・...
- Page 13 Operation and function Lower knife adjusting knob (adjusting the lower knife position for cutting width) Switch the machine off (power switch”O”) Turn the lower knife adjusting knob by pressing part (A) in the fig- ure. Reduce cutting width (knife moves to the left) if the edges of fabrics curl up Increase the cutting width (knife moves to the right) if the loops are too loose...
- Page 14 Operation and function Changing the needle Switch the machine off (power switch”O”) 1. Turn the handwheel until the needle is fully raised. 2. Before changing the needle, lower or remove the presser foot. 3. Using a small screwdriver, loosen the needle setscrew and remove the needle.
-
Page 15: Threading
Threading Thread the machine carefully in the correct sequence. This is important for making beautiful seams. Preparation 1. Retractable support rod with thread guide must be fully raised. 2. Open the looper cover and cloth plate. 3. Turn the handwheel toward you until the needles are fully raised. 4. - Page 16 Threading (1) 1. Upper looper thread (Blue) Place the spool on the spool holder pin right under blue marking on the retractable support rod thread guide. Bring thread up to the retractable support rod thread guide. (2,3) Pass the thread through the thread guide plate. Lay the thread between the thread tension dial discs.
- Page 17 Threading (2) 2. Lower looper thread (Red) Place the spool on the spool holder pin right under red marking on the retractable support rod thread guide. Bring the thread up to the retractable support rod thread guide. (2,3) Pass the thread through the thread guide plate. Thread the thread tension dial.
- Page 18 Threading (3) 3. Needle thread (Green) Place the spool on the spool holder pin right under the green mark- ing on the retractable support rod thread guide. Bring the thread up from the spool to the thread guide the green thread guide. (2,3) Thread the thread guide plate.
-
Page 19: Trial Sewing
Trial sewing After threading, make a trial sewing. Be sure to use a double layer of fabric in order to check whether the seam and thread tension are adequate. 1. Set all of the thread tension dials at “4”. 2. Make sure that the upper knife is lowered (in the cutting posi- tion). -
Page 20: Adjusting The Thread Tension
Adjusting the thread tension Adjusting the thread tension Turn the thread tension dial in the direction of the arrow, and make a trial sewing. A - If the upper looper threads meet on the underside of the fabric: B - If the lower looper thread meet on the upper side of the fabric: C - If the overlock needle thread forms loops on the underside of the fabric: D - The edge of the fabric curls when both upper looper and lower... -
Page 21: Sewing In Tape
Sewing in tape Sewing In tape The standard presser foot is equipped with a tape guide. When sewing shoulders or side seams of stretchy fabrics as a knitted fabric, a tape works effectively to prevent undesirable stretch of the fabric. 1. -
Page 22: Roll Hemming
Roll hemming Roll hemmer The roll hemmer is built-in to the sewing machine. The fabric edge is automatically rolled and oversewn. The result is a very fine and narrow edge finishing. ・ Turn the overlocking width selection knob toward you to align with the red marking in front of the throat plate. - Page 23 Roll hemming Standard thread tension list for roll hemming (rolled hem, narrow overlock stitch) 1. Thread tension slightly differs depending on the types of the fabric and thread 2. Use the woolly nylon thread or thinner thread for roll hemming to attain the beautiful finish. 3.
-
Page 24: Thread Breakage During Sewing
Thread breakage during sewing Thread breakage during sewing 1. Turn the workpiece at a right angle direction and stop sewing immediately. Then remove the workpiece. 2. Rethread. * If the lower looper thread is broken, cut the both needle threads off at the needle. -
Page 25: Securing Seams
Securing seams Securing seams 1. Sew about 3 to 4 cm of the thread chain at the beginning of seams. 2. Sew 2 to 3 stitches on the fabric. 3. Lower the needle and raise the presser foot. 4. Stretch the thread chain and lay it between the presser foot and the fabric from the left. -
Page 26: Maintenance
Maintenance Replacing the knives WARNING : Please refer to the safety instructions. Changing the upper knife The upper knife (moving knife) is made from special hardened ma- terial. Replace the upper knife only when the knife blade tip is damaged. For a replacement, contact your local dealer. -
Page 27: Trouble Shooting Guide
Trouble shooting guide The following problems should not be regarded as the machine trouble. Check the following table before you call for help from us. Trouble Cause (reason) Corrective measures Page Fabric does not 1. Presser foot pressure is too low. •... -
Page 28: Specifications
Specifications ・Specifications Item Specifications Number of threads 3 threads Needle 1301705H Overlocking width Standard 4.0 mm (for roll hemming: 2 mm) Stitch length 1 to 4 mm (feeding amount) (standard stitch length: 2.5 mm) Presser foot lift Sewing speed Max. 1,500 sti/min Dimensions 270 (W) x 260 (D) x 295 (H) mm Weight... -
Page 29: Optional Accessories
Optional accessories A9810 634 0A0A A9865 655 0A0A A9870 634 0A0A A9815 655 0A0A A9820 655 0A0A A9860 655 0A0C... - Page 32 2-11-1, TSURUMAKI, TAMA-SHI, TOKYO, 206-8551, JAPAN PHONE : (81)42-357-2341 FAX : (81)42-357-2379 Copyright © 2020 JUKI CORPORATION All rights reserved throughout the world. 40240825 000609...
Need help?
Do you have a question about the MO-623N and is the answer not in the manual?
Questions and answers