Table of Contents
Advertisement
Available languages
Available languages
Failure to follow instructions may cause damage or explosion, always shield
eyes. Read entire instruction manual before use.
WARNING: This product can expose you to chemicals, including Vinyl-Chloride, Styrene
and Acrylonitrile, which are known to the State of California to cause cancer. For more
information go to www.P65Warnings.ca.gov.
BATTERY TESTERS
BATTERY TESTERS
SOLAR Battery and System Tester
with Integrated Printer
Model No. BA227
User Manual
WARNING
Advertisement
Table of Contents

Related Manuals for Solar BA227


Summary of Contents for Solar BA227
- Page 1 BATTERY TESTERS BATTERY TESTERS SOLAR Battery and System Tester with Integrated Printer Model No. BA227 User Manual WARNING Failure to follow instructions may cause damage or explosion, always shield eyes. Read entire instruction manual before use. WARNING: This product can expose you to chemicals, including Vinyl-Chloride, Styrene and Acrylonitrile, which are known to the State of California to cause cancer.
- Page 2 WARNING Read these instructions completely before using the tester and save them for future reference. Before using the tester near a car, truck or boat, read these instructions and the instruction manual/safety information provided by the car, truck, boat or equipment manufacturer. Following all manufacturers’ instructions and safety procedures will reduce the risk of accident.
-
Page 3: Personal Precautions
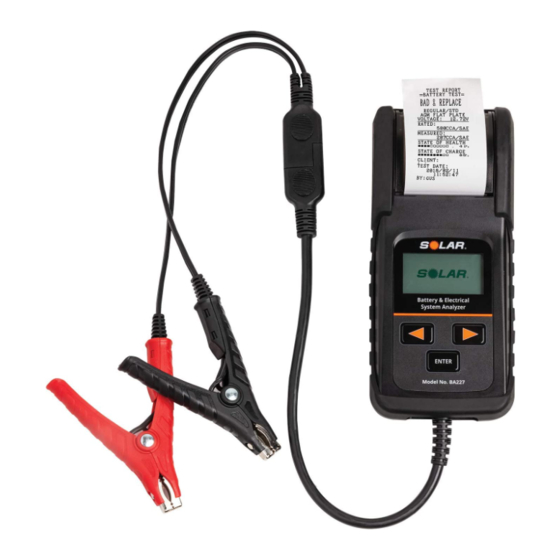
About Your SOLAR Battery and System Tester with Integrated Printer (Model No. BA227) Battery Tester Model BA227 is designed to test 12 Volt batteries, starting and charging systems. It offers quick and accurate assessment of battery condition and starting and charging system performance. It features long 36” leads for convenient testing and a backlit display for easy viewing in bright or low light environments. - Page 4 (with starting rating) batteries. The tester can test these types of batteries against several battery capacity rating systems, including CCA, CA(MCA), EN, IEC, JIS and DIN. The tester’s capacity in CCA terms is 100-1400 CCA.The tester has a recommended operating ambient temperature range of -4˚F to 122˚F. Preparing Battery to Be Tested Warning: Always wear eye protection, appropriate protective clothing and other safety equipment when working near lead-acid batteries.
- Page 5 You must be properly connected to a battery (See Battery Tester Operation: Battery Testing, steps 1-3) to confiure the tester. Upon proper battery connection, the tester display will splash the SOLAR logo for one second and then proceed to the Home Screen. The Home Screen shows the battery status by providing the Open Circuit Voltage of the connected battery.
-
Page 6: Battery Testing
Battery Tester Operation Note: Each time you connect the tester to a battery, the tester will run a quick cable verification to ensure a proper connection through the output cables to sensors in the clamp jaws. If the connection checks out OK, the display will momentarily flash “Output Cable Check Complete”... - Page 7 7. Scroll Arrow Keys to input the battery rating/capacity. Note that the Arrow Keys will scroll, such that you do not have to continually repeat pressing each key. Once proper battery rating is shown on the display, press “ENTER” to perform the battery test (lasts 1-2 seconds).
- Page 8 you chose YES, the printer will print results. If you chose NO, the tester will once again return you to the Home Screen and once again display the battery’s open circuit voltage. 12. Remove the test leads from the battery posts after completion of testing, always removing the negative (black) clamp first and then the positive (red) clamp.
- Page 9 immediately. 7. After Starting System Test, press “ENTER” to go to Charging System Test, beginning with the Charging System without Loads Test. The display will remind you to ensure all loads are off – after making sure there are no loads on the system, press “ENTER”.
-
Page 10: Counter Function
NORMAL – Charging System OK LOW – Charging Voltage is Low – Alternator is not providing sufficient current for the system’s electrical loads and to charge the battery. Check belts and connection from alternator to battery. HIGH – Charging Voltage is High – Voltage output from alternator to battery exceeds the normal limit. -
Page 11: Maintenance And Care
Scrolling forward once will bring you to RESET. Press “ENTER” to see your reset options, NO or YES. Scroll to your desired outcome and press “ENTER”. If you chose to reset the counter, the display will return to the counter display and show zero tests preformed. -
Page 12: Warranty
Instructions for obtaining service under this warranty: To obtain service under this warranty, return your SOLAR Battery Tester to the place of purchase, along with your dated sales receipt, for an exchange. Your product can also be sent back to Clore Automotive for exchange –... - Page 13 Registering Your Purchase For best service and to receive periodic product updates, please visit www. cloreregistration.com, click on the SOLAR logo, complete the information in the web form and click “submit.” It’s that easy! For answers to questions concerning use, out-of-warranty service, or warranty/service information on this or other Clore Automotive products, contact Clore Automotive Technical Service at 800.328.2921;...
-
Page 16: Precauciones Personales
Precauciones personales Al trabajar cerca de baterías de plomo-ácido, siempre debe haber alguien cerca, para que pueda oírlo y ayudarlo de ser necesario. Tenga a mano abundante agua fresca y jabón, por si el ácido de la batería entra en contacto con la piel, los ojos o la ropa. - Page 17 Acerca del probador para baterías y sistemas SOLAR con impresora integrada (Modelo BA227) El probador de baterías modelo BA227 está diseñado para probar baterías de 12 voltios, sistemas de carga y de arranque. Ofrece una evaluación rápida y precisa del estado de la batería y del funcionamiento de los sistemas de arranque y de carga.
- Page 18 Funcionamiento del probador para baterías: Pasos 1-3 para la prueba de baterías). Tras realizar una conexión correcta de la batería, la pantalla del probador mostrará el logo de SOLAR durante una segunda y luego avanzará hacia la pantalla Principal. La pantalla Principal muestra el estado de la batería mediante un circuito de voltaje abierto de la batería conectada.
- Page 19 La pantalla de CONFIGURACIÓN ofrece cinco opciones: IMPRIMIR EL ÚLTIMO RESULTADO, IDIOMA, CONTADOR, ESTABLECER FECHA, BRILLO y PERSONALIZAR. Cada uno de estos pasos de configuración se puede alcanzar al desplazarse por las pantallas, pulsando el botón de flecha hacia la derecha. Para imprimir el último resultado de la prueba, desplácese hasta IMPRIMIR ÚLTIMO RESULTADO y pulse “INTRO”.
- Page 20 Funcionamiento del probador para baterías Nota: Cada vez que usted conecta el probador a la batería, el probador ejecutará una verificación rápida del cable para asegurar la conexión adecuada de los cables de salida a los sensores en las mordazas de sujeción. Si la conexión está...
- Page 21 5a. Secuencia adicional cuando se elige el tipo de baterías START/STOP. El probador preguntará qué tipo de batería se está utilizando en la aplicación START/STOP, EFB o AGM. EFB se refiere a construcciones de Baterías inundadas mejoradas y AGM se refiere a construcciones de baterías AGM. Escoja el tipo correcto de batería y presione “INTRO”.
- Page 22 BAD & REPLACE: La batería no puede conservar la carga. Debe cambiarla de inmediato. BAD CELL & REPLACE: La batería probada tiene, por lo menos, una celda que hace cortocircuito. Debe cambiarla de inmediato. LOAD ERROR: La batería probada es mayor a 2000 CCA o 200 AH. También puede ser que no se hayan conectado las pinzas correctamente.
- Page 23 • Prueba del sistema de recarga con cargas Sigas las instrucciones a continuación para completar las pruebas anteriores. 1. Verifique que los terminales de la batería estén limpios. Consulte la sección anterior, Preparación del sistema y batería. 2. Conecte los conductores del probador a la batería; para ello, primero sujete la pinza roja al terminal positivo de la batería del vehículo.
- Page 24 8. El probador mostrará el voltaje del sistema de recarga sin cargas y ofrecerá una evaluación de esa lectura. NORMAL – El sistema de recarga está en buen estado LOW – El voltaje de la carga es bajo – El alternador no está enviando suficiente corriente a la batería.
- Page 25 HIGH – El voltaje de la carga es alto – El voltaje del alternador a la batería excede el límite normal. Revise las conexiones del alternador, incluso la conexión a tierra. Además, verifique las especificaciones del fabricante, ya que la salida de corriente varía según el tipo de vehículo. 14.
-
Page 26: Mantenimiento Y Cuidados
para ver sus opciones de restablecimiento: NO o YES (Sí). Avance hasta el resultado deseado y presione “ENTER” (Introducir). Si decide restablecer el contador, la pantalla volverá a la pantalla del contador y mostrará que no se ha realizado ninguna prueba. Si selecciona NO, se le pasará a la pantalla principal. Avanzar dos veces lo llevará... - Page 27 Garantía Clore Automotive justifica este producto para ser libre de defectos en la materia o la habilidad para un período de un año de la fecha de la compra original de usuario final. Esta garantía se extiende a todas las personas que adquieran legalmente el derecho de propiedad dentro de los uno año de la compra inicial, pero es nula en caso de que el producto haya sufrido abusos, o haya sido alterado, o visto sujeto a mal uso o empacado en forma inadecuada y dañado durante el traeyecto de...
- Page 29 AVERTISSEMENT Lisez entièrement ces instructions avant d'utiliser le testeur. Gardez-les à titre de référence. Avant d'utiliser le produit pour testeur une auto, un camion, un bateau ou pour alimenter un équipement, lisez ces instructions ainsi que le manuel d'instruction ou les informations de sécurité fournis par le fabricant de l'auto, du camion, du bateau ou de l'équipement.
- Page 30 Precautions personnelles Assurez-vous qu’un tiers soit à portée de voix ou à proximité pour vous prêter assistance quand vous travaillez près d’une batterie au plomb-acide. Ayez une réserve d’eau douce et de savon à portée de main au cas où l’acide de la batterie entrerait en contact avec votre peau, vos vêtements ou vos yeux.
- Page 31 SOLAR avec imprimante intégrée (modèle BA227) Le testeur de batterie modèle BA227 a été conçu pour tester des batteries 12 Volts ainsi que les systèmes de charge et de démarrage. Il permet une évaluation rapide et précise des batteries ainsi que des performances des systèmes de démarrage et...
- Page 32 ENTER enfoncée pendant 2 secondes pour revenir à l’écran précédent. Lorsque l’appareil est raccordé correctement à la batterie, le logo SOLAR apparaît pendant un seconde sur l’afficheur avant de passer à l’écran d’accueil. L’écran d’accueil affiche l’état de la batterie en indiquant la tension en circuit ouvert de la...
- Page 33 (anglais, espagnol ou français) à l’aide des flèches et appuyer sur « ENTRÉE ». Vous retournerez à l’écran Fonction. Pour en savoir plus sur le fonctionnement du compteur, voir la partie Fonction compteur de ce manuel. Pour définir la date et l’heure, faire défiler jusqu’à RÉGLAGE DATE et appuyer sur «...
- Page 34 Vérification de la batterie 1. Avant de vérifier une batterie dans un véhicule, coupez le contact, puis mettez tous les accessoires et les charges hors fonction. Fermez les portes du véhicule et le couvercle du coffre. 2. Assurez-vous que les bornes de la batterie sont propres. Consultez la section Préparation de la batterie et du système.
- Page 35 note que les flèches font défiler le menu pour que vous n’ayez pas à appuyer de manière répétitive sur chaque touche. Lorsque l’indice de batterie voulu apparaît sur l’afficheur, appuyez sur ENTER (entrée) pour effectuer la vérification de la batterie (de 1 à 2 secondes). 8.
- Page 36 le branchement est correct, chargez complètement la batterie et vérifiez-la de nouveau en vous assurant qu’elle est raccordée correctement. Si la lecture demeure identique, la batterie doit être remplacée immédiatement. Note : Lorsqu’un tel résultat s’affiche, on demande à l’utilisateur de vérifier si des accessoires restés allumés en sont la cause.
- Page 37 apparaît sur l’afficheur. Sélectionnez SYSTEM TEST (vérification du système) en faisant défiler le menu au besoin jusqu’à ce que la flèche se trouve en face de SYSTEM TEST. Appuyez sur le bouton ENTER (entrée) situé au centre. 4. L’affichage confirmera que l’utilisateur a choisi SYSTEM TEST (vérification du système).
- Page 38 vous aux instructions du fabricant, dans la mesure où la tension de sortie varie en fonction du type de véhicule et du constructeur (confirmez que la plage n’est pas trop élevée pour le véhicule). 9. Ensuite, l’appareil de vérification exécutera le test du système de recharge en présence de charge, en commençant par une évaluation de l’ondulation.
- Page 39 l’alternateur à la batterie dépasse la limite établie. Vérifiez les branchements au niveau de l’alternateur, sans oublier la mise à terre. De même, reportez-vous aux instructions du fabricant, dans la mesure où la tension de sortie varie en fonction du type de véhicule et du constructeur. 14.
-
Page 40: Entretien
zéro. Si vous choisissez NO (non), vous êtes redirigé vers l’écran d’accueil. En faisant défiler les options deux fois, vous affichez l’écran d’impression du compteur. Appuyez sur ENTER (entrée) pour consulter les options d’impression : NO ou YES (non ou oui). Sélectionnez l’option souhaitée et appuyez sur ENTER (entrée). -
Page 41: Garantie
Garantie Clore Automotive mérite ce produit pour être libre des défauts dans le matériel ou de l’exécution pour une période d’une année de la date d’achat d’utilisateur final original. La présente garantie s’applique à toute personne ayant fait l’acquisition du produit dans les un an suivant la date d’achat au détail initial, mais elle est nulle et non avenue si le produit a été... -
Page 44: Battery Testers
BATTERY TESTERS BATTERY TESTERS SOLAR Battery and System Tester with Integrated Printer Model No. BA227 User Manual 842-227-500 © 2019 Clore Automotive...
Need help?
Do you have a question about the BA227 and is the answer not in the manual?
Questions and answers
After setting Date and time how to save it in the tester? Battery Tester Solar BA227