Table of Contents
Advertisement
Available languages
Available languages
equipment when working near lead-acid batteries. Do not touch eyes while working
on or around lead-acid batteries.
Use extreme care while working within the engine compartment, because moving
parts may cause severe injury. Read and follow all safety instructions published in
the vehicle's Owner's Manual.
Batteries being tested with the SOLAR tester likely contain liquid acids which are
hazardous if spilled.
Failure to follow instructions may cause damage or explosion, always shield
eyes. Read entire instruction manual before use.
WARNING: This product can expose you to chemicals, including Vinyl-Chloride, Styrene
Warning: This product contains chemicals, including lead, known to the State
and Acrylonitrile, which are known to the State of California to cause cancer. For more
of California to cause cancer, birth defects and other reproductive harm. Wash
hands after handling.
information go to www.P65Warnings.ca.gov.
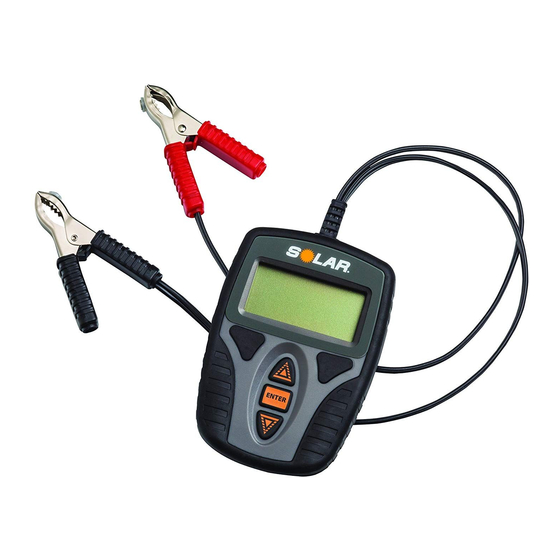
Battery and System Tester
Model No. BA9
WARNING
Advertisement
Table of Contents

Subscribe to Our Youtube Channel
Related Manuals for Solar BA9


Summary of Contents for Solar BA9
- Page 1 Use extreme care while working within the engine compartment, because moving parts may cause severe injury. Read and follow all safety instructions published in the vehicle's Owner's Manual. Batteries being tested with the SOLAR tester likely contain liquid acids which are hazardous if spilled. Battery and System Tester Model No.
- Page 2 WARNING Read these instructions completely before using the tester and save them for future reference. Before using the tester near a car, truck or boat, read these instructions and the instruction manual/safety information provided by the car, truck, boat or equipment manufacturer. Following all manufacturers’ instructions and safety procedures will reduce the risk of accident.
- Page 3 Personal Precautions Someone should always be within range of your voice or close enough to come to your aid when you work near a lead-acid battery. Have plenty of fresh water and soap nearby in case battery acid contacts skin, clothing or eyes.
- Page 4 About Your Battery and System Tester The battery tester is designed to test only 12 Volt batteries and systems. The tester is compatible with a wide range of battery types, including Conventional, Maintenance Free, AGM, Gel Cell, Spiral Wound and Start-Stop batteries. The tester can test these types of batteries against several battery capacity rating systems.
- Page 5 Battery Tester Operation Battery Testing 1. Before you test a battery in a vehicle, turn off the ignition, all accessories and loads. Close all the vehicle doors and the trunk lid. 2. Make sure the battery terminals are clean. See Preparing Battery to Be Tested. 3.
- Page 6 10. When the test is complete, the display will show the actual determined rating (as compared to the nominal rating entered in Step 8) and provide an assessment. Assessment corresponds as follows: OK – The battery is good and capable of holding a charge. OK RECHARGE –...
- Page 7 6. The display shows CRANKING, the battery’s voltage and a blinking key icon. 7. Start the engine. The display will show the minimum voltage reach by the battery and provide an assessment of starting system condition. Assessment corresponds as follows: OK –...
-
Page 8: Troubleshooting
15. Turn engine OFF and remove the test leads from the battery posts after completion of testing, always removing the negative clamp first and then the positive clamp. Troubleshooting Question: What does it mean if the Tester Display shows HI? Answer: The voltage of the tested battery is over 16V and too high of a reading for a 12V battery. - Page 9 Question: What might cause sparking at the connection to the negative or positive terminal? Answer: It is important that the tester clamps make a good connection to the battery terminal (preferred) or to the battery connection hardware. Avoid connecting to any screws that are used as part of the vehicle’s battery connection. In some circumstances, usually when connecting to such screws, an inefficient connection is made that provides very little surface contact from the clamp to the connected surface.
- Page 10 Warranty Clore Automotive, LLC warrants your SOLAR Battery Tester to be free from defects in material and workmanship for a period of one year from the date of sale to the original user or consumer purchaser. This warranty excludes and does not cover defects, malfunctions, or failures of your...
- Page 12 ADVERTENCIA Lea todas estas instrucciones antes de usar el probador y guárdelas para referencia futura. Antes de usar el probador para arrancar el motor de un auto, camioneta o bote, o para alimentar cualquier equipo, lea estas instrucciones, el manual de instrucciones y la información de seguridad que proporciona el fabricante del auto, remolque, bote o equipo.
- Page 13 Precauciones personales Al trabajar cerca de baterías de plomo-ácido, siempre debe haber alguien cerca, para que pueda oírlo y ayudarlo de ser necesario. Tenga a mano abundante agua fresca y jabón, por si el ácido de la batería entra en contacto con la piel, los ojos o la ropa.
- Page 14 Acerca del probador para baterías y el probador para baterías y sistemas El modelo BA9 para probar baterías están diseñados para utilizarse únicamente con baterías y sistemas de 12 V. El probador es compatibles con una gran cantidad de baterías como, por ejemplo, las convencionales, las que no necesitan mantenimiento, las AGM, las que tienen celdas de gel, con estructura en espiral y las de ciclo profundo.
- Page 15 los accesorios del vehículo estén APAGADOS para asegurarse de que no provocará la formación de un arco eléctrico. 6. Si es necesario extraer la batería del vehículo, siempre quite primero el terminal de puesta a tierra de la batería. Funcionamiento del probador para baterías Prueba de las baterías 1.
- Page 16 8. Presione las flechas ARRIBA o ABAJO para ingresar la clasificación de baterías. Presione INTRO para realizar la prueba de batería (dura entre 1 y 2 segundos). 9. (La secuencia opcional es determinada por el probador). a. Si la pantalla muestra BAT. CARGADA (¿la batería probada está cargada?), presione la flecha ARRIBA o ABAJO para mostrar SÍ...
- Page 17 12. Presione INTRO para regresar a la pantalla principal y mostrar nuevamente el voltaje de circuito abierto de la batería. Retire los cables del probador de los bornes de la batería después de que finalice la prueba; siempre retire la pinza negativa primero y, luego, la pinza positiva.
- Page 18 evaluación de dicha lectura. Los resultados de la evaluación son los siguientes: OK: carga del sistema OK. ALTO: el voltaje de carga es alto. BAJO: el voltaje de carga es bajo. 10. El probador puede realizar una evaluación de la carga del sistema cuando esté cargado.
- Page 19 Solución de problemas Pregunta: ¿Qué significa que en la pantalla del probador aparezca HI? Answer: El voltaje de la batería probada es superior a 16 V y constituye un valor demasiado alto para una batería de 12 V. El probador no funciona en estas condiciones.
- Page 20 Pregunta: ¿Qué podría producir chispas en la conexión del terminal positivo o negativo? Answer: Es fundamental que las pinzas del probador tengan una buena conexión con el terminal de la batería (recomendado) o con sus piezas de conexión. Evite conexiones con tornillos que se utilicen como parte de la conexión de la batería del vehículo.
- Page 21 Garantía Se garantiza que el probador no presentarán defectos de materiales ni de mano de obra por un plazo de (1) año a partir de la fecha de compra original. Para obtener los beneficios de la garantía debe presentar la factura de compra original. Esta garantía no se aplica a productos que, a exclusivo criterio de Clore Automotive, se hayan sometido a uso indebido, abuso o modificación del estado original.
- Page 22 AVERTISSEMENT Lisez entièrement ces instructions avant d'utiliser le testeur. Gardez-les à titre de référence. Avant d'utiliser le produit pour survolter une auto, un camion, un bateau ou pour alimenter un équipement, lisez ces instructions ainsi que le manuel d'instruction ou les informations de sécurité fournis par le fabricant de l'auto, du camion, du bateau ou de l'équipement.
- Page 23 Precautions personnelles Assurez-vous qu’un tiers soit à portée de voix ou à proximité pour vous prêter assistance quand vous travaillez près d’une batterie au plomb-acide. Ayez une réserve d’eau douce et de savon à portée de main au cas où l’acide de la batterie entrerait en contact avec votre peau, vos vêtements ou vos yeux.
- Page 24 Modèle BA9 sont exclusivement conçus pour vérifier des batteries et des systèmes de 12 volts. BA9 sont compatibles avec un vaste éventail de types de batteries, y compris les batteries conventionnelles, sans entretien, AGM, à gel-piles, batteries spiralées et à cycle profond. Ils permettent de vérifier ces types de batteries en fonction de divers indices de la capacité...
- Page 25 6. Si vous devez retirer la batterie du véhicule pour la vérifier, retirez toujours la borne de masse de la batterie en premier. Fonctionnement de Testeur de Batterie Test de Batterie 1. Avant de tester une batterie dans un véhicule, coupez le contact, et mettez tous les accessoires et toutes les charges hors tension.
- Page 26 7. Appuyez sur la flèche du HAUT ou sur la flèche du BAS pour sélectionner la classification applicable de batterie contre laquelle vous envisagez tester. Les options incluent SAE/CCA, DIN, IEC, En ou CA(MCA). Appuyez sur ENTER (Entrée). 8. Appuyez sur la flèche du HAUT ou sur la flèche du BAS pour saisir la classification de la batterie.
- Page 27 12. Appuyez sur ENTER (Entrée) pour retourner à l’écran d’accueil et pour de nouveau afficher la tension en circuit ouvert de la batterie. Retirez les fils des bornes de batterie après la fin du test. Retirez toujours la pince négative d’abord, puis la pince positive.
- Page 28 9. Faites tourner le moteur à 1200 - 1500 tr/min. Le testeur affichera la tension du système de charge sans charges et fournira une évaluation de cette lecture. L’évaluation correspond à ce qui suit : OK – Le Système de Charge est OK. HI –...
- Page 29 Dépannage Question : Quelle est la signification de la mention HI (élevée) à l’afficheur de l’appareil de vérification? Réponse : La tension de la batterie vérifiée est supérieure à 16 V et trop élevée pour une batterie de 12 V. L’appareil de vérification ne peut fonctionner dans ce cas.
- Page 30 Question : Qu’est-ce qui peut causer des étincelles au niveau du branchement à la borne négative ou positive? Réponse : Il est important que les pinces de l’appareil de vérification soient bien branchées à la borne de la batterie (méthode recommandée) ou au matériel de branchement de la batterie.
- Page 31 Garantie Le testeur sont garantis exempts de tout défaut de matériau et de main-d’œuvre pendant un (1) an à compter de la date d’achat initiale – le reçu original étant requis pour bénéficier de la garantie. Cette garantie ne couvre pas les produits qui, à la seule discrétion de Clore Automotive, ont été...
- Page 32 Battery and System Tester Model No. BA9 841-040-000 B © 2018 Clore Automotive...
Need help?
Do you have a question about the BA9 and is the answer not in the manual?
Questions and answers