Table of Contents

Subscribe to Our Youtube Channel
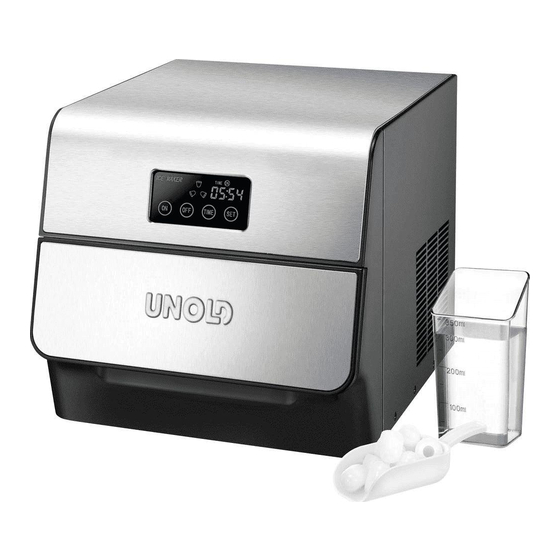
Related Manuals for Unold 48955


Summary of Contents for Unold 48955
- Page 1 EISWÜRFELBEREITER EDEL Bedienungsanleitung Instructions for use Notice d´utilisation Gebruiksaanwijzing Istruzioni per l’uso Instrucciones de uso Návod k obsluze Instrukcja obsługi Modell 48955...
- Page 2 Impressum: Bedienungsanleitung Modell 48955 Stand: November 2016 /nr Copyright © Mannheimer Straße 4 68766 Hockenheim Telefon +49 (0) 62 05/94 18-0 Telefax +49 (0) 62 05/94 18-12 E-Mail info@unold.de Internet www.unold.de...
- Page 3 Weitere Informationen zu unserem Sortiment erhalten Sie unter www.unold.de...
-
Page 4: Table Of Contents
Traitement des déchets / Informationen für den Fachhandel ....20 Protection de l’environnement ....47 Service-Adressen ........21 Service ..........21 Instructions for use Model 48955 Gebruiksaanwijzing Model 48955 Technical Specifications ......22 Technische gegevens ......48 Explanation of symbols ......22 Verklaring van de symbolen ......48 Safety Information ........22... - Page 5 INHALTSVERZEICHNIS Istruzioni per l‘uso Modello 48955 Návod k obsluze Modelu 48955 Dati tecnici ...........61 Technické údaje ........87 Significato dei simboli ......61 Vysvětlení symbolů ........87 Per la vostra sicurezza ......61 Pro Vaši bezpečnost ........87 Prima del primo utilizzo ......65 Před prvním použitím ......91 Display ..........66...
- Page 6 EINZELTEILE...
- Page 7 EINZELTEILE Ab Seite 8 Pagina 61 Gehäuse Custodia Display Display Wassertank Serbatoio dell’acqua Eisbehälter Contenitore del ghiaccio Restwasserablauf (Geräterückseite) Scarico dell’acqua residua Page 22 Página 74 Housing Carcasa Display Pantalla Water tank Recipiente de agua Ice container Recipiente de hielo Residual water drain Salida del agua residual Page 35...
-
Page 8: Bedienungsanleitung Modell 48955
BEDIENUNGSANLEITUNG MODELL 48955 TECHNISCHE DATEN Leistung: 150 W, 220–240 V~, 50 Hz Maße: Ca. 29,5 x 35,0 x 29,0 cm (LxB/TxH) Zuleitung: Ca. 120 cm Gewicht: Ca. 9,8 kg Gehäuse: Kunststoff, schwarz/Edelstahl gebürstet Wassertank: 1,5 Liter Wasservolumen Ausstattung: LCD-Display, Zeitvorwahl-Funktion, Uhrzeit-Anzeige, Signalton bei vollem Eiswürfelbehälter sowie bei leerem Wassertank, bis zu... - Page 9 Spielzeug. Das Säubern und 7. Tauchen Sie das Gerät oder die Wartung des Geräts dür- die Zuleitung keinesfalls in fen von Kindern nur unter Wasser oder andere Flüssig- Aufsicht durchgeführt wer- keiten ein. den. 8. Das Gerät und die Zuleitung 2.
- Page 10 ren Gegenständen, um eine sollte deshalb mindestens ausreichende Belüftung des drei Minuten lang in Betrieb Gerätes zu gewährleisten. sein. 15. Verwenden Sie keine elektri- 23. Schalten Sie das Gerät aus schen Geräte im Inneren des und ziehen Sie den Netzste- Gerätes, es sei denn, diese cker, bevor Sie es bewegen, wurden vom Hersteller emp-...
- Page 11 mäße Reparaturen können wird, muss sie durch den zu erheblichen Gefahren für Hersteller oder seinen Kun- den Benutzer führen und dendienst oder eine ähnlich haben den Ausschluss der qualifizierte Person ersetzt Garantie zur Folge. werden, um Gefährdungen 29. Wenn die Anschlussleitung zu vermeiden.
-
Page 12: Vor Dem Ersten Benutzen
VOR DEM ERSTEN BENUTZEN ƒ Achten Sie beim Auspacken und Entfernen der Verpackung darauf, dass das Gerät nicht um mehr als 45 ° gekippt wird, da sonst der Kompressor im Gerät beschädigt werden kann. Entfernen Sie alle Verpackungs- sind und das Gerät stabil und materialien und ggf. -
Page 13: Display/Bedienelement
DISPLAY/BEDIENELEMENT Ihr neuer Eiswürfelbereiter verfügt über ein „Touchscreen“-Bedienelement. Das bedeutet, dass alle Einstellungen am Gerät direkt über das Display vorgenommen werden. Tippen Sie hierfür leicht auf die gewünschte Taste. Beachten Sie dabei, die Einstellungen über die Tasten zügig vorzunehmen. Wenn Sie länger als 3 Sekunden mit einem Tastendruck warten, wird die aktuelle Eingabe abgebrochen und das Gerät kehrt in den ursprünglichen Zustand zurück. -
Page 14: Uhrzeit Einstellen
UHRZEIT EINSTELLEN Drücken Sie einmal die Taste lange die Taste „SET“, bis die „TIME“ auf dem Display, um die gewünschte Uhrzeit in Minuten Stunden einzustellen: Drücken erreicht ist. Sie hierfür nun so lange die Drücken Sie die Taste „TIME“, Taste „SET“, bis die gewünschte um die eingestellte Uhrzeit zu Uhrzeit in Stunden erreicht ist. -
Page 15: Hinweise Zum Wasser
HINWEISE ZUM WASSER Bitte verwenden Sie ausschließ- Tipp: Im Regelfall stellt das Gerät lich Trinkwasser, um Eiswürfel leicht trübe Eiswürfel her, was herzustellen. Verwenden jedoch die Qualität der Eiswürfel keine Zusätze, Aromastoffe oder nicht beeinträchtigt. Dies liegt am Ähnliches, diese können besonders schnellen Gefriervor- Gerät verunreinigen. -
Page 16: Bedienen
BEDIENEN Achtung: Die ersten mit dem Gerät Schieben Sie den Eisbehälter hergestellten Eiswürfel sollten wieder in das Gerät. nicht verzehrt werden. Bitte Drücken Sie die Taste „ON“, um entsorgen Sie diese Eiswürfel, die Eiswürfelherstellung sofort zu da ggf. Produktionsrückstände starten. Wenn Sie die Zeitvorwahl enthalten sein können. - Page 17 12. Sie können jederzeit 20. Das Gerät stoppt automatisch Eiswürfelherstellung unter- oder die Eiswürfelherstellung. Füllen abbrechen, indem Sie die Taste Wasser nach, oben „OFF“ drücken. beschrieben, und beachten Sie 13. Wenn Sie das Gerät über die dabei die MAX-Markierung und Zeitvorwahl programmiert haben, überfüllen Sie das Gerät nicht.
-
Page 18: Reinigen Und Pflegen
REINIGEN UND PFLEGEN Vor dem Reinigen stets das und anschließend mit einem fus- Gerät ausschalten und den selfreien Tuch trocknen. Stecker aus der Steckdose Verwenden Sie keine scharfen ziehen. Scheuermittel, Stahlwolle, metal- Das Gerät und die Zuleitung dür- lischen Gegenstände, heißen Rei- fen nicht in Wasser oder eine nigungsmittel oder Desinfektions- andere Flüssigkeit eingetaucht... -
Page 19: Fehler Beheben
FEHLER BEHEBEN Fehler Ursache Lösung Der Kompressor brummt Voltzahl zu niedrig. Schalten Sie das Gerät sehr laut. aus und prüfen Sie, ob das Gerät an einer 220– 240 V~-Steckdose ange- schlossen ist. Es leuchtet keine Kon- Das Gerät ist nicht rich- Prüfen Sie, ob der Ste- trollleuchte, wenn Sie tig angeschlossen. -
Page 20: Garantiebestimmungen
Produkt in gesundheits- und umweltverträglicher Weise entsorgt wird. INFORMATIONEN FÜR DEN FACHHANDEL Hiermit erklärt die UNOLD AG, dass sich der Eiswürfelbereiter 48955 in Übereinstimmung mit den grundlegenden Anforderungen der europäischen Richtlinie für elektromagnetische Verträglichkeit (2014/30/EU) und der Niederspannungsrichtlinie (2014/35/EC) befindet. -
Page 21: Service-Adressen
68766 Hockenheim Internet www.unold.de Sie möchten innerhalb der Garantiezeit ein Gerät zur Reparatur einsenden? Auf unserer Internetseite www.unold.de/ruecksendung können Sie sich einen Rücksendeschein ausdrucken, um damit das Paket kostenlos bei der Post abzugeben (nur für Einsendungen aus Deutschland und Österreich). -
Page 22: Instructions For Use Model 48955
INSTRUCTIONS FOR USE MODEL 48955 TECHNICAL SPECIFICATIONS Power: 150 W, 220–240 V~, 50 Hz Dimensions: Approx. 29.5 x 35.0 x 29.0 cm (LxW/DxH) Power cord: Approx. 120 cm Weight: Approx. 9.8 kg Housing: Plastic, black / stainless steel, brushed Water tank: 1.5 litre water volume... - Page 23 appliance or they must be 9. The appliance is intended under constant supervision. for household use only, or for 3. Children between the ages similar areas of use, such as, of 3 and 8 should only ƒ kitchenettes in businesses, switch the appliance on and offices or other workplaces, off when it is in its normal...
- Page 24 17. Do not operate or store the 27. Never attempt to repair the ice cube maker outdoors. appliance yourself, since 18. Use the appliance only after this can result in electric it has been properly assem- shock. bled. 28. Check the appliance, the 19.
- Page 25 ularly for wear or damage. In 34. If the supply cord is dam- case of damage to the power aged, it must be replaced cord or other parts, please by the manufacturer or its send appliance service agent or a similarly inspection and repair to our qualified person in order to after sales service.
-
Page 26: Before Using The Appliance For The First Time
BEFORE USING THE APPLIANCE FOR THE FIRST TIME ƒ When unpacking the appliance and removing the packaging material, make sure not to tilt the appliance more than 45°, to prevent damage to the com- pressor inside the appliance. Remove all packaging materials Check whether the residual water and any transport safeguards. -
Page 27: Display
DISPLAY Your new ice cube maker has a touch screen operating element. This means that all settings on the device are made directly via the display. To do this, lightly tap the desired button. In this regard, note that the settings must be made promptly via the buttons. -
Page 28: Setting The Time
SETTING THE TIME Press the „TIME“ button on the the desired time in minutes is display once to set the hours: reached. To do this, now press the „SET“ Press the „TIME“ button to save button until the desired time in the set time. -
Page 29: Instructions Concerning The Water
INSTRUCTIONS CONCERNING THE WATER Please only use drinking water to Tip: As a rule the appliance pro- produce ice cubes. Do not use any duces slightly opaque ice cubes, additives, flavourings or similar which however does not impair items, such items can contami- the quality of the ice cubes. -
Page 30: Making Ice Cubes
MAKING ICE CUBES Caution: Do not use the first ice Press the On button to start cubes that have been produced making ice cubes immediately. with the appliance. Dispose of If you have activated the timer, these ice cubes; they may contain you do not need to press any production residues. - Page 31 appliance stops making ice cubes the appliance and wait until the ice automatically at the set time. cubes have melted slightly. Then 14. Caution: If you interrupt the proceed with production of the process, the excess water runs ice cubes (however, wait at least back into the water tank.
-
Page 32: Cleaning And Care
CLEANING AND CARE Before cleaning, always turn Do not use any abrasive scour- off the appliance and unplug it ing agents, steel wool, metallic from the electrical outlet. objects, hot cleaning agents or disinfectants. Do not immerse the appliance After use, please leave the ice and power cord in water or other cube maker open to prevent the liquids or wash them in the dish-... -
Page 33: Troubleshooting
TROUBLESHOOTING Problem Cause Solution The compressor hums The voltage is too low. Switch off the appliance very loudly. and check whether it is connected to a 220- 240 V~ electrical outlet. No indicator lamp The appliance is not Check to make sure that lights up when you connected correctly. -
Page 34: Guarantee Conditions
By separate collection and disposal of waste products you help to protect natural resources and ensure, that the product is disposed in an adequate way to protect health and environment. The instruction booklet is also available for download: www.unold.de Coolant used: R600a... -
Page 35: Notice D´utilisation Modèle 48955
NOTICE D´UTILISATION MODÈLE 48955 SPÉCIFICATION TECHNIQUE Puissance : 150 W, 220-240 V~, 50 Hz Dimensions : env. 29,5 x 35,0 x 29,0 cm (Lxl/pxH) Câble d’alimentation : env. 120 cm Poids : env. 9,8 kg Boîtier : plastique, noir / inox brossé... - Page 36 l‘appareil que s‘il se trouve ou à des fins similaires, par dans sa position d‘utilisa- tion normale prévue, s‘ils ƒ une kitchenette dans des sont surveillés ou s‘ils ont boutiques, des bureaux ou été informés concernant d‘autres lieux de travail, la sécurité...
- Page 37 bord du plan de travail, cela d‘une autre marque pour ne pouvant provoquer des acci- pas risquer de l‘abîmer. dents si un enfant tire des- 25. Débrancher l’appareil sus, par exemple. secteur après utilisation 17. La machine à glaçons ne doit et avant le nettoyage.
- Page 38 Ne pas ouvrir le boîtier de l‘appareil. Risque d‘électrocution. Une fois l’appareil déballé, le laisser reposer au moins deux heures avant de le mettre en service. Le liquide de refroidissement contenu dans l’appareil doit d’abord diminuer, sans quoi le compresseur pourrait être endommagé. Remplir l‘appareil avec de l‘eau potable pure uniquement.
-
Page 39: Avant La Première Utilisation
AVANT LA PREMIÈRE UTILISATION ƒ Lors du déballage, veiller à ne pas incliner l’appareil de plus de 45 ° afin de ne pas endommager le compresseur situé dans l’appareil. Retirer tous les matériaux d‘em- unes aux autres et si l’appareil est ballage et, le cas échéant, les stable et horizontal. -
Page 40: Régler L'heure
Le symbole tourne : glaçons en cours de préparation Le symbole clignote : panne TIME ON L‘heure de début actuellement paramétrée TIME OFF L‘heure d‘arrêt actuellement paramétrée Affichage de l‘heure Régler l‘heure ou la présélection de temps TIME Afficher l‘heure ou la présélection de temps Éteindre l‘appareil / Stopper ou interrompre la production de glaçons Allumer l‘appareil / Commencer la production de glaçons... -
Page 41: Présélection De La Durée
PRÉSÉLECTION DE LA DURÉE Régler la présélection de température en réglage de base. Appuyer Temps de mise en marche : maintenant trois fois sur la Presser trois fois touche touche « SET ». « TIME », « ON » « TIME » pour régler les heures et «... -
Page 42: Remarques Concernant L'eau
REMARQUES CONCERNANT L‘EAU Veuillez utiliser exclusivement de Conseil : en règle générale, l‘ap- l‘eau potable pour produire des pareil produit des glaçons légè- glaçons. N‘utiliser aucun additif, rement troubles, ce qui n‘altère arôme ou ingrédient analogue. Ils cependant pas la qualité des gla- pourraient encrasser l‘appareil. -
Page 43: Fabriquer Des Glaçons
FABRIQUER DES GLAÇONS Attention : les premiers glaçons Presser la touche « ON » pour produits avec l‘appareil ne doivent démarrer immédiatement pas être consommés. Veuillez les production de glaçons. Si vous jeter, car ils sont susceptibles avez activé la présélection de contenir résidus temps, vous ne devez presser... - Page 44 12. Vous pouvez interrompre ou arrêter 20. L’appareil arrête automatiquement à tout moment la fabrication de la fabrication de glaçons. Faire glaçons en pressant la touche l‘appoint d‘eau, comme décrit « OFF ». plus haut, et respecter à cette 13. Si vous avez programmé l‘appareil occasion le marquage MAX afin avec la présélection de temps, de ne pas trop remplir le réservoir.
-
Page 45: Nettoyage Et Entretien
NETTOYAGE ET ENTRETIEN Avant le nettoyage, éteindre humide, puis le sécher avec un systématiquement l’appareil et chiffon non pelucheux. débrancher la prise. N’utiliser aucun abrasif puissant, pas de laine de verre, d’objets L’appareil et le câble ne doivent métalliques, pas de détergent pas être immergés dans l’eau ou chaud ou de désinfectant. -
Page 46: Dépannage
DÉPANNAGE Problème Cause Solution Le compresseur est Voltage trop faible. Débrancher l’appareil et très bruyant. vérifier si il est raccordé à une prise 220-240 V~. Aucun témoin lumi- L’appareil n’est pas Vérifier si la prise a bien neux ne s’allume correctement raccordé. -
Page 47: Conditions De Garantie
CONDITIONS DE GARANTIE En cas d’utilisation conforme et lors de dégâts manifestement dus à des défauts de fabrication, nos appareils sont garantis 24 mois, lors d’utilisation professionnelles 12 mois, à dater de l’achat. Notre garantie n’est valide que pour les appareils vendus en Allemagne et en Autriche. -
Page 48: Gebruiksaanwijzing Model 48955
GEBRUIKSAANWIJZING MODEL 48955 TECHNISCHE GEGEVENS Vermogen: 150 W, 220-240 V~, 50 Hz Afmetingen: Ca. 29,5 x 35,0 x 29,0 cm (lxb/dxh) Aansluitkabel: Ca. 120 cm Gewicht: Ca. 9,8 kg Behuizing: Kunststof, zwart/roestvrij staal geborsteld Watertank: 1,5 liter watervolume Uitvoering: Lcd-display, tijdprogrammeringsfunctie, tijdweergave, signaaltoon bij volle ijsbak alsmede bij lege watertank, maximaal 60 ijsblokjes per uur, inhoud ijsbak ca. - Page 49 3. Kinderen tussen de 3 en 8 9. Het apparaat is uitsluitend jaar mogen het apparaat uit- bestemd voor huishoudelijk sluitend in- en uitschakelen, gebruik of voor soortgelijke wanneer het apparaat zich doeleinden, bijv. in zijn voorziene, normale ƒ theekeukens in bedrijven, bedieningspositie bevindt, kantoren...
- Page 50 16. Let erop dat het snoer niet 24. Om schade te vermijden, over de rand van het werk- mag het apparaat niet met vlak heen hangt, omdat dit toebehoren van andere fabri- tot ongevallen kan leiden, kanten of andere merken als bv.
- Page 51 komen, door de fabrikant met dezelfde competentie of de klantenservice van de worden vervangen. fabrikant of door iemand Open de behuizing van het apparaat in geen geval. Er bestaat kans op een elektrische schok. Laat het apparaat na het uitpakken minstens twee uur staan voordat u het in gebruik neemt.
-
Page 52: Vóór Het Eerste Gebruik
VÓÓR HET EERSTE GEBRUIK ƒ Let er bij het uitpakken en verwijderen van de verpakking op dat het appa- raat niet meer dan 45 ° gekanteld wordt, omdat de compressor in het appa- raat anders beschadigd kan worden. Verwijder alle verpakkingsmateri- Controleer of de afloop voor rest- alen en eventuele transportbevei- water aan de achterkant van het... -
Page 53: Tijd Instellen
Symbool draait: ijsblokjes worden gemaakt Symbool knippert: Storing TIME ON De op dat moment ingestelde starttijd TIME OFF De op dat moment ingestelde uitschakeltijd Tijdweergave Tijd of tijdprogrammering instellen TIME Tijd of tijdprogrammering weergeven Apparaat uitschakelen/het maken van ijsblokjes beëindigen of onderbreken Apparaat inschakelen/het maken van ijsblokjes beginnen Niet weergegeven: Symbool bak... -
Page 54: Tijdprogrammering
TIJDPROGRAMMERING Tijdprogrammering instellen display is teruggekeerd naar de Inschakeltijd: basisinstelling. Druk nu drie keer Druk drie keer op de knop „TIME“ op de knop „SET“. In het display om de uren door middel van de wordt rechtsboven „TIME“, „ON“ knop „SET“ in te stellen resp. druk en „OFF“... -
Page 55: Aanwijzingen Bij Het Water
AANWIJZINGEN BIJ HET WATER Gebruik uitsluitend drinkwater om Tip: Over het algemeen maakt het ijsblokjes te maken. Gebruik geen apparaat iets troebele ijsblokjes, toevoegingen, aromastoffen en hetgeen echter de kwaliteit van de dergelijke, deze kunnen het appa- ijsblokjes niet nadelig beïnvloedt. raat verontreinigen. -
Page 56: Ijsblokjes Maken
IJSBLOKJES MAKEN Let op: De eerste met het apparaat Druk op de knop „ON“ om het gemaakte ijsblokjes dienen niet maken van ijsblokjes direct te te worden geconsumeerd. Gooi starten. Als u de tijdprogrammering deze ijsblokjes weg, omdat deze hebt geactiveerd, hoeft u niet evt. - Page 57 13. Als apparaat de MAX-markering, zodat het tijdprogrammering hebt apparaat niet overvuld wordt. geprogrammeerd, hoeft u niet 21. Sluit de ijsbak weer en druk op de op een knop te drukken. Het knop „ON“. apparaat beëindigt het maken 22. Als dit symbool brandt van ijsblokjes automatisch op de wordt de watertank door te grote ingestelde tijd.
-
Page 58: Reinigen En Onderhouden
REINIGEN EN ONDERHOUDEN Vóór het reinigen altijd het vervolgens met een pluisvrije apparaat uitschakelen en de doek. stekker uit de stekkerdoos Gebruik geen scherpe schuurmid- trekken. delen, staalwol, metalen voorwer- Het apparaat en de aansluitkabel pen, hete schoonmaakmiddelen mogen niet in water of een andere of desinfecterende middelen. -
Page 59: Storingen Verhelpen
STORINGEN VERHELPEN Storing Oorzaak Oplossing De compressor maakt Te weinig voltage Schakel apparaat een heel hard brom- uit en controleer of het mend geluid. apparaat op een 220- 240 V~-stopcontact aan- gesloten is. Er brandt geen contro- Het apparaat is correct Controleer of de stekker lelampje, als u de stek- aangesloten. -
Page 60: Garantievoorwaarden
GARANTIEVOORWAARDEN Wij geven op onze apparaten een garantietermijn van 24 maanden (12 maanden bij commerciële gebruik), gerekend vanaf de dag van aanschaf. Deze garantie geldt voor schade, die bij correct gebruik aantoonbaar is veroorzaakt door een fout in de pro- ductie. -
Page 61: Istruzioni Per L'uso Modello 48955
ISTRUZIONI PER L‘USO MODELLO 48955 DATI TECNICI Potenza: 150 W, 220-240 V~, 50 Hz Misure: circa 29,5 x 35,0 x 29,0 cm Cavo di alimentazione: circa 120 cm Peso: circa 9,8 kg Scocca: plastica nera/acciaio inox spazzolato Serbatoio dell’acqua: volume d‘acqua 1,5 litri... - Page 62 anni oppure questi devono 9. L‘apparecchio è progettato essere costantemente sorve- esclusivamente l’uso gliati. domestico o per impieghi 3. I bambini di età compresa tra similari, ad es. 3 e 8 anni dovrebbero accen- ƒ in aree cucina di negozi, dere e spegnere l‘apparec- uffici o altri luoghi di lavoro, chio soltanto quando questo...
- Page 63 piano di lavoro, in quanto 25. Dopo l’utilizzo e prima della potrebbe causare infortuni, pulizia, staccare la spina ad es. se un bambino pic- dalla presa elettrica. Non colo dovesse strattonarlo. lasciare mai l‘apparecchio 17. La macchina per ghiaccio incustodito quando la spina non deve essere usata o con- è...
- Page 64 Non aprire mai la scocca dell‘apparecchio. Sussiste il pericolo di scosse elettriche. Dopo il disimballo lasciar fermo l’apparecchio per almeno due ore prima di metterlo in funzione. Il refrigerante dell’apparecchio deve prima scendere, in quanto altrimenti il compressore può subire danni. Riempire l‘apparecchio esclusivamente con acqua potabile pura.
-
Page 65: Prima Del Primo Utilizzo
PRIMA DEL PRIMO UTILIZZO ƒ Al momento del disimballo e della rimozione della confezione assicurarsi che la macchina non sia inclinata di oltre 45 ° in quanto altrimenti il com- pressore può subire danni. Rimuovere tutti i materiali da la macchina sia posizionata in imballo e le eventuali protezioni maniera stabile e orizzontale. -
Page 66: Display
DISPLAY La sua nuova macchina del ghiaccio è dotata di un elemento di comando „touch-screen“. Ciò significa che tutte le impostazioni possono essere effettuate direttamente tramite il display. Per procedere alle impostazioni toccare leggermente il tasto desiderato facendo attenzione a effettuare le impostazioni rapidamente. -
Page 67: Impostazione Dell'ora
IMPOSTAZIONE DELL‘ORA Per impostare l‘ora premere una raggiungere l‘ora desiderata in volta il tasto „TIME“ del display: minuti. premere quindi il tasto „SET“ fino Per memorizzare l‘ora impostata a raggiungere l‘ora desiderata in premere il tasto „TIME“. ore. Per impostare i minuti premere prima due volte il tasto „TIME“... -
Page 68: Avvertenze Sull'acqua
AVVERTENZE SULL‘ACQUA Per preparare i cubetti di ghiac- Consiglio: Di norma la macchina cio si raccomanda di usare esclu- produce cubetti di ghiaccio leg- sivamente acqua potabile. Non germente torbidi, il che non ne utilizzare additivi, aromi o simili, pregiudica assolutamente la qua- in quanto possono danneggiare lità. -
Page 69: Preparazione Dei Cubetti Di Ghiaccio
PREPARAZIONE DEI CUBETTI DI GHIACCIO Attenzione: I primi cubetti di Premere il tasto „ON“ per avviare ghiaccio preparati con la mac- immediatamente la produzione china non devono essere con- dei cubetti di ghiaccio. Se la tem- sumati. Si raccomanda di but- porizzazione è... - Page 70 asi momento premendo il tasto 20. La macchina arresta automatica- „OFF“. mente la produzione dei cubetti 13. Se la macchina è stata program- di ghiaccio. Reintegrare l‘acqua, mata tramite temporizzazione come descritto in precedenza, non serve premere alcun tasto. tenendo presente la marcatura Essa termina la preparazione dei MAX in modo da non riempire cubetti di ghiaccio automatica-...
-
Page 71: Pulizia E Cura
PULIZIA E CURA Prima di procedere alla pulizia quindi asciugarlo con un panno spegnere sempre la macchina antipelucchi. e staccare la spina dalla presa Non usare prodotti abrasivi, lana elettrica. d’acciaio, oggetti metallici, disin- La macchina e il cavo di ali- fettanti o detergenti caldi. -
Page 72: Risoluzione Dei Problemi
RISOLUZIONE DEI PROBLEMI Problema Causa Rimedio Il compressore produce Voltaggio troppo basso. Spegnere macchi- un rumore molto forte. na e controllare che sia col-legata a una presa a 220–240 ~-. Quando la spina è La macchina non è cor- Controllare che la spina inserita nella presa rettamente collegata. -
Page 73: Norme Die Garanzia
NORME DIE GARANZIA I nostri prodotti sono garantiti per 24 mesi, 12 mesi in caso di uso professionale, dalla data di acquisto per i guasti manife- statisi durante un utilizzo conforme alle disposizioni e attribuibili in modo dimostrabile a difetti di fabbricazione. Nel periodo di garanzia porremo rimedio ai difetti materiali e di produzione secondo la nostra valutazione, procedendo alla riparazione o alla sostituzione dell’apparecchio. -
Page 74: Manual De Instrucciones Modelo 48955
MANUAL DE INSTRUCCIONES MODELO 48955 DATOS TÉCNICOS Potencia: 150 W, 220–240 V~, 50 Hz Medidas: aprox. 29,5 x 35,0 x 29,0 cm (LxAn/PxAl) Cable de alimentación: aprox. 120 cm Peso: aprox. 9,8 kg Carcasa: plástico, negro/acero fino cepillado Depósito de agua:... - Page 75 desconectar el aparato si se ƒ cocinas tipo office encuentra en su posición comercios, oficinas u otros de manejo normal previsto, lugares de trabajo, si son supervisados o han ƒ el uso por parte de clientes sido instruidos en el manejo hoteles, moteles seguro del aparato y han...
- Page 76 que ello puede conducir a enchufe el aparato. No deje accidentes, si p. ej. niños nunca el aparato sin vigilan- pequeños tiran de él. cia cuando esté enchufado. 17. La máquina de cubitos de 26. Limpie el aparato después hielo no debe ser usada ni de cada uso.
- Page 77 De ninguna manera abra la carcasa del aparato. Existe peligro de descarga eléctrica. Después del desembalaje deje el aparato en reposo durante dos horas como mínimo antes de ponerlo en funcionamiento. El refrigerante del aparato debe primero bajar de nivel dado que, de lo contrario, se podría deteriorar el compresor.
-
Page 78: Antes Del Primer Uso
ANTES DEL PRIMER USO ƒ Durante el desembalaje y la retirada del mismo preste atención a no incli- nar el aparato más de 45 ° dado que, de lo contrario, se podría deteriorar el compresor en el aparato. Retire todos los materiales de Compruebe si la salida de agua embalaje y, dado el caso, los residual en la parte posterior del... - Page 79 El símbolo gira: Se fabrican cubitos de hielo El símbolo parpadea: Fallo TIME ON El tiempo de inicio actualmente ajustado TIME OFF El tiempo de desconexión actualmente ajustado Indicador de tiempo Ajustar la hora o la preselección de tiempo TIME Visualizar la hora o la preselección de tiempo Desconectar el aparato/finalizar o interrumpir la fabricación de cubitos de hielo...
-
Page 80: Ajustar Hora
AJUSTAR HORA Pulse una vez la tecla „TIME“ en hasta obtener el tiempo deseado la pantalla para ajustar las horas: en minutos. Para ello, pulse la tecla „SET“ Pulse la tecla „TIME“ para hasta obtener el tiempo deseado guardar la hora ajustada. en horas. -
Page 81: Indicaciones Sobre El Agua
INDICACIONES SOBRE EL AGUA Utilice exclusivamente agua pota- Consejo: Normalmente, el aparato ble para fabricar cubitos de hielo. fabrica cubitos de hielo ligera- No utilice aditivos, sustancias mente turbios. Sin embargo, no aromáticas o similares. Podrían perjudica la calidad de los cubi- ensuciar el aparato. -
Page 82: Fabricar Cubitos De Hielo
FABRICAR CUBITOS DE HIELO Atención: Los primeros cubitos de Pulse la tecla „ON“ para iniciar hielo fabricados con el aparato no de inmediato la fabricación de se deberían consumir. Deseche cubitos de hielo. Si ha activado estos cubitos de hielo dado que la preselección de tiempo, ya no podrían contener residuos de debe pulsar ninguna tecla. - Page 83 cualquier momento pulsando la de agua es demasiado bajo se tecla „OFF“. ilumina este símbolo (9). 13. Si ha programado el aparato a 20. El aparato detiene automática- través de la preselección de tiempo mente la fabricación de cubitos no debe pulsar ninguna tecla. El de hielo.
-
Page 84: Limpieza Y Cuidado
LIMPIEZA Y CUIDADO Antes de la limpieza se debe No utilice productos de limpieza desconectar siempre el aparato agresivos, lana o estopa de acero, y retirar el enchufe de la toma objetos metálicos, productos de de corriente. limpieza calientes ni desinfectan- El aparato y el cable de alimen- tes. -
Page 85: Eliminación De Fallos
ELIMINACIÓN DE FALLOS Fallos Causa Solución El compresor hace Voltaje demasiado bajo. Desconecte el aparato mucho ruido. y compruebe si está co- nectado a un enchufe de 220–240 V~. No se enciende nin- El aparato no está co- Compruebe si el conec- guna luz indicadora rrectamente conectado. -
Page 86: Condiciones De Garantia
CONDICIONES DE GARANTIA La garantía para nuestros equipos es de 24 meses, y de 12 meses en el caso de uso comercial, a partir de la fecha de compra, cubriendo los daños que con un uso acorde a lo prescrito pueden atribuirse fehacientemente a defectos de fabri- cación. -
Page 87: Návod K Obsluze Modelu 48955
NÁVOD K OBSLUZE MODELU 48955 TECHNICKÉ ÚDAJE Výkon: 150 W, 220-240 V~, 50 Hz Rozměry: cca 29,5 x 35,0 x 29,0 cm (DxŠ/HxV) Přívod: cca 120 cm Hmotnost: cca 9,8 kg Těleso: plast černý / nerez kartáčovaná Nádrž na vodu: objem 1,5 litru Vybavení:... - Page 88 jsou pod dohledem nebo 10. Nikdy se přístroje popř. jeho pokud byly poučeny o bez- přívodu nedotýkejte mok- pečném používání přístroje rýma rukama. a porozuměly z něj vyplýva- 11. Z bezpečnostních důvodů jícím rizikům. Děti mezi 3 a přístroj nikdy nestavte na 8 roky by neměly přístroj ani horké...
- Page 89 21. Nechte přístroj po vybalení 26. Po každém použití přístroj minimálně dvě hodiny stát, vyčistěte. než jej uvedete do provozu, 27. Nikdy se nepokoušejte pří- abyste předešli poškození stroj opravovat sami, protože kompresoru. hrozí nebezpečí úderu elek- 22. Nezapínejte a nevypínejte trickým proudem.
- Page 90 V žádném případě těleso přístroje neotevírejte. Je nebezpečí úderu elektrickým proudem. Nechte přístroj po vybalení minimálně dvě hodiny stát, než jej uvedete do provozu. Chladicí prostředek v přístroji se musí nejprve usadit, protože jinak může dojít k poškození kompresoru. Plňte přístroj výhradně čistou pitnou vodou. Nikdy nepoužívejte vodu s přísadami nebo jinými tekutými potravinami.
-
Page 91: Před Prvním Použitím
PŘED PRVNÍM POUŽITÍM ƒ Při vybalování a odstraňování obalu dbejte na to, aby se přístroj nenaklonil více než o 45 °, protože jinak se může poškodit jeho kompresor. Odstraňte všechny části balení Zkontrolujte zda odtok zbytkové a případné transportní pojistky. vody na zadní... -
Page 92: Displej
DISPLEJ Váš nový výrobník ledu disponuje ovládacím prvkem „dotyková obrazovka“. To znamená, že všechna nastavení přístroje se provádějí přímo na displeji. K tomu lehce stiskněte požadované tlačítko. Dbejte přitom, abyste nastavení pomocí tlačítek prováděli svižně. Když budete se stisknutím tlačítka čekat déle než 3 vteřiny, aktuální... -
Page 93: Nastavení Času
NASTAVENÍ ČASU Jednou stiskněte tlačítko „ČAS“ bude dosažen požadovaný čas v na displeji pro nastavení hodin: minutách. Nyní stiskněte tlačítko „NAST“ Stiskněte tlačítko „ČAS“ tak dlouho, až bude dosažen uložení nastaveného času. požadovaný čas v hodinách. Pro nastavení minut stiskněte tlačítko „ČAS“... -
Page 94: Pokyny K Vodě
POKYNY K VODĚ Pro výrobu kostek ledu používejte Tip: Přístroj zpravidla vyrábí kostky výhradně pitnou vodu. Nepouží- ledu s mírným zákalem, což však vejte žádné přísady, aromatické jejich kvalitu neovlivňuje. Je to látky ani podobné látky, ty mohou dáno mimořádně rychlým proce- přístroj znečistit. -
Page 95: Výroba Kostek Ledu
VÝROBA KOSTEK LEDU Pozor: První přístrojem vyrobené ledu. Pokud jste aktivovali kostky ledu neměly předvolbu času, musíte stisknout konzumovat. Tyto kostky ledu malé tlačítko, přístroj se pak vyhoďte, protože případně mohou automaticky zapne v zadanou obsahovat zbytky z výroby. dobu. Připravte přístroj tak, jak je Přístroj začíná... - Page 96 14. Pozor: Když chcete postup (počkejte však alespoň 3 minuty, přerušit, přetéká přebytečná voda než budete pokračovat, abyste zpět do nádrže na vodu. Kostky předešli poškození přístroje). ledu, které ještě drží na mrazicích 23. Dbejte na to, abyste kostky tyčkách, spadnou po určité době ledu nenechali v nádobě...
-
Page 97: Čištění A Péče
ČIŠTĚNÍ A PÉČE Před čištěním přístroj vždy Nepoužívejte abrazivní čisticí pro- vypněte a vyndejte zástrčku ze středky, drátěnku, kovové před- zásuvky. měty, horké čisticí prostředky ani dezinfekční prostředky. Přístroj a přívodní kabel nesmí Nádobu na led nechte po použití být ponořovány do vody nebo jiné stát otevřenou, aby se předešlo tekutiny ani čištěny v myčce. -
Page 98: Odstraňování Chyb
ODSTRAŇOVÁNÍ CHYB Závada Příčina Řešení Kompresor velmi hlasi- Příliš nízké napětí. Vypněte přístroj a zkont- tě bručí. rolujte, zda je zapojen do zásuvky 220–240 V~. Nesvítí žádná kon- Přístroj není správně Zkontrolujte, zda zástrč- trolka, když síťovou připojen. ka v zásuvce správně zástrčku zastrčíte do sedí. -
Page 99: Záruční Podmínky
ZÁRUČNÍ PODMÍNKY Na naše přístroje poskytujeme záruku v trvání 24 měsíců (u průmyslového využití 12 měsíců) od data koupě výrobku, záruka se vztahuje na poškození, která prokazatelne vznikla při správném použití v důsledku výrobních vad. Po dobu záruky budeme odstraňovat materiální i výrobní vady opravou nebo výměnou podle našeho uvážení. Poskytnutí záruky výhradně platí pro zařízení... -
Page 100: Instrukcja Obsługi Model 48955
INSTRUKCJA OBSŁUGI MODEL 48955 DANE TECHNICZNE Moc: 150 W, 220-240 V~, 50 Hz Wymiary: ok. 29,5 x 35,0 x 29,0 cm (dł. x sz. / gł. x wys.) Przewód zasilający: ok. 120 cm Ciężar: ok. 9,8 kg Obudowa: tworzywo sztuczne, czarny kolor / stal szlachetna, szczotkowana Zbiornik na wodę:... - Page 101 3. Dzieci w wieku od 3 do 8 9. Urządzenie przeznaczone lat mogą włączać i wyłączać jest wyłącznie do użycia w urządzenie tylko wtedy, gdy gospodarstwie domowym znajduje się ono w swojej lub w podobnych zastosowa- normalnej pozycji obsługi, niach, np. gdy dzieci są...
- Page 102 16. Zwrócić uwagę na to, aby producentów lub marek, aby przewód nie zwisał z brzegu uniknąć szkód. powierzchni roboczej, gdyż 25. Po użyciu urządzenia może prowadzić przed czyszczeniem urzą- wypadków, gdy np. pociągną dzenia wyciągnąć wtyczkę z za niego małe dzieci. gniazda.
- Page 103 W żadnym wypadku nie wolno otwierać obudowy urządzenia. Istnieje niebezpieczeństwo porażenia prądem elektrycznym. Po rozpakowaniu urządzenia poczekać do uruchomienia urządzenia przez przynamniej dwie godziny. Chłodziwo w urządzeniu musi najpierw osiąść, w innym przypadku może dojść do uszkodzenia sprężarki. Napełniać urządzenie wyłącznie czystą wodą pitną. Nigdy nie używać...
-
Page 104: Przed Pierwszym Użyciem
PRZED PIERWSZYM UŻYCIEM ƒ Podczas rozpakowywania i zdejmowania opakowania należy zwrócić uwagę na to, aby nie przechylać urządzenia o więcej niż 45 °, gdyż może dojść do uszkodzenia sprężarki. Usunąć cały materiał opakowa- Sprawdzić, czy odpływ wody z tyłu niowy i ewentualne zabezpiecze- urządzenia jest zamknięty nakła- nia transportowe. -
Page 105: Wyświetlacz
WYŚWIETLACZ Kostkarka do lodu posiada dotykowy element obsługowy. Oznacza to, że wszystkie ustawienia urządzenia można dokonać bezpośrednio na wyświetlaczu. Wystarczy lekko dotknąć żądanego przycisku. Ustawień przyciskami należy dokonywać stosunkowo szybko. Jeżeli przycisk nie zostanie naciśnięty w ciągu 3 sekund, aktualne wprowadzanie zostaje przerwane i urządzenie powraca do stanu wyjściowego. -
Page 106: Ustawianie Godziny
USTAWIANIE GODZINY Nacisnąć jeden przycisk długo, aż ustawiony zostanie „TIME“ na wyświetlaczu, aby żądany czas w minutach. ustawić godziny: W tym celu Nacisnąć przycisk „TIME“, aby naciskać przycisk „SET“ zapisać ustawioną godzinę. długo, aż ustawiony zostanie żądany czas w godzinach. Aby ustawić... -
Page 107: Wskazówki Dotyczące Wody
WSKAZÓWKI DOTYCZĄCE WODY Do wytwarzania kostek lodu należy Porada: Urządzenie sporządza używać wyłącznie wody pitnej. Nie zazwyczaj lekko mętne kostki używać żadnych dodatków, aro- lodu, co nie ma wpływu na ich matów ani tym podobnych, gdyż jakość. Wynika to z szybkiego mogą... -
Page 108: Wytwarzanie Kostek Lodu
WYTWARZANIE KOSTEK LODU Uwaga: Pierwsze kostki lodu lodu. Gdy aktywowany jest wybór przygotowane w urządzeniu nie wstępny czasu, nie jest konieczne nadają się do spożycia. Należy je naciśnięcie żadnego przycisku, wyrzucić, gdyż mogą one zawierać urządzenia uruchamia się pozostałości produkcyjne. automatycznie o zadanej godzinie. - Page 109 kostek lodu po upływie zadanego zablokowany za dużymi kostkami czasu. lodu. Wyłączyć urządzenie 14. Uwaga: Po przerwaniu procedury zaczekać, aż kostki lodu trochę nadmiar wody wraca do zbiornika roztopią się. Kontynuować na wodę. Kostki lodu wiszące na produkcję kostek lodu (zaczekać drążkach chłodniczych spadają...
-
Page 110: Czyszczenie I Pielęgnacja
CZYSZCZENIE I PIELĘGNACJA Przed czyszczeniem należy Nie używać ostrych środków szo- zawsze wyłączyć urządzenie i rujących, wełny stalowej, przed- wyciągnąć wtyczkę z gniazda. miotów metalowych, gorących środków czyszczących lub środ- Urządzenie i przewód nie mogą ków dezynfekujących. być zanurzone w wodzie lub w Po zakończeniu użycia zostawić... -
Page 111: Usuwanie Błędów
USUWANIE BŁĘDÓW Błąd Przyczyna Rozwiązanie Sprężarka bardzo głoś- Za niskie napięcie elek- Wyłączyć urządzenie i no pracuje. tryczne sprawdzić, czy urządze- nie jest podłączone do gniazda 220–240 V~. Po włożeniu wtyczki do Urządzenie jest niepra- Sprawdzić, czy wtyczka gniazda nie świeci się widłowo podłączone. -
Page 112: Warunki Gwarancji
WARUNKI GWARANCJI Udzielamy na nasze produkty 24 miesięcznej gwarancji od daty zakupu (warunkiem jest zachowanie faktury zakupu lub paragonu) na szkody, które przy użytkowaniu zgodnym z przeznaczeniem wskazują na wadę fabryczną. W czasie trwania gwarancji usuniemy wady materiałowe bądź fabryczne zgodnie z naszym osądem poprzez naprawę lub wymianę. Gwarancja udzielana jest na produkty sprzedawane na terenie Niemiec i Austrii. - Page 116 Aus dem Hause...
Need help?
Do you have a question about the 48955 and is the answer not in the manual?
Questions and answers