Shofu EyeSpecial C-IV Advanced Manual
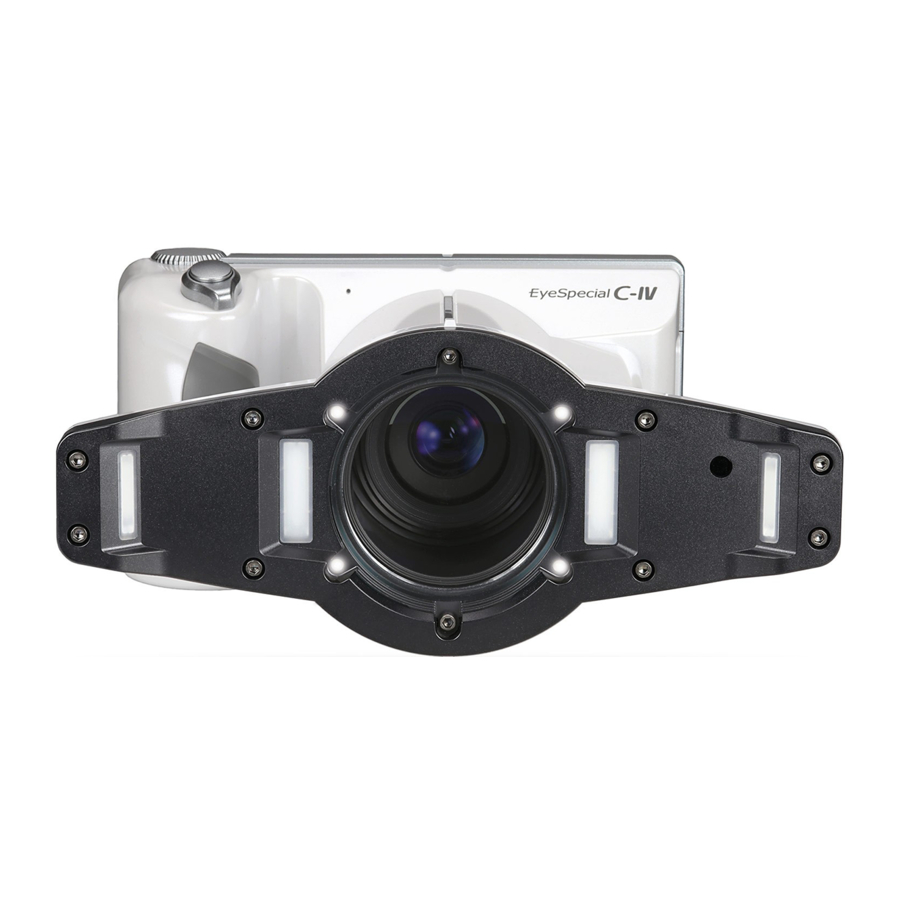
Smart digital camera designed exclusively for dentistry
Hide thumbs
Also See for EyeSpecial C-IV:
- User manual (56 pages) ,
- User manual (52 pages) ,
- Advanced manual (114 pages)

Related Manuals for Shofu EyeSpecial C-IV


Summary of Contents for Shofu EyeSpecial C-IV
- Page 1 Read through the “Important Safety Instructions” included in the package carefully before using your camera. Smart digital camera designed exclusively for dentistry Advanced Manual...
-
Page 2: Before Using Your Camera
Before using your camera Thank you for purchasing our EyeSpecial C-IV. The instructions mentioned below provide necessary information on successful operation, daily maintenance and safe use of this unit. Please read this manual carefully before use to attain maximum benefits during function and ensure durability of this unit. -
Page 3: Copyright
● SHOFU will repair and replace main body and its system in case of defect within the warranty period. However, we do not assume any responsibility for subsequent dam- ages arising from the failure of the unit beyond the warranty period. -
Page 4: Table Of Contents
Contents Before using your camera ........ii Special functions of shooting modes ....35 Mirror mode ..........35 Intended use ............ii Face mode ...........35 Important precautions ......... ii For your safety ..........ii Tele-macro mode ........36 Notice ............ii STEP 3 Record movies ........37 Focus and record movies......37 Test shot ............ - Page 5 Functions while reviewing still images ....65 Magnify / reduce images ......65 Edit images ..........65 Functions while replaying movies .....68 Play ..............68 Pause ............68 Rewind/ fast forward ........68 Volume ............68 Stop .............68 Transferring images to your computer ...69 Menus ............70 Shooting mode menu ........70 Tab 1 ............
-
Page 7: Getting To Know Your Camera
Getting to know your camera Names of parts Front view Part name Explanations To turn the camera on / off Power switch Shutter button When taking photographs, half press to auto-focus. Then, press down com- pletely to capture the image. Indicates working state of the camera by the color and flash of the light Pilot lamp Action of light... -
Page 8: Bottom View
Bottom view Part name Explanations Holds the hand strap Strap eyelet Lock lever Locks the battery cover shut Battery cover Holds batteries in place. Batteries are placed in the battery cells. To affix to a tripod Tripod socket Name plate Lot number etc is described on it. -
Page 9: Function Keys
Part name Explanations SET key Function Camera mode Brief press : Change magnification rate Shooting mode of instant playback. Long press : Picture information turns on and off. Brief press : Display patient information. Playback mode (original size) Long press : Picture information turns on and off. -
Page 10: Lcd Screen Indicator
LCD screen indicator Information described on the LCD screen for Shooting mode and Playback mode, respec- tively, is as follows; Shooting mode 25 24 22 21 ● Still images Items Explanations Reference Function tabs Function changes depending on the mode you select. The functions available are displayed on the LCD monitor. - Page 11 Items Explanations Reference Focus P.32 Indicate the focus is appropriate or inappropriate when auto-focused. (Green) : Focused properly (Red) : Not focused properly Auto-cropping Appears when auto-cropping is available. The sign is in green or P.32 red. Green : Auto-cropping in range Red : Auto-cropping out of range Horizontal to vertical ratio of the image is indicated.
- Page 12 ● Movies Items Explanations Reference Function tabs Function changes depending on the mode you select. The functions available are displayed on the LCD monitor. 1a: Preinstalled modes Preinstalled modes are displayed. P.22 1b: Custom modes Custom modes are displayed. P.24 Menus to edit patient information are displayed.
-
Page 13: Playback Mode
Playback mode ● Still images Items Explanations Reference Function tabs Function changes depending on the mode you select. The functions available are displayed on the LCD moni- tor. 1a: Shooting mode To change to Shooting mode. P.18 P.65 1b: Enlarge image Image taken is enlarged. - Page 14 ● Movies Items Explanations Reference Function tabs Function changes depending on the mode you select. The functions available are displayed on the LCD monitor. 1a: Shooting mode To change to Shooting mode. P.18 P.60 1b: Thumbnail index Thumbnail index is displayed. 1c: Delete a movie P.61 Press this to delete a movie currently displayed.
-
Page 15: Operation Methods
Operation methods There are two ways to operate this camera. ● Direct screen touch Touch one function tab you want to select. T i ps ● Touch panel function of EyeSpe- cial C-IV Screen keys can be operated with or with- out gloves on, or by using a tip of a stylus. Face Low glare However, securely pressing with finger is... -
Page 16: Getting Started
Getting started Perform the following preparation before you start taking images. Attaching the hand strap Attach one end of the strap to the strap mount on the lateral side of the camera and another to the eyelet on the bottom of the camera. ●... -
Page 17: Attaching The Lens Cap Strap (Optional)
Put the other end of the strap through the strap eyelet. Adjust the strap while holding the camera until the optimal fit is obtained. Feed the strap end through the slide adjuster to fix. · Insert the strap into the buckle as pictured below. Attaching the lens cap strap (optional) Loop the lens cap strap to the strap hole. Take the lens cap itself and push it through the loop that is sticking out. If you do not need the lens cap strap, cut it out with scissors etc. -
Page 18: Installing Batteries
Installing batteries The battery slot is on the bottom side of the camera. Gently turn the camera upside down to install the batteries. Turn the Lock lever to the position of “UN- LOCK”. Then, slide the Battery cover to the front side of the camera. -
Page 19: Inserting Sd Memory Card
Inserting SD memory card Open the Card slot/HDMI connector cover and insert the SD memory card. The card label is facing the front side of the camera. Up to 2GB 4 to 32GB 64 to 512GB Note Make sure the card is facing the right direction. Forcing the card may damage the camera or card. - Page 20 Ti p s ● Storage capacities (number of pictures) Approximately 350 shots can be taken on a fully charged rechargeable nickel metal hydride (NiMH) batteries (capacity 1,900mAh). Approximately 250 shots can be taken when using new alkaline batteries (based on in- house test results).
-
Page 21: Removing The Lens Cap
Removing the lens cap Pinch the notches on the lens cap and pull it off. · Reattach the lens cap by pinching the notches. · Always attach the cap when the camera is not in use. Tuning the camera on Rotate the power switch to turn the camera on. · To turn the camera off, rotate the power switch with the dial notch to the OFF position. - Page 22 Setting the time zone Select one time zone. Choosing the date display style Select one date format. Setting the date and time (Dial key) or touch the Rotate the screen to move to the next item field. Press (F2 key) or (F3 key) to increase or decrease the value for each option.
- Page 23 Replace or recharge the batteries. ● Slow response of the camera EyeSpecial C-IV sometimes does not respond to your command immediately when other operations are in progress; for example, immediately after you rotate the dial to change the magnification rate and then press the shutter half-way to focus or just after you take a picture etc.
-
Page 24: Basic Technique
● Follow the safety information indicated in the attached “Important Safety Instructions”. Before you start taking pictures / movies EyeSpecial C-IV is designed exclusively for dentistry, which is different from general digital cameras that allow pictures at any distance from the subject. In order to take intraoral photos under optimal conditions, the distance from the subject has to be within a certain range. -
Page 25: Step 1 Input Patient Information Or Photograph Patient Record (Optional)
(including underscore, hyphen and space when used). Finish the input Ti p s EyeSpecial C-IV has a function that makes recording patient information mandatory. When this function is acti- vated, you cannot take photos unless you record patient information. -
Page 26: Scanning Qr Code
* QR code can be created with the image manage- ment software by other companies. For more details about the image management software, visit our website at www.shofu.co.jp/eyespecialc4/ Ti p s Patient information scanned through the QR code will be displayed on the screen and stored as follows;... -
Page 27: Photograph Patient Record
Photograph patient record Patient’s name can be recorded by taking a picture of his (her) medical record. When you select “Photograph patient record”, the display pictured on the right appears on the screen. Position the camera to photograph the patient name and press the shutter button halfway to focus properly. -
Page 28: Step 2 Select Shooting Mode
STEP 2 Select shooting mode Preinstalled modes (F1 key) to display all the modes preinstalled. Press Nine different modes are preinstalled. Select one optimal mode for each purpose. Blue frame : Selected mode Back to previous display… Up… Down… To change mode display…... - Page 29 ● Shooting modes Mode Intended use Explanations Standard Mode For standard intraoral photography Basic mode for dentistry. Surgery Mode For intraoral photography from a You can take photos from a greater distance distance than in standard mode. This mode is optimal for surgery, when you do not wish to put the camera close to the subject.
-
Page 30: Custom Modes
Ti p s ● Change mode display There are two different ways of displaying the modes ; mode list and mode details. (F4 key) to alternate between mode list and mode details. Press Mode details Mode list Custom modes Preinstalled camera settings can be changed and registered as custom modes for future use. (F2 key) in the shooting mode, three custom settings appear on the When pressing screen. -
Page 31: Scanning Qr Code
Scanning QR code Camera settings can be changed in one step by simply scanning a QR code (exclusive for this camera). When pressing (F2 key) in the shooting mode, custom mode appears. Select the bottom key “Scan QR code”. When the photo below appears on the screen, align the QR code within the white frame. - Page 32 Select from Custom 1 to Custom 3 to register the setting. When taking photos using the registered custom mode, follow the procedures of “Custom modes” on page 24 of this Advanced Manual. Note In custom mode, new settings cannot be scanned with QR code...
- Page 33 ● QR codes for custom presets Following is the QR codes for custom settings. Select the appropriate setting for each purpose. QR code Mode Intended use Explanations For photographing large stone Brightness compensation Stone model (large) models such as study model is -0.7Ev with other settings same with the standard mode.
-
Page 34: Step 3 Select Magnification Rate (Still Images)
Following procedures will be different for taking still images or recording movies. Refer to P.37 to record movies in this Advanced Manual. STEP 3 Select magnification rate (still images) (Dial key) to display magnification indicator on the center of the screen. Rotate the (Dial key) again to determine the magnification rate. The indicator will Then, rotate the disappear approximately 3 seconds after setting the magnification rate. - Page 35 2 Mirror mode Upper jaw palatal view Occlusal view Anterior lingual view 1/2 - 1/2.5 1/1.3 - 1/1.5 1.0 - 1/1.3 3 Face mode Mouth Face Half-body Full-body 4 Low-glare / Whitening / Isolate shade mode Shade taking Anterior close-up Prosthesis Stone model 1/1.3 - 1/1.5 1.4 - 1/1.3 1.4 - 1/2...
-
Page 36: Step 4 Set Focus Distance (Still Images)
5 Tele-macro mode Outside flash Anterior close-up Prosthesis 2.0 - 1/1.8 2.0 - 1/1.8 Inside flash Prosthesis Impression Stone model 2.0 - 1/1.8 2.0 - 1/1.8 2.0 - 1/1.8 STEP 4 Set focus distance (still images) Based on the optimal focus distance displayed on the upper area of the screen, set the distance between the camera and the subject. - Page 37 Change the camera position until the subject appears on the screen sharply. Too close Too far Blur Blur Sharp Note Do not press the shutter button until the distance is determined. Ti p s ● Focus distance Even if the actual focus distance becomes outside the optimal focus distance, you can take a picture as long as it’s within the possible distance range. Possible distance range ● Magnification of the taken image When you press the...
-
Page 38: Step 5 Take Pictures (Still Images)
STEP 5 Take pictures (still images) Focus and take pictures Ti p s When flash mode icon is indicating , flash is being charged. You cannot take photos until it’s fully charged. * Battery charge takes longer time after not being used for a long period of time. - Page 39 Ti p s ● SPOT Auto-focus When touching the center of the LCD screen in the shooting mode, the focus mode can be changed to SPOT AF mode with the touched area being the center of the focus. For returning to standard AF mode, keep pressing the spot focused area for a few seconds. Spot AF area Press any area you wish to focus within this gray frame.
- Page 40 Ti p s ● Auto-cropping Auto-cropping function crops the image automatically based on the selected magnification rate. Even if the subject is out of the optimal focus range, the picture can still be taken at the magnification rate you selected due to this function. * This function is not available for Face mode and Tele-macro mode.
-
Page 41: Special Functions Of Shooting Modes
Special functions of shooting modes Mirror mode When you have taken a picture in Mirror mode, the image can be flipped vertically or horizontally afterwards as shown in the message display. · This message does not appear when you set the flip direction in advance in the Setup Reference menu to always flip the image to the same direction. -
Page 42: Tele-Macro Mode
Tele-macro mode When selecting Tele-macro mode, “Attach close-up lens” appears on the LCD screen. Note Use close-up lens only for Tele-macro mode. Remove the lens cap first. Then, the close-up lens should be screwed onto the front of the lens. Mount the close-up lens onto the cam- era lens and rotate it clockwise until it is attached securely. -
Page 43: Step 3 Record Movies
STEP 3 Record movies Focus and record movies Half-press the shutter to focus. Blur Focused After focusing properly, press (SET key) to record a movie. When the distance has changed and the target is not focused properly, press the shut- ter button to readjust the focus. -
Page 44: Advanced Technique (Still Images)
Advanced technique (still images) ● Follow the safety information indicated in the “Important Safety Instructions” included in the package. In this section, advanced techniques for taking more sophisticated images are introduced. Taking photos without auto-cropping function Basic procedures are described in Chapter 2 “Basic technique”. Magnification rate changes when the camera is positioned farther from the optimal focus distance. -
Page 45: How To Take Photos Without Auto-Cropping Function
How to take photos without auto-cropping function ● Select magnification (Dial key) to display the magnification rate indicator on the center of the Rotate the screen. (Dial key) again to select the magnification rate you desire. Then, rotate the Current magnification rate Possible magnification range Indicator Illustration... - Page 46 Change the camera position until the subject appears on the screen sharply. Too close Too far Blur Blur Sharp Note Do not press the shutter button until the distance is determined. Ti p s When you press the (SET key), it will magnify ×2 and when you push it again, it will magnify ×4.
- Page 47 ● Taking pictures Ti p s When flash mode icon is indicating , flash is being charged. You cannot take photos until it’s fully charged. * Battery charge takes longer time after not being used for a long period of time. Half-press the shutter to focus Set the focus within the Auto Focus (AF) frame.
-
Page 48: Taking Photos With Manual Focus
Confirm the proper focus, actual focus distance and magnification rate, and press the shutter button completely down. · In cases where the focus distance needs to be adjusted, release the shutter button and reposition the camera. Taking photos with manual focus You can select manual focus to optimize the conditions of your photo. Method to take photos is the same with conventional dental digital cameras based on the single-lens reflex camera. -
Page 49: How To Take Photos With Manual Focus
How to take photos with manual focus ● Select magnification (Dial key) to display the magnification rate indicator on the center of the Rotate the screen. (Dial key) again to select the magnification rate you desire. Then, rotate the Current magnification rate Possible magnification range Indicator Illustration... - Page 50 Change the camera position until the subject appears on the screen sharply. Too close Too far Blur Blur Sharp Note Do not press the shutter button until the distance is determined. When you press the (SET key), it will magnify ×2 and when you push it again, it will Reference magnify ×4. P.40 “Tips”...
-
Page 51: Taking Photos By Adjusting Focal Length Manually Like General Digital Cameras
Taking photos by adjusting focal length manually like general digital cameras You can change the focal length by changing the dial function to “Focal length”. Magnifica- tion rate can be disregarded when using this function. ●Advantage and disadvantage of setting the focal length manually Advantage Can take pictures without regard to magnification rate Disadvantage The images taken aren’t standardized. -
Page 52: How To Take Photos With Focal Length Set Manually
How to take photos with focal length set manually ● Adjust focal length (Dial key) to display the focal length indicator on the center of the screen. Rotate the Determine the focal length by rotating the Dial key. (Dial key) to change the focal length. Rotate the mark indicates the digital zoom range. - Page 53 ● Focus and take pictures Half-press the shutter to focus Set the focus within the Auto Focus (AF) frame. AF frame After focusing, press the shutter button completely down to take the picture.
-
Page 54: Tips For Taking Photos
Tips for taking photos ● Follow the safety information indicated in the “Important Safety Instructions” included in the package. In this chapter, further advanced techniques and useful information to help you take more sophisticated intraoral images are introduced. Information given is just for your reference and does not guarantee optimal images Note will be achieved by changing the settings.It also does not guarantee that you can take optimal photos by using the techniques in this chapter. -
Page 55: Tips To Avoid Image Blurring
Countermeasure → Focus on the area with high contrast. Explanation Auto-focus of EyeSpecial C-IV is based on the contrast of the subject. Thus, when the sub- ject is in a single color completely, has low contrast, or it’s placed in very dark place, it might not be focused properly. -
Page 56: Focusing The Area Outside Of The Af Frame
Focusing the area outside of the AF frame Specific area can be focused by using Spot AF. Hold the camera toward the subject and touch the area you wish to focus. Spot AF area You can move the focus area within the Spot AF area. Half-press the shutter to focus. Then, after focusing press the shutter button completely down to take a picture. -
Page 57: Take Pictures With Focus Lock
Take pictures with focus lock When focusing on the area outside of Spot AF area, you can select “Focus lock” as indicated with the red frame in the photo. The area to be focused Move the camera in such a way that the red frame is overlapped by the Spot AF area. -
Page 58: Fine-Tuning Brightness
Press the shutter button completely down to take the picture. Fine-tuning brightness When photographing with a mirror in Mirror mode, the image might be too bright or too dark due to the reflection rate of the mirror. When photographing something that scatters light intensely such as stone model, the image might be too bright. -
Page 59: Focus Distance In Face Mode
●How to select flash mode ● Key operation Rotate the dial key while pressing F1 key. P.71 “Flash mode” P.81 “Shortcut function in shooting mode” Focus distance in Face mode Marking the floor with plastic tape is recommended to keep the optimal distance between the patient and the camera. -
Page 60: Shadow Appearing In The Face Mode
Shadow appearing in the Face mode Shadow might appear along the patient body or the background might be darker when photo- graphing with flash lights on. In order to overcome this problem, you can turn off the flash or use a slave strobe. ●... - Page 61 · Face photo (from the front) When using a slave strobe, brightness of the image varies depending on the position and angle of the slave flash and light intensity. Position the flash after optimizing these factors that affect the image quality. There are two types of slave strobes; those responding to pre-flash and others to Note single flash. Use the strobe compatible with the single flash.
-
Page 62: Inside And Outside Flashes For Tele-Macro Mode
Inside and outside flashes for Tele-macro mode In Tele-macro mode, you can choose the flash to use from both inside and outside flashes. Outside flashes should be used to minimize reflection and glare on the subject, while inside flashes should be used for photographing inside cavity wall etc. Outside flash Inside flash Reflection varies depending on the condition and configuration of the subject. Select... -
Page 63: Tips To Minimize Shadow When Photographing Stone Models And Prostheses
Tips to minimize shadow when photographing stone models and prostheses When trying to minimize shadow created by using the flash, using a diffuser is recommended. ●Preparation Tracing paper approx. 4×10cm : 2 pieces * Using colorless tracing paper designed for photography is recommended. Cover both outside flashes with the tracing paper and tape them in place as indicated figures below. - Page 64 Use a light diffuser to minimize shadow. Without diffuser With diffuser...
-
Page 65: Playback
Playback ● Follow the safety information indicated in the “Important Safety Instructions” included in the package. Viewing your images (still images / movies) Single frame playback (F4 key) in shooting mode to change to playback mode. The last image taken is dis- Press played. -
Page 66: Reviewing Other Images
Reviewing other images (Dial key) to scroll backward or forward through pictures. Rotate the Old image New image Thumbnail images (F3 key) to view thumbnail images. A maximum of nine images are displayed simul- Press taneously. In order to display a single view, select one image by moving the cursor to select the image and press (SET key) or directly touching it on the screen. -
Page 67: Erasing Images
Erasing images Erase the displayed image (F4 key) to erase Select Playback mode and press the displayed picture/movie. The message, “Erase this image?”, appears on the image. Press “OK” to erase it. Erase selected multiple images simultaneously You can erase multiple images simultaneously by selecting them from the thumbnail display. -
Page 68: Protecting Images
Protecting images Protect the image to avoid accidental deletion or unintended editing. Protect images (MENU key) in the Playback mode and Press select “Protect”. You can protect the image currently displayed . Press “OK” to protect it. To release protection, press MENU key, Reference then select “Cancel”. -
Page 69: Playing Images/Movies With Hdmi Cable
Playing images/movies with HDMI cable Connect the camera with TV or other device with a HDMI cable. HDMI output terminal of EyeSpecial C-IV (Micro HDMI) HDMI output terminal of connecting device Note Insert the HDMI cable into the terminal securely. - Page 70 · It’s not guaranteed that EyeSpecial C-IV is compatible with any HDMI devices. Ti p s Ti p s ● HDMI cable HDMI (Type A to Type D) cables generally available on the market are compatible with EyeSpecial C-IV. Recommendation (when the connecting device has HDMI (Type A) connector): CAC-HD14EU15BK by ELECOM...
-
Page 71: Functions While Reviewing Still Images
Functions while reviewing still images Magnify / reduce images (F2 key) in the Playback mode. Maximum magnification is · To magnify the image, press (F1 key) to redisplay the at x6. Press (F3 key) to reduce the size of the picture. Press picture at the x1 (original) size. - Page 72 ● Draw on images (paint function) When “Draw” is selected, you can draw lines on the recorded images. Press (F2 key) to (F3 key) to erase them. draw lines and Draw Blue Exit… Gray Draw… Erase Erase… Gray Undo… Blue (F4 key) to undo the previous ac- ·...
- Page 73 ● Rotate images Rotate 90° clockwise The images can be rotated by 90°. (F2 key) to rotate the image clock- · Press (F3 key) to counter-clockwise. wise or (F1 key) to finish rotation. Select · Press “Store rotated image” to record the image. Rotate 90°...
-
Page 74: Functions While Replaying Movies
Functions while replaying movies Select one movie frame. Play Press the play button on the center of the screen or press (SET key). Pause Press the pause button or (SET key) to stop the movie temporarily. Rewind/ fast forward ● Rewind Press the rewind button or rotate... -
Page 75: Transferring Images To Your Computer
EyeSpecial C-IV according to the patient ID entered prior to capturing images. To download this free software or for more information please visit http://www.shofu.co.jp/ eyespecial/en/surefile.html. To use SureFile, your SD memory card must first be formatted by the EyeSpecial C-IV camera. ●How to format SD memory cards... -
Page 76: Menus
Menus EyeSpecial C-IV has a total of three menus; shooting menu, playback menu and setup menu. Shooting mode menu You can manually set conditions, such as flash mode, brightness compensation etc. (MENU key) to display the condi- Press tions you can set manually. -
Page 77: Tab 1
Tab 1 ● Flash mode To select the flash mode (right & left / right / left) Items Explanations Both flashes are on. Only left flash is on (seen from the LCD). Only right flash is on (seen from the LCD). Flash is turned on. - Page 78 ● LED lighting To turn the LED lights on or off and to adjust the intensity of LED lights (Dial key) to adjust Touch “+” and “-” keys or rotate the the light intensity. Press OK or (SET key) to determine. When taking still images Auto ........
-
Page 79: Tab 2
Tab 2 ●Dial function To change items adjusted with the (Dial key). Items Explanations Magnification To change the magnification rate. Focal length To change the focal length. * When focal length is selected, auto-cropping function is not available. When “Focal length” is selected, the indicator shown below appears on the upper right of the screen instead of the magnification indicator. - Page 80 ● Focusing screen To change the grid type Items Explanations ― Type1 Type2 Type3 (*) * Type 3 is for Face mode only. Optimal grid is automatically selected.
- Page 81 ● ISO speed To adjust the ISO speed Items Explanations Auto ISO speed is automatically adjusted for different situation. 100 - 3200 When ISO speed is raised, bright image can be taken even in a dark place. However, image noise increases. ISO speed can be adjusted only in Face mode and Tele-macro mode, in which TTL light adjustment is used.
-
Page 82: Tab 3
When using FlashMatic light control, white balance is automatically adjusted. When you select “Manual”, the image shown right appears on the screen. Set SHOFU Gray card or the subject you wish to use as the standard of white balance in the square... - Page 83 ● To adjust the hue (Dial key) Touch “+” and “-” keys or rotate the to move the indicator. Press OK or (SET key) to determine. Press “+” and “-” keys on the screen or rotate the (Dial key) to adjust the hue. To move between the indicators, press ▲...
-
Page 84: Tab 4
Tab 4 ● Camera position To change the image direction while holding the camera in normal (horizontal) position. Items Explanations Horizontal image The aspect ratio is 4 (width) : 3 (height). The aspect ratio is 3 (width) : 4 (height). Vertical image When vertical image is selected, right and left margins are blacked out as shown in the photo below. - Page 85 Items Explanations You can select if you flip the image or not after each shot. Every time The image taken is automatically flipped vertically and stored. Vertical Horizontal The image taken is automatically flipped horizontally and stored. Don’t flip The image taken is stored without being flipped. ●...
- Page 86 Ti p s ● Erasing custom settings Custom settings cannot be erased one by one. P.93). When you wish to erase a custom setting, select “Reset all settings” ( Please note that when you select “Reset all settings”, you will erase not just the custom settings but all other startup settings.
-
Page 87: Shortcut Function In Shooting Mode
Shortcut function in Shooting mode EyeSpecial C-IV has shortcut functions. Following 4 settings can be changed in Shooting mode without accessing the menu. Shortcut can be performed by pressing a function key (not function (Dial key). The item you can adjust with... -
Page 88: Playback Mode Menu
Playback mode menu You can edit the stored images (draw lines and rotate) or protect them from accidental dele- (MENU key) on the playback mode. tion or edit. Press Items Explanations Draw * To draw lines on the images. Rotate * To rotate the image by 90°. - Page 89 Items Explanations Tab 1 Image size To select the image size. Image quality To select the image quality. To select on or off the image information (date and settings). Image information Instant playback To select the time to display the last image taken. Original image before flip To select save or discard the original image before flip.
-
Page 90: Tab 1
Tab 1 ● Image size To select the image size. Vertical and horizontal ratio can be either 4:3 of general digital camera or 3:2 of general single-lens reflex camera. When selecting 3:2 size, the area outside of photo range is blacked-out. Reference ●... - Page 91 Image quality Compressive rate Intended use Extra-fine Extremely small Photo process and enlarge print. Fine Normal print (L-2L size) and for viewing photos on the Small computer screen. Middle Use on the Internet. Standard Ti p s ● Compressive rate The quality of JPEG images vary depending on the compressive rate you select when you save the images.
- Page 92 ● Instant playback To select the time to display the last image taken. Items Explanations 2sec. / 5sec. / 10sec. The last image taken is displayed for the selected seconds. Instant playback is off. · Even if you select “Off”, the last image taken appears briefly. Reference ·...
-
Page 93: Tab 3
● Original image before flip To select save or discard the original image before flip. Items Explanations Two images, before and after flip, are stored. Save Discard Only flipped image will be saved. The images can be distinguished between before and after flip with the icon appearing Reference on the image during playback mode. - Page 94 ● Date format To store current date and time as well as to set the date format and time zone. Rotate the dial key or touch the item you wish to change. F2 or F3 key to Press alter the value. ●...
-
Page 95: Tab 4
● Metric/Imperial To change the measurement unit for length. Focal length is displayed in metric system only. Reference Tab 3 ● Preview zoom reset To select the timing to reset the preview zoom Items Explanations Every shot Preview zoom is reset after each shot. Every magnific Preview zoom is reset when you change the magnification rate. - Page 96 ● File number memory To turn the file number memory function on or off. In default setting, file number starts with “PICT0001. JPG” when you change or format SD card or when you erase all images stored in the SD card. When the date of the dated folder is changed, file number also starts with “PIC0001.JPG”, which can be used sequentially.
-
Page 97: Tab 5
● Folder name To change the folder name. A folder named with “Folder No. (3 digits) SHOFU” is created. Std. format Folder numbers are 3-digit numbers starting from 100. A maximum of 9999 images can be stored in one folder. - Page 98 ● Sounds To turn on or off the key sound, shutter sound and auto-focus sound. Note Press OK to determine. When returning to the previous display by pressing the F1 key, sound setting has not been changed. ● Power save ON To select the standby time before power saving starts.
- Page 99 To calibrate the light intensity and white balance of the flash lights. When you take many photos, light intensity might decrease or color temperature might slightly change. Please adjust the light intensity and white balance with SHOFU Gray card provided. It takes about 10 minutes for the calibration to complete.
- Page 100 When you select "Flash calibration", the message pictured right appears on the screen. Select the calibration you wish to perform. * Always mount the close-up lens when per- forming calibration for inside flash for taking photos in Tele-macro mode. Distance between the camera and the gray card is different depending on the calibration you perform.
- Page 101 Distance between the camera and the gray card is different depending on the calibration you perform. Perform calibration following the instructions pictured right. When the message shown in the right photo appears, check the distance between the camera and the gray card and reperform calibration from the beginning. When calibration is completed properly, the message shown in the photo right appears.
-
Page 102: Qr Codes For Optional Functions
QR codes for optional functions EyeSpecial C-IV provides some optional functions by scanning special QR codes. Select “scanning QR code” from the custom mode. Refer to P.25 “Scanning QR Code” QR code Activate Deactivate Explanations To make registering To make registering patient patient information information mandatory. -
Page 103: Patient Information File (.Mif)
Patient information file (.MIF) Every movie file (.MOV) comes with its thumbnail and corresponding patient information file (.MIF). When handling, such as moving, deleting or copying etc, movie files (.MOV) on the comput- er, always handle them together with the corresponding patient information files (.MIF). When using a SD card with either the movie file or patient file remaining on it, an error Note message “File structure is corrupted”... - Page 104 MEMO...
-
Page 105: Note On Use
Recording media ● The recorded data might be lost in the following cases. SHOFU will not be responsible in any way for the loss of recorded data or the consequences of such loss. It is recom- mended to always maintain backup data on another media (hard disc etc). -
Page 106: Lcd Screen (With Touch Panel Function)
Please contact your SHOFU dealer for maintenance and repair. Water proof and chemical resistance ● EyeSpecial C-IV is IPX4 water proof. This means that it can withstand against water jets from all directions and can be cleaned with a disinfectant-moistened gauze (ethanol for disinfection). -
Page 107: Maintenance & Storage
Maintenance & Storage Follow the safety information indicated in the “Important Safety Instructions” included in the package. Maintenance ● Wipe the outside of the camera with a soft, clean and dry cloth. For disinfection, gently wipe with a disinfectant-moistened gauze etc. Should this camera come into contact with sand, avoid dusting it off with hands, instead, use compressed air to clean. -
Page 108: Troubleshooting
The camera does not work and turn on the camera again. If the camera still does not work, it might properly. have some defect. Contact your SHOFU dealer. Since Wi-Fi SD memory cards consume more energy to operate Wi-Fi SD memory card is inserted... -
Page 109: Error Messages
The SD memory card is not format- Format SD memory cards with Eye- Even though you inserted a ted with EyeSpecial C-IV. SureFile Special C-IV before using SureFile. SD memory card into your *Back up the date you wish to store P.69... -
Page 110: Frequently Asked Questions
SD card is defec- been found. tive. Please try another card if you have one. Something other than the provided WB unadjusted SHOFU gray card was photographed Use provided SHOFU gray card. P.76 when white balance is manually set. Frequently asked questions Question... -
Page 111: Specifications
Specifications Specification Items Primary Color Filter, CMOS sensor Type 1/1.7inch Size Approx. 12 million pixels (4,163 × 3,062) Sensor Total pixels Number of effective pixels Approx. 12 million pixels (4,000 × 3,000) ISO100 - 3200 Camera sensitivity Focal length (35mm equivalent) 28 - 300mm, A total of 25 levels WIDE : 2.83 - 7.99 Maximum aperture... - Page 112 Specification Items SD / SDHC / SDXC card (MAX 512GB) Storage media File format JPEG / MOV (in combination with (.MIF)) 4,000×3,000 3,264×2,448 2,560×1,920 2,080×1,560 Still images 1,600×1,200 Image size 640×480 (JPEG) 10.6M 4,000×2,672 7.1M 3,264×2,176 Image 4.3M 2,560×1,712 storage 2.8M 2,080×1,392 Movie size (MOV)
-
Page 113: Accessories
(for 1 year after you purchase the product), SHOFU will replace or repair this product free of charge. Refer to the Warranty attached to this camera.
Need help?
Do you have a question about the EyeSpecial C-IV and is the answer not in the manual?
Questions and answers