Table of Contents
Advertisement
Quick Links
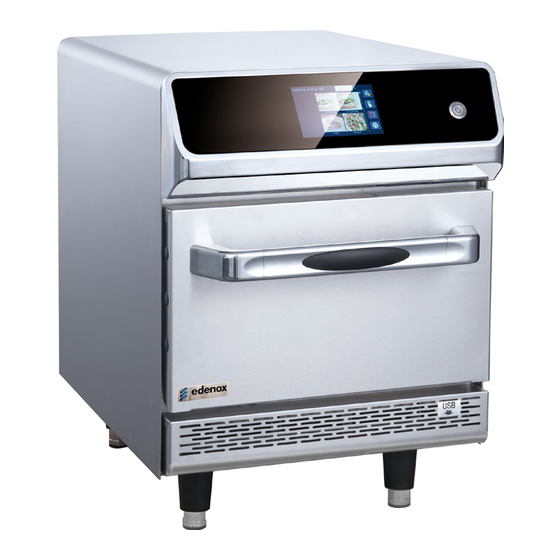
Installation and User Manual
Model: MICRO-1217HS
Special note:
Before use and operation, please read the operation manual carefully and operate in strict accordance with the
operation manual. We reserve the right to change the relevant information (including design and parts) in this
instruction book without further notice when the product is upgraded or adjusted for use.
1
Advertisement
Table of Contents

Subscribe to Our Youtube Channel
Related Manuals for edenox MICRO-1217HS


Summary of Contents for edenox MICRO-1217HS
- Page 1 Installation and User Manual Model: MICRO-1217HS Special note: Before use and operation, please read the operation manual carefully and operate in strict accordance with the operation manual. We reserve the right to change the relevant information (including design and parts) in this...
-
Page 2: Key Symbols
Key symbols DANGER! WARNING! This symbol highlights dangerous This symbol highlights potential situations which could lead to dangerous situations which might lead to serious injury or death serious injury or death CAUTION! DANGER! This symbol highlights potential Be careful. Life is at risk. Failure dangerous situations which could to comply may result in electrical lead to light injury... -
Page 3: Introduction
Introduction Rapid Oven series reduce a lot of cooking time when we compare it with traditional ovens, without compromising with quality. Once you have determined the precise parameters of the cooking, you can store it in the oven's controller so that the program can be extracted at any time for precise repeat operation. - Page 4 ※IMPORTANT SAFETY INSTRUCTIONS WARNING Basic safety precautions must be observed when using electrical products to reduce the following risks: Burn, electric shock, fire, personal injury, excessive microwave radiation: 18. Do NOT use caustic cleanser to clean this 1. Please read all instructions carefully before product, it will cause permanent damage;...
- Page 5 IMPORTANT SAFETY INSTRUCTIONS Read this guide before using the oven 1. Like other electrical appliances, this product needs a comprehensive inspection on the electrical connection lines at least once a year; 2. Clean the inside and door seal of the oven regularly according to the operation instructions in the relevant chapters of the manual, otherwise the oven may cause fire, leakage and other hazards;...
- Page 6 Chart of Suitable Containers Manufacturer will list a few containers that allowed under specific conditions below, please check carefully and be aware before use. Heat-resistant containers Tempered glass √ Containers with metal ornaments Glass ceramics √ cannot be used Pottery (enamel, pottery, ceramics) √...
-
Page 7: Table Of Contents
CONTENTS Key symbols ......................2 Introduction ....................... 3 1. Installation ......................8 1.1 Receipt Note: ....................8 1.2 The location and position of the oven ............... 8 1.3 Power supply installation ................. 9 1.3.1 Power supply ..................... 9 2. Device parameters ....................10 2.1 Product parameters table ................ -
Page 8: Installation
1. Installation 1.1 Receipt Note: 1. Upon receipt, check whether there is any significant damage on appearance. If yes, contact with Transport Company. 2. Open the package, tear off/remove the protective tape from the chamber top AND stainless steel protective film. Then dispose the package waste in a proper way. -
Page 9: Power Supply Installation
1.3 Power supply installation 1.3.1 Power supply It is highly recommended to install leakage protector, and the decoupling current of leakage protector shall not be less than 30mA. At least select standard type (class B standard) circuit breaker sensitive to electrical signal mutation. -
Page 10: Device Parameters
The back of the equipment has an equipotential 2. Device parameters power cord with sufficient length. DO NOT ground point for separate grounding (GND) CONNECT POWER CORDS TOGETHER FOR EXTENTSION 2.1 Product parameters table MICRO-1217HS Model Dimension(mm) 460X675X660 Chamber(mm) 305X305X185 Capacity(L) Net Weight(KG) Voltage(V) -
Page 11: Features
Max. Temperature Approximation microwave power output 3. Features On/ Off Power switch- Turn on power switch; touch MICRO-1217HS screen will be light up. Notice: Turn off switch does not cut off internal circuit; Touch Screen controller- details please refer to “Operation Instruction”... -
Page 12: Operation Instruction
USB port location It locates in the front lower part Step 1: Remove the front lower panel The front lower panel is installed by magnetic suction, which can be pulled out with a little force; Step 2: Open USB dust cap Rotate left or right to open Step 3: Insert U disk to download or upload recipe, picture, etc. -
Page 13: Operation Interface
4.2 Operation interface 4.2.1. Interface 1. Turn on the power switch, the computer board screen will be on, and enter stand by interface as follows: :Cooling Mode, when cavity temperature is higher than 70℃, open the door according to the prompt, meanwhile fan keeps rotating; when temperature drops down to70℃, it automatically exits back to standby interface, or you terminate cool down mode by click 2. -
Page 14: Editing Menu
:Press this to set Preheat temperature, :Switch off button, it requires a long press to return back to standby interface 4.2.2. Editing Menu 1. Tap on dish photo to enter setting: :view parameters of each stage. - Page 15 :Click on timer to edit cooking time for this time, not saved; :Click to edit cooking temperature for this time, not saved; :Hold pressing this icon can view real cavity temperature. :Continually tap to change microwave percentage. (0%- 100% then recycle) :Click to adjust wind speed.
- Page 16 2. Tap on start cooking icon, enter cooking screen: : Pause/resume during cooking process Caution: :Stop, Exit cooking Open the door during cooking process will result in warning sound and pop up notice” DOOR OPEN”, but it will continue cooking after closing the door.
- Page 17 If click on √, but did not place food inside oven. System will soon display this window: 3. Finish cooking, it will pop up a window. Click “+10” to add 10 second increment at a time, as below 4. When door is open, it will appear a warning notice as picture:...
-
Page 18: A Quick Customized Menu
4.2.3. A quick Customized menu : Customized mode used for recipes testing and development, all parameter are editable. Click on , add another cooking stage. After finish, click to save it. -
Page 19: System Setting
4.2.4 System setting : click to enter system setting interface: 1. Click “Recipe Setting”, enter screen like below: : Copy recipe from USB to oven; Copy recipe from oven to USB; : Delete Menu;... - Page 20 : Set up a new menu, click into a screen like below: Click to edit every factor accordingly, then click to enter into the second cooking stage as per requirement. It has maximum 15 cooking stages. Once finish setting, click for saving.
- Page 21 Chinese and English input are optional. Tap “A” for English, “文” for Chinese. If you have more than 2 stages, you can set alarm for each stage, except the last stage. Click on alarm to set information for alarm as below: “Stage Index”...
- Page 22 “Language”, click on EN or Chinese can select English and Chinese. “Date”, click on date can edit the date which show on the screen “Time”, click on time can change time which shows on the oven “Auto Start”, click to set an auto start time for cooking a recipe “System passcode”, set up password for entering system setting 3.
- Page 23 “Diagnostic”, diagnostic screen for device technical maintenance “View Event Log”, operation malfunction will be recorded into this Log “Copy Fast Log Data to USB”, download log data into USB. “Service Passcode”, ****** (please contact the dealer or manufacturer to obtain password authorization).
-
Page 24: Cleaning
“Beeper Volume”: volume for alarm, higher is louder “Alarm Sound”: alarm tone “Temperature Unit”: interchange between ℃ and ℉ “Edit Recipe image”: manage recipe picture, add or delete “Recipe Passcode”: once set up, it will be required to key in before entering into recipe parameter page “Appliance Passcode”: it is the password to enter Appliance setting “Demo Mode”: “yes”, only touch screen is working for demo, no heating function. -
Page 25: Cleaning Tools
6.1.2 Cleaning tools Non-corrosive oven use cleanser, heatproof gloves, rubber gloves, non-abrasive nylon scrub pad, cleaning cloths and rags, goggles and dust masks Caution: When cleaning the oven, please wear rubber gloves. Do not use sharp tools and strong abrasive cleaning on any part of the oven. - Page 26 Hi-limiter locates at the back of oven, Hi-limiter is tripped reset it and reboot the oven The door is not closed properly. Clear barrier, close the door properly. Oven does not heat up Does not switch on oven Switch on oven and heat up Food block the door from Clean barrier, close the door properly.
Need help?
Do you have a question about the MICRO-1217HS and is the answer not in the manual?
Questions and answers